Saturday, October 05, 2013

Scaleforum 2013

Things I know about Scaleforum:
  • It's the show for P4 modellers
  • Everyone wears tweed
  • No one looks like they are enjoying themselves
  • The merest mention of OO modelling will see you chased from the venue by grey-haired people wielding tweezers

Anyway, the last time I went to one was over 15 years ago and that was in Falkirk.

A move of venue from Leatherhead to Aylesbury in the same venue as Railex made a re-visit much more practical. Being handed a free ticket sealed the deal. Anyway, I hopped on a train and then the free shuttle bus service to the centre and grandly waved my ticket to those on the entrance.

First impressions were that it's like Railex but quieter. Trade, layouts demos (more of the later perhaps) but basically a normal model railway exhibition. No-one was wearing tweed either.

I made a quick circuit of the hall to get my bearings. The trade was certainly impressive. One RTR shifter, the excellent Cheltenham Model Centre, and loads of specialists. Hard core specialists who aren't afraid of etched metals or lead alloys. I was a happy man.

Layouts were pretty good also. I loved Midland Goods, not a lot happened but the modelling was first class and the design, with a warehouse you could see inside of, innovative.
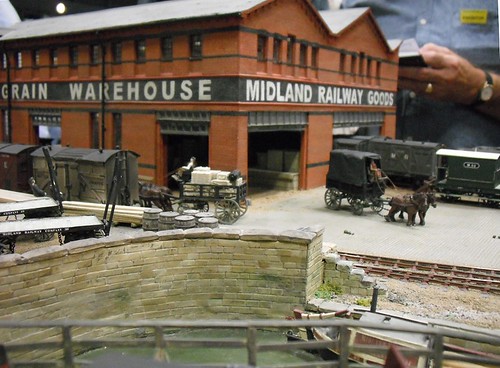
ModlandGoods

Others were just as nice. Sadly, I can't remember names but there was a cracking run-down station with slowly decaying canopy.
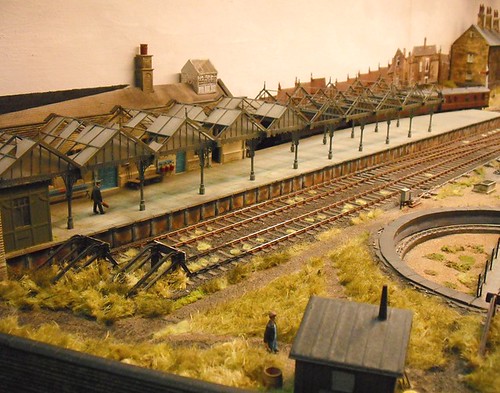
Canopy

My only moan would be a lack of barriers. It seems that this is trailed as a plus point. Something about removing the barriers with the layout builders. In my experience this just meant trying to see anything was a challenge thanks to middle aged men pressing themselves hard up against the baseboard fronts trying to absorb some P4 goodness. Only the less well viewed layouts offered a chance to look along the model without bodies in the way. A shame and something barriers keeping the punters a foot away would have fixed. I don't see them impeding chat - they don't for me.
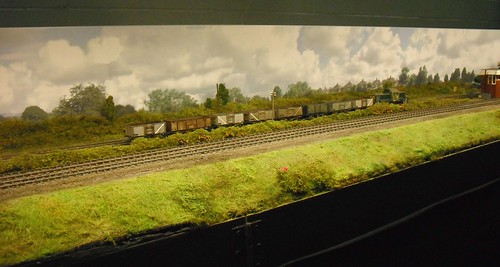
Class 14

People seemed to be enjoying themselves too, especially the Welsh guy and his crew in the corner. Communicating with either end of the layout was achieved by tapping the electrical trunking that formed the fascia to attract the attention of the other operator (both were at the front separated by the layout) and waving a board upon which was written a number. I'm assuming that this meant something and they weren't doing it to confuse us anyway.

Would I go again? Yes I would. It's worth it just for the trade. And I don't need to wear the scratchy trousers next time. I took quite a few pictures, not overall views but of some cracking little scenes seen on several layouts. This P4 thing isn't just about wheels you know...

Pictures from Scaleforum on Flickr

Friday, October 04, 2013

Soldering irons for wagon building


Dan asks: What soldering irons do I need for brass wagons I would like to solder up and start the art of soldering. I have read your Parkers guide but got a bit lost to which one I need I have the Antex CS18 18w iron, but I know that it is no good for soldering up the wagons.

Hmmm. I'd disagree with the idea that an 18w Antex iron is no good for etched wagon building. I'm assuming you are working in 4mm scale so for smaller kits, it ought be man enough for the job but probably only just.

When you heat solder on an etched kit, the brass will suck heat from the soldering iron bit. If the heat is absorbed faster than the iron can generate it, the solder doesn't heat up properly. You might be able to splodge it on as though it were a paste but that's not soldering, the metal should run like a liquid. The bigger the bit of metal you are soldering, the faster it will absorb the heat.

I'd suggest a 25w iron as a minimum, but of you really want to get into this, my preferred tool is an Antex TCS230 50w. Buying one of these about 10 years ago was the best move I ever made as far as soldering was concerned. Yes, it's a bit more expensive than smaller irons, but the heat it pumps out is sufficient to allow me to work with big bits of brass including O gauge kits. Despite this, I can also use it to wire layouts up.

I'll admit a preference for Antex tools, there are a couple of reasons for this.

First, the heating element is inside the bit. This is more efficient than the element being wrapped around the bit as all the heat has to pass through the thing you want to get hot.

Second, in my formative modelling years, one of the modellers who influenced me (Dave Elbourne) worked for British Telecom. Their technical staff did a lot of soldering and were all issued with Antex irons. In BT abuse, the tools worked for great long periods of time and kept working. I like things that do that, hence my preference for the yellow handled tools. So far, I've not been proved wrong.

This is all good for electric but sometimes you need even more heat. This is where a gas powered torch comes in. Blasting solder with a small flame will heat it up faster than the surrounding metal can pull heat away so you will get the stuff to melt. Blowing solder along joins is great fun but you need to be careful the metal isn't very thin or it can expand and buckle. This is rarely a problem and if it is, I'll switch to using glue.

On top of this, you need solder, preferably tin/lead mix and some flux. I get mine (Copolux) from the plumbing isle of a DIY store. If you can't find it, Powerflow works too, it's just more vicious and really must be cleaned off after every soldering session.

I'd also recommend a ceramic soldering board from Cousins. Perfectly flat and heatproof, it's a great surface to work on.

Finally, get some wooden chip forks and lolly sticks to help hold parts. You want the metal to heat up and not your fingers!

Thursday, October 03, 2013

Modelling British Railway Diesel Locomotives now in the shops

 
My spies tell me that the top bookazine Modelling British Railway Diesel Locomotives is now on sale in WH Smiths around the country.

Listing every TOPS class of diesel from 01 to 99, you get a potted history along with a list of modelling options. That's 58 histories, all written by me and then checked by someone else. On top of this I build an 01, detail 02 options, build and 07 and Class 13 and weather a 15. There's stuff on preserved diesels, short trains and prototype locos.

180 A4 full colour pages long, it contains 223 prototype photos (Mix of B&W and colour) and 139 shots of models both complete and under construction.

Worth £9.99 of anyones money. Especially since it contains an voucher for £10 off orders from ModelFair, so even if you don't like it, you can buy a loco or something and get your money back!

Can't be bothered to go in to town? Well order on-line then. Come on, no excuses!

Wednesday, October 02, 2013

Matt varnish test

Test Van

After a couple of days talking about shiny things, I thought that perhaps I ought to take a look at curing the gloss problems on models.

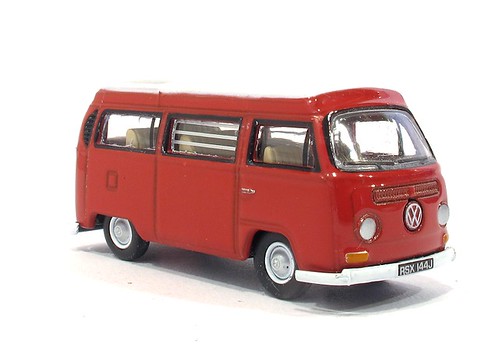
Picking up a handy model VW campervan, I've matt varnished different panels on one side using a variety of products. Apart from being a fantastic car, the VeeDub is handily split into obvious panels that allow me to divide the side up.

Starting with the front, you see the raw Oxford Diecast gloss enamel finish. Nice, not too thick, but too shiny for a model vehicle in my opinion.

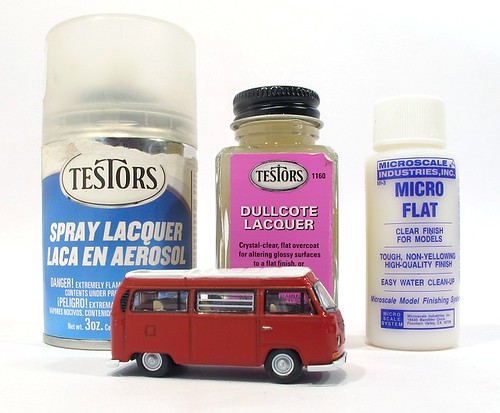
The cab doors are hand painted with Microscale Micro Flat, bought from Jotto Hobbies in Rugby. This is a water based varnish that flows well. The finish isn't perfectly matt, although I only used one coat, but the sheen is very slight and only visible in certain lights. Ideal for a clean and shiny car.

The middle panels are hand painted in Testors Dullcote Lacquer bought from Hobby Holidays. Quite a thick liquid that needed a good shake to mix the contents up, it still flowed well and dried with no brush marks. Drying time was fast too - 3 minutes or so. Clean up is with cellulose thinners rather than turps which might not be that convenient.

Finally, the rear panel is sprayed with Testors Spray Dullcote Lacquer bought from EDM Models. This is my standard matt medium and works as well as ever. A quick squirt from about 30cm away followed by a blast from the hair dryer and the paint turns matt is quick and simple. Of course you do need to mask any glazing (I used Blu-tack which still needs to be fully removed from the edges of the frame) but that's as bad as it gets.


Varnish Test
 
Conclusion - They all work. Brush painting is very handy for small areas. The Micro Flat is the easiest clean up as you just need water, but the least matt on test. HAving said that, it's perfectly acceptable and I'll be using it in the future. I really like the paint on Dullcote as it's very handy but will continue to work my way through the stocks I have of the aerosol version.

Tuesday, October 01, 2013

Shiny, happy diesel roof

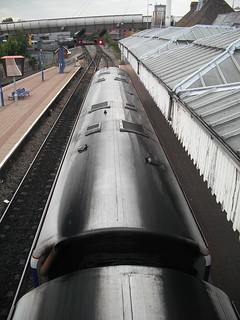
DMU RoofSticking with the shiny theme from yesterday, I was looking out from the footbridge at Ayelsbury station and noticed the state of the roof of an DMU.

It's not dirty, or at least not in the way we tend to think in model terms. There are streaks from the exhausts. Great black splodges of muck, but only black and quite a pure version of the colour. There's not brown or even grey in there.

Elsewhere though, it's not only clean but thanks to the efforts of carriage washing plants, burnished to quite a high shine. It doesn't show up in the photo but the colour was nearer silver than the white I assume they are supposed to be. You can see the reflection of the canopy edge quite clearly. Away from the exhausts, the effect was even more pronounced.

I'm not sure this could be modelled, at least not without people telling you you got it wrong. In out minds, up top of a coach is muck, not shine.

Monday, September 30, 2013

Shiny, happy, motor cars

Shinycars

Spotted at Scaleforum this weekend (full review of the show coming on Saturday), right on the front of an otherwise excellent layout - straight from the box diecast cars.

Grrrrrrrr

This is a pet hate of mine. Why spend hours building super-dooper finescale P4 track and then decide that simply plonking vehicles in a state the yoof would call "box fresh" in the car park?

The solution is simple - take them apart by drilling out the rivets in the base. Spray the body with matt varnish. Reassemble. Job done.

Look at a real car from a distance, the sort of distance that means it's about the same size as a 4mm model. Can you see it shine? No you can't. It's probably doesn't look dirty either. Weird that.

(Yes I know I can be worse than most with unfinished jobs on layouts, but this is a common source of annoyance to me as lot of layouts do it. And it's my blog so if I want to grumble, I will)

Sunday, September 29, 2013

Mr Ben in Model Boats magazine

 
My second cover photo in a month!

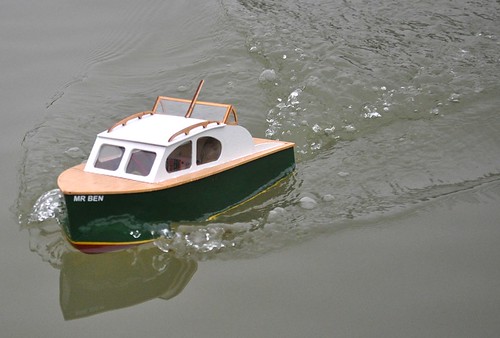
This time it's Model Boats magazine that does the honours with a photo of my little boat Mr Ben occupying the bottom corner.

Inside, I run through the process of building a very traditional wooden boat from a Vintage Model Boats company kit

It's a very nice boat although since the article was written I've re-waterproofed the hull as the sanding sealer and paint wasn't doing to the job quite as well as I would have liked. It's not essential but nowadays I would cover the hull with Deluxe Materials cloth.

At least the piece mentions that I didn't get the first attempt at the drive train set up properly. This fried a motor and resulted in me eventually ripping out the propshaft to get things working as well as I would like. To be fair, if you weren't trying to build it in a hurry as a Christmas present for my Mum then I'd have got it right first time.

Oh, and the name. The kit is called "Mr Tom" but the farm where we sail has a cat called "Mr Ben" who is lovely and often comes over for some fuss.

Mr Ben


Saturday, September 28, 2013

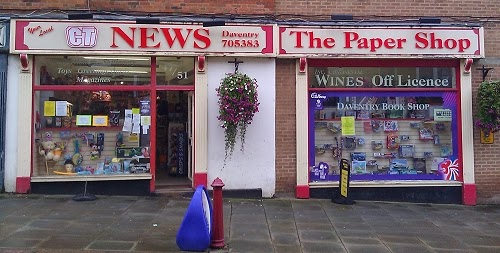
Daventry's unxepected model shop - CT News


It's amazing where you discover interesting shops. In Daventry I spotted CT News on the main street - it's a newsagents, book shop, hardware shop and surprisingly good model shop.

Inside there is an impressively large range of plastic kits, mainly Revell and Airfix. You can also buy paint and glue. Even a couple of external mix airbrushes were hung on a rack.

OK, it's not competition for the shop in nearby Northampton, but if you don't want to take one of the half-hourly buses in that direction or just need a pot of matt black, then it's the business. Anyway, you can't buy your newspaper as well as a model of HMS Hood in a normal model shop, can you?

Map showing the location of CT News

Friday, September 27, 2013

Cardboard window

Card Window Working on a little secret project (well, one I can't mention yet on the blog) I've been trying some of the laser-cut card windows from Truetexture.

Each one is made up of 4 parts nicely cut in card less than 1mm thick. The frames are lovely and fine and the extra thickness makes them look, to my eye, better than etched versions.

Assembly is simple enough using PVA glue and taking your time. Put the first one together without glue to get your head around the order the layers are placed in though.

The killer is probably the price. £4 for 4 windows isn't cheap. A Wills pack of plastic ones worked out a lot less money.

The advantage of these is that you get a lot more variety in styles but I think I'll keep them for foreground models only for the moment.

Thursday, September 26, 2013

Wonky Plasticard

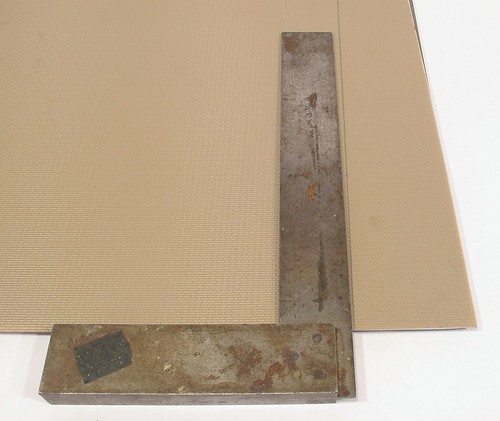
Wonky Plasticard

I'm doing a little model building work, some of which involves brickwork. My standard method for making 4mm scale brickwork involves breaking out a sheet of Mr Slaters most excellent embossed plasticard and sticking it on the surface requiring attention.

Mr Slater being a parsimonious cove, keeps the cost down to the hard-pressed modeller by using a cheap guillotine to chop the larger sheets into A4 sizes. This isn't a desperately accurate process as the cut lines aren't normally along a single brick course. I know this and always trim the sheet to provide an accurate bottom edge by running a blade along the grove of a course.

The next stage for this building involved producing a vertical edge at right angles to the bottom. Carefully sighting along the vertical brick courses is usually the way to do this. However, on this sheet, I discovered that the vertical courses aren't perpendicular to the horizontals.

You can see the line drawn by following courses compared to the "right" right angle set by the square.

To be sure, I checked a couple more sheets and they also weren't spot on, but a lot closer than this one. These were different bonds so from different batches.

How did this happen?

My guess, and it is only a guess, is that the plastic is heated up, pressed to emboss it and then cools down. I suspect that the cooling process isn't happening at the same rate over the entire sheet thus introducing the error.

Now, this can be a problem. I'm sure it's lead to some wobbly building work from me in the past when I've assumed that I could cut square by following the courses. Insetting windows and doors in a wall, it is essential that they follow the courses rather than the absolute accurate square lines so how do you "square" this?

For the moment at least I know. Future sheets will be checked. Iffy ones relegated to less well seen areas of a model. I'll also make sure I keep a reasonable stock of the stuff to hand. Don't want to pull out the last sheet on a Sunday and find it's a wobbly one!

Wednesday, September 25, 2013

Book Review: The Great Western's Last Year by Adrian Vaughan

It must have been strange for the GWR board as they sat down for the first meeting of the year on 24th January 1947. By the end of the year they knew that they, and the company that they ran, would be no more. Nationalisation was coming at the start of 1948 and despite all the different railway companies protestations, there was nothing they could do about it.

No matter what they felt, they still had to run things until the various branches of government took over. What they faced was trying to rebuild a system battered by years of war, suffering desperately from a maintenance backlog and starved of both materials and manpower.

Adrian Vaughan takes us through month-by-month telling the story of the last year. He sets the scene looking at both the national picture and some very detailed descriptions of incidents that took place.

One example is oil fired locomotives. poor quality coal supplies persuaded the company to investigate using a more consistent and reliable fuel than the traditional stuff. It worked but then the outside world intervened. Britain was forced to allow free exchange of sterling to dollars as a condition of America loaning us £3.5bn to help rebuild after the war. Oil had to be bought in dollars and the country had none as investors rapidly exited the UK and headed for the land of the free.

This is quite a wordy book but well written. What photos there are often come from the Great Westerns own company magazine. Their age is given away by less than stellar reproduction, not the fault of the printing process as a number of original photos are clear and sharp. There's also too much repetition, the picture of fueling a an oil fired loco is used 3 times, which considering the low number of images, seems excessive. Having said this, the pictures included are often fascinating and not the sort of thing you find in the mainstream press.

Overall, this is an interesting book. If you want nerdy detail, there is some. If you are more interested in the bigger historical picture, then it's here too. To me, this is the strength of the text. Placing events in a historical context that is alien to the modern reader helps us understand why things happened.

From a modellers point of view, it should influence the types of trains he or she runs (you can't have enough coal) as well as the state of the infrastructure they run through. If nothing else, it might tempt you to build a miniature of the jet-powered snow clearing machine!

Buy The Great Western's Last Year: Efficiency in Adversity from Amazon

Tuesday, September 24, 2013

Missing links - O gauge coupling chain

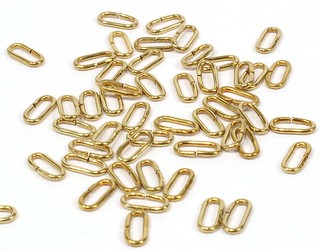
LinksStuff that should be easy to find at a model railway show No.2 - Coupling chain for use on O gauge wagons.

You'd have thought so anyway. As it was, I searched high and low at Guildex a couple of weeks ago and found none on sale, at least none available as a spare part. You could buy coupling sets with it in but as the wagons I run already have hooks on the end, I didn't really want to pay a premium price to purchase something I wouldn't use just to get some chain.

Just when I was contemplating winding my own, someone pointed me in the direction of Parkside Dundas. On previous passes by the stand, I'd not seen any hung up on the racks and the guy running things was being spoken at by one of the crustier punters so I'd not asked.

Rectifying this a couple of hours later, I was able to order the chain. No, they didn't have it in stock on the stand, but for a few quid, I was promised some in the post. I did this and a couple of weeks later, 50 links arrived in the post.

Great stuff. Now I can replace the links that have fallen off 3 of my wagons.

I still don't understand why none of the 120(ish) stands at the show had something so basic in stock. Perhaps they all think someone else carries it and there is no demand?

Monday, September 23, 2013

Humbrol Arcylic primer

PrimedPeoplePriming metal is a pain. Cellulose primers work but they tend to be too thick to allow the detail to show through. The brush you use is toast afterwards too so you don't use a good one - which makes things worse.

Car touch-up primer is good and comes in tiny quantities in a pot complete with a brush, but it's still to thick.

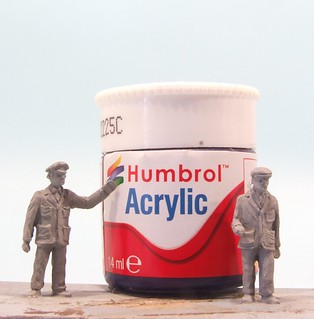
Humbrol have just released a nice acrylic primer - Pot number 1 in the range.

Tested on some Monty's Models whitmetal figures, it works well. The detail is still clear and sharp despite the stuff being applied with a brush. To get this sort of result, I normally spray.

Tests on brass weren't quite so impressive. It's OK and no worse than anything else but the results show brush marks. I suspect some light abrasion and serious de-greasing is required to get best results.

It doesn't smell and best of all, the primer cleans off the brush with water, so you don't have to use something from the "past their best" pot.

Humbrol Acrylic Primer.

Sunday, September 22, 2013

GMC wrecking truck

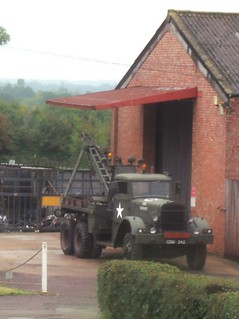
ArmyWreckingTruckDo you like including slightly random military vehicles on your model railway?

Are you slightly ashamed when people see it and you try to explain why the 8th Army is parked in your model of Homebase?

Worry no longer thanks to the Phil's Workbench prototype for anything research team.

This top truck was spotted from the top of a double decker bus a week ago. It's a GMC originally owned by the US army and not living at a garage in Warwickshire, somewhere near Southam.

I'm sure there is a kit available, Aifix used to do the truck but it seems out of production at present. I bet they aren't only ones and you can probably buy something complete with towing gear.

Saturday, September 21, 2013

Horse Hearse

FuneralPreperation

Funeral processions are a bit of a cliche on model railways - if you build a church then you, by law, have to fill the front of it with either people getting married, or someone getting planted.

But can you have a funeral without a church?

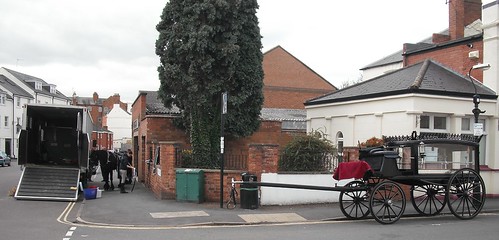
How about this little scene I spotted walking through town. A traditional horse-drawn hearse being prepared for someones final journey.

Finding a suitable vehicle might be difficult. My first thought was Dart Castings but while they have many similar items in the range, no coffin carriers. Langley Models have come to the rescue with a Victorian Horse Drawn Hearse kit.

To complete the scene about you'll need a horsebox and Oxford Diecast do an Albion that's probably too old for modern image modellers, but would do for the rest of us.

Set it all up around a funeral parlour and you're sorted. So, I want to see not more funerals on layouts now.

Friday, September 20, 2013

The Model Shop, Northampton

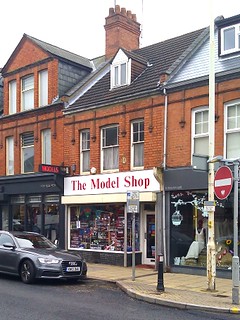
The Model Shop NorthamptonA shop that does exactly what it says on the, errrr, sign.

10 minutes stroll from the Northampton town centre, past a Games Workshop, a not-Games Workshop but selling the same stuff and a comic stores that does a lot of miniature figures, is this little gem.

Established in 1937, this shop has a bit of everything. On the door frame there is the legend "Super Model Aircraft Supplies" as this was the main interest of fonder Ted Evans. A consummate aircraft modeller, he was involved in designing and building aircraft from the very earliest days of the hobby.

How do I know this? Simple, for the 75th anniversary of the shop opening, a book was produced and I bought a copy. Look out for a review in a couple of weeks time.

Anyway, the shop is modestly sized but stuffed full of stock. Aircraft, boats, model railways, slot cars and plastic kits. If it's miniature, then this is one of those places that either has it, or can get it. While I was there a customer was being helped with parts for an IC powered radio controlled car.

At the back of the shop in the railway section there is a healthy range of Hornby, Bachmannn and Dapol. Card kits from Metcalf and Superquick hang on the walls alongside Ratio plastic kits. There is even a small stock of Slaters O gauge wagon kits and Dapol 7mm RTR stock. Around the counter are myriad Peco products.

Paints and glues are stocked for everyone and since the shop caters for different disciplines, there's a good range of these to chose from. Lots of wood, plastic (nicely filed ranges of Slaters Plasticard) and metal sections too.

It's the sort of shop that makes visiting Northampton worth the journey!

The Model Shop Northampton

Thursday, September 19, 2013

Stripping car bodies

2carbodies

First job on the O gauge cars - get the paint off them.

The plastic bodied Citroen needs a gentle strip so I used Precision Paints Superstrip. Now, I should have dunked it in the stuff for an hour or so. As it was, I just put it in a shallow bath and brushed the liquid over a few times. This didn't take all the paint off - the silver radiator was pretty resistant but then silver paint always is - but it certainly removed the worst of it. Given enough time, I'm confident that I could return the model to bare plastic, but what I have is near enough.

The diecast model encountered the more serious Nirtromore paint stripper. A good brushing with this quickly removed all the paint and transfers even if the work was a bit smelly. My rubber gloves weren't really thick enough either as the finger and thumb that held the model tingled a bit afterwards.

Next up, some reconstruction. More on that later.

Wednesday, September 18, 2013

Cars for Clayhanger

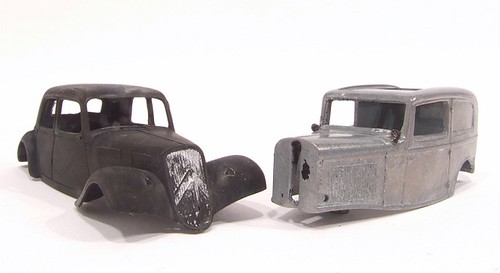
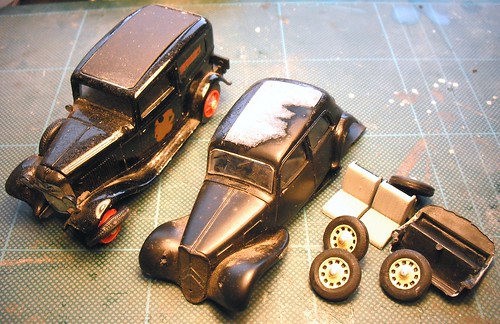
Car parts

Looking over Clayhanger Yard, I think I need another road vehicle tucked away. Looking around Guildex, I was struggling slighty - there are plenty of vehicles to chose from but they are either too late for the period I'm running the layout, or too expensive. I can't justify £30+ for a single vehicle for this particualr model, even when the kits looks so appealing.

On the back table ot the O Guauge Guild exectutor service I spotted a battered diecast that looked about right. This turned out to be by the firm Hobbcar - who I can find nothing about on the interweb. It claims to be a 1932 Ford which is the right era even though it looks a bit Anthill Mob.

Branded as a Fortnum and Mason delivery van, I had some hopes the prototype ran in Britian. Fot 2 quid, I grabbed it.

One problem was that a wheel had been damaged so I required a replacement. Next on the table I found a battered Traction Avant which looked like it had suitable wheels. 3 quid.

1934 Ford Model B (UK)The Ford turns out to be a Model B - a car that appears to have been manufacturered at Dagenham, so I'll get away with it.

On the running board, I found a spare wheel, ideal to replace the broken one if I only display the car with the depression in the wing hidden from view. Looking at the poster on the right, it may be that UK cars either didn't have the spare, hid it away, put it on the other side, or the artist just ignored it.

This is good because the Citroën is a nice model too and far too good to throw away just to use the wheels. An unidentified plastic kit, there are parts missing, as there are on the Ford, but I reckon I can save them both. Neither will be perfect, but they'll look the part and fill a gap on the layout.

You might think a French car isn't ideal for the UK layout, but as I discovered from a firend who owned one, they were produced in Slough, so mine will be a UK built model and this perfect for me.

Tuesday, September 17, 2013

A big day for the blog!

Indulge me for a moment please - this is a big day for the Phil's Workbench blog and I can't resist getting a bit nerdy about it.

Look, it's a blog about building trains'n'stuff. Nerdy is what we do.

Anyway, like every other blogger, I watch the visitor numbers to my site. We all get excited when these go up. Well, for me, one of these counters has reached a milestone.

This blog now has 100 regular readers.

Among the 350 or so people who drop in each day, just under a third are visiting and reading this stuff on a regular basis. This is an important number as it only goes up if readers are enjoying what they read and come back for more. On the other hand it could just be that you are all bored at work and this is more exciting than a spreadsheet.

Mind you, it's taken me 2700 posts and over 7 years to get here!

OK, so compared to many websites, these are penny numbers, but as anyone who blogs will tell you, it's incredibly gratifying that anyone bothers to read this stuff at all. I'd like to thank each and every one of you who take the time to look in. Hopefully, I'm being entertaining at least some of the time.

Normal service will be resumed tomorrow.

Monday, September 16, 2013

Dock in a box in Hornby Magazine


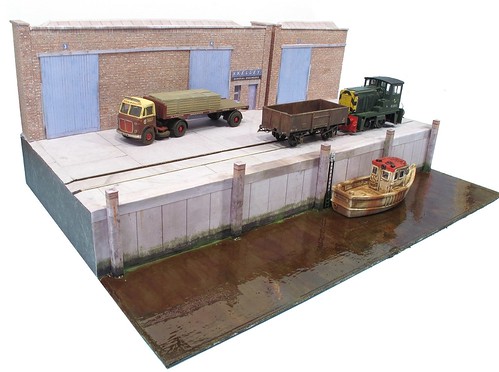
With lots of other work floating around, my contribution to the October issue of Hornby Magazine is a bit limited. On the other hand, it's one I've been keen to do for a couple of years - a small dockside diorama.

With the last couple of Parker's Guides requiring kits in the 3-figure price range, it's nice to do something that cost less than a tenner.

Using Scalescenes kits, mainly the free warehouse, I made up a short diorama in a box file. Obviously, if you have more space then you can build a far longer scene, but this is enough for my purposes.

Dock Diorama

The magazine is a lot fatter than normal this month. The reason is that you get a free layout inside!

OK, so not a complete one, but the trackplan for a very buildable station and yard. Future issues will contain the kits (again, from Scalescenes) to complete the scene. Just add a baseboard, some track and trains. Best of all, if you don't want to build the layout, the structures will still be useful.

It's great to see this model. The idea for it developed over a year ago at a get-together with the main contributors. I have a feeling that I may have been instrumental in coming up with the idea although I can't claim all the credit. Nor can I claim to have done any of the work to bring it to fruition. It's still nice to see it happen though. Let's hope a few people actually build the model. It would make a great little layout for anyone looking to move on beyond the trainset oval.