A daily updated blog typed by someone with painty hands, oil under his fingernails and the smell of solder in his nostrils who likes making all sort of models and miniatures. And fixing things.
Sunday, March 30, 2008
Bow pen on wood
The photos of the model being used as a guide show yellow lining on the side and I thought this would help the look. To do the lines I tried using a compass bow-pen from my old school geometry set. The compass point is run along the bottom of the top rail and the pen leaves a nice line further down the hull.
Or it would except for a couple of factors. First, I didn't use a nice new can of paint. New paint flows better than old but for such a short line I thought I'd chance it.
The second is that while the wood hull surface has been sanding sealed and is reasonably smooth, it's not perfect and so the bow pens doesn't run as smoothly as you might like.
Still, I understand from chatting to professionals and reading their books, half of the work is in the tidying up. The worst wobbles and blobs were quickly covered. In the context of a layout I hope people won't really notice.
Saturday, March 29, 2008
16mm Society AGM 2008
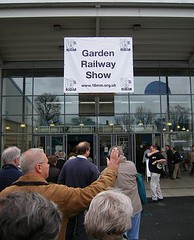
Once the very reasonable fiver had been handed over at the door (no free entry for me as I'm not a member) I wandered in to find that the event had grown in size from last year. And that was impressive.
Around the edge of the hall there were trade stands. And in the centre there were trade stands. And somewhere in there you would also find 10 working layouts. As I said, a lot of stuff.
The 16 millers are a laid back bunch. Because they share so much with the G-gauge workers, both scales were to be found, at least on the sales stands. The layouts mostly showed off very nice radio controlled steam trundling around. It was pretty well behaved too.
The modelling was good too. On the competition table some slightly cartoony, but lovely, trains mingled with the super scale items. On the layouts it seems weathering has arrived on the electric trains at least.
Top marks to Timpdon Lake railway which really looked good. Featuring proper scenery that would have been good in a normal exhibition it was home to a neat gimmick - there was a hole in the road and a button next to it. The sign told you to press the button to find out why the road was up - whereupon you got a squirt of water from the burst pipe !
Most impressive were the crowds. The place was packed. OK so the average age was over 50 but then this sort of modelling encompasses engineering and that's not been a young mans (and it's pretty much 100% men) hobby. To many this sounds the death knell of this pastime but then I don't think there was ever a time when an event like this would be full of strapping youths.
Words can't really get over everything to be seen here, so go and look at some pictures on Flickr and even a video or two.
Friday, March 28, 2008
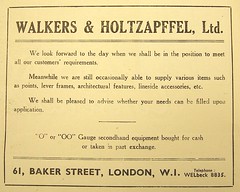
World War 2 model advert
The modeller would be asked by the shop for their requirements in the same way a posh tailor will ask a customer what they would like in the way of a suit. Railway modelling was a much more serious business then. You made everything yourself but then so did everyone else. With none of the sophisticated materials we have to hand now you did what you could and we rightly proud of it.
Something as tiny as a new type of rail chair would be announced with all the solemnity that a Pope is revealed today. There was none of this colour photography or attracting custom by furious price cutting either. If you wanted something you paid for it. In cash too.
The wartime adverts are the best. Unsurprisingly hardly any materials or parts were available but the manufacturers kept faith and continued to advertise. Across the country they knew that men in sheds and air raid shelters were still beavering away is defiance of the hun, creating miniatures to be proud of.
Compared to today's modeller who rushes to the web to whine about minor discrepancies in a new model, you have to take your hat (or cap if you are at school) off to them don't you ?
Wednesday, March 26, 2008
Cardboard wood
So I use a trick first seem (from me) on Melbridge Dock. Taking a sheet of Daler board I score 6 inch wide planks on the surface using the back of a scalpel blade.
A couple of passes are usually enough to idicate a plank without breaking the surface of the card. Result: a surface which has a tiny amount of texture (1/100th of a real texture I hope) but looks neat and tidy.
Monday, March 24, 2008
York Model Railway Show 2008
The weather forecasts for today weren't as apocalyptic as the rest of the weekend so we took a risk and headed up to what turned out to be, sunny York.
After a morning wandering around the city we took a cab out to the show. This was a good move as the cab driver turned out to be an enthusiast and has a load of TT stuff in his attic ! We chatted trains for the duration of the 6 quid trip from the minster to racecourse. Hopefully next year he'll actually make it in the door to the event !
Apparently the weather had put a few more people off and the show was 500 down by the end of Sunday. Monday appeared to be busier though and so hopefully they have hauled the numbers back a bit.
As far as the content goes - good trade and good layouts - same as normal. On the layout front I loved the look of Kingswear in 2mm scale but wondered why nothing much happened. I've not seen the model before so it's probably one of the first shows which means it's still shaking down and working out bugs.
Anderstaff Yard also caught my eye. It's a really nice modest modern(ish) image model with bags of atmosphere. For some reason the owner had decided to set the sound on his models at a realistic level. Obviously he is under the misapprehension that sound is an aid to realism. Real modellers know it's a tool for showing off and annoying everyone. I hope this attitude doesn't catch on or I might have to revise my dislike of the aural element.
The layout I want to build was more difficult. I think it was Tony & Sue Hills circular model of an estate railway. As well as being a cracking piece of modelling, it amused the crowd by rotating, so the loco was always in the same spot and the scenery moved !
On the trade front there had been some changes with a couple of stands moving in and a couple vanishing. The balance is always pretty good. You probably have less choice of RTR box-shifters than most shows but then if you actually want to build models, the range of bits is better than nearly any other event. Mind you I managed to get out cheaply - a pack of 100 degree solder, some Mek-pac and a switch. Cheapest York for years !
The York show web site is worth a visit too.
Sunday, March 23, 2008
Shed roof woes
Quite how this happened is a mystery. It was very windy but no worse than the shed had seen before. The wood was mostly OK at the roof line.
Anyway, three of us managed to haul the roof panels back into place. The impaled one needed a bit of violence to persuade it off the fencepost but otherwise that stage wasn't too bad.
Some hurried work with 6 inch nails secured it a bit. Trouble was the best solution - long screws needed a powered screwdriver and this was low on charge. It hadn't occurred to anyone that we might need it in a hurry.
Over night with fingers crossed, the repairs held. Next day found me climbing around on the roof with a newly charged Bosch screwdriver/drill and some good sharp decking screws from Homebase - hand hint the Focus ones are rubbish whereas Homebase screws go in like a knife through butter.
Satisfying as it is to do proper building work I prefer to be on the ground. I don't have a head for heights when perched on a ladder or trying to get a grip on even this low roof. The movement of the building while I was on it didn't help either. It certainly made me wish I was't so fat. Oh, and did I mention the light hail I was working in ?
Anyway, with the roof secured more solidly than it ever has been, we waited for the wood to dry. Unlike the one on Dorothy's house, this roof hadn't fared well when flying through the air and the felt needed replacing. Not fair really as I bet they don't have as much rain in Kansas.
With an hour of daylight left I'm back on the roof pinning felt down. I like clout nails as they go in easily with a decent size hammer. By this time I was getting more confident about the roof and reasoned that if I did fall through, it would just be less to cover.
An added fun element was the use of roofing felt glue. It's a black mastic substance that you smear around at the joints between the sheets. Then you (or at least I) smear some over the joints to stop the wind getting in under the sheets. As the kid next door commented - it smells like caramel but I'm not sure I fancy tasting it.
Saturday, March 22, 2008
Warflat
It's come up nicely. The resin cast tank looks very good too and is a whole lot easier to assemble than a plastic kit one !
Tying the tank down needed a bit of research but I found a photo of a Sherman (this is a Churchill) strapped down to a GWR wagon which showed how it was done. Basically a couple of whopping great chains at each end and some chocks for the tracks. OK, so the chains should have shackles in them so you could put some tension in but I wasn't going to use up 4 perfectly good screw couplings when I doubt anyone will really notice.
Friday, March 21, 2008
Pilot boat
But, this boat kit (OK, a few bits of vac-formed plastic, some plans and photographs) is made by the same guy who produced the Brede Lifeboat kit I'm going to do this year. And since I have a thing for orange boats (and cars but that's another story) a pilot vessel has been on my wish list for years. The two boats will look good together I'm sure.
Anyway, it was only a fiver so what the hell. I can buy the paint in bulk to save cash.
However it set me wondering. How many of these kits simple circulate through various modellers cupboards never quite making it to the workshop ?
Thursday, March 20, 2008
Night of the RAC man
Off to the KMBC tonight for the "Bring & Buy" and RNLI videos evening. Plenty of chat and laughs were enjoyed plus there was a lot of admiration for those who crew the orange boats. We left a bit early planning to head over to the railway club as well to pick up some advertising posters for the weekend.
I turned the key on the van and the dashboard light up but the engine didn't turn over. I tried again, And again. Nothing. Since the run out had been fine, this was an unexpected and unwelcome mystery. So I tried again, just to be on the safe side you understand. It may be a sign of madness to keep doing the same thing and expect different results, but it's also the hallmark of the classic car owner who is wishing he was in a modern car that started.
Poking around in the back didn't help because my torch, a wind up model, was hopeless. You can't do much when one hand is holding the torch and the other is winding the handle ! Fortunately we were in a well lit and dry car park.
The RAC came out after only 20 minutes. The mechanic poked around for a bit, checked the battery (OK) and the wires in the engine bay (OK). The he had a look at the starter motor. Now I had fancied this as the problem area but with no torch or anything suitable for crawling around under vehicles to wear, I couldn't look myself.
The problem was a wire had come off the back of the solenoid. Putting it back on cured the fault. On reflection this probably happened when I was trying to adjust the heater cables a few weeks ago. It's a bit messy and tight in there and easy to dislodge a wire when you are doing something else. Especially when that something else is a pain in the arse job. Mind you we've started quite a few times since then so I must have been lucky before.
After filling in the paperwork we headed off. The van seemed a bit underpowered but I suspected all the fiddling had loosened a plug wire so soldiered on.
This worked OK until we got past Ufton and on a dark, narrow road, broke down. There was no power at all. Still had electrics though, even the engine turned over but wouldn't fire. I had visions that filing up at Sainsburys earlier hadn't been a good idea.
Just as I was about to get on the phone, a familiar orange van turned up behind. "Are you broken down" he asked rhetorically.
More poking around and the conclusion was - loose wires in the ignition circuit. One was off the coil entirely and putting it back sorted the problem. Of course, sans working torch I wasn't likely to spot this.
The run back (followed by the RAC man) was uneventful. Power was back to normal with a steady 50mph all the way.
Jobs to do:
Buy a torch.
Buy a second torch in case the first breaks down.
Buy spare batteries for torches.
Put these in the van.
Crimp up all the connections in the ignition circuit to stop them falling off.
Never, ever think of cancelling the breakdown membership. It's worth it's weight in gold.
Now I was lucky, the orange rescue vehicle I was so pleased to see came by land. I sat in the dry, not bobbing around on the sea. It makes you realise how important the guys in orange boats are.
Wednesday, March 19, 2008
Slingshots & naming
The Sling Shot article has come out especially well. The magazines designer, Richard Dyer, has excelled himself with the layout of this. It looks fantastic.
Monday, March 17, 2008
3mm scale boats
During a holiday on the Isle of Man I managed to photograph the plans for a traditional Manx fishing boat. The owner also had quite a nice radio controlled model he had built. Despite the pictures being taken at 5mp they were still good enough to print full size on an A4 sheet.
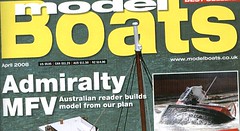
More importantly they were easy to reduce to 1/100th scale so my Dad could start a couple of scale versions. This isn't as daft as you might think - this shape of boat was also common in Scotland. In fact the Admiralty also built some during the Second World War so there ought to have been plenty around in the period the layout is set.
The basis of the model is a sold balsa wood hull wrapped in thin ply to give the bulwarks. The deck is built up and a wheelhouse added. This is being replaced with a hollow version which is tiny and made up of many parts. The hull will be shaped a bit more but as these are waterline models, not much.
Sunday, March 16, 2008
DOGA Warflat
My first go proved that work was needed on the instructions. We fixed this but I've had to build another kit to get it right. The kit has some clever thinking behind it and once you understand the thing goes together pretty quickly.
One area I failed on last time was the jacks at the end of the vehicle. On the prototype wagon these are screwed down to touch the rails, supporting the wagon as tanks are driven on or off. I put these on back to front.
This time they are the right way round but I see from the picture I need to rotate the buffer !
Saturday, March 15, 2008
Kingsbury 3mm event
First up was the event run by the West Midlands group of the 3mm Society. It's not a huge event - you get half a dozen trade stands and a single layout. All this takes place in a little hut on the grounds of a school. Disconcertingly the building was labeled as a nursery when we got there, but all the people inside were grown-ups.
This isn't a traditional model railway show. It's closer to the events run by the O gauge people where the emphasis is on buying stuff and chatting then watching layouts. With the scale supporting very few traders, and that's using the loosest definition of the word "supporting", it's great for modellers to get them all in one place.
I left the best part of a 100 quid lighter with wheels for two locomotives, mechanical parts for one, several wagon kits, tools and a few other bits. Not a lot it appears, but enough bits to supply my 3mm scale modelling for a year.
The thing is that I only go to one event like this a year. Yes I know I can do everything by mail order but it's more fun going and getting your hands on the products. You get to browse while you are there, just going through the drawers of castings makes the journey worthwhile.
No rest for the bank account though, it's York next week.
Thursday, March 13, 2008
Pink telephone
"What sort of paint should I use on my phone", she asked. The inference of course is, "Will you take my telephone and paint it pink for me."
So I took the thing to bits - something you can do with proper old equipment like this. The plastic was wiped down with some degreaser found under the kitchen sink. It still looked shiny so I primed it with grey car aerosol.
A trip to Castle Trains found me with some Tentacle Pink paint from Games Workshop and a can of Humbrol gloss varnish.
The paint sprayed well from the airbrush. It needed a little thinning with water but coverage was excellent although I needed a full pot for the job.
The varnish took longer. Spraying a pots worth over the phone wasn't enough. It dried strangely matt and rough too. Another tinlet went on after the first was smoothed down with the fined emery cloth to hand.
This was better but to get a really smooth finish I had to put so much on it tinted the pink slightly yellow. Even then I still didn't get an even enough coat.
In desperation I polished the whole lot with T-cut - which did the job. The varnish smoothed off nicely and the shine was restored. Next time I'll try something different. Not that I have any urge to paint another phone !
Wednesday, March 12, 2008
Brittle Plastistruct ?
Years ago I built a garden railway. Although I didn't try plastic buildings there was a serious problem with brittle sleepers on the Peco track. The problem was caused by ultraviolet light attacking the plastic. Peco have now changed the plastic mix apparently so the problem shouldn't occur.
If I'm right, all you need to do is paint the Plastistruct properly and it will be protected. Keep and eye on this too - garden railways need a fair bit of maintenance so you need to consider re-paints every couple of years.
It is still possible that the heating and cooling effects of the weather could damage the material. To test this, put a section of material in the freezer overnight, then leave it out during the day. Repeat a few times and see what happens - and let us all know please.
Handy link: The Beckingham and South Wales Railway
Hope this helps !
Monday, March 10, 2008
Holding items to be soldered
In the days when your iron was a lump of metal heated on a gas flame, temperature control wasn't an option so if the metal heated up you had to deal with it. This way you get to hold the spud and save the burned fingers.
Mind you, I'm not sure how easy it would be to push delicate etched parts into your average King Edward but it's worth thinking about.
Sunday, March 09, 2008
Splodger on the lake
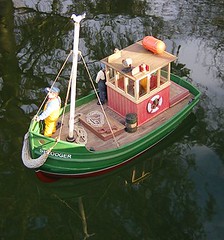
I had the water to myself today. That’s good ‘cos any problems can be found without the gaze of a hoard of “helpful” experts. The water was a touch choppy, enough to recover the model to the bank if it stopped entirely. Plenty of water was available too, I hardly had to reach down from the landing stage to launch.
First impressions were that I’ve still got too much weight in the hull. An extra 5mm above the water would be nice. The depth made me immune from listing in the breeze or tight turns though.
Drive was good with a slightly stupid top speed but enough spare power to overcome most winds I’m likely to sail in. Turning was excellent so I ought to be alright for the steering competition. Even in reverse there was control which is good news.
The only problem was radio reception. More than 20 feet away from the bank and the motor starts to chatter. Splodger managed a trip to the other side of the water but I’d like to improve this as the motor is pretty noisy so you can hear the problems even if they aren’t apparent in lack of control. Some suppression on the motor and perhaps an aerial tube into the wheelhouse should solve the problem but both of these can wait for another day.
After half an hours sailing the boat was dried off and put back in it’s box. There was a tiny amount of water in the hull which I quickly sucked out. As maiden voyages go this was OK. I’ll look forward to more sailing in the future.
Saturday, March 08, 2008
The spare parts box
With the fishing boat pretty much finished, I'm left with some mouldings that I have no imediate use for. There's nothing wrong with them, it's just that I think the deck is full enough without adding the fish boxes and the net doesn't look (to me, YMMV) like a fishing net. No matter what you do in the way of paint it will always look like a solid resin part.
So I get some bits for the spares box. A box, or series of boxes, that are part of every modellers life. Remember when the Airfix aeroplane you were building had "optional" parts like landing wheels, and if you left them off it was like getting something extra for free ? Come on, we all did it and we all put the bits in a box, which hardly ever gets raided because we never quite find a use for the contents but they are too good to throw away.
Anyway, the boxes are destined for the Boat Bits Box and the net probably for the bin. Still, they will come in handy one day...
Geek Note: I uploaded the picture and started this post (Blogger broke so I couldn't finish it that way) on my new Asus Eee PC. :-))
Friday, March 07, 2008
Wooden box
This time construction is from 6mm plywood cut to size by Torries Hardware in Warwick. Basically I wandered in last Saturday with a cutting list and an hour later picked up half a dozen bits ready to use. Apart from shortening two sides (my design not the accuracy of the cutting) construction involved glueing and pining the bit together.
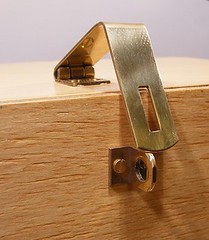
Hinges are fitted so the front flaps down and a catch is net up to hold the door shut. Using 6mm play made screwing the hardware on much easier as only the tips of the screws had to be filed off, there being enough “meat” to hide most of the screw.
A couple of coats of floor varnish (it was what was to hand in the garage) later and the box is ready to go. All I need is a nice day for a proper maiden voyage.
Thursday, March 06, 2008
Seagull
A quick look in a book of nature stuff gave the colour scheme - nothing clever, just a common gull but something that is difficult to guess or remember for the non-birdwatcher. If it was a goldfinch I'd know as there are dozens in the garden, but gulls - not around here.
To fix the bird securely, a hole was drilled between the legs. A short piece of wire was glued in and this slots into a matching hole in the top of the mast.
Tuesday, March 04, 2008
Rustproof Track Finish
Well clean the steel track and then smear it over with the following mixture.
Melt into one pound of lard half an ounce of powdered camphor, adding sufficient powdered black lead to give it a dark colour.
After rubbing this mixture on the rail, allow it to remain untouched for 24 hours; then wipe off the excess of grease with a cloth.
This treatment does not interfere with electric traction requirements.
Thank goodness for nickel silver track is all I can say ! I doubt you would be able to get half the ingredients for this little recipe today (powdered black lead ?!) even if you did fancy spending time boiling it all up in the kitchen.
Monday, March 03, 2008
Lobster's are red ?
Except that according to the book of nature I looked at they aren't. Lobsters only go red when you cook them. Since I wasn't planning on having cooked lobster on the trawler it was going to have to be brown.
But brown lobster isn't were appealing. And this is a cartoon boat so I decided to go for stereotype over accuracy. My lobster (a Playmobile accessory) is painted red and then dry-brushed with rust. That gave me a red-ish lobster that isn't totally stupid. Honour is satisfied, even if David Attenborough wouldn't be.
Sunday, March 02, 2008
Footie boat on the pond
Anyway, the battery was charged and I pulled to cover off part of our pool to try some testing. This time we'd be able to go forward and backward and everything !
Shockingly the amount of lead removed left the boat very nicely balanced. I'd been prepared to stick some back in but there was no need. The waterline is near the water line too. Sometimes you just get lucky I suppose, pity it's never with a lottery ticket.
Anyway, the limited testing gave promising results. I need to find the screw that attaches the arm to the servo - apart from that it all looks good. This model is very nearly finished. Speed is OK in both directions. Steerings good too, which it ought to be considering the size of the rudder. Manouverability wil be OK for my attempt at the steering competition this year.
Best of all the model looks great on the water. A proper cartoon worn out, dirty, working trawler. Just what I wanted.
Saturday, March 01, 2008
Splodgers maiden voyage
With everything wired up I need to see how well the boat floated – there’s no point in carrying on if it won’t do that after all !
Once in the water the biggest problem was a list to port. I’d weighted the model with lead equally but then stuck the heavy speed control on one side. Placing the two standing figures on the starboard side helped but a bit of kitchen “stuff” was needed to get things properly level. The “stuff” – a lid for a jar – weighed in at 34g so I need to add some more lead inside. Either that or remove some. The boat is a bit low in the water really. Trouble is, when I stick lead down, I stick it down properly so I’m not sure if I can get any out…
Sailing in the sink isn’t exactly exciting but I did get to prove everything works although the motor is wired back to front. Nothing that isn’t easily fixed though and then we can head off to larger waters.

