 I appreciate that my blog is mostly read by railway modellers and therefore the intricacies of model boat building might be a bit of a mystery. To be honest, even the idea of steering is a bit of an unknown, what with trains not needing anything in this direction.
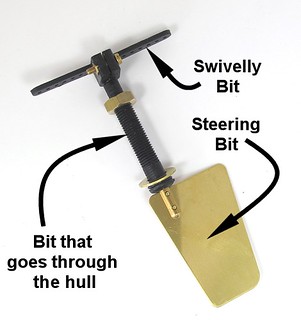
 So, here is a diagram of a typical model boat rudder.
The business end is the flat paddle at the bottom. This needs to stick out of the hull behind the propeller. The paddle diverts the thrust move the boat from side to side.
It is attached to a brass rod that runs up through the threaded part that goes through the hull.
At the top there is the swivelly bit that clamps to the rod. I'll attach a wire from this to a servo arm that will be moved in response to the controls on a radio transmitter.
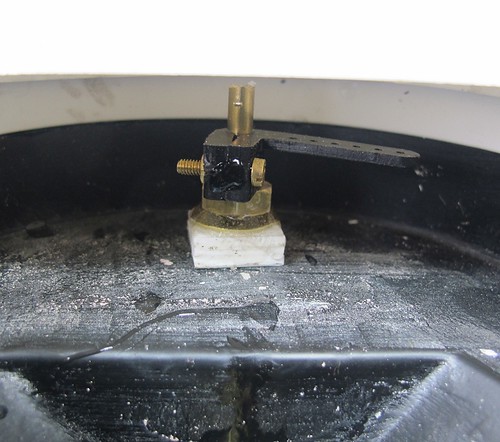
Fitting involves making a hole in the hull for the threaded part. This is far too long and needs to be shortened, as does the brass rod in the middle. The swivelly bit is unclamped and moved down the rod as required. To stop things leaking, I like to smear epoxy resin around the parts under the hull. While an O-ring is included, I prefer a belt'n'braces approach to keeping the wet stuff outside.
The hull is made of plastic just over 1mm thick so has to be built up around the rudder post - partly because the threaded bit isn't all the way down but mostly to support the parts staying vertical and not moving as they flex the hull plastic. You can see what I mean from this shot inside the boat.
No comments:
Post a Comment