A daily updated blog typed by someone with painty hands, oil under his fingernails and the smell of solder in his nostrils who likes making all sort of models and miniatures. And fixing things.
Wednesday, June 28, 2006
Splashing out
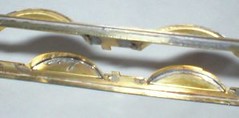
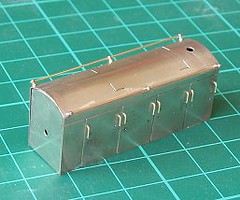
I thought the top part was too long initially. Only after fitting the first I realised the technique:
Bend the end a little so it forms a tongue.
Form the main bend over something round (I used a plastic tube).
Tack solder the tongue under the footplate and it holds everything in place while the main soldering is done.
Then the free end is flattened against the bottom and soldered up. It takes longer to describe than to do.
6 splashers done in minutes. Who says model making takes ages ?
Monday, June 26, 2006
More filters
So, I wonder (grasping for straws), is the pump contaminating the fuel ?
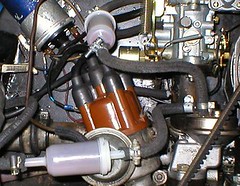
Only one way to find out, fit a filter before and after the pump. A bit fiddly but do-able. The first filter has enough pipe on it that I could remove it and the right hand tube, connecting the line from the metal fule pipe straight to the pump. I reasoned this would be quick in a roadside situation.
38 miles later the van had run perfectly. The post pump filter was clean and the pre-pump cruddy. However 38 miles is the best I’ve done in a while, especially as there should be plenty more life in the filter yet.
Of course what I’m slowly coming around to is the idea that the tank is going to have to come out and have it’s inside sealed. I really don’t want to do this ‘cos it will cost a load of cash for engine removal. Even then if I don’t get the sealing right first time I’ll need to do it all again.
Do people with Japanese cars ever have this problem ?
Saturday, June 24, 2006
Possibly OK
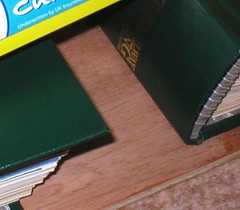
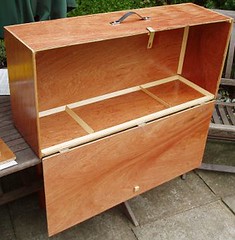
The box front looked a bit worrying at first. It’s a single piece of plywood with no bracing and it had twisted. Fortunately this was because only one side had been varnished. Now I’ve treated the flipside everything looks OK. Of course I haven’t tried it in place yet but that time is looming as it’s all varnished now and once properly dry re-assembly can commence.
Varnish
So I pulled my paintbrush out and started. The inside received Two coats a first coat covered the bottom and back. Paining a box has to be done in stages as you have to sit it on one face.
The painting happens outside and since I did this in the evening I decided to leave it out to dry. No chance of rain tonight.
In the morning, “Oh b****r, it rained.”.
Thursday, June 22, 2006
Lots of brass
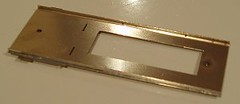
A lot of scoring with the Olfa Plasticard cutter on some thickish nickel silver and I had the parts. Very little curl to worry about and that that there was was easily removed with finger pressure.
Wednesday, June 21, 2006
G2
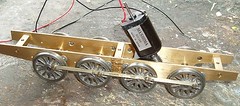
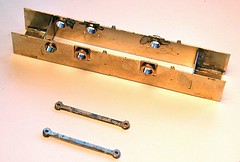
Yet another Mercian kit but I’m not using the chassis because Trevor was able to supply me with a milled brass one. It even had the wheels and rods fitted.
The loco has flangless wheels and the chassis was correctly fitted with these – but only on one side. For some reason the wheel was in the wrong position on the other side. I suspect when turning the model around and putting the wheels on the builder got confused. I rectified this when installing the rather nice motor and gearbox.
Then I found a problem. The wheels are cast iron (wrong spoke pattern but we’ll ignore that), drilled and tapped for the crankpins. The builder hadn’t been very accurate with this on one wheel. I tired running it without the crankpin and everything seemed fine. The solution was to ream the hole in the con rod out to huge and let the pin wallow around. It looks OK as long as you don’t use a magnifying glass.
Since this is intended for a garden railway I don’t suppose it matters. A friend was telling me this evening about the damage a loco of this size can do to a slug – and the fun of getting it out afterwards ! You don’t look too carefully after that I suppose.
Monday, June 19, 2006
Fixing an old friend
My duff weekend included breaking my watch. I tugged at the strap and it came off in my hand. No real surprise considering my fun with the seal on the van.
OK, it’s only a cheap watch but there was plenty of life in it. Besides, it’s the watch I use while doing mucky jobs. Impervious to water, oil, petrol and other nasty fluids, the trusty Casio goes on. It keeps reasonable time too ! My Scottish roots won’t let me buy a new watch for this job.
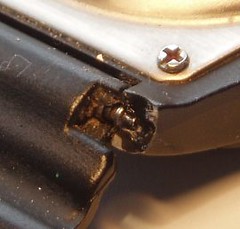
The break was unusual as the sprung bar that the strap pivots on and attaches to the body, hadn’t broken. A chunk had broken off the watch body itself. Clipping it back in and then adding a blob of Zap-a-Gap on the end of a pin seemed to fix it. I think a bit more help is required so a blob of epoxy glue will go over the superglue. If I don’t glue everything solid I might actually have fixed it !
Sunday, June 18, 2006
Bad seal
So, emboldened by this I made a fatal mistake. Looking at the new seal for the sliding door cover, I though, “That will only take a few minutes to fit and then there will be another job done”. Lets face it all you have to do is release the gripper, drop the cover into place and tighten things up again. That’s what it says in the Haynes manual for the VW Type 2 1968 on edition. And that is never wrong is it ?!
Off comes the cover and old seal. I clean things up and grease the runners for the door. Then I fit the seal to the cover to push it back into place.
It doesn’t want to go. I push and shove but no good. Then I lose my temper and hit it hard with my hand. Success. The back end is pretty much in place.
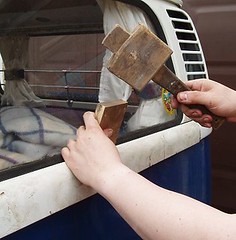
Obviously the seal is a tight fit (good) and will take some persuasion to go in. The photo shows the persuasion going on.
Most of the job is fine but about half way along it’s not working. I manage to waggle the seal from underneath and fixing re-commences. Then the door end gets caught underneath and I have to lift the cover a bit.
Glossing over the ranting at inanimate objects that occupied the next hour, I eventually gave up. The seal had torn and wasn’t going to sit tight and be pushed into position. So I cheated and cut off rubber that goes behind the cover.
Result – I can push everything in place but the seal isn’t sealing at the door end. It looks Ok-ish for the moment but I know this is one job that is coming back to haunt me.
Saturday, June 17, 2006
A nagging little voice
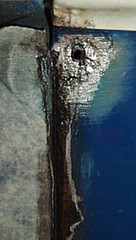
So I’ve given in. I know in my heart of hearts that things only get worse if left unattended. I poked around in the bubbles on the rear seam of my Type 2 with a knife. There are more bubbles than I thought (OK I’d ignored these but in my defence they were very shallow) but underneath I found the classic car owners friend, solid metal. There was only one tiny hole which I’ve photographed. How lucky am I ?! I scraped, chipped and hit it with the 3M rust removal disc and found solid metal all the way. Quite a depth of filler though.
Anyway, the metal has been well treated with rust killer and I’m going to be good and let it dry for the time it says on the tin. Then all (all ?!?) I have to do is fill and paint.
Perhaps by Monday all I will see is slightly mis-matched paint.
Wednesday, June 14, 2006
Stocking up
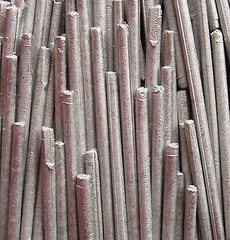
Since the high melting point stuff is OK, I’ve turned my attentions to low-melt as used to build whitemetal kits. There isn’t a lead free alternative for this so if it looks like the supply will be disrupted for a while as people work out what is and isn’t saleable. I don’t use a lot to be honest, as I prefer to attach smaller parts such as chimneys and domes with glue. That way they come off whole rather than bending if knocked. A bent chimney is a nightmare to fix. One knocked off can often be stuck back on without even touching up the paint.
Anyway, I thought I’d better buy a little solder. I normally use the stuff from Langley models which I suspect is a by product of their kit business. Available in packets of 10 sticks I decided to buy 50. However postage is free on orders over £20 so I went for a nice round 100 – cost about 35 quid.
This is probably a lifetimes supply but it doesn’t do any harm to stock up on materials you expect to use a lot of now and then. Mind you, if it does become scarce, look out for some eBay sales in the future !
Monday, June 12, 2006
Flux
Tom asked, “What do you use for flux, and where do you get it?”
When soldering you are supposed to use a “proper” liquid flux – at least according to all the books on the subject. However it’s never available when I want some and besides I’ve never found it necessary.
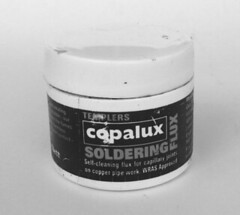
Currently I’m using Templers Copalux flux bought from a DIY store. It’s a paste flux that seems to do the job nicely. It’s wise to clean it off the piece after soldering – use “Shiny Sinks” from a hardware store or the cleaning isle of Tesco. I have left a couple of test pieces uncleaned for a few weeks and nothing has gone green. Mind you, it has the consistency of Vasaline so I doubt paint would stick to it very well !
The picture is black & white because I’ve wruiten a review of solders for the DOGA newsletter and I’ve lost the colour version.
“Any top tips for a complete beginner?”
Make sure the metal you are soldering is clean. If I’m not sure I rub it with a fibreglass pencil to make sure it shines.
Don’t try and solder big lumps of metal together – or at least not in your first days with the iron. The metal will suck heat away from the join. Practise on spare bits of fret or thin strips from the K&S rack.
If you use lead-free solder. Make sure it is the sort with a small amount of silver in it. Maplin sell something suitable for £2.49 for 4m
Hope this helps. If anyone has any more questions – feel free to e-mail me
Sunday, June 11, 2006
The land fashion forgot
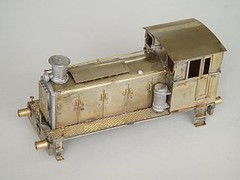
The result is as you see. A few hour work and I have a complete loco body. The experience of the previous two goes has paid off again. My work is much neater and squarer. Less visible solder means less cleaning up which saves time. If you want to improve your modelling technique, concentrate on using as little solder as possible, that’s what separates the men from the boys.
I altered my methods slightly from previous models. The top plate (the raised bit on to of the bonnet) was made separately and glued on after cleaning. It’s a pig to solder as the star shaped support (it replicates the prototypes supports) can’t be cleaned out properly. I think the castings (also glued on) are the same as the 4mm version. Although this makes them a bit big it’s not too obvious and for a kit with as limited a market as this, is a sensible economy.
The chassis fits too, although I forgot to shorten it when I built it so some slight bodging has occurred. Mind you the next job is to fit the mechanical bits so I might not be so happy soon.
Saturday, June 10, 2006
Come on Ingerlaaaand
While the rest of the country watched a nail biting England match against the greatest team ever to kick a ball, I was slaving over a hot soldering iron to get the HO Barclay together.
OK, I don’t do football and it was too hot outside. I like modelling with windows open on a warm day, gentle breeze blowing. There’s no reason it has to be a winter activity. The light is better for a start.
Since this is the third bonnet I’ve built I finally got it right first time. The metal was annealed and then bent (as per the instructions). The ends fitted pretty well and once I’d soldered them in it was still flat and square.
Learning from past problems I decided to fit the handrails before attaching the bonnet to the footplate. The horizontal ones were easy once the holes were eased a little. Lots of flux and tiny amounts of solder on the handrail knobs. Plenty of solder inside the bonnet to hold them in.
Bonnet handles are just a pain. However I a cunning method made things easier.
The wire supplied was chopped into two lengths. Each of these was bent over at the end and this pushed through the holes. A chopped down business card tucked under the wires and then was gripped in my fingers using a wooden chip fork to stop me getting burnt. Imagine from the top – fingers, fork, wire, card, bonnet.
Soldering was carried out from the inside so I could be messy without anything showing. Two handles were done at a time. Once the solder had cooled I snipped the handles to length – this means that all end up the same – hooray ! No fiddling around with short lengths of wire either. The are long enough to handle until the final snip. Verticalness (is that a word ?) was easy as well. Gentle tugging the wires achieved this before snipping.
I wonder if I can get a St George’s flag in HO ?
Friday, June 09, 2006
The lights were worth it
Fantastic.
Thursday, June 08, 2006
The experiment continues
The footplate for the Barclay is laminated from two parts. One has parts to fold down to make the valances. The other is the top surface with checker plate on it. What I do is place the top face down on the board and put the other part on top. Solder is run down the side by the valance with plenty of flux. This is enough to attach the parts and hopefully hide the join.
On one side I used lead free from Maplin. On the other leaded cored solder from Screwfix (I use normal cored solder for all my etched brass work). The same flux from a DIY store was used.
Result. Both as good as each other. I also fitted the retaining nuts, again one with each type of solder. Same result, both work fine. I did have to use PowerFlow flux as the nuts were steel but you couldn’t tell the difference.
Monday, June 05, 2006
It's the end of the world as we know it.
Just to make things interesting, instead of using conventional solder, I’ll be relying on the new lead free stuff, albeit with a bit of silver in it to help the flow.
Apart from this I expect the techniques to be the same. The tools will be as well – a big Antex iron (40W – best tool for soldering I ever had) and the usual files etc.
So far I have built the chassis. No problem there and after an hour or so I had the basics together. As progress continues, the results will be posted here.
Boxing clever
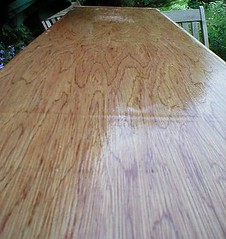
Soooo it was time for trip to Torries Hardware in Warwick where I left a cutting list. A couple of days later a pack was waiting for me, all nice and square with straight edges. A few lengths of stripwood, nails, screws and varnish and I was ready to go. Can’t understand why anyone uses a DIY store when the local shop will do the hard work for you at little or no cost. Nice wood as well with a superb grain on the face.
It’s a big box and only just tall enough for the boat. Plenty of length for a few tools and the radio control handset. A cheap clip keeps the front closed but if I wanted to a lock could go on for extra security. Even a big box is easier to move than the boat loose on its stand – and if the box takes a knock I’m not so worried.
Perhaps I should chuck work in and start making coffins !
Sunday, June 04, 2006
Big, fat, wire.
The problems are no longer keeping the stuff straight – now bending rails requires the use of a pair of pliers and some serious force.
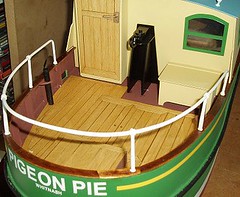
What I had to produce was a bit of a 3D puzzle. The rails have to curve around the back of the boat AND the rise of the sides. Worst of all the rail, while supported by stanchions, needs to bend down to finish in the top rail. This is the bit I messed up. Not a huge amount but enough for me to notice. The parts quickly became permanent fixtures thanks to the efficiency of the glue (Zap-a-Gap super glue). A minor dilemma is whether the damage done to remove them would be worse than the errors. I’ve taken the easy way out and left well alone. To my eyes there is a problem but I doubt others will spot it. If I think they will then they will only see the better side of the model !
Painting was fun. Can’t spray the brass with primer as it has to be glued to the model and the masking would be a nightmare. Handily it’s possible to buy touch up paint from Halfords and the range includes primer. This is the only paint I use which needs regular shaking while you are using it. On a hot day this is before dipping the brush in each time. It dries very, very fast. A smoother result would come from a slower dry but never mind. I did get the satin white on in a short space of time and the results look much better. Actually once the final colour was on I even managed to over look the imperfect bending.
One final problem was lack of material. In the box there is enough for the rear rail and one front one. Happily the K&S metal rack in the local model shop makes up for the deficiency. How else do you think I knew the size of the metal !?
Saturday, June 03, 2006
Useful reminder
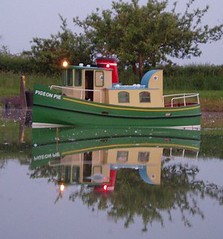
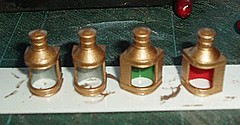
A useful aide memoir for anyone who can’t remember which side the red and green lamps go on a boat. You don’t want to get that wrong for fear of humiliation on the lakeside !
Lights are attached now and look superb in the dark. There may have been whitemetal castings supplied in the kit, but in this scale you can’t beat something that actually lights up. I look forward to sailing at dusk.
The photo shows the lamps while being painted. There is a clear inner for each so I painted the backs appropriate colours so they still look good in daylight. The bulbs are coloured but it’s not enough to give the effect required. Best of all would be to use the correct colour transparent paint on the lenses – no chance of that – I’m not buying a pot for each lamp !
Friday, June 02, 2006
Back together again
The model was a Blue Pullman made out of balsa wood. It was the last remnant of a model of Paddington Station also made from balsa. A gentleman who had long since died created this incredible piece of work. It was donated to the railway club by his widow and appeared at the earliest show I remember the club holding. There was also a model of Banbury locomotive shed. While incredible work had gone into all of these, the scale was odd. Roughly 4mm:1ft, everything was compressed and slightly cartoon like. Put together the effect was convincing.
Paddington had long since been disposed of. It was huge (about 5ft by 3ft as I remember), fragile and not suited to being stored in a damp cellar with limited storage. I always liked the Pullman so I saved it, housing it in the back of the aforementioned cupboard.
A couple of weeks ago, the builders son got in touch via the club website. He was hoping to be re-united with the model. I had to break it to him that it was long gone, but I had a train. A few calls and Banbury loco shed was located as well.
Last night we brought everyone together with the models. A couple of photo albums were produced showing other model created by the same artist (it was artistry) including some superb cars. At the end of a pleasant evening, the son went away with the Pullman and is keeping in touch with the loco shed owner. I’m sorry to see it go as it was a nice model but if I were in that position I would be looking to acquire anything my Dad had created. I’m just glad the train has found a good home.
And I have some space in the cupboard for more kits…
