A daily updated blog typed by someone with painty hands, oil under his fingernails and the smell of solder in his nostrils who likes making all sort of models and miniatures. And fixing things.
Sunday, November 30, 2008
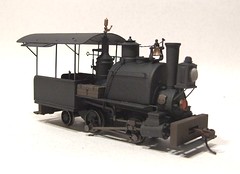
Lightly weathered Porter
This model is requested with a light weathering job. To this end I wafted some dark grey over everything. Then the lower half of the locomotive had some dark brown and earth mixes blown on. Across the top some weathered black simulated the smoke dirt.
This really looks nice. Subtle but effective.
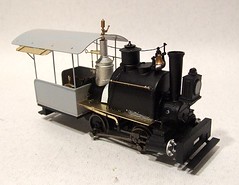
Painted Porter
The buffer beams are picked out in dark brown and requested and the whistle and bell in brass. Strange how the noisy bits are shiny isn't it ?
Built Porter
Lots of other parts need to find their way onto the model. The running boards are the worst as they glue to the bottom of the saddle tank, which isn't all that good a fit. A touch of filler sorted out the gap on one side - it's important to get these level.
Cylinder covers are provided, nice but a bit oversize. They do give that "backwoods" look to the model and impart a bit of character.
Saturday, November 29, 2008
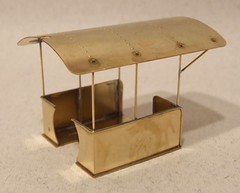
Etched cab
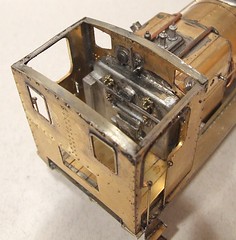
Since I'm doing an 0-4-2 the floor has to be shortened as it's supplied long for an 0-4-4 with rear bogie. Then the sides go on, beading is added using 0.7mm brass wire and then the uprights from the same stuff. The back is made up from part of the back intended for the longer model.
The roof is supplied pre-formed and riveted. Care soldering it in place and you end up with it nice and level - get that wrong and it will ruin the model locomotive.
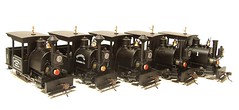
Porter lineup
I did one of these earlier in the year. Now I have another 5 to work on. Hopefully they won't take too long as I can practice will make perfect and speed things up. My plan is to build one of the model locomotives and then do the other 4 in one go.
Of course this could just mean I end up with pots of bits kicking around and it will take me longer to sort them out than doing one model at a time would have done !
Part number - why ?
I'm sure that most modellers could work out which part this is without the numerical assistance.
Friday, November 28, 2008
Airfix Beam Engine Kit
A big tick on the kits I've always wanted to build list with this one. Somewhere on a bookshelf is a 1970's Airfix catalogue which lists all sorts of delights including the science range of models. This comprised a beam engine, Trevithic locomotive and later a paddle steamer engine. All moulded in plastic and all intended to move, especially if motorised.
Finally the beam engine and locomotive have been re-released. I order the former from my local model shop (they get Airfix stuff from the Hornby rep) and £11.45 later I had the kit in my hand. A few hours later it had hit the modelling board.
My plan is to try and built it well enough that the model could pass, from a distance, as a Stuart Models engine. Much as I'd love to build and own one of these fantastic models they are well out of my skill and price range. That means the plastic has got to look like metal. Hmmmm.
Painted VW Model
If you look at nearly every van, it will be in two colours. White, or a very pale shade down to the swage line and a darker hue below this. The correct split for the colours if you are restoring an early bay is apparently at the roof line. For the modeller this is good news as it makes an easy masking job or a good hard line to work against for those brush painting.
Wanting as discrete a model as possible I went for a creamy beige with white roof. Indicators, door handles and the spare wheel cover were picked out. The whole lot topped of with a coat of satin varnish - this is a brand new car after all.
The glazing was replaced with Krystal Klear which isn't bad but the windscreen isn't great, a bit concave for realism.
Finally the model was reassembled. The foreign number plates went black, they should have silver digits but that's to fiddly for me, and black rubber steps on the ends of the bumpers.
The model replaces a Springside Morris Minor on the Dock. Admittedly it's a bit early to see one of these but as I always say - It's my train set so I'll do what I want.
Thursday, November 27, 2008
Left hand drive Schuco
So, I took the body off the chassis - pull the bumpers out to do this as it releases the parts. I broke off one lug but the others came out OK. The chassis and interior drop out but the glazing unit is harder. Mine was well glued into the top and shattered under the attention of the screwdriver rammed underneath it. Never mind.
A dunk in brake fluid didn't touch the paintwork but a dose of Nitromoors paint stripper did the job. The body casting is very high quality and finely moulded. To do the conversion properly I filed off the door handle on the (new) drivers side. The depression for fingers disappeared under a bit of filler. On the other side a piece of microstrip will be enough, I hope, to look OK. Making a dent in the diecasting isn't something I'm equipped to do !
The paint stripping removed the VW symbol on the nose but rather than try and find a transfer to replace it I made a spare wheel cover from plastic tube. This is common alteration so won't look odd. Most modern covers don't have the symbol either thanks to the efforts of Volkswagen's lawyers in chasing anyone who replicates it.
Inside the job was easier than expected. Cutting the lump that holds the wheel off the dashboard and re-gluing it on the correct side was easy with plenty of liquid plastic solvent. The dash details might be wrong but no-one will notice inside the van. I did remember to chop the spare wheel mounted on the back shelf off though as one is plenty for most drivers.
Wednesday, November 26, 2008
Y7 in print
As well as this there is an excellent DVD - the best cover disk they have produced so far. There's plenty on it, I haven't manged to watch it all yet !
"Railway of the Month" is Pete Watermans model of Leamington Spa. As a resident of the town this interests me of course, but in addition I have actually been up and seen the model. Although you get a track plan this can't give a sense of the shear scale of the project. It is vast. And brilliantly made. Perhaps I'd better focus on the excellent Highland layout in the same magazine.
Tuesday, November 25, 2008
Layout badges
The only trouble with this is that when your layout has been to over 80 shows you either have to build a huge board to display them all or do what we do and only show an edited selection.
Editing also allows us to avoid blighting the model with anything from the "gold plated taps are the height of good taste" school of design. It's not often you get this but I do have a particularly large slab of chromed and engraved plastic that would make a good shaving mirror...
On the other hand there are badges of real quality. York has produced some spectacular cast brass examples in the past. They weigh as much as a locomotive but are beautiful. Warley manages a very nice etched version as do several other shows. Occasionally you get a nice surprise - the Uckfield badge has been done on the cheap but is one of the best looking out there and will soon grace Flockburgh when we get around to doing a board for that model.
Anyway there is routine for new badges. Firstly we never fit them straight to the layout - that makes you look like a newbie excited at your first show. For us old hands, badges are received, the deliverer thanked, and then put straight into the top of the tool box so they aren't lost. Back home they go in a nice wooden cigar box with all the others (I never throw a badge away even if it is horrible). Every so often the badge board is updated and we go through the selection and lay out a new display. Those that appear are nowadays often chosen because a show is special, the first or an anniversary event or we particularly enjoyed the event. Sometime though the need to fill a gap gets some of the smaller plaques on and sometimes just because they look pretty.
And the best thing about layout badges ? The handing out process allows the exhibition manager a reason to get around during the show and have time to chat to all the exhibitors, something he might otherwise not have time to do. Appreciated by both sides, it's a little gesture that we all enjoy.
Monday, November 24, 2008
Notes from Warley
Getting in is easy if you arrive early enough. That means about 2pm.
The cash machine had a queue of 10 in front of it by 10:10am (10 minutes after the show opened) on Saturday. I was there because I had bought a bargain loco kit from a trader who didn't take plastic or cheque. An LNWR inspection saloon with integrated steam engine since you ask. And no I don't really have a use for it. It was still a bargain though.
Warley is a big show. Big enough to make the purchase of a show guide a necessity. Or you can wander around getting grumpy because you can't find the stand you want like quite a lot of visitors did. I'm not sure haring off in random directions helps.
The layouts looked excellent. Probably one of the best years ever. Needless to say I didn't get a proper look around them.
Every visitor seems to have a digital camera and wants to use it. About half ask first but this isn't the problem it used to be as the flash isn't used as often. Quite what happens to all these photos is unknown. Presumably they are used more often than the miles of video tape that were expended in the past. Incidentally, if you have posted any photos of Melbridge Dock online, let me know and I'll try and link to them.
Because of the above I took very few photos of layouts. Most of my shots are behind the scenes stuff showing the calm before the storm or the controlled chaos of packing up. You can see these pictures on Flickr.
A 20 year old layout can work as well as any other. We had no failures of the mechanical bits all weekend. In fact in this respect everything seemed very good.
The locos were a different matter. Despite having far too many for the model and filling the display case I think on Saturday we probably only had 4 or 5 I'd have been able to happily rely on to work the layout (we need 3). Not sure why as they all work normally. Perhaps the long lay-up between shows affected them more than expected.
Sunday night the fairies came in and fixed my 4mm scale Garratt. It ran beautifully (unlike its solitary appearance on Saturday) before opening.As soon as the crowds came in normal service resumed and it juddered away hopelessly and was returned to the ignominy of the fiddle yard. Apparently those same fairies also fixed the chips on a friends DCC layout for the second day.
If you miss the turn on the road to the NEC when arriving from Balsall Common it adds 25 minutes to a 35 minute journey and does nothing for the temper of the driver.
The 7mm scale Garratt went down very well. Everyone said nice things about it and I think Trevor sold a couple.
The Class 14 is too long to run around the layout. It's OK on the front road but that tight bend at the back defeats it. Pity as it looked great.
Lunch was lovely but on Saturday those in the last sitting were offered chicken curry or very little else as us early birds had eaten all the steak and ale pie etc. On Sunday all the meals looked fantastic (excellent lasagna) although I suspect people weren't as good at sticking to the times on the tickets. The guy in charge for the NEC looks and acts like Dale Winton but he really hustles things along and you don't have to wait long. No matter how he tried, the exhibitors were not convinced a ruby was the right meal...
There were bargains to be had but not that many of them. A couple of foreign caravans for a quid each and some American stuff half price from a retiring seller came home with me. I don't know about the mainstream RTR and didn't bother looking at the scrum by Bachmann's stand at the start of the show.
One of our earlier visitors had left home around 6am - in Scotland. he flew down specially for the show. Not a bad idea if you book early enough for a cheap ticket.
Saturday morning crowds were all being relieved of their tongues by cats outside as hardly anyone spoke. By lunchtime this was improving and we got to chat. Sunday there were people being invited behind the layout as they were being inspired to have a go and if inspiration is striking then anything I can do to help is worth a go. One of the best things about a 9ft long model railway is that people look at it and think, "I could build that".
Getting out was harder than getting in. Once packed up I took a look outside and decided to hang on getting the van as the queues of vehicles outside were huge. With such a short journey there was no rush for us to get out - better let those with longer distances to travel get away. At 6:30 I went out to the car park, drove to the hall and got very close before being pointed into another parking space opposite along with everyone else. There was by then lots of space in the hall and once parked, no obvious way we could then proceed in. At this point, despite the drizzle, we carried everything out. And then drove away cursing the jobsworth who was still sending everyone in to the holding area.
Numbers through the door were apparently slightly down on Saturday and looked about the same for Sunday. Some of the trade had done very well, others less so. There were a lot of people out there though and the wide gangways were welcomed.
Overall, even allowing for problems with illness and travel it was an excellent weekend. We enjoyed ourselves and so did those we spoke to who had paid to come in. I hope we get to do it again. Thanks must go to the Warley exhibition team who do a really excellent job. For more on the show, visit the website.
Sunday, November 23, 2008
Carpet
Carbon Steel ?
Diamond ?
Wrong. It's the floor found in the halls of the NEC.
Anyone who has spent a few days standing on these will know that after a few hours your feet are wanting to climb your spine and scream at your head, "Get me off this floor NOW !!!".
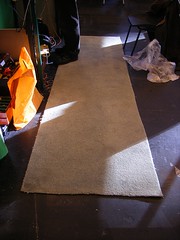
Of course we've been here before. Experience has taught us that NEC shows are hard work. Since the layout has to operated standing up - it's so much easier a position to talk to people from for a start - some artificial aids are required. Hence a 9ft long roll of carpet can be found behind the layout. I know it doesn't look pretty but by mid day Saturday it was getting some envious looks from other exhibitors. It was a bit of a surprise to find it still there on Sunday !
Anyway, while we may have been clever at ground level, head height was different. Thanks to my inability to screw the lighting poles to the legs properly, these drooped. This ment the four spots were lower then normal and had to be angled in a bit to point at the model. Which put them in my eyeline. All day. By the end of Saturday I had a crushing headache. Getting back home I flopped without enough appetite to eat some rather nice sausage and chips - something that those who know me say shows how ill I was. It also explains the lack of post. Sorry. I'll catch up in the week.
Sunday morning, the problem was fixed thanks to some work with a big screwdriver and little packing pieces made from wooden tea stirrer - result, a much better end to the day which considering the "fun" getting out was good news for at least one fluorescent jacketed idiot...
Friday, November 21, 2008
Warley 2008 - Setting up
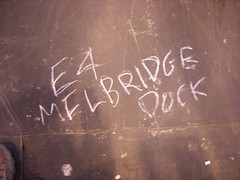 Off we go again. It's less than 20 miles for us to get to that little show in a shed near Solihull but we know from experience that most of the time on the road can be spent within the confines of the NEC.
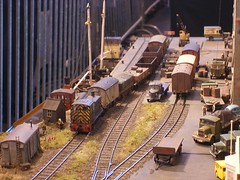
As it happens, arriving just before 2pm proves to be ideal. We get into the hall less than 15 minutes after arrival. Melbridge Dock is quickly unloaded and I lose the camper into the car park. It's a rare model railway exhibition as you can drive up to your stand. The VW works particularly well as the side door means we just chuck everything out into the allotted space.
Setting up takes a few minutes and by 3pm we are running. Or at least the model is up and tested. Putting the stock on properly can wait for Saturday morning. Despite security there are too many people wandering in and out to cover the layout with very pocketable models. I appreciate that anything from a traders stand will appeal to most thieves but you never know. Besides we need something to do first thing in the morning. Today there is chatting to do.
Before the exploring can take place though we have to help the organisers. The layout behind us is in the wrong place. Rather than take it to bits, it's decided to get a gang of people together and carry it 20 feet to the right spot in the hall. A dozen of us all took a bit and shuffled the model, a modest 7mm scale affair, to it's new home. Sadly I couldn't get a picture of this what with having my hands full of train set.
A wander around the show later and we are out of the door and back home by 4:30. Not bad. Tomorrow, we take the train. Because we can (hopefully).
Take a look at the pictures of the event setting up. In 18 hours these isles will be full of people.
Dirty bear
Most of the work was carried out with the airbrush. A weak mix of track colour was wafted on first. Once a paint cup of this had been used up the next one had a mix of earth colour in it. This was concentrated on the wheels and lower footplate to give the effect of dirt thrown up from the track.
The final cup was a track colour and dark grey mix which went on the top of the bonnets to simulate exhaust muck.
Finally some weathering powders in the crevices put in the ingrained dirt.
All I had to do then was glaze the windows with Krystal Klear. I still need to look at the windows in the noses as these should at least have a black background ideally have the train identification letters in there.
Thursday, November 20, 2008
Oops
 Now those of you know know the Class 14 diesel will have spotted my deliberate mistake. I didn't realise the error until fitting the roof and looking at prototype photos.
As any fule knos, a "Teddy Bear" locomotive has only one exhaust. I had fitted two.
For a moment I seriously thought of leaving the extra port in place and hoping no one noticed. That was too much deviation even for me though. The extra casting had to be removed. And without a complete repaint as well, there's no time for that.
Anyway, my lazy building efforts paid for for a change. The whitemetal castings were only soldered along the bottom edge and one side. Some great from the bit iron loosened the joins and forcing a scalpel down the back quickly flicked the offending part off.
Cleaning up took longer of course - the solder and leftover superglue from the non-soldered side had to be scraped clean. Then the horn cover was reattached in the correct place. A coat of primer showed I needed to feather the paint a bit more but a fibre pen sorted this out. Another prime and then some topcoat and varnish, carefully masking off the handrails and most importantly cab sides.
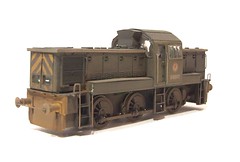
The result isn't bad apart from the satin varnish being a bit glossier than the rest of the the locomotive. Were the model to be finished as ex-works I'd have to re-paint. For a weathered look the dirt will hide any joins. I hope.
Wednesday, November 19, 2008
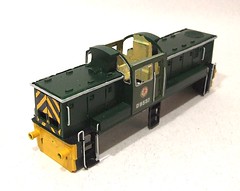
Painted Teddy
This work takes several days as the paint has to be left to harden between coats. The task runs something like this:
Day 1 - Paint the light green cab sides.
Day 2 - Mask the cab sides and spray the dark green bits.
Day 3 - Paint the yellow bits including the nose doors which are separate until the stripes are printed. Those stripes involve lots of pencil lines and constant fiddling until I am reasonably happy. Then they are stuck to the nose with superglue. Also paint the white bits with Humbrol 147 (pale grey) and silver windows surrounds. Then touch up the pale green bits around the window frames where the brush slipped.
Day 4 - Spray the whole loco with satin varnish.
So now you are nearly up to date. Nearly, the sharp eyed amongst you will have spotted one job I need to do. And I don't mean the cab roof.
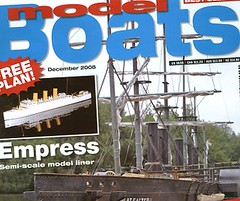
Tiny Puffer Review
Once you've read it, turn the page an you find a photo of a very nice model 1970's cruiser. The rowing boat article looks fun too...
Bodywork
This one needed a bit more work than normal. I didn't have an etched part for this except for on on a completely new body etch sheet. It seemed a shame to break into this just for one strip so I made my own from sheet nickel silver. My skrawker quickly and neatly cut the part which is just under 2mm wide. That's possibly a touch too fat still but it looks OK and is strong enough to resist handling.
Tuesday, November 18, 2008
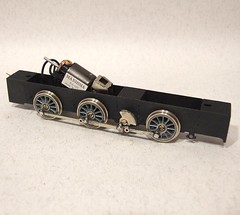
Teddy bear chassis
There's loads of space in the bonnets of this model and if I'd had to go and buy the bits for powering it, rather than using those to hand, I'd have been very tempted to stick a 2-stage box in. The model mustn't be geared down too much though. The prototype had a 40mph top speed so the model needs to be able to go faster than walking pace.
Monday, November 17, 2008
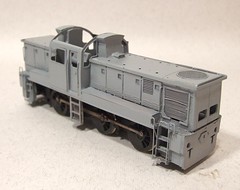
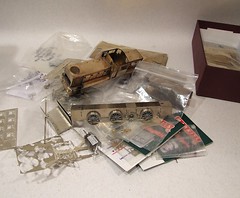
Class 14 pile
After the long stretch of Garratt making, time for what I hope will be a quick project. The pile of bits you see in the photo will hopefully become a Class 14 diesel soon. In time for Warley soon. That's by the end of the week.
Those with long memories or a copy of the Railway Modeller from a few months ago might remember that I've built one of these locos before as a test build for Mercian. The deal that time was that for my efforts I'd get another complete kit.
Well I actually have about one and a half kits since while last at Mercian HQ (a bunker 5 miles beneath the streets of Birmingham where world domination is planned, no not really) I nicked the part built model I assembled for the first test. The one the pattern maker borrowed to create the castings and that has sat on a shelf ever since because the kit was then re-etched in nickel silver.
I though I'd made a pretty decent job of my first go so I have taken the old model and a load of new bits to see if I can turn it into a finished product without starting from scratch with a new kit. Things look good so far as a scrub with Hob Brite has removed the worst of the tarnish from the metal. The wheels go round on the chassis too.
Actually, when I look back I built the previous Teddy Bear in a hurry for Warley last year. Deja-vu ?
Sunday, November 16, 2008
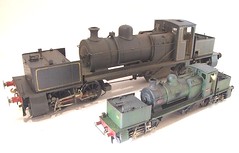
Two Garratts
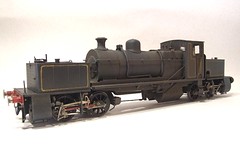
To give an idea of scale, the larger model is around 13 inches in length, The prototypes are slightly different - the cab fronts and front tanks aren't exactly the same but otherwise they are comparable.
If fancy the smaller model, it's a Backwood Minatures etched kit. A nice model and reasonably (taking into account the twin engine units and 4 sets of complicated waggly bits) easy to build.
Saturday, November 15, 2008
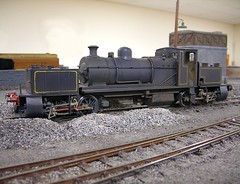
Finished Garratt
This is a good kit to build. It's not perfect but then I don't think the perfect kit exists. For such a complicated locomotive though the process is pretty painless.
The result is a very attractive (to my eyes anyway) model locomotive that runs well and is certainly different from anything else likely to be found on a layout. Which is good news as I've got to build one for me now.
Friday, November 14, 2008
Wiring up
A pair of the finest wires I have to hand were fitted. They were twisted together and then the pair glued along the inside of the engine units with Loctitie superglue - chosen because it's fairly thick and the pot is fitted with a brush. Glue was splodged in place and the wire pushed into the blob and held for a few seconds with a screwdriver.
The locomotive seems to run better in the test track now. Presumably the pickups weren't the best I've ever fitted and working off 8 wheels instead of 4 was bound to improve matters.
Thursday, November 13, 2008
Facing the press
So it was that we set up Melbridge Dock yesterday.
This did have the benefit of allowing us to test the model ahead of the show. One dry joint and a sticky point motor were the only problems encountered and quickly fixed. All the locomotives ran around the model successfully. It's amazing that after 20 years the model still performs this well without any serious maintenance.
In the afternoon Jaz the photographer turned up and we posed in all the typical local press ways including "Look it's a locomotive !" and "I must examine this steam engine more closely". To his credit he did his best to fit in as much layout as possible. Knowing the snapper helped and the road vehicles on the model were (for the photo) predominantly VWs as both Jaz and I share a love of the marque.
Of course we now await the results as they appear in the paper. You can never be sure what the picture editor will decide to use. A few years ago I organised a press call for an Easter competition at work. The photographer went away with some excellent shots of one of my colleagues (an attractive young woman) holding a cute spring lamb. They made most of the papers except one, who decided that that festive weekend would be better illustrated by a scruffy student hidden in some grass. That is why you end up with so many gurning idiot pictures in the local press...
Coal Load
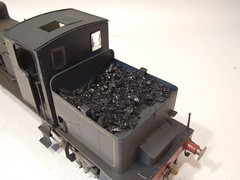
Obviously it's too large as supplied but putting some in a plastic tray from the local Chinese takeaway and tapping it gently with a hammer sorts this out.
Some of the results were then spooned into the bunker and fixed in place with a PVA/Water mix/drop of washing up liquid mix. In 7mm scale you get just the right glossy black effect this way.
Inside the cab some coal dust was sprinkled on the floor and fixed in the same way. Be very sparing with the liquid if you thy this !
The only trouble is I had to buy too much coal, so I bought some plastic bags and am selling it on eBay.
Wednesday, November 12, 2008
Weathered Garratt
First up, the dirt seems happy to sit everywhere except the crevices. They remain much free and simply glowing with shinny blue paint.
The dry brushing goes OK but when I move on to the airbrush I can't get the paint to sit properly. Yet again the cracks and valleys refuse to fill and glow even brighter when I take the model into daylight. So I put more paint on, which doesn't help and the finish starts to look like silt rather than airborne muck.
So I clean everything off with turps and cotton buds. I kid myself that this will give the effect of a machine that has been cleaned by hand. It's not bad but still not right.
Finally a fresh mix of dark browns and rusts is wafted over everything and finally seems to tie the finish together. I've probably gone further than originally planned but this was a mucky beast. A blast of thinned grey along the top of the boiler and tanks looks nice as though smoke has settled .
Finishing touches came courtesy of weathering powders. Those crevices, especially behind the pipework, had grey and brown dirt powder forced into them. The very slightly sticky paint aided this process and I'm confident that it won't fall out when the model is handled.
Phew.
Tuesday, November 11, 2008
Commissioning the power units
I've started with the power units. The valve gear has been cleaned up as best I can and quite a bit of paint was scraped off the wheels. Final polishing with the fibre pen made things look a whole lot better. Happily everything still seems to work freely so I lightly oiled the important bearings.
Next the motor went back in - it had been removed while I was spraying. I fiddled with the gear mesh a lot until the running was reasonably smooth. It's always been a little tight and (engineers, look away now) I have run a file on the brass crown wheel to take the tops off the teeth to ease things. Molybdenum grease helps as well.
The buffers needed the threaded section of the shanks shortening slightly to allow full travel before they hit the cylinder fronts.
Finally the fluted bit of the rods has been filled with red paint. Apparently this is something the NCB used to do to brighten up their locos. I wasn't sure but having done it, the result is very attractive.
Monday, November 10, 2008
Boat Show Day 3
The highlight, for me, was the two minute Remembrance Day silence. I have always found this more moving when it takes place at a show rather than at a War Memorial. Here, people don't have to shut up. They do it because they want to. Added to this, at 11am the pond was full of warships adding extra poignancy to the moment.
Afterwards the hall filled a little more. Many of the traders were running out of products and having to offer free postage instead. Lucky the crowd is more families than enthusiasts so the demand wasn't as strong. Those selling specialist bits such as boat fittings didn't do that well but the first two days compensated for this.
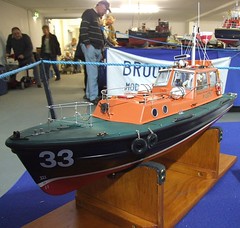
By the end of the weekend we'd talked ourselves hoarse and hopefully picked up a few new members for the club. The show is fun but three days is plenty. Mind you it is a nice venue so things could have been a lot worse. Our stand looked good and won third prize behind the Lifeboats and Warship stands which made it the best Club stand. Well deserved in my opinion as there was a huge range of boats on display and helpful members manning it at all times. The DVD had plenty of viewers too who seemed to enjoy it, or at least hung around long enough to be swooped on by a member proffering leaflets !
And I did end up on telly. And I did look every bit as stupid as expected. The rest of the report looked good though.
Sunday, November 09, 2008
Yellow lines
 The relieve the dark blue colour scheme, this locomotive is to receive a single yellow line around the tanks and cab side.
Easy, I thought. Break out the Bob Moore lining pen and run it around the edges. Then I played around with this and discovered that all the lines I could draw were far too narrow. Good for 4mm scale but hopeless for 7mm.
Out with the bow pen and a fresh pot of lemon yellow. And a couple of hours messing around trying to get something remotely acceptable. I put the locomotive aside at one point convinced I was going to have to give up on this as the results were rubbish. Coming back a couple of hours later and things didn't look so bad - with a bit of tinkering I was able to get nearly there. It's not perfect and if the model eventually gets a repaint by someone competent I won't be offended. For the moment a realistically heavy weathering job will have to cover the worst problems.
Saturday, November 08, 2008
Boat Show Day 2
We've discovered quite a few modellers who live withing spitting distance of the club (please don't we have enough water already) and so will hopefully pick up a few new members. The DVD I put together showing a few shots of last years activities has attracted a lot of attention.
You can't help everyone though. One visitor wanted a boat suitable for his grandchildren to sail. He fancied joining our club to sail it. Since a quick result was required, he was pointed to Howes to buy a RTR fishing boat, a bargain at £99. Later he came back sans model having decided it wasn't for him and being assured that if he turned up at the shop there would be more to choose from.
I explained the problems with cheap boats R/C - that it works on 40 or 27mhz and swamps the frequencies so he couldn't sail with anyone else. The suggested model had crystal controlled radio which avoided any problems. He suggested it was a finished model and he "wanted to be able to put his stamp on it" to which I replied that there wasn't any reason not to do this as he could re-paint and detail it to his hearts content. As a beginner he'd start with something that worked and be able to pick up the skills later. Also at the price you wouldn't do any better buying a kit. I knew from the earlier discussion that he'd never built anything before.
Pretty quickly it became obvious that what was required was cheap. The boat would be (now be) for a 7 year old and private water was (suddenly) available. Fine, so a scale boat wasn't ideal so how about a Slingshot - the kids could learn to race and no ones frequency would be swamped. It's a good little boat and not to expensive at £39. He still wasn't sure.
I doubt we'll see him again. And we hadn't even mentioned that there was a membership fee !
Dark Blue Paint
 On inspection, the Garratt seemed OK apart from one corner where some water hadn't been dried out properly, was OK. This issue was quickly dealt with and I moved on to the next stage, paint.
Trevor had requested that the locomotive be finished in S&D Blue - apparently this is similar to the shade used by the NCB, who would have eventually owed this loco and might have repainted it in their colours. I thought he was nuts as the one colour prototype photo I have show it in a faded red which would (IMHO) be much more attractive. My model will be either this or pale green. It's his model though so I suppose he gets to chose...
Anyway, I set up the airbrush and mixed up a pot of Railmatch S&D Blue with about 40% cellulose thinners. Spraying commenced with the engine unit bodies as I couldn't go too far wrong with these. Then the engine units themselves with the waggly bits masked off as best I could. Finally the boiler & cab changed colour.
All this went pretty well. About 3/4 of the paint pot was used leaving some for touch ups later. Quite a few coats, applied with airgun in one hand and hair drier in the other, were required to build up the required depth of colour. I kept taking the model outside to make sure all was OK.
I think I am learning to like this colour. It looks a bit dark in shadow and will need some dirt to bring it alive but at least this loco will stand out on display.
Friday, November 07, 2008
Boat Show Day 1
Anyway the day dawned and we turned up at the show only to be turned back and told to use a different car park. Apparently the recent rain had reduced capacity in the normal one so exhibitors were being kept out to save the space for punters. Not to worry as we ended up parked around the back of the hall, which is so much easier for carrying purchases out to the car !
Inside the crowds arrived pretty early and the hall filled with people. For most of the morning it was difficult to move around, something that didn't change until early afternoon.
Highlight (I think) of the day was being interviewed for Central ITV news by a very attractive presenter who's name I don't know. Cutbacks have hit the local TV media as she was operating the camera and sound as well. My bit involved showing her how to work a model boat, comically crashing it into the side and sailing around a bit. IF I make the telly, you'll have to spot me quickly as I doubt I'll be on screen for less than 20 seconds despite the shooting taking about ten minutes and about a dozen takes. I got the job because they needed a bright, large and easy to sail boat. And I had Pigeon Pie on the stand ready to go.
Anyway, I took some pictures which you can see here.
Into primer
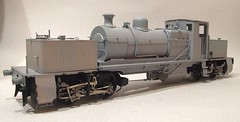 Several cleans later, another model locomotive gets the benefit of the attention from my can of etching primer. Now all I have to do is crawl over the model looking for little niggly things to improve.
At first sight it look nice though.
Thursday, November 06, 2008
Model Boat Show 2008
We are next to the sailing pond and apparently responsible for it in some way along with the Lifeboat Enthusiasts group. What this means is we need to bring a few extra models to make sure there aren't big gaps with nothing on the water. It's surprisingly difficult to get boat modellers to sail at an event like this it seems. Good job some of us aren't so reticent !
Cab controls
Those with more information could really go to town in here as there is plenty of space. All I had to work with was a single photo but to be honest, once you have a crew in place then the view will be limited anyway.
Around the top edge I've added some strips of scrap etch. I like to fit the cab roof after painting and so need something thicker than the edge of brass sheet to glue. All etched kits have enough scrap material to do this and I'd recommend this ploy to anyone. It certainly makes the detailing easier in there.
Wednesday, November 05, 2008
Underboiler pipework
On the real Garratt all the stuff underneath is connected to the engine units. On the model we want to be able to remove these without recourse to spanners.
Oh, and you don't get any particularly useful photos either from any source (I know, I've looked). Luckily the shilouette is all important and getting this right isn't that difficult. The kit parts all fit nicely and there is a clever bit of work representing a join between firebox and brake support.
I did have a little work to get brake rodding and pipes through the firebox but it's only drilling a couple of holes.
Now I can remove the boiler cradle from the engine and you it all looks like everything is connected up when the locomotive is on the track. I'm going to paint it all black anyway so you're not going to see it. So there.
Tuesday, November 04, 2008
Garratt pipework
And from the modellers point of view, the tradition of hiding all the unseemly mechanical stuff away make for a much easier building session. However, there is no getting away from it. If the model is to look like the prototype then it must be festooned with fat (roughly 2.5mm) wire like a spaghetti tree ready for harvest.
I used some handy copper wire - which turned out to have a steel core. That made bending it harder than it would have been otherwise, although the silver lining is that once bent it stayed bend and didn't go all wiglly at the slightest touch as pure copper is wont to do.Some of the bends defeated me and so I cheated and made the pipe is two parts joined with hot blobs of solder which thanks to surface tension look OK. Even the gentle bends around the boiler were "fun", a Maglite torch worked very well as a former funnily enough...
The absolute worst part of the pipework is figuring out where it was supposed to go. At one point it dips down inside the frames - out of sign on all but one photos available to me and even that wasn't clear.
Aside from pipes there were the dreaded handrails. After fiddling around with a mixed bag of knobs (do stop sniggering at the back) some medium sized ones worked best. For a change I managed to drill holes in the front of the cab which makes attaching that end a whole lot easier. A handy hin here - put the two middle knobs on before forming the front bends, or you have to undo them to slide the fittings on - guess how I know this !
Monday, November 03, 2008
Cleanup timing
With the Garratt though I have a problem. Even if I clean every bit of valve gear before attaching it, there are still a lot of fluxed joints that have to be washed afterwards. The wheels are trapped in place too.
This time then I've head to take a risk. Once the running properties had been proved the motors were removed and the entire chassis unit washed with Shiny Sinks and rinsed with water. This isn't ideal as those steel wheels and axles are vulnerable to rusting but there's no way they are coming out now.
After it's wash the unit received a good long blast from a hair drier. Then every pivot and bearing was oiled. I'm not sure if this is going to make a difference in the long term but I can cross my fingers and hope.
Sunday, November 02, 2008
The Garratt runs !
With all the waggly bits soldered up it was short step to trying the model out. A spacer had to be made to lift the back end - three axle spacing washers on the rear pivot - and some pickups were fitted. Then the loco ran up and down my test track. The valve gear whirled away and nothing fell off and I was happy.
There is a world of difference between running on a straight track and operating on a proper layout. For that I needed to head down the the railway club and ask nicely if they guys building "Kimble" if they would let me give it a run. Fortunately all the boards were in place and none of the track was being fettled so this was OK.
So while we drank tea the Garratt traversed the layout. It looked fantastic and unlike some of the models I've built it didn't embarrass me the moment I got into the public gaze.
You can watch the run on this video.
Saturday, November 01, 2008
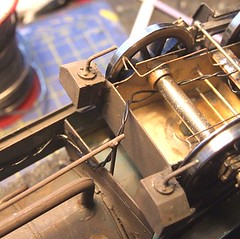
Brass pin hints
This time I solved that - before use each pin has its head dressed with a few strokes of a file to give a flat top. Now each pivot point presents a flat disk to the viewer. It's possible still a bit big but looks a whole lot better for very little effort.
