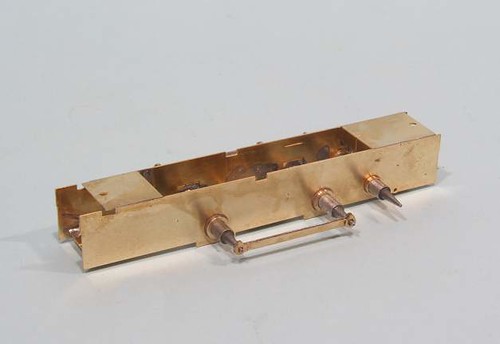
Starting at the bottom of the loco as usual, I made up the coupling rods, the shorter of which you can see in the photo.
Next, the sideframes were joined with the two main end spacers. Everything checked out as nice, square and flat. Handy hint at this point - don't used a spare wing mirror glass to check, they are slightly curved. Guess how I know.
The rods were then used to align the axle bearings, it's important that the centres of these are the same distance apart as the holes in the rods if the loco is ever to run properly. I jigged the front axle to crank axle set as well but couldn't be bothered to take a photo of this. And yes, the rod does run from the front to the crank, not the back. That's the class 06 that does that. Yes the two locos do look very similar. Being a Scottish company, Barclay didn't waste money of design if they could help it. Or stuck to a "brand image", you decide.
Once happy, I added a third spacer in the middle at the bottom because it will be used to support the pick-ups. Then the two outer strip ones because I'd paid for the bits and wasn't going to waste them even though I can't see what they are supposed to add to anything..
2 comments:
Can you do it as one of the ones that worked Holyhead breakwater? They were local to me.
That's what I have in mind. Possibly even in black with TOPS numbers.
Post a Comment