A daily updated blog typed by someone with painty hands, oil under his fingernails and the smell of solder in his nostrils who likes making all sort of models and miniatures. And fixing things.
Friday, May 09, 2014
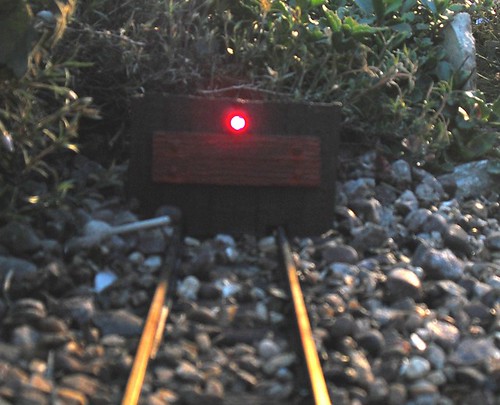
Nightime bufferstop
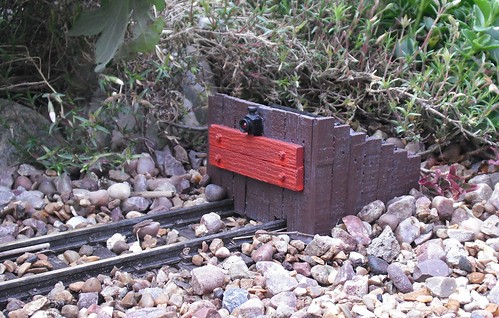
OK, so the buffer stop is now finished and installed. For the moment I've not PVA'd the gravel around it but that will happen the next time we get some sunny weather.
Inside, I've tried to waterproof the electronics as far as possible. The original casing from the solar light has been rebuilt around the circuit board and all the holes I can see are filled with Pound Shop epoxy resin. Soldered connections outside the casing are protected with heat shrink tubing.
With no moving parts inside, this ought to keep the light working for a long while. The weak link is the separate AA battery in the unit which relies on contact with its sprung connectors to work. I considered soldering it in (I think it's removable to conform with WEE regs for disposal) but have found in the past that you need flux on the contacts to get solder to stick and so that will just go green and cause the joints to fail anyway.
So, my hope is that if I keep as much moisture out as possible, I'll get a couple of years service from the unit. I think replacement will be possible, if not a 10 minute job.
One area I did initially get wrong was wiring the solar cell. With the polarities reversed, the circuit still charged and the light came on but it didn't switch off again in daylight. Obviously my error meant the transistor that handled this stuff wasn't working. A quick swap of the wires and in daylight the light is off, put your hand on the solar cell and it comes on. That's worth remembering for the future.
Labels:
garden railway,
model railway
Subscribe to:
Post Comments (Atom)


4 comments:
You can get rechargable batteries fitted with solder tags from the likes of Farnell (possibly Maplin?) which make soldering much easier than attempting to heat the whole battery case.
If you give a good scrub with iso-prop. alcohol and a stiff brush afterwards that should clean off any flux residue.
Putting anything electrical in a moist environment, especially with dissimilar metals, is asking for corrosion to start eventually. The way to tackle that is a conformal coating spray (also available from Farnell / Maplin). This leaves a thick plasticy coating over everything that excludes moisture and stops corrosion - often used where electronics is places in 'harsh' environments. Don't believe the claims that it can be soldered through for subsequent repairs - whilst technically it *can* be done, it's a painful process that isn't much fun!
Looks good. Given that the LED presumably has a much lower current requirement than the original garden lamp you might be able to get away with having the lamp on during the day as well as at night?
Ian - Good point but the battery with tag probably costs more then the quid the original lamp cost me! In the future though I might pick one up for eventual replacement, we'll see how it goes. I did think about a covering of WD40 but forgot before sealing the box up.
Stuart - Not sure there will be anything in it. The original lamp was an ultra-bright LED but I suspect the current draw isn't migh different from the conventional one in there now. The cell only supplied 1v in normal light so there needs to be some down-time anyway so the battery can charge and provide the extra power required.
Post a Comment