A daily updated blog typed by someone with painty hands, oil under his fingernails and the smell of solder in his nostrils who likes making all sort of models and miniatures. And fixing things.
Tuesday, July 14, 2015
Windows
While stripping down the building, I tried to remove the plastic windows carefully, decided they were too well stuck in place and just bust them out with a poking finger.
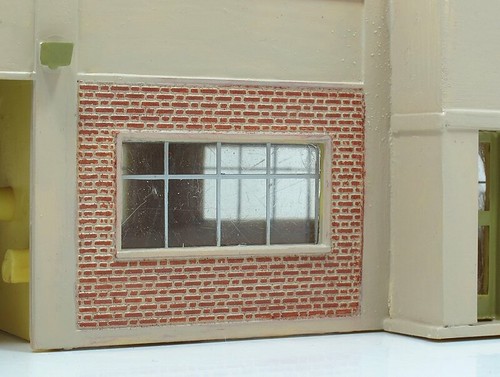
Replacements were cut from 1mm thick plastic sheet. I tried to mark the bars by scribing them and filling the lines with white ink. This didn't work as the ink pulled out of the scratch as soon as I rubbed the excess away.
The second attempt was made with enamel (Humbrol 147) put on with a bow pen. Although I'm showing the best window, the others are OK, at least for this project. To be honest, I wish I'd gone for the bow pen straight away - a lesson to be learnt for next time. It's certainly the best way to represent steel industrial window frames.
Labels:
50p Hornby,
building,
model railway,
painting
Subscribe to:
Post Comments (Atom)

1 comment:
Very tidy, Phil! I suspect that getting a bow pen to work is an art in itself... (I could never get mine to work.) I've tried a number of techniques to represent "glazing bars" over the years. I had some success with filling scribed lines with Humbrol enamel: I think I allowed the paint to dry a little before wiping off the excess. Sticky (paper) labels can be stuck over the glazing material, and bits removed where you want the glass to be -- great for window frames. I've found 3M Scotch "Magic Tape" to be useful too: paint a suitable length opaque white, leave to dry, and then use a sharp craft knife or scalpel to cut thin strips of material that can be stuck to the glazing material where required.
Post a Comment