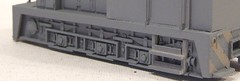
As part of my efforts to remove all traces of the models HO origins I spent quite a lot of time hacking away at the steps moulded into the underframe. With all the detail present this wasn't a fun job.
Fortunately the sides are moulded from a very soapy plastic which carves well and reasonably cleanly. What I should have done is sharpened a screwdriver to make a small chisel but my scalpel did an OK job (an X-acto chisel is too large for this work).
New steps were fabricated from 1mm plastic. The verticals sit in slots cut in the detail with a hacksaw and are fixed with superglue - the only stuff that will get close to sticking to this plastic.
Thursday, July 10, 2008

Wednesday, July 09, 2008
Critter in primer
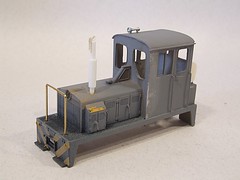
Not being 100% confident of the joins at the cab corners I whacked a coat of primer on the locomotive rather earlier than normal. This highlighted a few very minor areas to be re-filled but generally things were OK.
Happy with this I added the chimney - a nice single part that I think is turned from solid plastic rod. A bit of fiddling with plastic strip and it had one of those sprung caps that exhausts are fitted with to stop the rain going down them. Some may think I've used the part the wrong way up but I prefer the long bit of the pipe to be at the top - and it's my model.
I also spotted some moulded handrails I missed on the lockers which have been scraped off. Finally a new handrail is added at the front from 0.7mm wire. The height was set to match the cab not the bonnet as shown in the kit instructions as the later is too low.
Happy with this I added the chimney - a nice single part that I think is turned from solid plastic rod. A bit of fiddling with plastic strip and it had one of those sprung caps that exhausts are fitted with to stop the rain going down them. Some may think I've used the part the wrong way up but I prefer the long bit of the pipe to be at the top - and it's my model.
I also spotted some moulded handrails I missed on the lockers which have been scraped off. Finally a new handrail is added at the front from 0.7mm wire. The height was set to match the cab not the bonnet as shown in the kit instructions as the later is too low.
Slingshot damage
We seem to have gained a "Gentleman's Racing Series" in addition to the normal Slingshot series this year. Apparently the Thursday morning crowd at the model boat club fancy have a go at racing with the big boys.
All of which means I had to sort out the damage to my boat from the last races. To date I've always been fairly lucky and come through unscathed. A flip last time lead to water getting into the controls through a hole chewed in the hull by someones propeller.
The water damage has dried out and controls are working again. Physical damage required a patch to be stuck on the inside of the cover with superglue and the a bit of smoothing. This reduces the covers flexibility a bit but not in any way that will affect the boat - I hope.
We'll find out tomorrow if the rain stops long enough for a sail.

All of which means I had to sort out the damage to my boat from the last races. To date I've always been fairly lucky and come through unscathed. A flip last time lead to water getting into the controls through a hole chewed in the hull by someones propeller.
The water damage has dried out and controls are working again. Physical damage required a patch to be stuck on the inside of the cover with superglue and the a bit of smoothing. This reduces the covers flexibility a bit but not in any way that will affect the boat - I hope.
We'll find out tomorrow if the rain stops long enough for a sail.
Critter cab part 2
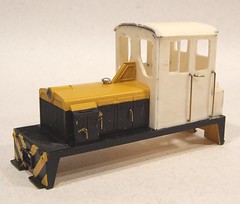
After a little tweaking the cab is finished. In the end very little filler was needed, just a bit around the front of the roof and tiny bits in the leading edges of the sides.
Handrails and door handle are from 0.7mm brass wire. While I was at it I removed the moulded handles from the bonnet sides and replaced them with wire too. This is all part of my plan to remove any signs that the body is based on an HO scale model locomotive.
Handrails and door handle are from 0.7mm brass wire. While I was at it I removed the moulded handles from the bonnet sides and replaced them with wire too. This is all part of my plan to remove any signs that the body is based on an HO scale model locomotive.
Tuesday, July 08, 2008
Critter cab
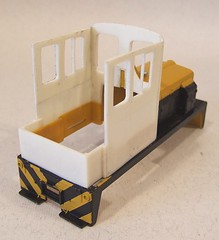
The Unit Models cab is made of resin. To be honest the fit is a bit average. Unlike plastic, resin has a tendency to warp a bit over time if it's not supported. This isn't going to be a problem on the finished locomotive but several sides had to be massaged a bit to get them properly flat. A little heat from the bulb of my desk lamp helped too.
Sticking duties were handled by superglue. As it's a gap-filling variant the corners are looking pretty good.
Sticking duties were handled by superglue. As it's a gap-filling variant the corners are looking pretty good.
Sunday, July 06, 2008
Little Critter
Having completed one On30 project I was so enamoured with the result I've decided to start on a second one. This time it's a diesel locomotive, what the Americans call a "Little Critter". Basically a freelance (but hopefully plausible) model loco based on a standard gauge model from a smaller scale.
The kit is a Unit Models Plymouth conversion kit. I liked it when I saw it because the result doesn't have the look of a standard gauge model with a giant cab - a very common problem with conversions of this type. The kit is based on a Bachmann HO scale shunter and consists of a new resin cab plus bits for the exhaust stack and front handrail.
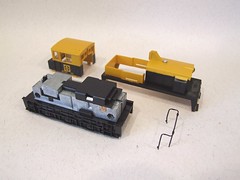 First job is to strip down the Bachmann model to remove the cab. A bit of wiggling of the tabs that hold it to the footplate and some light force did the job. Since the cab is thrown away it's not the end of the world if it gets broken but pride wanted me to get it off in one piece. The problem is it means I have a nice, well painted HO scale locomotive cab that is too good to throw away...
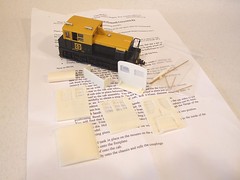
The kit is a Unit Models Plymouth conversion kit. I liked it when I saw it because the result doesn't have the look of a standard gauge model with a giant cab - a very common problem with conversions of this type. The kit is based on a Bachmann HO scale shunter and consists of a new resin cab plus bits for the exhaust stack and front handrail.
First job is to strip down the Bachmann model to remove the cab. A bit of wiggling of the tabs that hold it to the footplate and some light force did the job. Since the cab is thrown away it's not the end of the world if it gets broken but pride wanted me to get it off in one piece. The problem is it means I have a nice, well painted HO scale locomotive cab that is too good to throw away...Painted Porter
Job done and very nice it looks too.
As this was to be a clean loco, I needed to find a reasonable colour match for the original paint. After a bit of experimentation, Precision Black (not weathered or coal, just black) fitted the bill as it gives a nicely clean finish with just the right amount of sheen when applied with an airbrush.
The problem with this sort of model is you can't take it to pieces in the normal way. American locomotives don't have a sensible chassis/body break line like European ones. I dropped the wheels out and masked the cross heads as best I could. A few areas needed a little touch with a paintbrush but nothing highly visible. The paint brushes well but I still prefer to spray.
Once dry, the bufferbeams were treated to a couple of coats of Humbrol matt red to brighten up the livery. That's not an original idea - the pictures that come with the Backwoods kit show this colour !
Further colour comes from the bell, whistle, toolbox, oil cans, bucket and badges on the side of the smokebox.. This is the exciting bit - when the model starts to come alive.
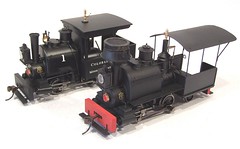 The result is a very nice looking model locomotive. It's certainly different from the standard item. As you can see, the reworked item is stretched and much more open. If you didn't know where to look you might not realise that they are based on the same model. The 0-4-2 version is, in my opinion, much better looking than an 0-4-0 version would be. The bogie fills in the otherwise empty back end.
This hasn't been a difficult it. Care attention and some modelling skills (especially soldering) are required. You have to make a lot of decisions along the way as the pack is so flexible but that's no bad thing as you get a model unique to the builder at the end.
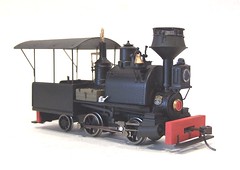
As this was to be a clean loco, I needed to find a reasonable colour match for the original paint. After a bit of experimentation, Precision Black (not weathered or coal, just black) fitted the bill as it gives a nicely clean finish with just the right amount of sheen when applied with an airbrush.
The problem with this sort of model is you can't take it to pieces in the normal way. American locomotives don't have a sensible chassis/body break line like European ones. I dropped the wheels out and masked the cross heads as best I could. A few areas needed a little touch with a paintbrush but nothing highly visible. The paint brushes well but I still prefer to spray.
Once dry, the bufferbeams were treated to a couple of coats of Humbrol matt red to brighten up the livery. That's not an original idea - the pictures that come with the Backwoods kit show this colour !
Further colour comes from the bell, whistle, toolbox, oil cans, bucket and badges on the side of the smokebox.. This is the exciting bit - when the model starts to come alive.
The result is a very nice looking model locomotive. It's certainly different from the standard item. As you can see, the reworked item is stretched and much more open. If you didn't know where to look you might not realise that they are based on the same model. The 0-4-2 version is, in my opinion, much better looking than an 0-4-0 version would be. The bogie fills in the otherwise empty back end.This hasn't been a difficult it. Care attention and some modelling skills (especially soldering) are required. You have to make a lot of decisions along the way as the pack is so flexible but that's no bad thing as you get a model unique to the builder at the end.
Porter in brass
This model locomotive is now ready for primer. All the construction is finished. There will be quite a few fiddly bits to add later but now I get to see what it's going to look like in a single colour.
Backwoods have produced quite an unconventional kit. While there are some standard construction jobs such as the cab, most has been more akin to scratchbuilding but with help. The builder has to make a lot of decisions - the cab back for instance has to be altered from another part. Handles are formed from wire - except for the regulator which is a nice etching.
There isn't a huge amount of the original Bachmann model left this time. I could have left the chimney but that would mean not using the nice whitemetal replacement. The footplate is cut back quite dramatically which alters the look of the loco quite a lot around the wheels.
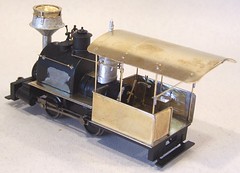
Backwoods have produced quite an unconventional kit. While there are some standard construction jobs such as the cab, most has been more akin to scratchbuilding but with help. The builder has to make a lot of decisions - the cab back for instance has to be altered from another part. Handles are formed from wire - except for the regulator which is a nice etching.
There isn't a huge amount of the original Bachmann model left this time. I could have left the chimney but that would mean not using the nice whitemetal replacement. The footplate is cut back quite dramatically which alters the look of the loco quite a lot around the wheels.
Saturday, July 05, 2008
Spark arrestor
The chimney is supplied with two tops - a cast whitemetal one and a kit of bits to make the same thing in brass.
If I were building a weathered loco, the former would be OK. Paint it black, dry brush with tank grey and the result will be pretty good.
This locomotive is to be clean and so the etched version will be nicer as it should have a see-through quality. It's a fiddly build though. The mesh comes as a sheet not long enough to go all the way around the parameter of the ring in one go. Fortunately it solders well and needed minimal cleaning up. As long as I'm careful with the paint it should look OK.
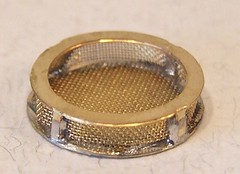
If I were building a weathered loco, the former would be OK. Paint it black, dry brush with tank grey and the result will be pretty good.
This locomotive is to be clean and so the etched version will be nicer as it should have a see-through quality. It's a fiddly build though. The mesh comes as a sheet not long enough to go all the way around the parameter of the ring in one go. Fortunately it solders well and needed minimal cleaning up. As long as I'm careful with the paint it should look OK.
Porter tank
Because the new chimney to be fitted to the Porter has a fat spark arrest er, the bell has to be relocated to the side of the saddle tank. The kit supplies a small etched bracket for this which is superglued in place. This isn't ideal but the metal (mazak ?) tank won't accept solder. The glue joint seems pretty strong though.
A new set of handrail stanchions are included. On one side they simply replace the existing ones. On the other side a pair of holes are drilled. I marked these with an odd-leg caliper to make sure they matched the originals and we level. The metal drills reasonably well with a small drill and pin-vice although I managed to break one drill in it.
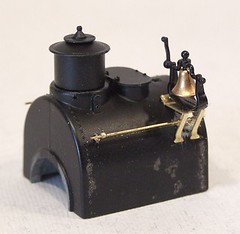
A new set of handrail stanchions are included. On one side they simply replace the existing ones. On the other side a pair of holes are drilled. I marked these with an odd-leg caliper to make sure they matched the originals and we level. The metal drills reasonably well with a small drill and pin-vice although I managed to break one drill in it.
Brass Porter cab
The biggest job on the Porter locomotive is building a new cab. First you have to pick you floor - long or short (short) and then form the side. The slots that the locating tabs fit through needed a lot of cleaning out - a surprise as the etchings are excellent quality.
The beading is added by soldering 0.7mm brass wire along the edges, aided by a half etch rebate. It's fiddly but well worth it. By soldering along the edge a neat finish is obtained. Half etched lines in the inside are then extended to the top and used to locate the roof supports.
The roof itself is pre-formed and pre-rivited, something not normally found on a UK kit. It's intended for the long Porter so I took the option of spinning it around and lopping a bit off the back which restores the proportions a bit. Getting the thing level involved some fiddling, tack soldering, measuring and a bit of swearing. Not a job you can skimp on or the model will look terrible.
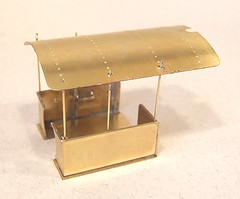
The beading is added by soldering 0.7mm brass wire along the edges, aided by a half etch rebate. It's fiddly but well worth it. By soldering along the edge a neat finish is obtained. Half etched lines in the inside are then extended to the top and used to locate the roof supports.
The roof itself is pre-formed and pre-rivited, something not normally found on a UK kit. It's intended for the long Porter so I took the option of spinning it around and lopping a bit off the back which restores the proportions a bit. Getting the thing level involved some fiddling, tack soldering, measuring and a bit of swearing. Not a job you can skimp on or the model will look terrible.
Friday, July 04, 2008
Naked Porter
First job in this conversion, is to take the nice, pretty, RTR locomotive to bits and throw lots of them away.
The back bunker pulls up and off the footplate. Then the cab can be wiggled off by running a scalpel along the joint and breaking the glue holding its tabs in.
The cab floor is next. Undo the screws each side of the firebox, pull this up and bit and then the floor and be pulled out. It takes more force than you'd think but there isn't any glue to defeat.
Next the saddle tank is released by undoing 4 screws under each side. Finally the chimney and steam done are gripped with pliers and pulled.
There's not much left now is there ?
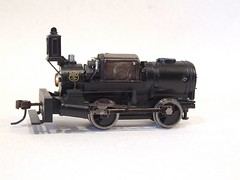
The back bunker pulls up and off the footplate. Then the cab can be wiggled off by running a scalpel along the joint and breaking the glue holding its tabs in.
The cab floor is next. Undo the screws each side of the firebox, pull this up and bit and then the floor and be pulled out. It takes more force than you'd think but there isn't any glue to defeat.
Next the saddle tank is released by undoing 4 screws under each side. Finally the chimney and steam done are gripped with pliers and pulled.
There's not much left now is there ?
Porter upgrade kit
The Porter model locomotive is going to be customised ("Pimped" as da kidz would say) with a Backwoods Miniatures detail kit.
The kit contents are made of etched brass, brass, whitmetal and mostly paper. In fact the box would be a lot smaller if it wasn't for the fulsome instructions that are provided.
In many ways, this isn't a kit. There is such a fantastic array of options available so you can build a loco that is personal to you. Use everything and your locomotive ends up as a 0-4-4 with a huge cab and a rear bogie. The model I build will have the shorter can intended for the 0-4-0 but will have the extra rear pony. Other options will be decided at the time depending what looks good.
Part quality appears to be good. The etches are clean and the whitemetal doesn't appear have any serious flash.
Time for a read.
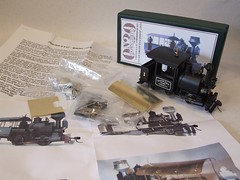
The kit contents are made of etched brass, brass, whitmetal and mostly paper. In fact the box would be a lot smaller if it wasn't for the fulsome instructions that are provided.
In many ways, this isn't a kit. There is such a fantastic array of options available so you can build a loco that is personal to you. Use everything and your locomotive ends up as a 0-4-4 with a huge cab and a rear bogie. The model I build will have the shorter can intended for the 0-4-0 but will have the extra rear pony. Other options will be decided at the time depending what looks good.
Part quality appears to be good. The etches are clean and the whitemetal doesn't appear have any serious flash.
Time for a read.
Thursday, July 03, 2008
On30 Porter
This is a Bachmann Porter locomotive. It's a delightful 7mm scale narrow gauge engine.
And it doesn't know what's about to happen to it.
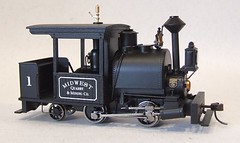
And it doesn't know what's about to happen to it.
Loco parade
Model railway enthusiasts love stock lists. They pour over then avidly working our which kits have produced which model locomotives. Layout articles often use half the available text on this detail and even then it's never enough. One of the most asked questions at shows is, "What kit is that then..."
Despite this it's still taken me years to get around to re-doing the rolling stock web page for Melbridge Dock. You can see the results here.

Despite this it's still taken me years to get around to re-doing the rolling stock web page for Melbridge Dock. You can see the results here.
Wednesday, July 02, 2008
Leftover kit bits
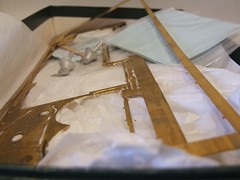
Must get rid of the leftover bits. Must get rid of the leftover bits. Mustn't just put the lid back on the box and forget about them. Mustn't add the box to a pile and forget about it. Mustn't just put the bits in a box with the others either.
Tuesday, July 01, 2008
Bantam Tug
On my trip to London for the DOGA AGT, I arrived a bit early and dropped into the Canal Museum. Around the back they have this very modellable Bantam Tug boat.
According to the display inside, the important details are:
Length - 21feet (6.4m)
Beam: 8 feet (2.44m)
Beam over rubber fenders: 8ft 9in (2.67m)
Draught: 3ft 3 in (1m)
A free card kit for a very simple waterline model can be picked up and more details found here.
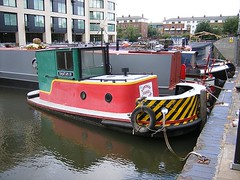
According to the display inside, the important details are:
Length - 21feet (6.4m)
Beam: 8 feet (2.44m)
Beam over rubber fenders: 8ft 9in (2.67m)
Draught: 3ft 3 in (1m)
A free card kit for a very simple waterline model can be picked up and more details found here.
Monday, June 30, 2008
Winner !

At the Double O Gauge Association AGT last weekend I scored another win in the kitbuilt and scratchbuilt locomotive section. By a small margin my ex-GWR 1361 class took the prize.
It also managed a run on a real live layout with points and crossing and everything. Even this went well with people being impressed with the way it operated. Sadly the layout was wired back to front so the direction switch on the controller was the wrong way round (a minor issue). It was shocking to discover Bachmann are also wiring their locos up the opposite way to me. Why am I the only person in the whole world who can get this sort of thing right ?
Sunday, June 29, 2008
Modelzone, Holburn
Chain model shops. So right but so wrong. My perfect emporium is a little shop in a side street. It will have been around for many years. The owner will been an enthusiast but not an evangelist. Someone who can talk to people and get them interested but not bore them to death or lay down the law and drive the punters away. Plenty of small items will be in stock because they were bought in years and are slowly selling. Rummaging will be the order of the day and there will be treasure to be found.
On the other hand these places are a bit of an endangered species. Slow moving stock means lots of money tied up. Modellers often make their small purchases in the shop but go on-line for the big ticket items that make the money to keep the business alive. The side street location doesn't help either as you have to search so the general public don't get the chance to see the goodies.
So a high street shop has to be a good thing too ? Well a lot of people aren't sure. Stores like Modelzone don't discount the big items. They don't carry the "bits" either, concentrating on nice boxed items. The place looks tidy but the staff expertise can be variable - if the man behind the counter is into cars he's not going to be too good on model railways.
But when I tripped over the Modelzone in Holburn I'll admit to being impressed. First thing inside is a big pile of sale stock plastic kits. I really had to remind myself that a HO Russian loco kit or Blackbird aeroplane weren't going to fit in my bag no matter how tempting the price or how much I fancied building them
Much of the stock is die-cast cars with a huge range of prices. I'm assured that the average punter in the area is pretty well off but perhaps they prefer to buy their Ferrari's small - saves money on the congestion charge anyway !
The standard Hornby and Bachmann ranges are there in quantity along with a very small selection of kit, mostly Wills and Peco. Boat modellers can find static kits plus a couple of Billings items. The range of plastic models (quite rare to find nowadays) is huge, albeit with no Type 2 pick-up, the one plastic kit I could do to buy at present.
Most impressive were the glues and paints. Even fairly exotic stuff like Zap glues and weird fillers are stocked. No excuse for running out when you are in the middle of a project !
With two good model shops nearby I'd hate to see one of these open up nearby. Birmingham city centre would be good though...
Modelzone web site.
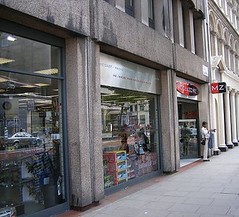
On the other hand these places are a bit of an endangered species. Slow moving stock means lots of money tied up. Modellers often make their small purchases in the shop but go on-line for the big ticket items that make the money to keep the business alive. The side street location doesn't help either as you have to search so the general public don't get the chance to see the goodies.
So a high street shop has to be a good thing too ? Well a lot of people aren't sure. Stores like Modelzone don't discount the big items. They don't carry the "bits" either, concentrating on nice boxed items. The place looks tidy but the staff expertise can be variable - if the man behind the counter is into cars he's not going to be too good on model railways.
But when I tripped over the Modelzone in Holburn I'll admit to being impressed. First thing inside is a big pile of sale stock plastic kits. I really had to remind myself that a HO Russian loco kit or Blackbird aeroplane weren't going to fit in my bag no matter how tempting the price or how much I fancied building them
Much of the stock is die-cast cars with a huge range of prices. I'm assured that the average punter in the area is pretty well off but perhaps they prefer to buy their Ferrari's small - saves money on the congestion charge anyway !
The standard Hornby and Bachmann ranges are there in quantity along with a very small selection of kit, mostly Wills and Peco. Boat modellers can find static kits plus a couple of Billings items. The range of plastic models (quite rare to find nowadays) is huge, albeit with no Type 2 pick-up, the one plastic kit I could do to buy at present.
Most impressive were the glues and paints. Even fairly exotic stuff like Zap glues and weird fillers are stocked. No excuse for running out when you are in the middle of a project !
With two good model shops nearby I'd hate to see one of these open up nearby. Birmingham city centre would be good though...
Modelzone web site.
Friday, June 27, 2008
Model-Tech, Port Erin
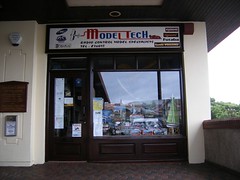 I have a confession. Normally when I mention a model shop on the blog I've visited it. Most of the time my wallet is lighter and the projects cupboard is a bit fuller. Sadly, this time my visit was on a Sunday and the shop was shut. I did have a good look through the window so I hope this suffices.
The shop seems to specialise in radio control cars and aeroplanes. Several nice models hang from the ceiling. Towards the back the shelves are full of plastic kits and I could see some model boat kits on there too.
Update: I see that the shop has now moved to Douglas. Take a look at the website here.
Tools and paint are available in the apparently well stocked interior. Next time I go I will make sure it's during opening hours !
Wednesday, June 25, 2008
Mannan Model Boat Festival 2008
I've just returned from a week on the Isle of Man. On the Monday I dropped in to the Manx Model boat clubs festival at Silverdale.
The venue is superb. It's a boating lake which the club have the use of for the day. As well as being set in lovely countryside there is a craft shops and cafe handy for refreshment and non-boating entertainment.
My visit was on the third day of the festival, one day for each leg of man on the flag and different challenge on each. Monday's are the steering competition and each boat entered had to complete what looked like a pretty easy course. Entries were split into 1 metre and above and less than 1 metre length models. As well as simply completing the course, boats were marked on how well they went around. To add spice, the boats shared the water with several ducks who came and went as they saw fit with some very spectacular water-ski landings.
A fun feature was that at one point each model had to stop between two buoys and if it had any operating feature - use them. Some models made noises, some sprayed water, one dropped a model buoy. The most memorable actually sank ! This was pretty impressive, especially as it then refloated and completed the course.
The members were very friendly. I chatted to several about their models which were uniformly of a very high standard.
More pictures in Flickr.
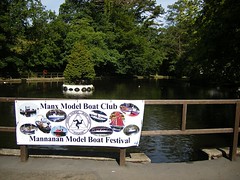
The venue is superb. It's a boating lake which the club have the use of for the day. As well as being set in lovely countryside there is a craft shops and cafe handy for refreshment and non-boating entertainment.
My visit was on the third day of the festival, one day for each leg of man on the flag and different challenge on each. Monday's are the steering competition and each boat entered had to complete what looked like a pretty easy course. Entries were split into 1 metre and above and less than 1 metre length models. As well as simply completing the course, boats were marked on how well they went around. To add spice, the boats shared the water with several ducks who came and went as they saw fit with some very spectacular water-ski landings.
A fun feature was that at one point each model had to stop between two buoys and if it had any operating feature - use them. Some models made noises, some sprayed water, one dropped a model buoy. The most memorable actually sank ! This was pretty impressive, especially as it then refloated and completed the course.
The members were very friendly. I chatted to several about their models which were uniformly of a very high standard.
More pictures in Flickr.
Model World - Ramsey
This isn't the worlds biggest model shop but it isn't a bad local store. If the stock is an indication of the tastes of Manx modellers then they are mainly interested in dolls houses, toy farm implements followed by plastic kits.
Tools, glues and paints are for sale along with a very small number of boat bits - mainly BEC flags and decals.
If you fancy having a go at building the local railways a small selection of card kits in 4 and 7mm scales for Manx Electric Railway prototypes. It's a pity the line to Ramsey isn't running this year.
The lady who runs the shop is always pleasant and chatty making it a real pleasure to visit.
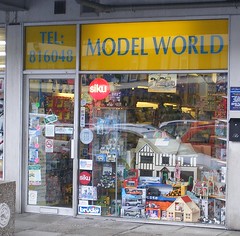
Tools, glues and paints are for sale along with a very small number of boat bits - mainly BEC flags and decals.
If you fancy having a go at building the local railways a small selection of card kits in 4 and 7mm scales for Manx Electric Railway prototypes. It's a pity the line to Ramsey isn't running this year.
The lady who runs the shop is always pleasant and chatty making it a real pleasure to visit.
Saturday, June 21, 2008
Battery repair
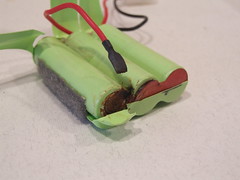 I need help with my Slingshot Racing sometimes. A few weeks ago everything seemed to be going fine and then the boat stopped. Dead.
Retrieval was the usual palaver - these things never die near the bank and there isn't much on the boat to grab hold of with a pole. The race carried on around me too. Thanks chaps.
Swapping the battery over for a spare cured the problem. Back at the bench it became obvious why. Some water had found its way under the battery cover and corroded the join between cell and wire. This had eventually parted company in the rough and tumble of the race.
Soldering the wire back in place after a quick clean with some emery paper was easy enough and the model is back on the water at full tilt. It doesn't look as pretty covered in insulating tape but I put that down for wear and tear. We can't all have a car like Louis Hamilton.
Thursday, June 19, 2008
Painting wheels
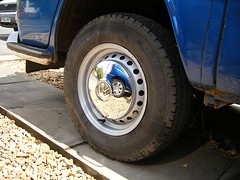 There is little you can do do improve the look of a car that will have as much impact for such slight effort as clean up the wheels. Every 2 or 3 years I spruce Asley's wheels up a bit by flicking them over with solver Hammerite Smooth paint.
Years ago I had them blasted and then painted the hubs with POR 15 which keeps the rust back. The paint discolours eventually so a new coat brightens things up for the summer. Easy.
Tuesday, June 17, 2008
My accelerator cable in print
2 pages with pictures in the latest VW Camper & Commercial magazine. You can buy it in WH Smiths too now so go and get a copy !

Modellers sizes
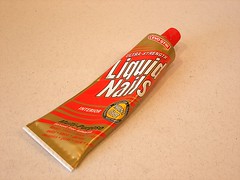 Browsing a hardware shop recently I found this hung on a rack. Liquid Nails glue in a tube.
While it might not strike anyone as that exciting, it's good enough to get me dipping my hand in my pocket. Liquid Nails is an excellent glue but usually only available in huge quantities. Coming from the building market where you splurge it on to attach skiting board to walls etc., normally the buyer finds themselves confronted with a cartridge of the stuff intended for one of those gun things. Even the smaller bottle version is a bit on the big side - it's pretty uncontrollable too. A tube is perfect though.
As model makers we have odd requirements. Even though glues and paints work out more expensive in smaller quantities we'll still snap them up this way. Most of the time this makes sense the residue will just go to waste. I can't be the only one who bought the biggest tube of UHU from a market and regretted it later. Of course I didn't know that in the heat it would explode in the bottom of my toolbox...
The trick is to realise when you need bulk. Baseboard making for example - get the big bottle of PVA as you'll use it eventually. Model boat hulls, if you can get the paint or varnish in a big pot, go for it. You'll save money on tinlets. It's not always necessary to employ the "propper" modelling version either. Many pros have been spraying Ronseal varnish from DIY stores for years. With each can costing the same as 5 tinlets and yet holding 20 times as much, if you can justify it the saving is there to be had.
Manufacturers of course wedge the price of the small quantities up a bit to cover the higher than normal packaging:contents ratio but even so I suspect the profit margins are higher too. Talking of packaging, the only thing I didn't like about this glue was the enormous clear plastic stand come wrapper. What's wrong with a cardboard box ?
Sunday, June 15, 2008
KMBC open day 2008
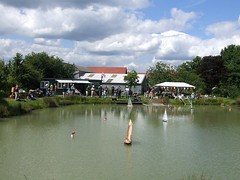
The sun shone (unlike last year), the people were happy. We sailed model boats and raced model boats and chatted about things including model boats. Everyone had a good time. That's what a hobby is about.
My results:
Slingshot - Middling. Fairly average scores today. In the last race though I was flipped over and water entered the hull. The speed control is now playing up. There is a nasty gash in the side which will make an impressive battle scar when repaired.
Plank - Hopeless. Lighting the burner took an age. Once on the water it travelled about a quarter of the way across before giving up. And I broke the chimney off by dropping the boiler when packing up. A re-think is required.
Saturday, June 14, 2008
Still not fast enough

The Huntsman has seen some development. Spray rails have been fitted using quarter round wood from a hardware store. Using a pair of dividers I marked out the positions relative to the keel. They certainly look nice when sanding sealed and varnished.
On the water they do make a difference with the water breaking very differently at the front. I think they help the lift at the front too.
The bad news is that the motor still smells when running. There's not much power coming out of it either so I think it's toasted and a new one will be required. We're back tot he original 2-blade propeller too as none of the new ones I bought will fit. The shaft appears to be an old imperial size so either I replace it (near impossible) or re-tap the threaded end to suit the new props.
The water cooling gave me grief too. I hadn't realised just how tight you have to do up the retaining nuts and it leaked like crazy on the water. A quick tweak with the pliers did the job so at least one problem was solved. When running water was emerging from the back outlet so I assume it was doing it's job.
For the moment the boat has gone into store as it's stopped being a quick job and now looks like a more involved and expensive project that I have time for right now. Perhaps in the autumn I'll take another look.
Friday, June 13, 2008
Popping across the lake
Having passed it's trials on the pool at home, the next test for the plank is on the competition ground (water) itself.
The evening was perfect, still and warm with no-one else around. I fired up the burner, primed the engine and set the boat off. After about 10 feet it died so I retrieved it and tried again. Same result. Various attempts were made with gradually improving results.
After charring the wood with excess meths from I tried a tea light. This was OK but underpowered so it was back to the burner.
A few attempts later and success - the boat made it across the lake. OK so it was in a series of hops as the steering was rubbish and I had to keep pointing it away from the bank but it worked.
Buoyed by this, the rudder was bent around and another trip made. This helped and only one re-direct was needed. A third attempt was even better, although the model paused in the middle of the pond for about 10 minutes.
The trick seems to be to let the coil get really hot. Then prime it and don't put the plank in the water until priming pushes steam out of the coil.
I'll see on Sunday if this works for real.
The evening was perfect, still and warm with no-one else around. I fired up the burner, primed the engine and set the boat off. After about 10 feet it died so I retrieved it and tried again. Same result. Various attempts were made with gradually improving results.
After charring the wood with excess meths from I tried a tea light. This was OK but underpowered so it was back to the burner.
A few attempts later and success - the boat made it across the lake. OK so it was in a series of hops as the steering was rubbish and I had to keep pointing it away from the bank but it worked.
Buoyed by this, the rudder was bent around and another trip made. This helped and only one re-direct was needed. A third attempt was even better, although the model paused in the middle of the pond for about 10 minutes.
The trick seems to be to let the coil get really hot. Then prime it and don't put the plank in the water until priming pushes steam out of the coil.
I'll see on Sunday if this works for real.
Shedded Y7
The Y7 couldn't really be called finished until it had run around a layout. While my test track is OK it's only a long straight, to be really happy with a model locomotive it needs to see action on points and crossings with scenery.
Off I trot to the railway club and present myself at the O Gauge layout Kimble asking if I could run my new train. For some reason they decided I couldn't - something to do with extending the model and most of the boards being upside down being worked on or sans track or something. Inconsiderate really, I mean all they had to do was re-assemble a dozen or so baseboards and lay a few metres of track, how difficult can this be ? :-)
Fortunately I was able to do something more useful for the Mallory road group. They were testing layout electrics with a Heljan Class 47 diesel. A short wheelbase locomotive is much better for this job though as you can see where there is no electricity much faster. As it happens there was only one problem area where a point frog looks like it's come unwired.
The model ran around very nicely. At first a good burst of speed took out the worst of the new model tightness and then some more realistic trundling around the pointwork commenced. I'm happy with the result and people were complimentary about my efforts.
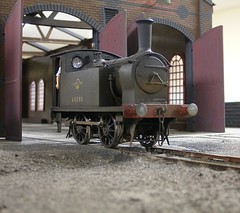
Off I trot to the railway club and present myself at the O Gauge layout Kimble asking if I could run my new train. For some reason they decided I couldn't - something to do with extending the model and most of the boards being upside down being worked on or sans track or something. Inconsiderate really, I mean all they had to do was re-assemble a dozen or so baseboards and lay a few metres of track, how difficult can this be ? :-)
Fortunately I was able to do something more useful for the Mallory road group. They were testing layout electrics with a Heljan Class 47 diesel. A short wheelbase locomotive is much better for this job though as you can see where there is no electricity much faster. As it happens there was only one problem area where a point frog looks like it's come unwired.
The model ran around very nicely. At first a good burst of speed took out the worst of the new model tightness and then some more realistic trundling around the pointwork commenced. I'm happy with the result and people were complimentary about my efforts.
Thursday, June 12, 2008
Puffer article

See the current (July 2008) issue of Model Boats magazine for a page on the Clyde Puffer I bought from a charity shop. I suspect it might give a few older modellers pause for thought !
For those to stingy to buy the magazine, my piece on naming boats also appears on their website so you can have a free read.
"Boiler"
The spirit burner/tealight/bit of firelighter power source for my plank kept blowing out in the breeze. Since I can't rely on a completely still day when sailing - the people with yachts won't thank me if my prayers are answered - so the flame had to be shielded. Of course air still needs to get in so what better than a fake boiler to do the job ?
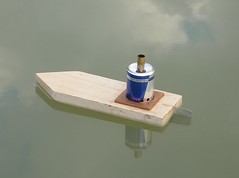
I wasn't going to spend good money on materials and besides, I couldn't be bothered to roll something from flat so the part has been made from halfanemptycanofredbull with a brass tube chimney. Even this was to be created from drinks cans but sticking aluminium defeated me. At least I can polish it for the competition. Cutting the boiler with scissors was easy as Red Bull designed the decoration to have a nice horizontal element in the middle for model makers to follow.
On the water this all seems to work well. Using a firelighter gives the best effect with real smoke emerging. The can is held in place by a balsa slab with a hole cut in it. It has to go in first time though as the metal becomes too hot to hold within seconds. Perhaps I need to lag it with wood to improve the look ?

I wasn't going to spend good money on materials and besides, I couldn't be bothered to roll something from flat so the part has been made from halfanemptycanofredbull with a brass tube chimney. Even this was to be created from drinks cans but sticking aluminium defeated me. At least I can polish it for the competition. Cutting the boiler with scissors was easy as Red Bull designed the decoration to have a nice horizontal element in the middle for model makers to follow.
On the water this all seems to work well. Using a firelighter gives the best effect with real smoke emerging. The can is held in place by a balsa slab with a hole cut in it. It has to go in first time though as the metal becomes too hot to hold within seconds. Perhaps I need to lag it with wood to improve the look ?
Wednesday, June 11, 2008
Motor MkII
I was happy with the original motor but felt a bit more grunt for use outdoors on the lake. Researching the subject on-line some builders use 5 coils of copper pipe and this seems to be the key to more power.
5 coils can be made from a single tube but the jets have to be made separately. As it happens this suited me as they now run through the plank itself and support the coil.
The heating element also needed refining. The first plan was to use a tealight candle. While this works it's a bit weak for the amount of copper involved now, Dropping a bit of firelighter into the used aluminum holder sorted this but that doesn't last very long.
Finally I've nicked an idea from a web site and made a burner up from a plumbing fitting. The fuel is still up for debate as meths works but I'm wondering if lamp oil will last longer.
Whatever else happens, on the pool the vessel certainly works. Once the coil warms up properly it's got a surprising amount of speed !

5 coils can be made from a single tube but the jets have to be made separately. As it happens this suited me as they now run through the plank itself and support the coil.
The heating element also needed refining. The first plan was to use a tealight candle. While this works it's a bit weak for the amount of copper involved now, Dropping a bit of firelighter into the used aluminum holder sorted this but that doesn't last very long.
Finally I've nicked an idea from a web site and made a burner up from a plumbing fitting. The fuel is still up for debate as meths works but I'm wondering if lamp oil will last longer.
Whatever else happens, on the pool the vessel certainly works. Once the coil warms up properly it's got a surprising amount of speed !
Tuesday, June 10, 2008
Plank

At the weekend I plan to enter the KMBC Plank sailing competition. The aim is to sail your plank from one side of our lake to the other. Power to to be provided by something other than an electric motor and battery.
For my attempt, I'm using a Pulsating Water Engine. It's old technology but fun. The engine is made of a bent copper tube warmed over a candle. Since I've not built one before I prototyped the device using a singe bit of tubing fitted to the hull with drawing pins.
Once I'd learnt that you have to fill the tube with water (prime in technical parlance) the craft worked pretty well, scooting across the bath at a reasonable speed. The tea-light lasted well so I reckon it will do for the trip on the lake. Some sort of shield will be needed to cope with the wind though.
A new more powerful engine is under construction and I'll be testing this soon.
ex-LNER Y7
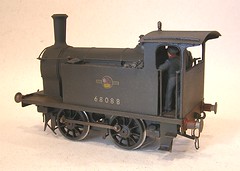
Finally, I have finished this model. The weathering went well this time with several coats of thinned greys and browns sprayed over the model and no transfers peeling off. Along the top of the boiler a coal black/tank grey mix simulates the smoke dirt but I've managed to keep this effect subtle so you can't see the join. It might be a pain setting up the airbrush but you can't produce this sort of effect any other way.
Glazing is from Krystal-Klear, crew from the box of things that I have forgotten where they came from and coal out of a packet picked up at a show once.
It's only taken 21 months to get this far, although for most of this time the model spent on the shelf of unfinished projects. It's a lovely kit to build though and looks really good for relatively little effort compared to some !
Glazing is from Krystal-Klear, crew from the box of things that I have forgotten where they came from and coal out of a packet picked up at a show once.
It's only taken 21 months to get this far, although for most of this time the model spent on the shelf of unfinished projects. It's a lovely kit to build though and looks really good for relatively little effort compared to some !
Saturday, June 07, 2008
Hereford Model Centre
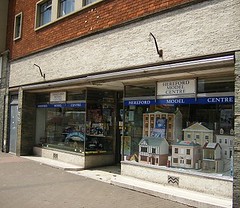
Now this is a huge model shop. Just off the edge of the city centre (you can't miss it if you walk in from the station) in a building that must have been really fashionable when it was built in the 1960's but just looks a bit dated now, even the window is bigger than most.
Once you get inside, allow half an hour minimum to get a good look around. As well as being large, the shop has been around long enough to built up a good level of little bits you have to root through.
There are plastic kits, dolls house bits, railways in all scales both new and second hand, radio control cars, boat kits in lots of scales (no fitting through) and some of the those weird construction kits where people make things out of matchsticks and other stuff. Obviously a good range of basic materials and paints is on sale.
There are several rows of display and the shop is a bit of a maze and all the better for it. To be honest this shop is worth the trip to Hereford on it's own.
Worcester model shops

Worcester's a nice town - it has two good model shops !
Starting out from the station you find Antics models. It's down a side street and above a camera shop. Inside there is a selection of die-cast, r/c cars, plastic kits, railways and loads of other stuff. The premises aren't large but they are absolutely stuffed with stuff and well worth a rummage. Plenty of modelling material on offer too. Sometimes these get the push from chain stores but not here.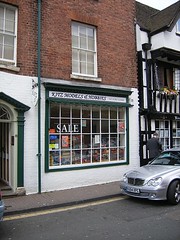 Five minutes walk away you find Kitz shop. This is mainly for the railway modeller (UK and foreign) but there are plastic kits and dolls house items. Again, plenty of materials are stocked so there is no need to to be short of a tinlet of paint or sheet of plasticard in Worcester.
And just in case you are wondering, it's not compulsory to turn up in a silver Mercedes !
Thursday, June 05, 2008
Repainted Y7
Well, the Y7 has been repainted AND renumbered with newer transfers. Those numbers then received a couple of coats of satin varnish by brush. I even used a good sable to get a nice finished.
Then I sprayed varnish over it. Loads of satin varnish. And then a bit more to be sure. I want a good protective layer before I go a-weathering again. It's going to be at least 24 hours before that happens as varnish this thick takes a log while to dry fully.
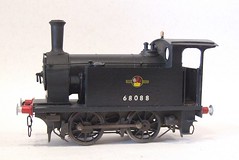
Then I sprayed varnish over it. Loads of satin varnish. And then a bit more to be sure. I want a good protective layer before I go a-weathering again. It's going to be at least 24 hours before that happens as varnish this thick takes a log while to dry fully.
Wednesday, June 04, 2008
Betty sails
While the Huntsman is under development, Bouncing Betty was a great success. You can see a video of her here.
It seems that the state of the battery is very important. My first battery was good and the model zipped along really nicely. The second hadn't taken a full charge and while the sailing was good, the speed wasn't up to much. She still gets up on the plane thanks to the slightly top-heavy figure.
My only problem is that I have 2 more of these models and it's really tempting to fit them up in the same way. If you fancy doing the same thing, you'll need a SU/EB 30s speed controller to emulate these efforts.

It seems that the state of the battery is very important. My first battery was good and the model zipped along really nicely. The second hadn't taken a full charge and while the sailing was good, the speed wasn't up to much. She still gets up on the plane thanks to the slightly top-heavy figure.
My only problem is that I have 2 more of these models and it's really tempting to fit them up in the same way. If you fancy doing the same thing, you'll need a SU/EB 30s speed controller to emulate these efforts.
Fairey planes !
After bench making this morning, the Fairey hit the water. I wanted to see what a difference the new motor, battery and speed control made.
The good news is the boat went up on the plane. It's not rocket powered but nice and controllable on a lake the size of ours. Most importantly it looks good.
After a few minutes I filmed the model and you can see the video here. The speed had dropped a bit but you get the idea especially head on.
A couple of minutes later still there was smoke coming out of the windows. Back on the bench the motor was red hot. I've not connected up the water cooling jacket yet. This is obviously not a good thing.
My hope was that the problem stemmed from the whopping 4 -blade prop being too large and stressing the motor. Once it had cooled down I swapped this for the original 2 blade plastic version and tentatively sailed again.
One the water the model was as sprightly as with the bigger prop, possibly even a little better. I'm not going to pretend to understand how a small prop with two blades is better than a big one with 4, but I'll go with it and stick the big 'un in the box for a future model.
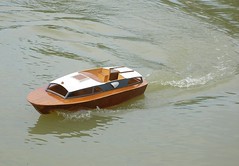
The good news is the boat went up on the plane. It's not rocket powered but nice and controllable on a lake the size of ours. Most importantly it looks good.
After a few minutes I filmed the model and you can see the video here. The speed had dropped a bit but you get the idea especially head on.
A couple of minutes later still there was smoke coming out of the windows. Back on the bench the motor was red hot. I've not connected up the water cooling jacket yet. This is obviously not a good thing.
My hope was that the problem stemmed from the whopping 4 -blade prop being too large and stressing the motor. Once it had cooled down I swapped this for the original 2 blade plastic version and tentatively sailed again.
One the water the model was as sprightly as with the bigger prop, possibly even a little better. I'm not going to pretend to understand how a small prop with two blades is better than a big one with 4, but I'll go with it and stick the big 'un in the box for a future model.
Wooden bench
The trouble with our model boat club is that when all the members turn up with models we don't have enough space for them all on the benches. So we ordered some decking and spent a pleasent couple of hours, including coffee break, doing some woodwork and made a couple more.
The weather was perfect and the company convivial. And we now have more space. Bet there still isn't enough space though !
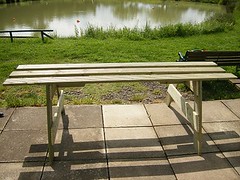
The weather was perfect and the company convivial. And we now have more space. Bet there still isn't enough space though !
Tuesday, June 03, 2008
Bending brass
Dick writes:
I am in the process of assembling a Barrett (E38) GWR clerestory (brass) coach kit. They invite you to put three bends in the bottom of the coach sides to form a built - in solebar. There are only two half etched lines where two of the folds would go, and the coach is quite long. I thought that making three long folds would be impossible for me so I substituted a piece of brass channel, having made just one fold.. But I'm left wondering what an expert would do? I have yet to ask Barretts.
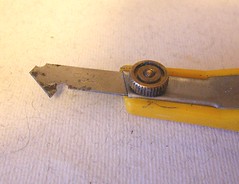
Well I'm not sure what an expert would do but I'd add the missing half etched bend line with a Tamya Olfa plasticard cutter. I bought mine from Squires years ago and it has done sterling service scoring lines on metal and plastic without needing its blade changed.
You can also deepen half etched lines with this which is handy when the metal is hard or thick and you want the fold to go easily. Reinforcement with soldered once the bend is made might be required to stop the metal reverting to flat again or at least acting like a hinge but that's easier than making the fold sometimes.
Of course if I screwed this up I'd replace the metal with a bit of channel, but I'm stingy enough to try making the extra line first.
I hate transfers
I thought I was on the home straight. Emergence blinking into the light at the end of the tunnel was imminent. Then someone switched it off.
The compressor was humming away powering the airbrush. Weak mixes of greys and browns were flowing away over the model. The black slowly turned a indeterminate colour best described as "mucky".
The numbers started to bubble up and peal off. I poked them back but it was no good. One of the 8's fell off than a 0 and finally they all came away. Heavy weathering to hide their absence did cross my mind but I knew the situation was hopeless.
The loco has seen Mr Nitromores and now sports a nice new coat of black paint which is very nearly as good as the old one. And if I find the inventor of Pressfix transfers I will kill him.
Silver Lining: Christopher points out I managed to get the crests the wrong way round as they should face the front of the locomotive. I knew that of course, it's why I didn't stick them on properly. Honest.
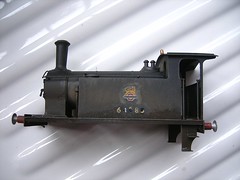
The compressor was humming away powering the airbrush. Weak mixes of greys and browns were flowing away over the model. The black slowly turned a indeterminate colour best described as "mucky".
The numbers started to bubble up and peal off. I poked them back but it was no good. One of the 8's fell off than a 0 and finally they all came away. Heavy weathering to hide their absence did cross my mind but I knew the situation was hopeless.
The loco has seen Mr Nitromores and now sports a nice new coat of black paint which is very nearly as good as the old one. And if I find the inventor of Pressfix transfers I will kill him.
Silver Lining: Christopher points out I managed to get the crests the wrong way round as they should face the front of the locomotive. I knew that of course, it's why I didn't stick them on properly. Honest.
Bouncing Betty
I can't take my Dad anywhere sometimes. A few months ago we dropped into Howes for some bits and came out with a surfer. This duly became an joke Christmas present and eventually ended up on the lake. Given a decent amount of water it proved to be great fun. The surfer tilts on the board so once you turn, you keep turning until change direction. That makes for "interesting" sailing.
Anyway, as usual when you buy a cheap model the radio gear is rubbish. Putting the batteries in the handset is a puzzle worthy of Rubik and there is only one channel so you can't sail at the same time as anyone else. The model was fun enough to make us think about sorting all this out with some new electronics.
Then, lo and behold, on eBay a surfer popped up. The seller had replaced the gear and then decided to sell the project. I snapped it up for about the same price as a speed control.
Once the box arrived, "Bouncing Betty" as our surfer had been nicknamed, had suffered a bit. One of her arms had fallen off, she'd been detached from the board and the prop was broken. Still the gubbins inside looked OK apart from the water cooling pipes on the motor. She was put back in the box and headed for the "oneday" pile.
Another shopping trip for bit for the Huntsman found us back in Howes. The plastic kit room has very sadly been replaced with a RTR boat room and on the back wall were lots of faulty models. Each was marked with the fault and they were being sold off cheap. I suppose that the cost makes it pointless to do anything else other than chuck them away. On the pile was a leaky surfer with a duff controller.
Now with 3 of these things I've pulled the eBay bits and cheapo machine together to make a complete model. For a change this was a quick project that only took an hour. Now she has proper radio, a buggy speed controller with no reverse and hopefully doesn't leak. And I've glued the arm back on.
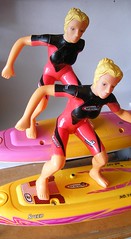
Anyway, as usual when you buy a cheap model the radio gear is rubbish. Putting the batteries in the handset is a puzzle worthy of Rubik and there is only one channel so you can't sail at the same time as anyone else. The model was fun enough to make us think about sorting all this out with some new electronics.
Then, lo and behold, on eBay a surfer popped up. The seller had replaced the gear and then decided to sell the project. I snapped it up for about the same price as a speed control.
Once the box arrived, "Bouncing Betty" as our surfer had been nicknamed, had suffered a bit. One of her arms had fallen off, she'd been detached from the board and the prop was broken. Still the gubbins inside looked OK apart from the water cooling pipes on the motor. She was put back in the box and headed for the "oneday" pile.
Another shopping trip for bit for the Huntsman found us back in Howes. The plastic kit room has very sadly been replaced with a RTR boat room and on the back wall were lots of faulty models. Each was marked with the fault and they were being sold off cheap. I suppose that the cost makes it pointless to do anything else other than chuck them away. On the pile was a leaky surfer with a duff controller.
Now with 3 of these things I've pulled the eBay bits and cheapo machine together to make a complete model. For a change this was a quick project that only took an hour. Now she has proper radio, a buggy speed controller with no reverse and hopefully doesn't leak. And I've glued the arm back on.
Applying transfers
Putting numbers on locomotives has always been a painful process for me. Get the string wonky and it will stand out like a sore thumb when you display the model. Of course it doesn't show when you are poking transfers around.
A trick I picked up from somewhere is to use a bit of clear plastic as a guide. The one in the photo is a bit from the packaging supplied in a shirt. I originally had it tall enough to set the crests up and then cut down the hight to do the numbers. A couple of marks on the sheet help the lining up on the body.
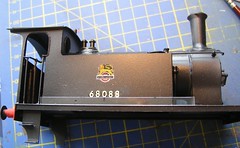
A trick I picked up from somewhere is to use a bit of clear plastic as a guide. The one in the photo is a bit from the packaging supplied in a shirt. I originally had it tall enough to set the crests up and then cut down the hight to do the numbers. A couple of marks on the sheet help the lining up on the body.
Monday, June 02, 2008
Black
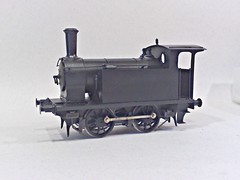
The Y7 locomotive now has it's body colour. This time I used Railmatch Coal Black. It's a satin black which covered very nicely and dried with a consistent sheen. Normally I'm not a fan of Railmatch but this is very nice.
Sunday, June 01, 2008
Stonor Park 2008

Stoner park (insert joke here...) is one of those VW shows I've meant to go to for about 15 years but never quite made. With a bit more time on my hands I decided that this was the year. Then I found it clashed with a load of other things. Anyway, looking at the map the show ground is only just off the M40 so if I used a modern car I could bat up and down there comfortably in a day. And I didn't get to Stanford Hall this year and needed some wiper blades.
Today was the day and off we set. The trip from Leamington was pretty easy and only 63 miles. That's about an eggcup of fuel in the Berlingo as far as I could tell from the gauge.
Anyway I'm not going to write a book but here are a few notes:
- The car park is on a hillside. A steep one..
- The grass needed cutting..
- Walking through the car park there were a higher than normal percentage of old VeeDubs..
- The autojumble is better than Stanford Halls..
- The trade however isn't as extensive as that at the Hall. Not bad but I've seen bigger. Pretty varied selection of stalls though with not too many selling “lifestyle” products. I'm an enthusiast and want to see lots of rusty bits !.
- The traders can't get a signal to their chip & pin machines thanks to the surrounding hills. I saw this cost at least one money as the punter simply didn't have that much cash in their pocket. If you don't take cheques the customer has to walk. There's no cash machine for many miles..
- Yet again no-one had any Dormobile table track. I've been looking for this for years and never found any not attached to an interior. If anyone has some they would like to sell, get in touch. Please..
- There were people carrying odd shaped objects and large chunks of VW. I used to think this was odd until I did it myself a few times..
- The house doesn't open until 2pm. Daft when the tea room could do terrific business. With admission included in the entry fee it would be a popular addition..
- Getting out is bad in a low slung modern car as you exit across the steep hill. I wouldn't have fancied being in the Type 2 ahead of us. How everyone gets out without tipping over sideways is a mystery..
- The concours display is fantastic with a huge range of vehicles. Some more bays and wedges would be nice though.
I'd go back if I could combine it with a camping trip. The area is good for this so manybe next year...
Subscribe to:
Posts (Atom)