A daily updated blog typed by someone with painty hands, oil under his fingernails and the smell of solder in his nostrils who likes making all sort of models and miniatures. And fixing things.
Tuesday, March 31, 2009
12" Barclay - Swanscombe
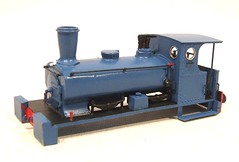
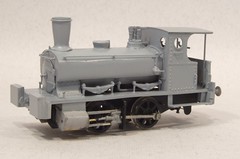
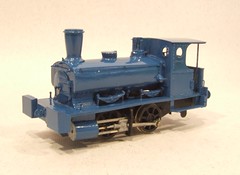
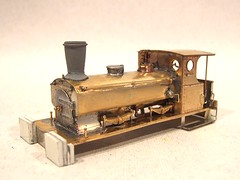
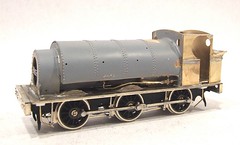
As a project, well it was more effort than expected but hugely enjoyable. The only parts from the 14" Mercian kit that didn't need modification were the front buffer beam and cab roof. Having said this, it was still a lot easier to start with the kit than to scratchbuild the model from raw metal. Looping off a few mm from the side of the tank or centre of the cab front is much simpler than trying to mark out the curves and cut them accurately.
The photographic name plates are surprisingly effective too. OK so etched ones would be a little better but if these weren't an option I could live with them so perhaps I will for a future model.
In the cab, the owner poses holding the regulator. The bunkers are filled with welsh steam coal and things are pretty spic and span for a mucky little loco. But then this is a well loved machine with no dirty to been seen anywhere. Perhaps for a layout some gentle weathering would be nice but a loco with a strong colour doesn't demand this IMHO than a black one.
All in all a nice little engine.
Monday, March 30, 2009
Nameplates
Sadly, when you build something unusual like an industrial engine, none of these boxes are going to have the name you want in there unless you are very lucky. I am not very lucky.
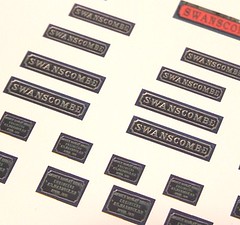
Lead time for producing custom etched plates is, I am told, about 9 months. That's about 8 1/2 months more than I had to produce the model, so an innovative solution was needed. In the past I've made up the odd nameplate using very small plastic letters. That's OK'ish but not really good enough for this model. Chatting about the problem in my local model shop someone suggested making them up on the computer.
Well I suppose I could do something from scratch but replicating the colour of the brass seemed difficult. Then it struck me - I had photos of the prototype plates, what would these look like reprinted to the correct size ?
The first problem was that the pictures weren't taken at right angles to the plates. Paintshop Pro enabled me to use some geometric manipulation to adjust the perspective and "flatten" the image. The results were then pasted into a DTP package (PagePlus) and re sized as required. I knocked these out in several variations and then printed the results on some semi-matt paper.
This looked OK so using, as they say in the magazines, a sharp scalpel blade I chopped out the plates from the sheet. The edges were blackened with a permanent pen and stuck in place with PVA.
Eventually a proper, etched set of plates will arrive but in the meantime these look pretty good.
Sunday, March 29, 2009
Chassis completion
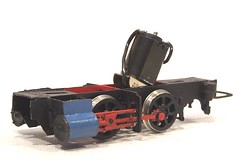
The 'box was quickly made up and slotted in the chassis but to be honest I still wasn't happy. After an hours tinkering I simply couldn't get things working to my satisfaction. It was no good, I had to take the plunge and start again. Everything that could be unscrewed, was. The slide bars came off to release the cross heads, the cylinders were unsoldered and finally the spacers came off the frames.While there didn't seem to be a problem I discarded the bearings too - if you are going to do a job, do it properly.
Out came the chassis jig and the whole process began again. One change was to use long (high top hat if you prefer) bearings point out at the front end. I could file these back to save using spacer washers. Anything to make reassembly easier !
I honestly can't see what I did differently this time but it must have been something as the MK II chassis was freer than before. OK, so I checked running at every stage but the result is much nicer.
Brakes for this model are a bit of a fudge. I think they are Gibson 03 diesel ones but it's difficult to see in the photos what the differences are and the shoes and hangers certainly look the part. I had to sacrifice the brake roding as it was this or electrical pickups - and I think the later are a bit more important !
Finally, painting. The rods, crossheads and slide bars are all red on the prototype with a bit of black trimming. This looks fine on the model but does gum up some of the joints a touch. Plenty of running in will wear the surfaces just right and a thrash on the rolling road seemed to help. Hopefully the new owner will exercise the model a bit, this is one where running in will pay dividends. I'm sure this won't be a hardship !
Saturday, March 28, 2009
Painting progress
Handrails - black
Footplate - black
Springs - black
Clack valves and pipework - black
Safety valve - black with red detailing
Spectacle rims - cleaned back to brass
Lamp irons - white
Buffer beams - red (4 coats !)
Finally, the whole thing received a coat of satin varnish. With relief I noted that the blue paintwork now looks a whole lot less toy-like. In fact this model locomotive is looking pretty nice. I rarely paint a steam engine blue as they often look awful but perhaps because of the industrial prototype, this looks really nice. Mind you, it's a much brighter blue than I would have ever dared to use. If there hadn't been a photograph to guide me I suspect I'd have gone for a much darker shade.
Next up is the painting of anything that should have a matt finish - chimney, smokebox, cab interior and buffers for example.
Friday, March 27, 2009
Barclay in primer and paint
A coat of Eastwoods etching primer unified the model and allowed me to look objectively at it. There were a couple of minor areas to be touched up especially on the back bufferbeam which needed a touch of filler. Mostly though I think I get away with it. Sharp eyed readers will notice I haven't masked the slide bars or rods very well - that's not laziness on my part, the prototype has red paint on these parts.
Painting threw up another challenge. The real steam engine is blue. A blue described as "Oxford" but sadly not the same colour as the Oxford blue in the Humbrol range. The colour appears to fall somewhere between numbers 14 and 15 with more 14. Of course in the photos light effects make it difficult to get an exact match and even if I could, this probably wouldn't look right in miniature due to the effects of atmosphere on our vision. Generally colours have to be a shade or two lighter when shrunk. There is science to work this sort of thing out properly but I have neither the time nor brainpower to understand it properly, and am not convinced it would make a big difference if I could.
So a mix of the two colours was made up and compared to the pictures. When happy I sprayed a coat all over the model. After a dust free overnight drying session, I think I might get away with it. The gloss finish is horrible (and always is on models as millions of diecast cars attest) but some satin varnish once the bufferbeams are painted will fix this. I also forgot to paint the sandboxes (they are seperate to make under boiler painting easier) but will do these with a brush later today.
Of course I'm not discounting the possibility that once varnished this locomotive isn't going in the paint stripper so I can have a second go. Having missed the deadline I will use the extra time to get a better finish. Or go mad in the attempt.
Thursday, March 26, 2009
Chewed Gear
I think these gears are from Ultrascale and they seemed OK when first installed. Thinking no more of it I pressed on and added the wheels and rods.
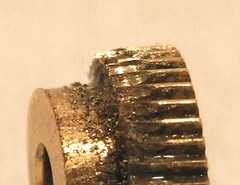
What followed were many hours of fiddling to try and get some decent running. Oil and grease on the various running surfaces seemed to help but only for a short while. I also noticed that the centre of the steel worm gear was discolouring - a strip appeared across it that first looked like rust but on inspection was brass swarf. Initially this was put down to normal bedding in but as you can see from the photo this was worse than I thought.
Checking where the tight spot was I wondered if I was experiencing a rare problem mentioned in Rice's chassis book - the grub screw on the axle was making the brass gear slightly oval. In desperation I whipped out the axle (not for the first time, practise was making me good at this unfortunately) and filled a flat in it so the screw could act as a "key".
At first I thought I'd fixed the problem but as the day progressed it became obvious that I hadn't. The gears seemed to be fine when run on their own but put a load on, such as the wheels, and they wouldn't self start. I could get things running by tweaking the wheels with my fingers but as soon as the power was reversed I had to tweak again. That's not what you want on a layout !
So, I need a new set of gears. My impression is that I had a set with duff, soft brass or a poor tooth profile. Time to hit the phone and see how quick I can get something delivered.
Wednesday, March 25, 2009
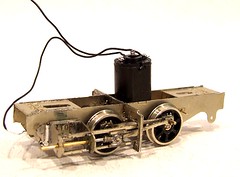
Chassis with waggly bits
Barclay loco wheels are unusual, the spokes have a flat face and look very different from the delicate thin ones found on most engines. Apparently there is a shortage of the model versions at present so I assume that a lot of you out there have Barclays on your own workbench - if that's the case I hope these notes are helping you !
Anyway, the wheels went in easily enough as did the motion bracket after laminating and a little filing where it passes through the chassis, much easier than opening up the slots.
Too allow for prototype variations the kit includes two sets of cylinders, 3 sets of con rods (although I couldn't tell the difference between them) and 3 sets of slide bars. I also had 3 sets of cross heads to work with - this choice was easy as the cast nickel ones are the nearest to the right colour.
Having picked the nearest cylinder etch and decided it didn't seem to matter a jot which slide bars I went for, construction started. The cylinder folds up and the bars are doubled and fitted making sure the crosshead slides all the way (I've been caught out with this bit before) without falling out. Mating the unit up with the bracket showed that the cylinder needs to be packed 1.5mm from the chassis side - unsurprising as this is a OO model, EM gaugers wouldn't need to do this although where they would get the clearance behind the crosshead is a mystery to me.
At this point I found an old problem reared it's ugly head - Romford crank throws. The scale rods are fine if you have scale throw. On these wheels the crossheads try to exit through the bracket. Normally (engineers and finescale modellers look away now) I just open the hole at the driving wheel end up a bit to allow some slop but here I think I'll do the job properly and use up some of the spare rods and make new ones.
Tuesday, March 24, 2009
More detailing
No goes the smokebox door complete with it's nice brass dart. The casting, as usual, took a bit of flattening down on the rear face just to make sure it fitted properly. No whitmetal casting will sit perfectly without this, but a big file, some emery paper and a few seconds work are all that is required.
The chimney sits OK in it's newly drilled hole. The half-etched metal needed treating with care as it bend easily. The locating spigot was pretty chubby too - so fat that with the limited depth available I could get a reamer of suitable size in and had to revert to needle files. The gap filling properties of the glue tided up the slightly ragged bottom flange as much as required.
2mm plasticard wasn't quite thick enough for the dumb buffers but a couple of layers look about right. The same material provided the wooden backs to the beams.
This is one really detailed model. Inside the cab I've cobbled together enough to look OK. Again the castings are larger than I'd like but building a perfect representation would take a couple of days that I don't have and to be honest the improvement would be marginal and not worth it.
Monday, March 23, 2009
Detailing starts
Detailing kicks off with the handrails. The worst of these are the ones on the saddle tank sides. I marked a centre line along the tank and then guestimated the position of the first handrail using the photos. A scrap of paper was then marked up with the distance from centre to handrail and used to transfer the dimensions to all points that required them. A ruler wouldn't work here as you would have to wrap it around the curve.
Unsurprisingly the supplied safety valve is a couple of mm too tall but being cast brass proved reasonably easy to modify. The top part was cut from the base and shortened. The base itself lost some height too as well as an extra fitting not seen in the photos. Then the base was soldered to the tank followed by the to, all using a resistance soldering unit for a neat finish. One thing that surprised me was how long these tiny casting held heat - ow !
The tank filler is a spares box leftover suitably modified. This marks a special moment, I'm soldering whitemetal and not brass which means the end is in sight for the body at least.
Finally the cab steps. For some reason this isn't my favorite job on any loco but I get to do something different here. I don't know what was going on when these were fitted in real life, possibly extra step was required for a shunter to stand on while travelling, but this steam loco didn't leave the factory with anything like this. Some strips of nickel silver did the job here with dimensions gleaned from photos. It was only after the first one went on I realised that I'd made it too long as there is a lump of wood at the back of these buffers. Oops.
Sunday, March 22, 2009
Barclay Cabside
The cab sides needed 1mm taking off the bottom but otherwise were ready to use. Sadly it seems that Barclay didn't see fit to rivet the sides of 14" locos so I had to mark the positions for this detail as best I could and try to keep the lines straight while punching rather than folloowing a nice set of half etched markers as is normally the case. Then I removed a couple and solder ed on the flat strip that is half etched with rivets for cab beading.
To make the job manageable the two vertical lines of rivets by the handrails have been reduced to one - I'm not convinced the metal would have take the two rows so close together (1mm separation) without distortion. As it was I ended up tweaking everything flat after the session in the punch.
And the bits above the cab to support the roof - each had a bit of scrap etch fitted to the back otherwise there is no way I'd have kept them, this straight !
Springs
Saturday, March 21, 2009
Military vehicles
In between soldering sessions I waved the airbrush over some military vehicles for Chris Mead's layout "Overlord". Set in Southampton Docks in the run up to D-Day, hence the name, the model is covered in vehicles already but always needs more to fill the space.
Someone from Hornby Magazine is coming over on Monday to take some pictures of the model so the layout is set up in the clubrooms for the moment. When I went over to see how things were getting on on Tuesday there was a little pile of unpainted army hardware. Foolishly I volunteered to finish a couple of them and ended up with a small box full and some paint. Paint that I think is a bit on the light side but then it's not my train set.
The main colour was quick and easy to spray although being a Revell colour the coverage was poor. Tyres were harder as the models were complete so some delicate poking around took place to try not to get paint anywhere it wasn't wanted. There are a few green chassis which should be black but I'm sure no one will notice them on the finished model.
Glazing is Krystal Klear and not properly dry when I took this picture, hence the white fringes. Mind you the windscreen on my camper van is a bit like that...
Update: The correct colour is Humbrol 86. The vehicles have now been hand-repainted into this by the person who gave me the duff information in the first place !
Saddle tank and boiler
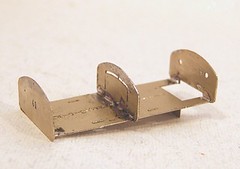
Anyway, as the footplate is ready, I can try and support the saddle tank in the right place. First I made up a piece for the smokebox. This is nearly as wide as the tank and has curved sides. Soldering this to the bottom of the tank carefully left no visible join. The smokebox door will mostly cover this area anyway.
At the back a temporary support went. Actually I had meant to leave it in position to give the all-important tiny gap between the tank and cab front. This would have been fine except that the hole in the front of the can is bigger than the spacer I made !
Anyway, it did the job and everything looked promising. I had to grind a little out of the tank bottom to slip the motor in but nothing major.
The cab front is of course wider than required, but if I took 2mm out of the middle this solved the problem with the added benefit of moving the spectacle plate into as near the correct position as made not difference. Inside the cab the join is braced with a bit of wire that I kid myself looks a bit like the internal framing of the real thing. If I file it flat it will anyway...
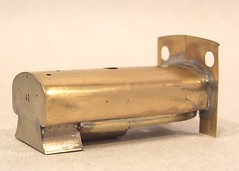
The boiler comes courtesy of K&S Metals - a suitable bit of tube chopped (OK, carefully split with the piercing saw, I've only broken two blades so far on this model which I think is a record) into half length ways and then a chunk taken out of the bottom to get the motor in. If I'd had the lathe set up still I might have tried turning the tube before alteration to put some boiler bands in - I'll stick some plastic strip ones on instead. You can barely see it under there anyway.
I think this concludes the most difficult part of the build. With this unit made up I'm confident this model will work and all I have to do is finish the cab, add some detail, make the rest of the chassis up, build the cylinders, paint the thing, and work out how to do the nameplates.
Motor in chassis
Rooting around in my stock of bits I found a smaller motor (1015 I think) which seems much more appropriate. A quick look with it sat on the plan seemed to indicate that I could mount it vertically to be as hidden as possible. Best of all it had the same shaft as it's corpulent cousin so the gears and box could still be used.
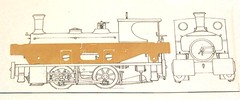
With the 'box made up and fitted in place another check with the plan showed my initial impression was correct. The saddle tank fitted and with the correct gap between footplate and tank bottom there even appears to be a little space above the cut-off shaft.
Talking of the footplate, this is another part that has been slimmed down. 2 millimetres along the centre line. The body retaining nuts and buffer beams strengthen this up. I supposed it might have been better to make a new piece up here but I enjoy the challenge of re-working the kit parts.
Friday, March 20, 2009
Barclay saddle tank construction
The saddle tank is about 2mm narrower (in 4mm scale) and slightly shorter and lower. I had a couple of options to achieve this. First Trevor has sent me a cast whitemetal tank which should be reasonably easy to modify - the height is right at the sides but sadly the top is curved very differently.
This returns me to the etched version. Consistency is the key so the three inner formers were tack soldered together and then narrowed as required. Then the curved corners were reinstated with a file. That done the parts were separated again with a gas torch and burnt finger (Ow !)
The baseplate needed to be reduced in length slightly then with some snips and then the centre line marked clearly. All the formers have this too so I hoped to keep them in line and make things easier for myself. The centre former needed to have a gap made so it could straddle the base. Finally the formers were all soldered in checking things were all square. Checking by eye, I'll be honest I wasn't convinced but the try-square said all was well so I pressed ahead.
Two tank covers were available and I went for the half-etched brass version in preference to the harder nickel silver. Again this had to be shortened and then marked up. Attachment started at the top and the gentle curve went very well. Bending against a flat piece of the wood put the top sharp corners in - pushing with a piece of wood along the length of the tank should give a ripple free result. Al soldering was carried out inside the tank.
Putting the bottom "tuck under" in was trickier. I couldn't get the iron in to attach the wrapper to the middle former so I seam soldered it along the bottom with lots of poking and warmed up fingers. Holding the tank was a nightmare as gripping it too tightly would put a dent it and the shape was more conducive to the thing slipping out of my wooden pincers. These come from a kitchen supplies shop and are invaluable when soldering.
The final closing up needed a couple of goes on one side and I ended up part bending with flat pliers. The result looks good and matches the plan. I just hope I can fit the motor in there !
Thursday, March 19, 2009
A little jig
Time for something more conventional today after my trip to the machine shop.
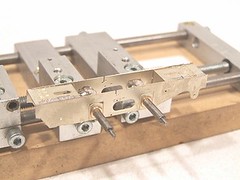
The chassis sides were shortened to match the locomotive plan by snipping off the excess at the front and flexing the rear to it broke on the convenient half etched line that occured just where I wanted it. Then everything was jigged up on my Hobby Holidays chassis jig for assembly.
The parts were nearly put together as intended except that at the front end the cut out for the spacer was lopped in half as part of the process of sorting the length. Rather than mess around with the slot, the locating lugs were removed from the spacer and I just soldered it in place.
Thanks to the jig everything seems square - I don't like relying on the ends being accurate once I've ham-fistedly hacked away at them but I am sure the more important axles are parallel to each other and perpendicular to the sides.
Wednesday, March 18, 2009
Barclay chimney
On a steam engine the chimney performs the vital task of letting the mucky stuff out and thereby providing a draught to pull the fire through the boiler tubes. Visually it's also a focal point for the locomotive. Model railway enthusiasts agonise for hours over the exact proportions of this part. No longer can you just stick a tube with a ridge on it on a model and expect people to be happy.
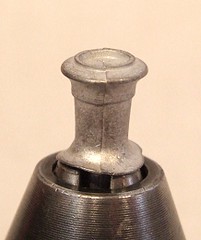
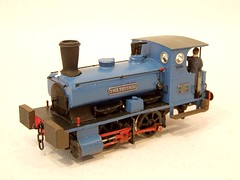
Barclay locomotives have a rather elegant (to my eye) chimney. Nicely proportioned with a cap on top that speaks of a well made machine designed to be used for many years. The one in the photo is a nice 4mm scale representation of it, albeit with a slight mould mis-alignment exaggerated by the camera and easily dealt with using a small file.
Unfortunately the locomotive being modelled doesn't have a chimney like this - it has an unusual but not unattractive stove pipe with a thin ridge near the top. This wouldn't be an issue except no one makes a casting for one of these. Therefore my first task was to try and create the part or admit defeat quickly so a proper pattern maker could be employed to do the job and make a suitable part for the future kit.
I fancied that all I had to do to convert the casting I had to the shape I wanted was stick it in a drill, file the cap off by holding to rotating part against a file and then fit a ridge around the top. Easy. Well, it is if you say it quickly...
The cap removal went well. A few minutes against the file resulted in a reasonable stovepipe. It looked a bit thin at the top without enough taper for the version in the photos so I built this up with 100 degree solder and "turned" it to the right shape.
Once I came to add the ridge using fuse wire everything went pear shaped. The built up solder started to melt, the wire wouldn't solder despite being tinned copper and the resulting blobby mess looked terrible. I could have repeated the exercise but very disheartened decided that perhaps this was a job for someone with the requisite skills rather than me.
A break for lunch before calling for help gave time to come up with a plan B. The hardest part to make on any boiler fitting is the flared base. The whitemetal one I had was OK, all I needed to do was fix the top. Perhaps I could use the flare and make a new bit to stick on to it.
Years ago I bought a Unimat 1 lathe tool. It's not a proper lathe and engineers laugh at it (It's a modular tool and so accuracy, especially in the tail stock isn't much to right home about. The standard motor is a bit weedy too) but it didn't cost me much and I fancied dipping my toe into the machining waters. That was a long while ago and apart from watching a demo on a trade stand once and feeling enthused to have a go myself, it's lain in it's box ever since.
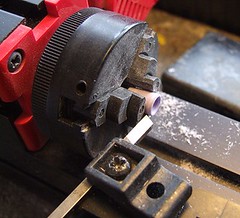
Set up on the bench the Unimat does look OK. I dug out some round, high quality plastic normally used as a knitting needle and had a play. With a bit of practise I turned some groves and finished the end of the rod. Both the proper tools, files and emery paper were tried. My technique combines elements of metal worker and wood turner but it seemed to work. Once I'd had a bit of practice the chimney proper was started.
All I wanted to produce was a tapered part with a grove to accept the ridge. A coarse file did the first bit and the cutting tool the second. The top was flatted and then drilled out - first with a 2mm bit all the way through and then a 5mm one as deep as I dared. Finally I parted off using a X-acto saw held on the base of the chimney.
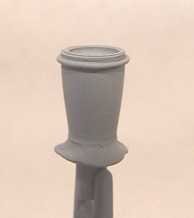
The top of the flange area was cleaned off in the lathe to give a nice flat, smooth area. I also drilled this with the 2mm bit so I could peg the parts together for extra strength.
For the ridge, very thin wire normally used for in-loco electrics stuck in place with superglue located in the grove neatly. Then I glued the base and top together. A quick spray of primer showed a touch of work still do do for perfection but at least I have this vital part the right size and shape for the model. No need for panicky calls to pattern makers. Today anyway.
Tuesday, March 17, 2009
12 inch Barclay
The nearest kit is Mercian's 14 inch Barclay. One for the smaller prototype (the 12 inch refers to the cylinder diameter by the way) is in preparation but as is the way with these things, the gestation period is long and the deadline short.
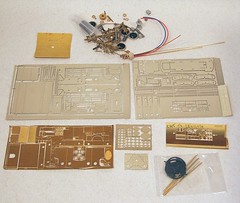
Fortunately Barclay were keen on standardisation so I'm hoping that many of the 14" parts can be used so I'm sitting looking at the parts supplied for this model along with a few extra bits Trevor chucked in to help out with the obvious detail differences. With photos and plans to hand my job is to produce as close a replica as I can.
Looking at the chassis first it seems I'm in luck. The wheelbase is exactly the same but the frames need to be shortened a bit. The cylinders to be used will be those in the kit as the difference is a fraction of a millimetre. Some of the body parts might give me more trouble but we'll see.
Monday, March 16, 2009
Kidderminster Model Railway Exhibition 2009
Off to a show with a mission. Planning is already well advanced for the great Leamington & Warwick MRC show next year and we are trying to keep our traders up to date with developments. They are often our best advocates on the ground and will help spread the word in the hobby about our improvements. More importantly, since they have to pay to attend then it's important to listen to their suggestions and keep them "in the loop" as management consultants would say (probably just before you punched them for speaking gibberish to be honest but you know what I mean).
Rather than spend time ringing round, it's much quicker and more fun to go to a show on the Sunday afternoon to do this and chat face to face. Of course this has the pleasant side effect that we get to go to a show and see some train sets, sorry - finescale model railways.
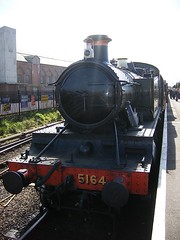
The exhibition is held at the Wyre Forrest leisure centre in the middle of town. For those who want to make a day of it, it's about 10 minutes (hilly !) walk from the Severn Valley Railway - hence the photo at the head of this post. Hopping off the train, the station is a good starting point with an excellent refreshment rooms serving a good All Day Breakfast for under a fiver along with an excellent cup of tea. One of the best carrot cakes I've ever seen was on the counter but I was a bit full after the fry-up.
Inside the hall the format is traditional - trade around the edge of the room, layout in the centre. 14 layouts in all ranging from Z gauge (Aldeburgh) to Gauge 1(Loscoe Yard) with plenty in between.
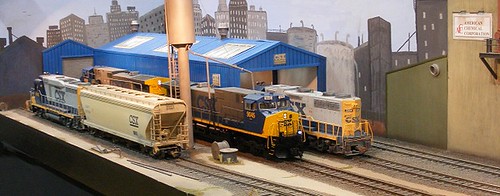
At large end, Loscoe Yard was impressive at 25 feet long. It's a small yard for American main line diesels. They shuttle back and forth with a few wagons. I think this is what is known as a "short line" although in an urban setting. Nice to see a scenic G1 model as opposed to the running tracks normally displayed. Weathered models too. The detail on the locomotives was enhanced by this and makes you wonder why so few people do it.
If I had a concern it was for the operators - this isn't a lot of space for G1 and the potential for movements is very limited. I suspect that unless you get to chat with the public a lot then you'd go mad on a long session. Another layout suffering from this would be the delightful "The Wagon Works" which doesn't have any points ! All shunting is carried out via a wagon turntable with rolling stock moved by chain shunting. Nice to see this carried out though - something you can do in 7mm scale and above as the wagons have enough mass to roll properly.
One of the more interesting arrangements for a layout is that on "Cornwallis Yard" which has a main scenic area nicely framed by a fascia side panels and open fiddle yards. All operation is carried out from the front including the normally behind the scenes activities. Modellers like to have a chance to ogle the stock at shows - we built display cases into two of our layouts to facilitate this - but the open yard takes the concept even further. The only problems is while this worked OK in the layouts early days, now with lots more stock it's too constrictive and a re-built to a more conventional form is in the offing !
One of my favorites had to be Moorton Bottom Yard, 009 in a canal side setting. Run by the Hull MRC it's tiny and very detailed. The working elevator was a nice touch, although Cornwallis has one of these as well so less novelty than normal ! Another model with excellent presentation the only downside was Dave poking my stomach and saying, "You're catching up with me !". Skipping the carrot cake was a a good move after all ! Mind you I'm Jenson Button to His Lewis Hamilton in this respect...
Talking of novelties that weren't that novel, two layouts were set in winter. Lindtzal is continental N gauge in the snow. It's very pretty and set off by some coloured lighting that gives a convincing night time effect - except in a brightly lit hall such as this when the light spill is stronger than the models own effects at the front. A chatty couple with the model are an added attraction - no hiding behind the model for them !
The other wintry theme came from the superb Blackstone Junction all the way from Edinburgh. The bare trees and white landscape are well modelled actually make you shiver even on a mild spring day. What caught my eye first though were the excellent locomotives with extensive lining out and bright colours.
Despite having only 3 1/2 hours we managed loads of chat with those selling things and so consider it a successful visit. Good fun with lots of excellent models on show. Good news as flicking through the programme I am reminded that we are exhibiting there next year.
Wyre Forest MRC website (Warning, anoying sound effects on the home page)
Sunday, March 15, 2009
Kingsbury 3mm Society Event
So how is it that I have 1.5 new loco kits and the mechanism for a Snaefell tram. Plus all the "little bits" I was looking for ?
The answer lies in the evil that is the second hand stall. Most of it is covered with old Triang locos and rolling stock as sensible prices (Hint: if you want to buy TT then join the 3mm Society. You'll save your membership fee on one purchase compared with dealers or eBay and still get an excellent magazine 4 times a year into the bargain) but at one end there are the kits'n'bits. On the top of the pile was a beautiful shiny etch for a Y6 tram engine. The gold of the metal looked lovely in the lunchtime sun. It glinted and called to me. I resisted as the Y6 (Toby for Awdry fans) may be a lovely loco but it has no place on a Scottish branch line. No place at all. None.
After a trip around the hall and chat with 3SMR about Bull-Ant motor bogies for an Isle of Man project I could still hear the kit calling to me. Back at the stall it had been submerged by some carriage etches but was still there. I gave in. Out came the cheque book and along with a GWR Railcar etch and few other miscellaneous bits the deal was done. 3SMR provided a motorising unit and I was happy.
Now, I can rationalise this purchase. The etch is a Connoisseur models original designed for O gauge. This means it's in the Finney & Smith range and according to their web site costs £33.50 including casting. So I saved a tenner there. The power unit at £33 is about the same price as buying the bits and making my own - but with the benefit of not having to do this. So if we ignore the fact I didn't need the model in the first place, it is a bargain !
Also on show at Kingsbury was the new 14.2 straight track kit which was selling well. Officially it's not available yet but if you knew who to ask (Hint: The man with a length of track in front of him and bags of the plastic sleeper mouldings), an "under the counter" supply could be obtained. This will make a nice test track.
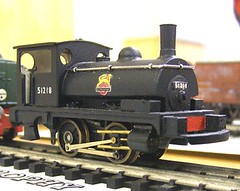
The photos shows one of the competition entries - an ex-L&Y pug. This is the famous Dudley Withers kit and really works despite it's tiny size. Apparently the kit's going into production again, I can hear it calling to me already...
Final hint. From Birmingham City Centre, get the 914 bus not the one shown on the leaflet. The ride is a great 10 minutes up the expressway and through spaghetti junction. Well worth the ticket price.
Saturday, March 14, 2009
Foul play or fairies ?
Spring approaches which for model boaters means it's time to think seriously about some sailing. Pleasant days on the banks of the lake tootling around with a radio controlled boat and chatting with like minded people are in the horizon. And with the new formula 1 season kicking off, it must mean the racing boats will be in action too.
With this in mind I've unearthed my Slingshot. Having won the first season I was disappointed last year not to be competitive. Even worse the boat didn't complete the the series of races thanks to some unexplained breakdowns. This year I want to do better.
Looking at the pile of bits that is my boat I couldn't find all the parts. Specifically the prop shaft and propeller. As the rules prohibit pushing your craft around the course, I can't see me winning many races without these !
Strangely the boat had been in store since I took it apart trying to find the fault last year. It's been in a box and I'm sure was all there when it went in. How did the bits escape ?
This isn't a problem just for boat modellers. Everyone who has ever taken something apart knows that somehow vital parts will vanish into thin air. No matter how careful you are you reach a point of re-assembly when you thing "Where is that .... ?". Now in this case I might attribute blame to my competitors who fear a return to form and think swiping the drive parts will slow me down. Normally though I think it is fairies. Yes, modellers fairies.
You see they flit around and pinch the odd screw or bolt from the workbench. Then they drop them where someone else is working. That explains why you always seem to have an odd bolt or screw left over when you put things back together.
Friday, March 13, 2009
Track in place - sort of
To get a feel for the space available I chucked down half a curve of set track pieces. I wouldn't want to try and run anything on it as the trackbed included plants, rocks and lumps of earth but the pieces made up for a surprisingly strong construction. Even so the result looks quite appealing.
The result is that unusually we have a bit more space than expected and the end curve might gain a bit of a wiggle in it's middle (OK, short reverse curve section for purists) to emphasise the narrow gauge feel.
Before then however there is the little matter of re-building the edges of the raised bed. Currently a mix of rotten sleepers, crumbling brickwork, insecure log rolls and hope, these are to be replaced with proper block work. So all I need to do is build 63 feet of wall two blocks high. That's about 100 concrete blocks then. I suppose it's a change from the miniature stuff !
Thursday, March 12, 2009
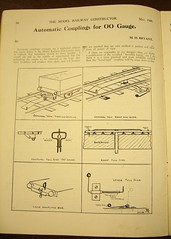
The first tension-lock ?
Anyway, is this the first appearance of a tension lock coupling ? It certainly looks like the same sort of thing you'd find at the extremities of a Hornby or Bachmann locomotive. Modern coupling ramps are sprung internally but essentially aren't a whole lot different to the one in the diagram (Note: click on the picture to get a bigger view).
It's interesting that the coupling proposed for the locomotives is just a bent bit of wire. This is much more subtle than mounting the standard version and, in many people's opinion, ruining the "face" of the model. It's one of the reasons us fans of the Spratt & Winkle coupling don't put hooks on our locos.
Making these things would have been fun in the late 40's. Etching technology was in its infancy so each hook and bar would have to be cut out by hand. Consistency would have been all important yet difficult to achieve.
Makes you realise how easy we have it now doesn't it.
Wednesday, March 11, 2009
Lined coach
Following the instructions in Ian Rathbone's excellent new book on painting and lining models, I broke out the bow pen, loaded it with oldish matt black paint and had a go. With a little effort and a lot of concentration I drew a line between the two colours. My guide was a ruler from the Volkswagen Type 2 Society which is prefect for this sort of this as its "stepped" leaving a gap between the coach side and edge being lined . Anything flat against the side will encourage paint creep under it.
The line is 30cm long, around 1mm wide and tidy. The trick is to start and keep going. Slowly. Let the paint flow and try for a steady progression along the line. Thinner lines can be drawn quickly from my observations of people who are really good at this but I guess the trick is to judge how fast the paint feeds down the pen.
I left the black lines to dry for a while and then added orange ones using Precision GWR orange lining paint. This is gloss and despite it's age, at least 10 years, a bit thinner and faster flowing. I'm still happy with the results though.
The second side didn't go quite as well. I made a minor mistake with the masking and so the lines had to go very close to the edge of the mouldings. Working on a flat area is fine, on curves, not so. The finished job is OK for a garden railway but I'd be inclined to do it again on anything for exhibitions. Rathbone's book is very explicit that he doesn't get everything perfect first time and there is a lot of poking and pushing of paint and the methods to do this are explained. I used a sharpened match stick to tidy one line very successfully !
Pleased with my lining, I then had a crack at some lettering on another garden railway vehicle - a WD van. It's not perfect but again fits the "look" of the outdoor line. I used matt white after trying a couple of other pale colours which were just too thin and ran out of the pen.
As the book says - only practise makes perfect !
Tuesday, March 10, 2009
Spray Rails
The spray rails at the front of the prototype boat are very prominent. To replicate them I hoped to pick up some triangular section plastic, stick this to the hull and then sand it to the final profile. Trouble is, you can't buy triangular plastic or wood of sufficient size. The largest I could get was from the Plastistuct range, but at 3.2mm high it was too small. This problem stumped me. I tried sanding some square section wood to shape but couldn't do this with sufficient accuracy to satisfy my critical eye. Holding such a small bit of tree is nearly impossible while manipulating a sanding tool.
In desperation I decided to try forming the rails on the hull itself. The Proxon sander gave me confidence that this might work and all that messing around with the hull last month proved that it could take a little bit of attack without damage.
The start and end points of the rails were carefully marked on the hull with pencil and then strips of obechi were soaked in the sink to maker them pliable enough to deal with the required curves. After about 20 minutes each was dried off and then stuck in place with superglue and clamps. This dried off really quickly and despite the undulations the wood appeared to be firmly fixed.
The wood was too large but gentle work with the detail sander soon fixed this. All work was carried out by eye. Looking along the hull it was quickly apparent when one side was fatter or less tapered than the other. To achieve the final shape I carved the bottom corners off with a sharp knife and then finished off with the mini sander.
Looking at photos I have probably under-represented the rails which look pretty chunky but they are close to those on the plan and if you aren't sure about a part making it under scale isn't a bad idea. More importantly they look right on the model.
A couple of coats of sanding sealer later the wood is nice and smooth just needing a coat of primer to check everything is OK and hide the shiny bits. then I can breath a sigh of relief and move on to fitting the mechanical bits.
Monday, March 09, 2009
Radio Star
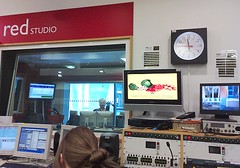
So yesterday morning I was standing outside the Coventry studio trying to work out how to get in. There isn't anyone manning reception, or the phone number listed on the website, but some arm waving at people through the windows attracted attention and someone let me in. Since the studio and some of the offices back onto the plaza and are in the middle of the city, I'm surprised the people working there haven't developed better abilities to ignore idiots outside but fortunately, for me, they haven't.
Inside I was repeatedly offered drinks and had to sit and wait for the gardening bloke to finish his sport before being rushed into the studio. The presenter was none other than Wincey Willis who I vaguely remember from her weather presenting days with TVAM. The researcher who'd got in touch with me hadn't actually told me anything about the show other than the segment was called "Passions" and the idea was to bring people in to talk about their interests.
Guessing that most people don't have a clue about model railways other than train sets I took a copy of the Hornby Magazine with the Melbridge Dock feature. By stuffing this under their nose I hoped to head off any mention of train sets and instead talk about the craft side of the hobby.
As it happens I didn't need to worry. For around 12 minutes we chatted comfortably. I'd anticipated some of the questions such as "How did you start" and "Are there any women building model railways" and had answers for these ready. It's a shame there wasn't more time but the news was looming and thanks to a last minute text question, the green fingered guy had overrun a little.
Anyway, I enjoyed it and apart from constantly saying "um", something I should have remembered from my hospital radio days not to do, I think it went OK.
Listen for yourself for the next week - my interview is about 1 hour 44 into the show.
Sunday, March 08, 2009
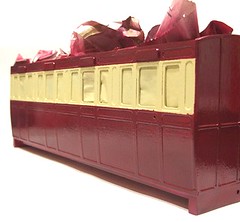
Cream windows
A few weeks ago I visited Garden Railway Specialists in Princess Risborough and saw a really nice coach on display. Green and cream it had as much paneling an the one I'm working on and plenty of lining. My lining needs practise and the learning curve is better carried out on my own stock rather than someone elses !
The main difference was to be the colours. My preference has always been for so called "custard and cream" paintwork. It looks good on BR coaches and even better on Isle of Man Steam Railway ones - since the main locos on the garden line with be IOM then that pretty much settles it.
To start the job, the coach body received a coat of grey primer. This showed up0 a few areas for attention but nothing major, just a little more rubbing down. The inside of the windows were masked up with tape from the inside, not essential but it should make varnishing the partitions inside easier.
First colour through the airbrush was matt Humbrol cream over the window area. I'd hoped to use gloss colours throughout on this model to improve weatherproofing and also for the practise spraying gloss, but there wasn't anything suitable in the range. I'll be satin varnishing the whole thing anyway to protect the transfers.
24 hours after the cream, the windows were masked on the outside. Photos of the real IOM coaches were examined to work out where my break lines for colour were to be. It seemed that maroon above and below the cream would be ideal so using proper modeling masking tape and and old envelope the protection was applied.
Finally a coat of gloss maroon. The first paint cup full came out a bit thin but a blast from the hair drier hardened this off and the next one was mixed up a bit thicker. The covering propertied of this paint are a bit hopeless - the matt stuff seems so much thicker - or maybe I'm just scared of putting too much on and getting runs.
With a flourish the masking was removed as soon as the brush had been cleaned. Apparently this stops a ridge forming. I think that's just an excuse, after all the hassle of paint application you just want to see the results !
Saturday, March 07, 2009
IP engineering coach
My Father and I are building a garden railway. We had one many years ago in 16mm scale, 32mm gauge which was OK. A lack of funds meant that the locos and rolling stock were all scratchbuilt, mostly by me, and not exactly rugged. I certainly enjoyed myself but then I wasn't paying for the PECO SM32 flexi-track !
Now were are using scary expensive LGB set track so everything is 45mm gauge. Stock consists of RTR items plus a few kits. One of the first being an IP Engineering coach currently on my Dad's workbench.
All I have to do is paint it 'cos I'm good at this sort of thing apparently.
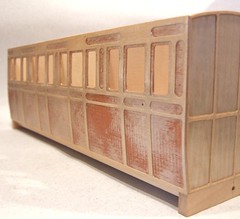
As I mentioned, the coach is milled plywood. That means that if I don't want to end up with something covered in fur, I had better seal the wood. Sanding sealer (the clue is in the name) is the substance of choice here. For those not in the know, this is a cellulose dope with fine talcum powder. You paint it on, it seeps into the woods sealing it and giving the modeller a nice surface to paint. Done properly the wood feels as smooth as plastic.
The first coat soaks in well and is dry withing minutes. the second, applied after sanding, takes longer but gives the wood the appropriate sheen. For best results some serious sanding and a third coats would be a good idea but getting into all the crevasses in the mouldings is a pain so we are compromising on 2 and a slight wood grain effect.
Friday, March 06, 2009
Proxon Pen Sander
I'm sad enough to have a favourite power tool - a Powerbase cordless detail sander bought from a car boot sale for 2 quid. It's seen loads of use on wooden stuff, filler in the campervan and even model boat hulls. When it dies it will be replaced straight away and I'll be willing to spend proper money on it too - that's how good it is.
Sadly for much model making work it's too large. I want a tiddly version - which is very nearly what we have here.
The Proxon pen sander is a miniature 12v electric tool about the size of a fat marker pen although perhaps a bit longer. It has different shaped interchangable plastic heads and self adhesive sanding pads (180, 240 & 400 grit). Power comes from either Proxon transformer or in my case, a Minicraft one using an adaptor lead plugged into the long coily power cable. Initial impressions are that build quality is excellent.
I bought a couple of spare packs of sanding pads as I didn't realise that there were a few sheets in the sander. The trader they came from tried to dissuade me from this as he says you can use normal sandpaper held on with double sided tape for a fraction of the cost.
My test piece is an IP Engineering coach which has panels milled in plywood. These are nice but on the ends the milling process has left some raised lines. I could have tried carving these off but would probably gouge the surface, or hand sanding, but I had a new tool I wanted to try !
The sander was fitted with a square pad that works perpendicular to the tool, other work in line or at a shallow angle. Fitting it with the coarsest grit was easy once the pad was released from the sheet with a knife blade. The pad just sticks to the tool. Changing the tool is just a twist of the end and it pulls out to be swapped.
In use the head moves side to side about 2mm in each direction. The vibrations in the handle can be felt but aren't bad. A full size power sander is a lot worse. There is only one control, an on/off switch. I found working easy enough and fairly quickly flattened the raised areas. The sawdust created was fine so wear a mask if you are doing a lot - but didn't fly around everywhere. The tool did heat up more than expected but this seemed worse on lower speed settings. It was never even close to too hot to handle. Noise was no worse than any other mini power tool and my cat happily slept through it.
This is a handy little tool. Assuming the tool heads are available separately I can see myself making custom ones by chopping the plastic around. For cleaning up inside the thinner mouldings this would be fantastic. For working in confined area this is certainly easier and less knuckle scraping than hand sanding.
Thursday, March 05, 2009
Repairing China
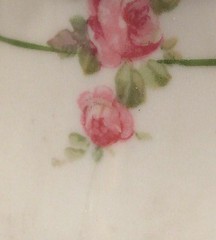
My sister is very lucky. A china pot she inherited from my gran "bounced" on the floor and broke in two. But the break was clean and when you held the two parts together, almost invisible. When I drop something, it smashes into a million pieces...
Anyway, the pot has sentimental value so it came my way to see if I could glue it back together. Superglue was mentioned, inspired by an advert years ago showing a market trader fixing a plate with the stuff. I remember that advert and recall being pretty certain that the "repaired" plate was a new one. Call me cynical but I find that if you assume everyone in adverts is a liar who eats kittens for a hobby then you aren't that far wrong...
Anyway, I am certain that if you go to a professional china restorer, superglue does not feature large in their repertoire of techniques. I therefore spent a fair bit of time researching online and in books (remember them ?) to work out how to fix this pot. I appreciate the quick and easy method would have done the job but I wanted know.
The correct method is this:
- Take some slow set (the blue tube) Araldite and apply it to one side of the joint.
- Press the parts gently together.
- Remove any excess glue that has squeezed out with acetone (nail varnish remover) on a cotton bud. Wipe off any leftover chemical with a clean paper towel.
- Support the joint with masking tape and leave it to dry overnight.
My results were pretty good. For most of the join the repair is invisible. Where it isn't this is my fault for not using a perfect clean towel to wipe the surface therefore forcing dirt into the crack.
I'm not saying this is the perfect professional method but it is certainly pretty good. Better than superglue anyway.
Wednesday, March 04, 2009
Finished Fox Walker
Three smokebox doors were included and all I had to do was work out which one was most appropriate. Since I didn't have a clear photo of the front of an early loco I used a process of deduction to work out which ones I couldn't use from pictures of rebuilt machines, and then used the one left over. I think it looks right.
All in all, this is a lovely looking model locomotive. The kits is fairly pain free and most of those problems are caused by the prototypes convoluted history. If you know your S&D locos (I don't) then the process becomes even easier. Of course I didn't have to do the painting, this model was to be delivered in primer. Perhaps then I really wood be cursing !
Tuesday, March 03, 2009
Handrails and fittings
On the smokebox front we have a curve. Nothing special about this except it is flatter than normal. Starting in the middle of a length of 0.45mm brass wire from Gibson, I bent it around a suitable pen. Next the corners go in to get the wire heading toward the cab. This is where the "fun" starts as the tank now gets in the way so the builder can't just hold the handrail in place to check the forming is proceeding well.
Three goes later and we are heading along the front of the tank and then back towards the cab. Of course I have been remembering to put handrail knobs on as I go. Well, except for one but I was getting good at re-bending the wire by then even if I was worried about the brass work hardening and snapping.
Even fitting the thing isn't easy as you can only see the inside of the body in the smokebox and at the back of the tank. Elsewhere it was a case of lots of flux and tiny amounts of solder to work from the outside. Where I formed a blob this was smoothed out across the flatter bits of tank and then cleaned off with the fibre pen,
With this trail complete, sticking some whitemetal boiler fittings on was much more fun. Only one, the tank filler, has a stalk sticking through the body but some careful work with the 100 degree solder followed by lots of cleaning up, and this model is really coming alive.
Monday, March 02, 2009
Tank on footplate
The footplate has to be shortened before use. Two of the prototypes were involved in accidents and rebuilt slightly longer, and the kit allows for this. 4mm needs to be knocked off the back end for an early engine like this. The buffer beams are hefty fold ups as the real things were chunks of wood. Some of the photos appear to show them faced with a steel plate and I'd have replicated this if I'd spotted it before riveting the beams. Of course the pictures available tend to be of the locos later in life so that might not be accurate anyway.
Before bringing tank and footplate together there is the little matter of the prominent pipes under the tank which meant fitting some injectors. I'd hoped to make this whole lot removable to ease the painters job but this proved very difficult so I decoded to make something that looks good. I'm not sure you'd squeeze it under the tank anyway as the gap under there is surprisingly small and the splashers get in the way.
The cab is a simple enough construction - 4 sides that just have to be kept square. Sorting out the bunker back is an other matter. It has a very strange flare which points out in all directions and tapers back into the cab side. 3 parts are supplied which have to be bent and bodged into position with a fair bit of solder put in as a filler and then filed away to give a tidy result. The worst part is that the components have very sharp pointed ends and jabbed fingers are inevitable !