The saddle tank is about 2mm narrower (in 4mm scale) and slightly shorter and lower. I had a couple of options to achieve this. First Trevor has sent me a cast whitemetal tank which should be reasonably easy to modify - the height is right at the sides but sadly the top is curved very differently.
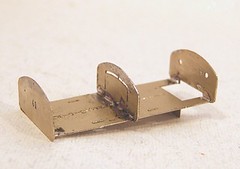
This returns me to the etched version. Consistency is the key so the three inner formers were tack soldered together and then narrowed as required. Then the curved corners were reinstated with a file. That done the parts were separated again with a gas torch and burnt finger (Ow !)
The baseplate needed to be reduced in length slightly then with some snips and then the centre line marked clearly. All the formers have this too so I hoped to keep them in line and make things easier for myself. The centre former needed to have a gap made so it could straddle the base. Finally the formers were all soldered in checking things were all square. Checking by eye, I'll be honest I wasn't convinced but the try-square said all was well so I pressed ahead.
Two tank covers were available and I went for the half-etched brass version in preference to the harder nickel silver. Again this had to be shortened and then marked up. Attachment started at the top and the gentle curve went very well. Bending against a flat piece of the wood put the top sharp corners in - pushing with a piece of wood along the length of the tank should give a ripple free result. Al soldering was carried out inside the tank.
Putting the bottom "tuck under" in was trickier. I couldn't get the iron in to attach the wrapper to the middle former so I seam
 soldered it along the bottom with lots of poking and warmed up fingers. Holding the tank was a nightmare as gripping it too tightly would put a dent it and the shape was more conducive to the thing slipping out of my wooden pincers. These come from a kitchen supplies shop and are invaluable when soldering.
The final closing up needed a couple of goes on one side and I ended up part bending with flat pliers. The result looks good and matches the plan. I just hope I can fit the motor in there !

No comments:
Post a Comment