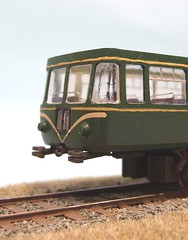
 The place where an injection moulded plastic kit scores over all others is when you get to glazing. The parts are moulded so they fit nicely in the openings and the result is flush with the sides. This is especially important on the corners where the prototype designer incorporated curved glass. The only other way I can think of achieving this effect would be with some vac-formed plastic and even then it would be a fiddle to fit, albeit slightly clearer. Bending flat styrene would never work as the natural spring back would defeat any glue used to hold it in place no matter how much bad language went into fitting it.
Anyway, the first job I did was painting the bars on the side windows that represent those greatly missed opening sections. Matt aluminium from my nearly empty Humbrol pot (why don’t they do this anymore, it’s so useful) applied with a fine brush looks good. Where the paint ended up in the wrong place I used a sharpened matchstick to move it before it dried. Not a totally successful trick but better than nothing.
Glazing started at the front. I found that separating the four window part into two side and windscreen pairs made the install a lot easier. The gap between the flat panes could be reduced ever so slightly with the resulting join invisible behind the pillar. Working my way around the body I tacked the “glass” in with plastic cement (Revell Contacta) and then washing some Mek Pak along the top to get a nice strong join. Handling the parts with tweezers meant only one slightly fogged corner and that I can write off as weathering.
No comments:
Post a Comment