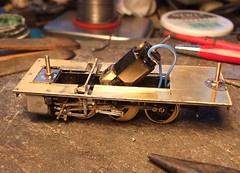
Attaching model locomotive bodies to chassis is a surprisingly contentious business. Obviously this matters - you want to pick up all the model, not just the top bits - but peoples preferences vary.
Some will argue for a clip fitting at one end and a single bolt at the other. Some prefer a multitude of tiny bolts (unavoidable with US prototypes which don't have a continuous footplate) while others, like me, want something chunky.
The kit is designed to go with the clip and single bolt method. Fine in theory, but the tabs in the footplate don't line up with the slots on the chassis. Altering either is difficult so I have put an extra hole on the chassis and used two decent sized (8BA) bolts. Anything smaller is a pain to fiddle with if you have to undo them. Besides, over engineering is always better than the alternative.
The footplate needs a little alteration before use. It's laminated and the brass top is more accurate than the nickle bottom. As it says in the instructions, the cut-out for the reversing gear needs to be opened up.
Soldering the nuts to the footplate was fun. At all costs you have to avoid fixing the bolt in place. I use combination of CD marker pen and WD40 to try and stop the solder running down the threads. This worked fine with the first bolt and failed on the second. Chopping an 8BA nut and bolt up with wire cutters didn't do them any favours either. I'm glad the third attempt went better.

No comments:
Post a Comment