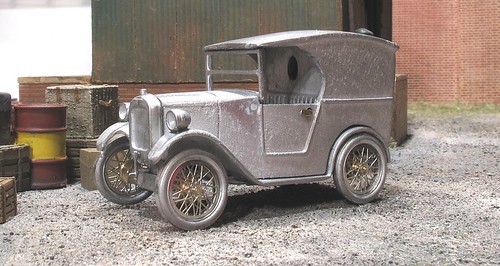
With the wheels built, construction starts with the chassis. Here I was a little disappointed that there aren't any positive location pegs for the rear axle or main chassis runners. It's not difficult to line things up but care is required. Some good superglue is called for, or better still would have been low-melt solder.
With the bits attached and wire axles cut, the van had a nose-down attitude that had to be sure by showing the rear to bend the chassis a bit - those wheels should fill the arches and the running boards are meant to be horizontal!
Fixing the wheels to the axles took 2-part epoxy as the superglue didn't hold well enough. I blobbed the stuff on so it covered the back of the brakes, not perfect especially on such exposed underpinnings, but you can't tell and at least the wheels aren't likely to fall off.
 The body is nice and easy but as I wanted a later model van, the headlamps were moved from the sides of the windscreen to the wing tops. This was a mistake as I glued them on somewhat less then straight and then realised that they should be either side of the radiator. Drilling holes in the bonnet side and using the spigots would have made fixing easier and more accurate.
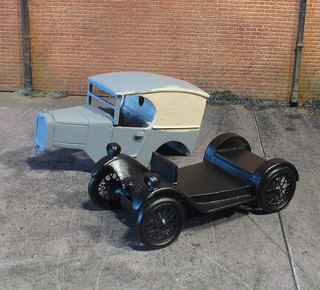
 Painting is made easier if you keep the body and chassis separate. The later got a spray of primer and then sating black. The top was primed and brush painted. This is prototypical as cars were finished with coaching enamel in those days, and it wasn't just that I couldn't be bothered faffing with the airbrush.
No comments:
Post a Comment