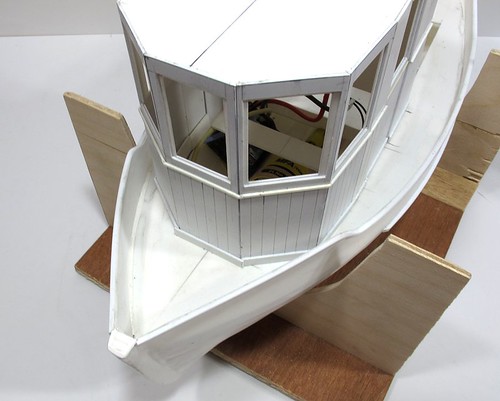
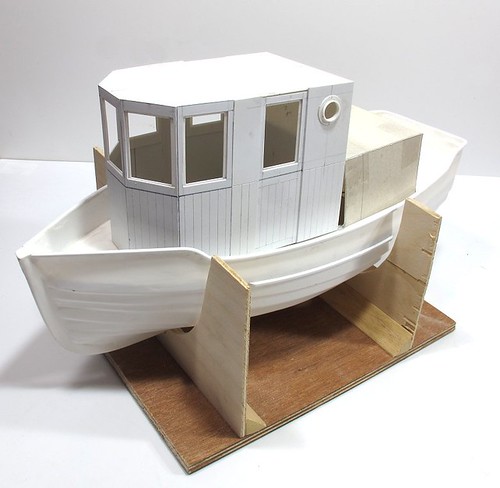
It's all very well having a curved roof, but at the front of the wheelhouse, it needs to slope down.
I cut ribs from plastic to join the front to a central point. Next, 2 layers of 20 thou plastic sheet were curved and fitted to the ribs. I'd hoped that the thin sheet might bend in enough directions to fit in one go, but no.
In the end, I choped away a triangle at the front. This was filled with some lightweight model filler with all the constancy of loose marshmallow. It's sold to aircraft modellers, but I'm told you can buy it by the bucket from Wickes. Probably for a lot less money.
Not happy that this was hard enough, I then skimmed it with Deluxe Materials plastic putty. This was sanded, recoated, sanded, recoated and then sanded and recoated again. I think I'm not happy with the results. At least until I paint them anyway.
A daily updated blog typed by someone with painty hands, oil under his fingernails and the smell of solder in his nostrils who likes making all sort of models and miniatures. And fixing things.
Tuesday, May 31, 2016
Front end filler work
Monday, May 30, 2016
How to draw a gentle curve
A large boat roof is a challenge. I wanted a gently curved profile but struggled to draw this on a sheet of plastic.
It's too large for compases and I needed something larger than a dustbin lid (remember them, before wheelie bins) and nothing suitable was to hand.
Mt dad suggested I try the roof from a G gauge tram loco kit. He was right, it's pretty much spot on. Close enough for my freelance model anyway.
This made me think - if I took a piece of brass trip and feed it through my rolling bars, templates for any curviture would be easy to make.
I'll remember that next time.
Sunday, May 29, 2016
Flowers good enough to eat
My sister is doing a sugarcraft flower making course. Apparently it's very popular and even held on a weekday morning, places are difficult to come by.
The results are fascinating. After 4 weeks we have daisies. Before this there was another flower that could have been real, not sugar. The delicacy with which the material can be worked fascinates me, as does the gentle colouring at the tips of the petals.
Best of all, the results are edible. Perhaps I'm in the wrong hobby.
Saturday, May 28, 2016
Not such a bargain
2mm thick cork for 3 quid a roll? Not bad from a high street bookseller you might think.
So, I measured the contents. The sheet is 60 X 30cm.
Which works out at 1800 square cm, 600 Sq cm per £.
A roll of Gaugemaster cork is 900 X 600 cm and costs £5.50 from eHattons.
That's 540,000 Sq cm or 98,181 Sq cm per £
(Please, someone check my maths. I failed both my AS and A levels as well as only scraping a pass at O level so I am an acknowledged thicky)
The bookshop version isn't quite such a bargain as I first thought. On the other hand, you can buy it in a high street and there is a very nice cardboard roll in the centre. Handy if you need a tiny bit at the end of corking your layout maybe.
Friday, May 27, 2016
How to build a locomotive climbing frame
As there wasn't space in the magazine to give my playground J94 the step-by-step treatment, I've blogged it over on the BRM blog.
Thursday, May 26, 2016
S gauge, a working van and playground J94 in BRM

This month I tick off an item on my model making "bucket list" as I dabble in S scale.This half way house between OO and O has appealed to me since I first became aware of it in a 1983 issue of Scale Trains. Being a scale for scratchbuilders also touches my interest in working away from the dominance of RTR models.
The timing of this project couldn't have been better. The society had just developed a kit based on a plastic moulded body when I started researching for my "Wagon kit in every scale" series. I'd assumed that there would be much effort pulling together items from several manufacturers, but no. Thanks to a special effort for the 75th Anniversary of the scale, it was all available in one box. An very nice it is too. The experience has tempted me to want to do more.
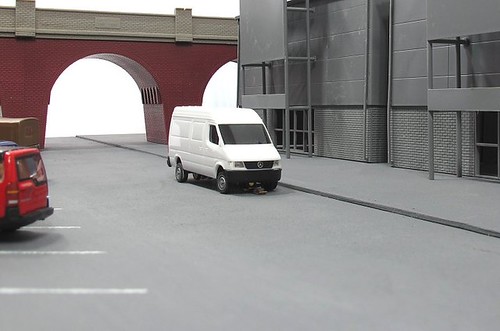
Moving things on layouts are always popular. Of course we normally mean trains, but Faller's road system has been with us for years now and yet I've never had a go with it. This changes with the first part of my build of a modern shopping centre.
The van shown in the picture circles the diorama surprisingly realistically at a sensible speed. With a little weathering, you'd not be able to tell it from a diecast, except when it starts to move.
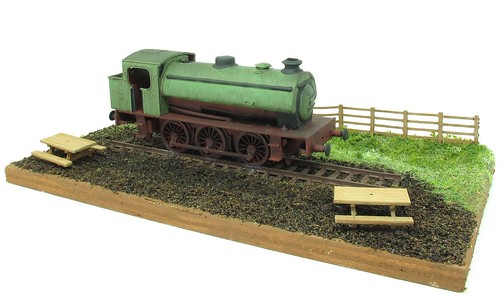
When I was a child, a J94 could be found in a local park acting as a climbing frame. It's long gone now, but I've built a miniature version using a old Airfix kit.
Elsewhere, I'm helping you chose a craft knife and on the DVD there is a tribute to John Webb with a show of his fantastic EM gauge locomotives.There's also a little video I made in the Extra's section on a 009 loco shown in the main mag. I had to do a bit of chassis fettling for Ben and decided a video was easier than a long e-mail. I hadn't expected it to go public but the team thought it would be entertaining. Next time I'll be more showbiz!
Wednesday, May 25, 2016
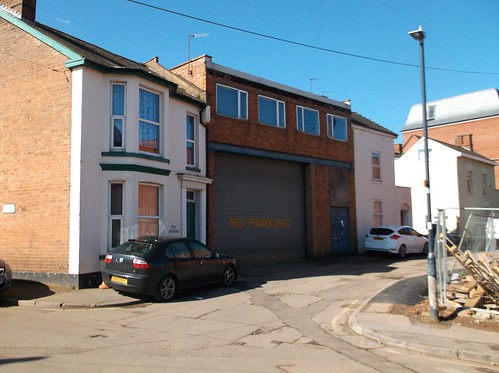
Warehouse Wednesday: I need a garage like that!
Tucked down a side street in Leamington Spa is this unusual building. Presumably it was once a row of terraced houses but over the years has morphed into the home of Merica Metals and a site that I'm sure plenty of developers are desperate to buy, label "brownfield" and lob up some homes on that are only "a short walk to the station with regular trains to London and Birmingham".
Let's face it, this is not beautiful. It's a honking great garage though with ideal space for a workshop above. Would suit me down to the ground.
See the building and surrounding area on Google Streetview. Plenty for the fans of derliction here!
Let's face it, this is not beautiful. It's a honking great garage though with ideal space for a workshop above. Would suit me down to the ground.
See the building and surrounding area on Google Streetview. Plenty for the fans of derliction here!
Tuesday, May 24, 2016
Successful scratchbuilding just takes good bodging
Making models from scratch is a concept that terrifies people, but it shouldn't
The photo illustrates some bodgery that has helped my boat look good. When I fitted the wheelhouse, I knew that the front edge would need to be cut away to compensate for the rising deck at the front of the boat. I should have allowed for this as I assembled the panels, but I didn't bother.
Cutting away the bottom of each was a bit trial and error as the rise isn't consistent thanks to the less than perfect hull. No matter, I just kept trimming until the wheelhouse sat upright.
Along the bottom, the cuts were less than perfect but some strips of plastic added a little decorate trim and made it look perfect. Each was cut over-long and cut or filed back, the front piece awaits this. Of course if you look inside you can see the errors but since no-one can, it doesn't matter.
Monday, May 23, 2016
Burning the midnight oil
When I get into a project, I really get into it. This photo shows the state my boat was in after midnight a few days ago. 4 hours work while a succession of Battlestar Galactica episodes (the original one when it was space ships and bad acting rather than alluding to stuff and CGI) played at the end of the bench.
It's great when a project really grabs you. Working away with the plastic sheet and watching something appear on the modelling board as the parts come together is just brilliant. You can't get that sort of feeling from just buying a model, you have to craft it yourself.
Along the way, I took advantage of plastic's ease of use. There were mistakes such as putting the portholes too low on the ends and forgetting to make the short panel in front of each door, but these were quickly rectified. By the time I made myself go to bed, I was really pleased with my efforts.
Sunday, May 22, 2016
Model Lifeboat Day 2016
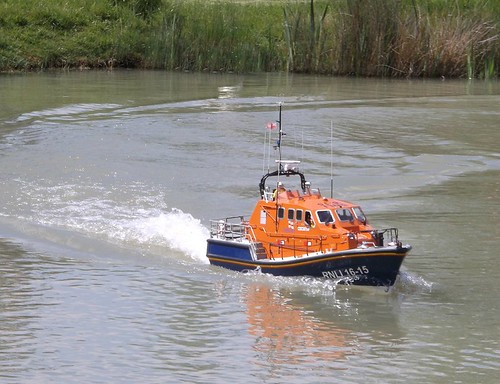
No-one likes car parking duty much but as I own a hi-viz jacket and am quite happy to stand around being useful, I volunteered to do it for the KMBC lifeboat day this year. Apart from a tantrum from one of the members who wanted to park next to the water rather than 30 feet away so those with boats could have prime position, it went very well. A lovely morning in the countryside pointing vehicles at one of three areas in the sunshine.
Once we had filled the space enough that any latecomers would have to work it out themselves, I ditched the yellow coat and headed down to the lake to enjoy the orange boats. A rough count suggested that there were almost 40 of many different designs and sizes.
A highlight was an Aerokits Solent class.
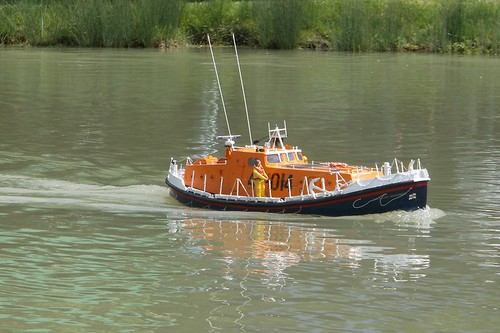
I've always though this to be a rather boxy and ugly boat, but once fully detailed, it comes alive. I suspect all the previous models I've seen have just used the supplied bits, whereas this builder (who is also a railway modeller) has gone to town making his own fittings. Now I want one.
In the afternoon, there were talks from RNLI people. The first involved owning a Rother lifeboat as a classic vessel. The group of friends who do this take it on fundraising trips to show an old RNLI craft. The highlight was the very wet Royal Flotilla a couple of years ago but there have been many enjoyable trips beside this. Owning a real lifeboat sounds fascinating, if a lot like owning a classic car with all the trials and tribulations but with an added restriction on where you can take it. No chance of doing that around here, you need more water than a canal!
The second talk was on the new Shannon lifeboat. Quite a detailed look around both the boat, tractor and trailer. All of these are really impressive bits of engineering.
The highlight of this talk was a final bit of video. The Shannon can be retrieved from a beach. Getting it there is very impressive.
Now THAT is how you park a boat. Something many of our members have demonstrated in the past when attention wavered!
An excellent day with fine cake thanks to both the boat and model railway club. You can see my photos on Flickr.
Saturday, May 21, 2016
Fixing a loose hammer head
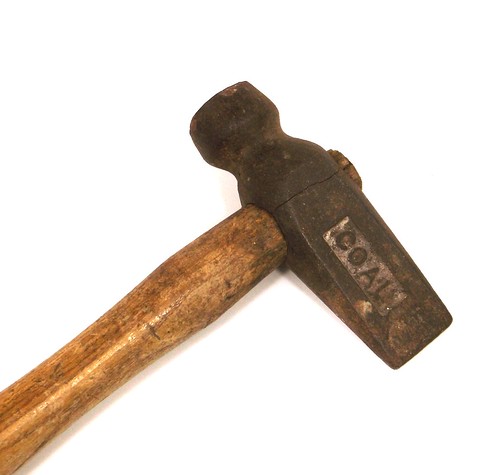
Months ago, I inherited a coal hammer. I know it's a coal hammer, partly because of the shape, but mostly because the words "Coal Hammer" are cast into either side of the head.
It's been kicking around on my bench for a while and found much use as a weight when I'm sticking things. What I couldn't do is use it as a heavy hammer because the head was lose. Lose hammer heads make using the tool difficult and more importantly dangerous. You don't want the metal bit coming off and flying in the direction of your (non-metal) head.
Glue, anti-freeze and old oil are all suggested as a fix but I was always taught that hammer heads should be wedged in place. Of course I didn't have the wedge, which is why it took so long to fix the thing.
Anyway, in my favourite hardware shop (Torry's, Warwick) the other day, I remembered to ask for some metal wedges. The first question was "How big?" and of course I'd assumed they were all the same. "Is it for a pin hammer?", I was asked and then sold a couple of quarter inch wedges for pennies.
I want to call these brads for some reason but I'm not sure that's right.
Anyway, all that is required is to make sure the head is well on the handle and then hammer (assuming you own more than one, but who doesn't?) the wedge in. There was one in there already so I cut the new wedge in half with a junior hacksaw, then belted it in.
The hammer head is now secure. Sadly, this has exposed a crack in the metal which means no thwacking coal or rocks with it. Light taps for model making and use as a weight is still on though. And I have a spare wedge if I can find it on the garage floor.
Friday, May 20, 2016
No panic, just let me at the plastic
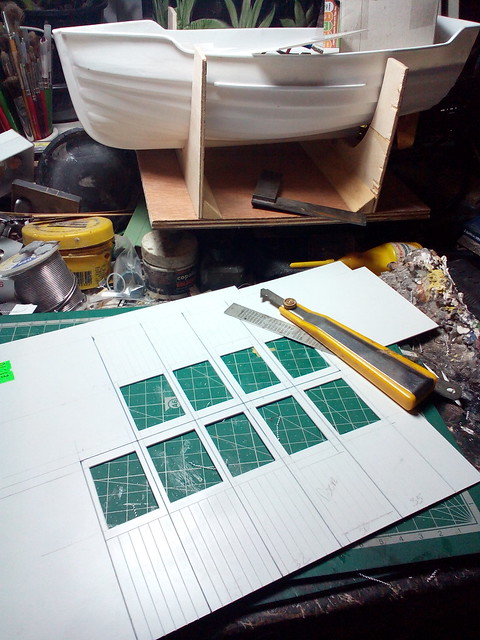
"You realise it's just over 3 weeks to the boat club open day don't you?"
My dad has been looking at the calendar. He's right. 3 weeks until my chairman's challenge boat needs to be ready and it's only a hull with a deck and some cornflake packet superstructure.
Which is why I spent a late night scoring and cutting the wheelhouse sides, aided by a box-set of the original Battlestar Galactica. Maybe if I'd paid a bit more attention I'd have spotted that two of the panels should have portholes and not windows in them...
Mind you, I found a lovely picture to provide me with some paint colours.
Mind you, I found a lovely picture to provide me with some paint colours.
Can you believe you can buy the plans for this REAL boat for $15? That's cheaper than model plans!
Thursday, May 19, 2016
Safety first - clamp it!
Temporary or exhibition layouts have one huge advantage over those firmly screwed to a wall - you can flip them on their backs for access when wiring up.
Of course, the model needs to be firmly set up or you'll find it falling towards you and bashing your bonce. Worse, it could fall back and bend the backscene if fitted, or even worse, flatten the scenery.
My layout building worktop has a lip around the edge and so when working on a model earlier this week, I was able to use a onking great clamp to fix it in place.
Soldering, drilling and poking then took place with impunity, and an unbashed bonce.
Wednesday, May 18, 2016
Warehouse Wednesday: Not a warehouse, but looking like one
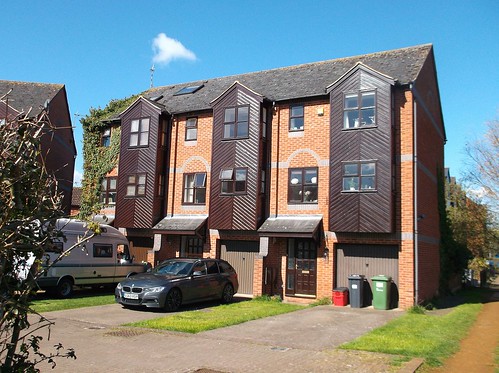
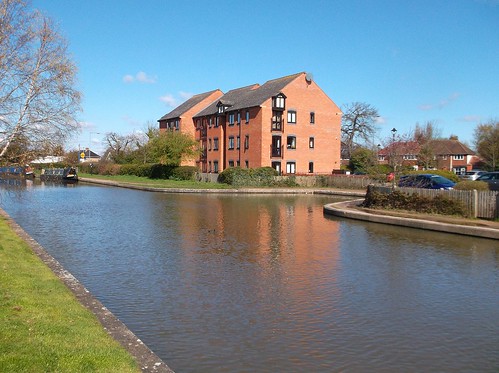
Once upon a time, if houses were built
beside a canal, they faced away from the water as if to ignore it.
Some time in the late 1970s, things
changed and the waterside aspect became appealing. Developers turned
the plans around so owners could enjoy the view of canal boats
chugging by, and bunged another few grand on the price for the
privilege.
These houses were built in 1988 and
cost £90k - at the time a hefty price even for Leamington Spa. I
don't know why I recall this but a colleague and her husband bought
one and I remember it being a stretch for them at the time.
The canal, in case you are wondering,
is to my right. 5 feet more and I'd have got wet feet whilst taking
the picture.
This is the view when I swivelled right. Nice place to three-point-turn your boat.
Anyway, the point is that the houses at the top ape warehouses, even when they don't face the water. The whole estate is like this. Is the style called "mock towpath"?
Tuesday, May 17, 2016
Another solution looking for a problem
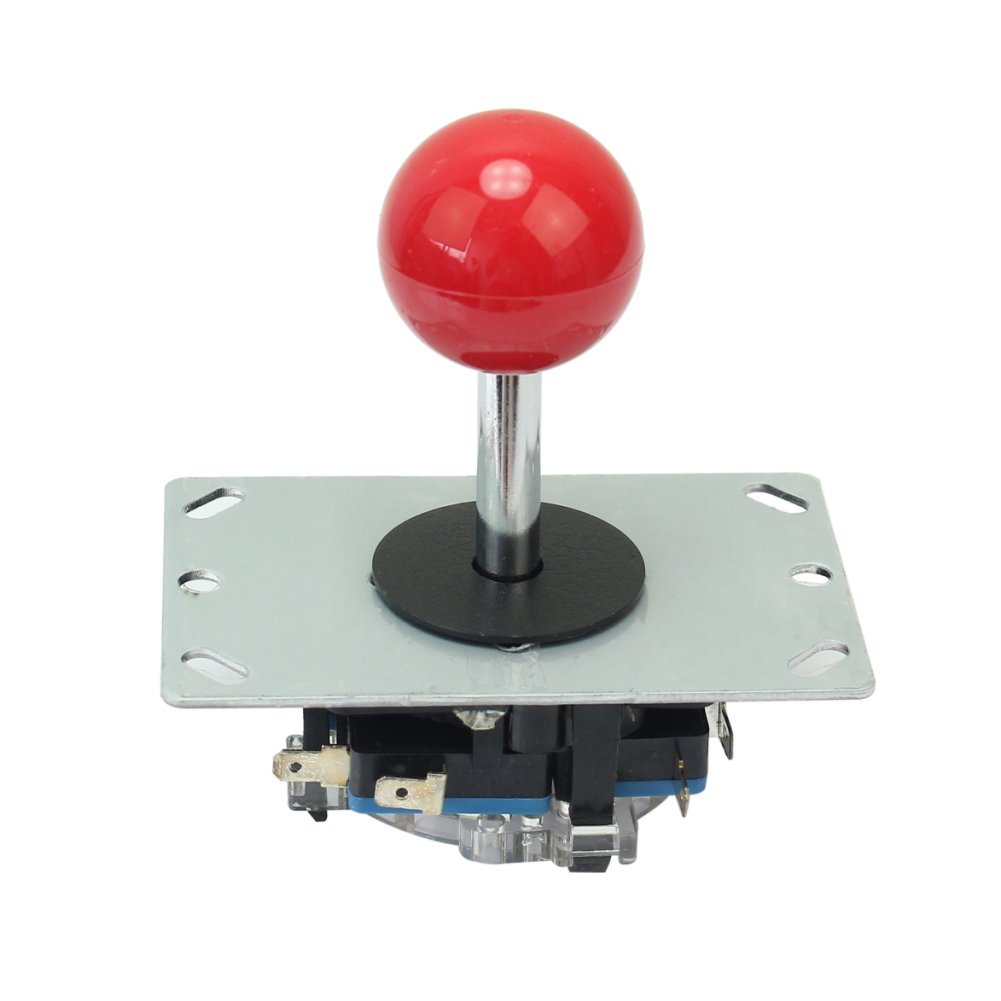
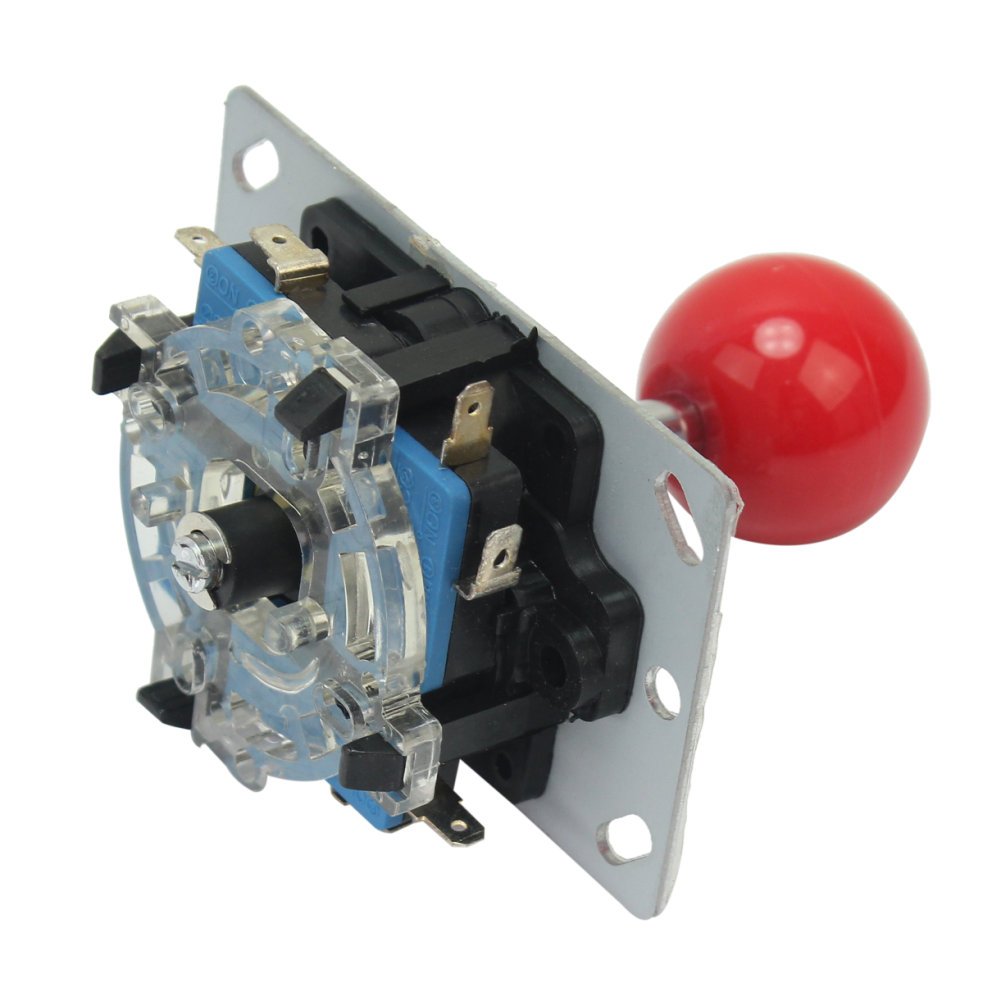
This is a joystick intended for use in an arcade game - something like one of those claw games where you might (but probably won't) hook a cuddly toy and transfer it to a hopper so you can get your hands on it.
Underneath, the stick is connected to 4 microswitches.
Anyway, he suggested that there must be a model railway use for this and I agree - it's robust, easy to wire and stupidly cheap at a smidge over 4 quid.
But what is this use? I'm sure there is one, but apart from operating a gantry crane like device, I'm foxed. Maybe an idea to keep in the back of my mind for another day.
You can find the joystick on Amazon, there's also the matching heavy duty buttons too.
Monday, May 16, 2016
A Beginners Guide to Model Railways
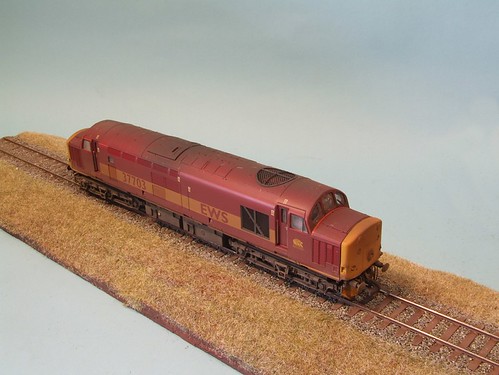
In a couple of months' time, I'll be doing something new - running a model railway course for a day.
The people at Dillington House contacted me about the idea and after a little discussion, we came up with the idea of a simple course for beginners covering some of the basics to help people move on from simply owning a train set, or at least a collection of models.
In a day, I can't cover a huge amount of ground, but the plan is to build a photo-plank and wire it up. That will cover a bit of scenery, ballasting and some soldering for the hands on elements. I'll talk around some of the other topics while the glue dries.
The day is aimed at real beginners, so if you or anyone you know fancies it, places are limited and can be booked on the Dillingtom House website.
Sunday, May 15, 2016
Ruined barn identified
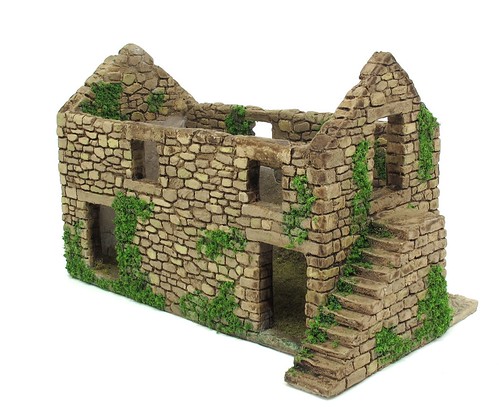
When I started work on the Skytrex ruined barn casting, someone suggested it had been mastered by David Wright of Dovedale models. Having chatted with him at Derby, I can confirm this is the case.
Inspired by this model:
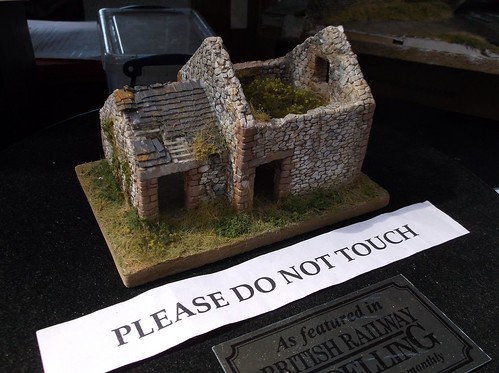
a request was made for a version suitable for casting in resin. The master was madein foamboard and DAS. A mould was taken from this and then lots of resin versions produced.
A tenner for such artistry sounds like a good deal to me.
Saturday, May 14, 2016
Derby 2016
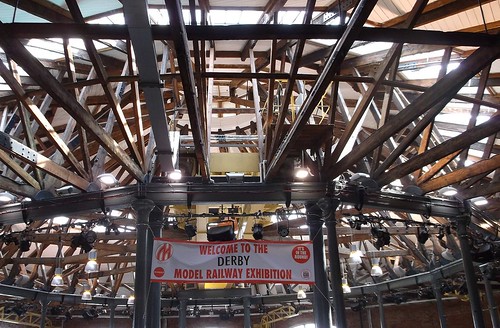
I've seen Derby Roundhouse on TV a few times and it always looked a fascinating building. The model railway exhibition moving in just gave me an excuse to go.
First tip: Ignore Google when travelling from the station. You don't need to go out of the main entrance, walk along the road (past the pub with a Class 37 cab in the car park), under the road and along the canal and through an industrial estate. Just walk out of the other entrance and the show is 10 seconds walk away. Luckily I worked this out on the way back as it was raining.
First impressions are that the hall is smaller than I expected. Compared to Barrow Hill, it's tiny. The roof is fascinating though, full of beams and cranes. That and theatre lighting, but I assume this wasn't installed by the Midland Railway.
A round venue must be a joy for the organisers. Stands are arranged in doughnut fashion with a ring around the edge and a back-to-back inner ring around the turntable. This was covered with seating for those having something to eat.
 Food was pretty good I thought. A small cafe on the side served some nice sandwiches, crisps, drink a mahoosive slice of cake for a reasonable (in the real world, if not for any railway modellers who never get out) price. I took mine outside, collecting a giant pass out stamp on the back of my hand, to sit in the pleasant grassy areas perfectly designed for enjoying the sunshine.
Back inside I toured the trade stands completing my shopping list along the way. I'd say it was pretty good, with a few stands I'd not seen before, but understand that additional space might allow for even more next year. The show has traditionally brought in more non-UK content than other events and this is shown with several traders selling foreign products. I like this as I get to see new things but if your interested is in the cheapest red or blue boxes, this might not appeal as much.
Layouts are limited in length by the roundness of the hall. Although there is a side room, a carriage shed, which could accommodate something longer, this was a show for more modest models. Again, this makes me happy, especially as I got to see the excellent Manston Brewery for the first time.
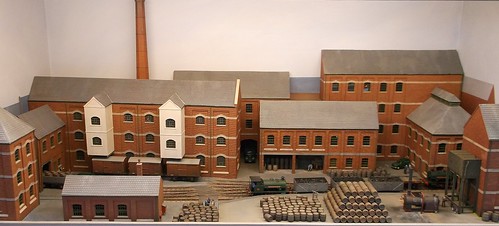
Manston was built for a P4 competition to create a model in a limited space. Cleverly they've filled the space with buildings so the tiny area is prototypical. No point in cramming a sprawling country station into a tiny space as it looks ridiculous.
Around the corner from this was my friend Paul Marshall-Potter's model Albion Yard.
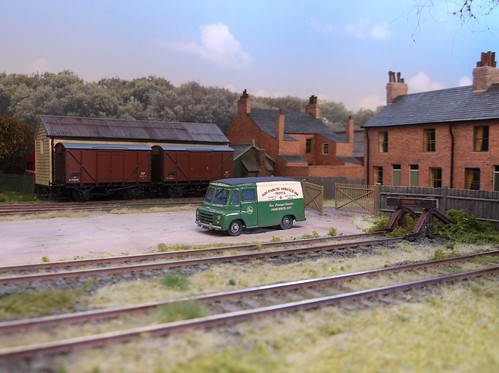
He had been working through controllers with a couple of DC Gaugemaster handhelds being killed off for no apparent reason. So desperate was he, that operation was by the evil DCC to keep something working. Combine that with 3-link couplings and it all sounds very fiddly.
The photo shows some of the fiddle yard. Hidden behind a canvas flap (the layout is operated from the front) is about a third of layouts worth of scenery so that when you look along the model, the view doesn't stop at the edge of the scenic section. Normally modellers employ some sort of break such as a footbridge or tunnel, but this wouldn't be appropriate for this model. If you can stand all the Great Western stuff, do check out his blog.
Towards the end of the day, and another spell sitting outside with refreshments later, I spent a long time talking to David Wright about scribing DAS and model making in general. We have a common interest in "atmospheric" modelling rather than the cold and clinical perfect stuff that sometimes appears in the finescale press.
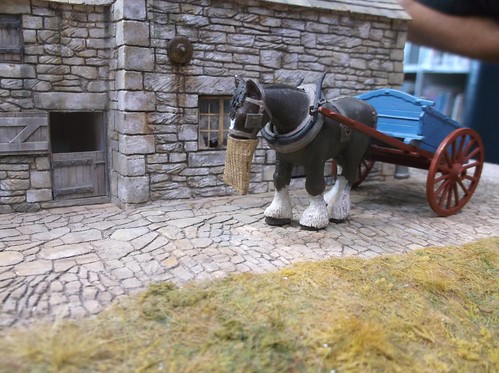
We're also both keen to get people making things. It's all very well spending money, but give over a few hours to making a model and you'll be rather more committed and probably stick around a lot longer. This doesn't need to cost much either. All David's models are made from foamboard and clay with a few details. No need to spend time on forums moaning that everything is too expensive either.
Anyway, a thoroughly enjoyable show. I enjoyed the venue and everything on show. Back next year, 6th and 7th May.
Friday, May 13, 2016
NG chassis ideas required
OK, narrow gauge nerds, take a look at this:
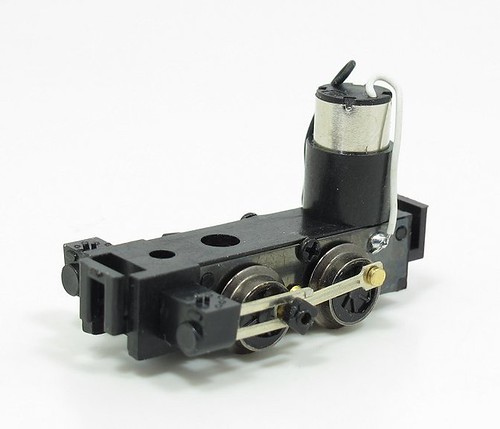
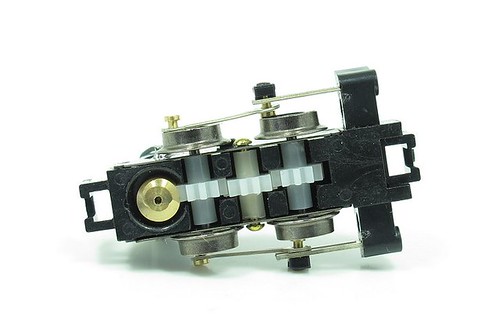
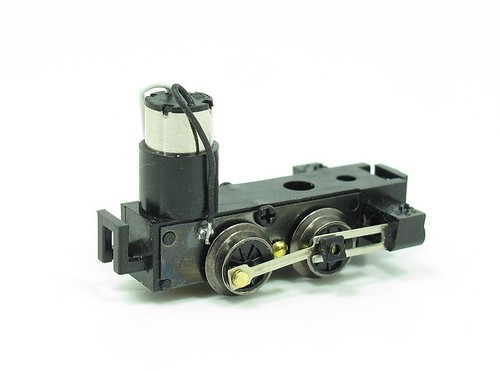
Wheel diameter: 5.5mm
Wheelbase: 8mm
Height from rail top: 18mm


Wheel diameter: 5.5mm
Wheelbase: 8mm
Height from rail top: 18mm
I bought this from this seller on eBay for less than £25 RTR. Placed on some 009 track and given some elelctric juice from a 9V battery, it runs far sweeter than a bantam weight chassis should.
So, the big question - what should I turn it in to?
My plan is for a scratch built body but apart from that I'm very open to ideas. My assumption is this should be a 009 model, but it could be an N gauge industrial, or something very narrow gauge in a larger scale, O9 perhaps?
Thursday, May 12, 2016
Table and chairs
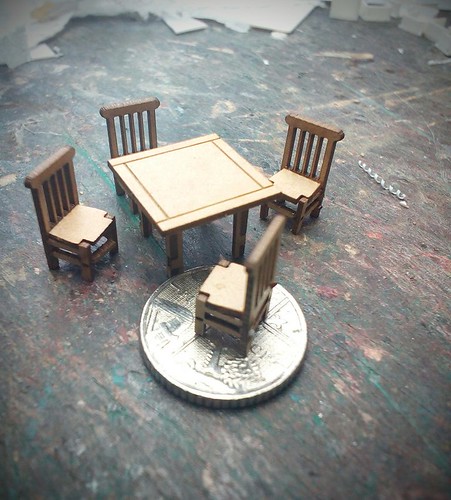
Laser cutting is a marvelous thing. The ability to produce perfectly cut out parts never ceases to amaze me. Given the chance, a cutter is the one bit of kit I'd add to my dream workshop.
The photo shows a set of table and chairs in 4mm scale by modelrailwayscenery.com. You'd expect such tiny models to be difficult to put together, but no. The chair sides plug into the back, a drop of glue making the joint permanent. Then the front spacer thing goes in, and you have to orientate it properly as the holes at the end in the front legs are rectangular not square (I think, they are soooo small) and finally the seat drops in place.
No cutting, sanding or trimming. So annoyingly crisp too.
(No I'm not buying a laser cutter. I've seen what I want and it's £10k. And makes noise and smells. Of course, if I had the dream workshop then that wouldn't be an issue, it could have its own room.)
Wednesday, May 11, 2016
Warehouse Wednesday: Around the back of a bit of art deco

From a railway carriage, Flavel's factory is an art deco gem.Admittedly one that is now buried behind dirt and many years of modification, but a gem nonetheless.
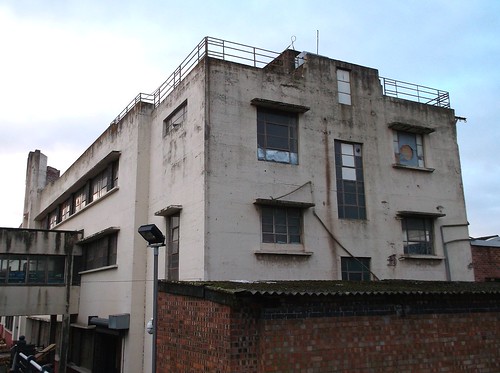
Around the back however, things are a lot less pretty.The architectural style is still there though. Square topped metal framed windows are set in rendered walls. For the modeller, if you can design in the style, then the rest should be easy. I'd think that mounting card would be fine for the walls as it provides a tiny amount of texture.
This view is from the canal bridge at the end of an industrial estate. The railway passes over the canal on the left hand side of the picture.
With such a magnificent frontage, you'd think that the owners would be proud to welcome visitors in, but no. It seems that the pretty vista looks out over a recreation ground. For convenience, a modern entrance is provided around the back.
I'm thinking 1970s. At the time it would have been considered very stylish.
Tuesday, May 10, 2016
Mortar lines
My normal method for colouring brickwork involves mortar colour paint and a selection of brown colour pencil crayons. Sadly, for some surfaces, this doesn't work as the brick mouldings are too sharp and mortar lines too thin. This is a common problem with laser-cut walls for a start.
Needing to paint a building made this way, I've had to experiment with motar colouring.
A - Bricks painted and cream colour acrylic paint washed over the surface. In theory it will sit in the mortar lines. Not for me it won't. Wiping the surface doesn't help, not does abrasion with very fine emery.
B - Moratr lines filled with Deluxe Materials Perfect Plastic Putty filler. This works very well but on plasticard, it fills part way up the rounded (caused by the embossing process) brick faces and the lines are too thick.
C - Ready mix DIY store all filler wiped over the surface first by finger and then by high-density foam to clean the faces. By far the best although it needs practise and doesn't work so well on less pronounced brick faces.
Interesting experiments. Before anyone suggests adding mortar colour paint into the courses where capillary action will pull it along the lines - not for me it won't. I wish life was simple!
Monday, May 09, 2016
Tiny Landrover
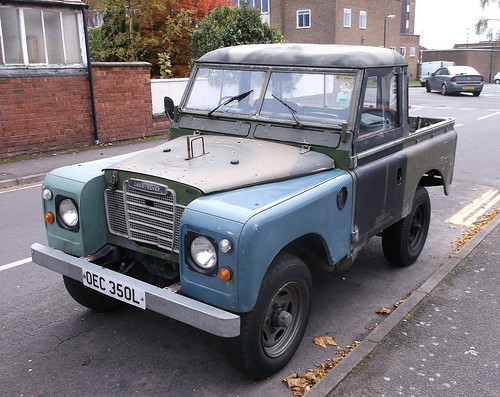
Some time ago, I spotted this short wheelbase landrover while wandering around town. Obviously I fancied making a model of it. Well, now I have:
Based on an LWB Airfix kit, I've cut'n'shut the plastic vehicle to make my model.
While the colours might be right, I think it shows what a truly terrible model Airfix have produced. The windscreen has panes far too small, there is something odd about the wings ans the lights are too small and too low.
A second attempt might involve leaving the windscreen out and replacing it with plastic strip. The lights could be scraped off and re-make. Or I could just use the far better Oxford diecast version. Still, it was fun to make and hidden in a larger scene, it won't matter much.
Sunday, May 08, 2016
Ramsay's Guide
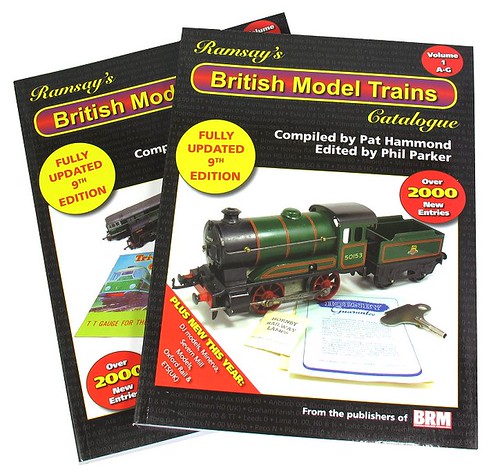
The 9th Edition of the "bible" for model railway collectors has arrived. Ramsay's guide aims to be the most comprehensive listing of model railway locos and rolling stock available, and an indispensable guide for collectors.
As you can see, I've been working on this edition with Pat Hammond. I'll admit that the shear scale of the task has been overwhelming at times and without Pat it wouldn't be the impressive publication it is today.
It's interesting that this time we've added several new manufacturers as well as thousands of new products to the listing. In this respect it's a bit like the final years of the Guinness Book of Hit singles - for years there were lots of bands releasing lots of singles. Then the world changed and an awful lot of groups came together for one single and then reformed into something else, making the listings a nightmare.
Of course, this isn't quite the case for railway models but it's interesting that there is an emerging group of small RTR manufacturers commissioning models from Chinese factories. Not just in plastic either. There is a market for modern tinplate trains that I was previously unaware of.
Those who know me won't be surprised to see quite a few extra photos of Triang items, but I took the chance to photograph lots of other collectables too. I reckon I've added around 100 pictures to the guide including the covers which I'm quite pleased with.
This has been a fascinating and educational experience. Just don't expect me to have memorised all of it.
Saturday, May 07, 2016
The full Beatties set?
This week, thanks to a lucky ebay purchase, I think I might have completed my collection of Beatties wagons.
In the photo you see (from left to right):
R2444 - Triang open wagon - 1973
Graham Farish - Ventilated van - 1980
R028 - Hornby 7 plank wagon - 1995
R6034 - Hornby Monobloc tank - 1997
Is this the lot?
Friday, May 06, 2016
Bulwarks!
I'm quite pleased with this. Now the deck is fitted and level, I can work out the bulwarks - that is the sides of the boat above the deck that either keep water out, or in depending on how high the waves are.
As I'm not using the hull as the manufacturer intended, I need a new top line with a bit of shape.
The length is a bit longer than a single cereal packet but by sticking two together, I was able to make a template for the cut. Using it on both sides should result in symmetry. Incidentally, the card from Weetabix "Crunchy Bran" is much better quality than Sainsbury's own brand versions.
A few lengths of 2mm square styrene strip finish off the top edge and look better than trimmed plastic which is too thin. It adds a bit of strength too.
Thursday, May 05, 2016
Wonky deck
Trust nothing. I foolishly used the plank lines on the vac-formed boat hull as a guide when fitting the deck. As you can see from the photo above, it's wonky. Quite a bit wonky.
Removing the deck (Hint: Soak the joint in Plastic Weld and peel apart gently) and then using a big pair of dividers (thanks Grandad) to measure the distance from top of the hull to top of plank line and the problem becomes obvious.
I don't know how, or why, but the plank lines are wrong in the rear corner. They climb back up to the same level as the other side half way along the hull which is even weirder. Someone at the club had commented the hulls weren't symmetrical but I'd assume this was a just the typical vac-form hull errors (see past abandoned projects) and only occurred between the two sides, not along the length!
Putting in some new plastic support along the true line solves the problem and gives me a nice flat deck, but it's a problem I hadn't expected.
Wednesday, May 04, 2016
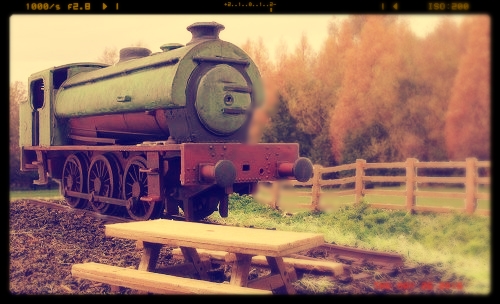
Warehouse Wednesday: Old tin shed
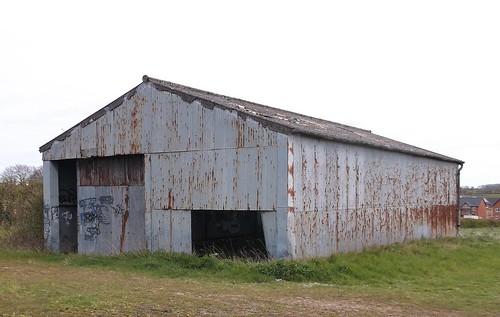
This barn makes me feel old.From 1982 to 1988, I used to walk a mile and a quarter each way to school. Every day, just after traipsing over a railway bridge, I would pass this corrugated iron barn.
Strolling that way again at the weekend, apart from having an "I remember when it was all fields around here moment", I was surprised to see the barn is still there. OK, so a panel has been removed and someone has slid the door open and spray painted the inside, but it's still the building I remember from all those years ago. I don't even this it's been painted, apart from the graffiti that is.
As a prototype it could fit in anywhere. There's very little detail and if you keep the doors shut, it's a bit of a blank canvas. Weathering experts can enjoy creating some nice rust effects, but not many as this is at least 3 decades old and the tin-worm is still only a surface affliction.
Tuesday, May 03, 2016
Cabin V2
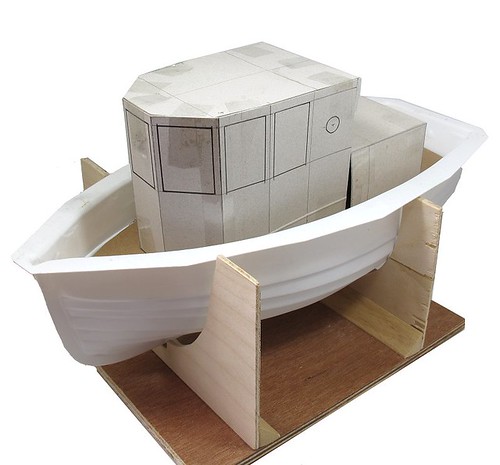
Finger pulled out, progress on my Chairman's Challenge boat starts again.
The first job is to build a new mock up for the superstructure as the first version wasn't a complete success.
I liked the front windows so these have stayed but the new design has all the panels the same width, including the door which had been far too narrow before. Since this is supposed to be a sliding panel, the section behind had better be wide enough to accommodate it too.
The proportions are a lot better. I'll need to make the back cabins about 15mm longer to balance the look but just by placing the cardboard creations on the deck, i can see this is much batter balanced and closer to the prototype I'm sort of basing it on.
Monday, May 02, 2016
Improved running in The Collector and a non-runner in NGW
Struggling to make your model locos run?
In the newly revamped "The Collector" magazine - the house mag of the Hornby Collectors Club, I'm providing a few useful hints and tips. We're cleaning, oiling and prodding with tweezers to make things work properly.
Over in Narrow Gauge World magazine you can read about my RH&DR armoured train build. OK, it's a non-runner what with the loco being solid resin and all, but it should be popular with the NG fans. At the bargain price, the kit might even persuade a few people to have a go at their own version.
Sunday, May 01, 2016
It was 20 years ago today...
20 years ago this weekend, I saw the advert above attached to the van in the photo. After a test drive, I handed over a cheque and the van became mine.
Now it's up for sale as for a quarter of the time I've owned it, Ashley has been off the road as I've been to busy to use him. The price has gone up a bit but I've replaced a lot of metal, an engine, interiror and the paint twice since 2006. He now needs a new home who will take him out and enjoy the VeeDub life.
The current advert is here - and yes, I will move quite a bit on the price.
Subscribe to:
Comments (Atom)


