A daily updated blog typed by someone with painty hands, oil under his fingernails and the smell of solder in his nostrils who likes making all sort of models and miniatures. And fixing things.
Sunday, October 31, 2010
You do what ?
I find this video fascinating. Here we have Rod Stewart, pop star, collector of lithe blonde women and occasional "hell raiser", being embarrassed to admit he has a model railway.
Like all of us who share his hobby, at some point people will find out what you do for relaxation. Once this happens you find yourself staring into an abyss. You know it is a good and interesting hobby. You know that skills, knowledge and patience are required to achieve the results you desire. Despite this you fully expect, just like Rod does in this clip, that what will follow the revelation is a torrent of mockery.
In fact, the host actually goes on to be very impressed by his guests work. Maybe that is so he gets another chance of an interview in the future but I like to hope that's it's because the models are really rather good. Of course the first thing that wows the uninitiated is the sheer size of the project but we cognoscenti appreciate the quality.
However, if a gentleman with all the "cool" qualitifcations I mention above (Look, I know da Kidz don't thing he is cool but stay with me on this) gets embarased by his hobby, what about the rest of us ? I reckon that only 3 people I work with know what I do in my spare time. A couple of them because it's on my CV and another because she's a freind who I've menetioned the magazine stuff to. Everyone else gets to rattle on about endless television programmes or football teams but were I to mention toy trains, any small credibiltiy I have would vanish. OK, so there is a tightrope to walk between banging on about railways all the time and treating it as a perfectly normal interest, but I'm sure it is possible.
(Hat tip to RJR for bringing this one to my attention)
Saturday, October 30, 2010
Large scale model aircraft show
 Back in July I took a trip to Cosford to see some large scale model aircraft flying. The season is over now and instead the owners are hard at work building more models. This means it’s time for the same association’s exhibition at the Gaydon Motor Museum. This is less than 10 miles from me and I’ve always wanted to go so it seemed like a good excuse to kill two birds with one stone.
The museum costs £9 to enter but this ticket makes you a member and allows repeat visits for a year. Great value is you like classic cars, especially British ones. Not being flush with time I had a quick look around and decided a return visit was in order. Just to whet your appetites, there is an MGB sliced in half length ways and several racing cars from eras when they looked like racing cars, as well as prototypes and oddball motors from years ago.
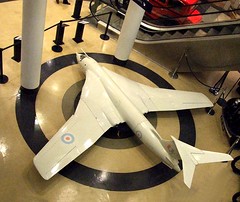
The exhibition was on the first floor accessed up a curved staircase, in the middle of which was the fantastic Vanguard I’d seen in the air. Close up it’s even more impressive as the thing is massive.
Upstairs the real reason I wanted to visit was found. While Cosford had flying models, Gaydon has half finished ones and these are fascinating.
First though, a chat with the owner of an English Electric Lightning. The wingspan is a model 8ft but since they are swept wings, you still end up with an impressively huge model. Naively I asked what provided the power and was introduced via a hatch at the back to a pair of real live jet engines. Surprisingly small they gobble 1 gallon of fuel every 9 minutes at full chat (look a technical term, do you like how I’m getting the lingo ?). The model splits into three sections and just fits in a van for transport.
Next door though was a real beast. A Vulcan bomber. When complete it will have a 20ft wingspan. Made of wood (in fact all of the models were wood covered with more wood except those WW1 jobbies covered in material) the big surprise was that it is a kit. All the parts are laser cut, although you need to do a bit more than simply slot and glue them together to achieve a finished model. Imagine that next time someone moans about your unbuilt kit collection – “Well I could cut back to just two or three…”
Further down the line was a team building a DC10 refueling plane. One of the wings was on display and wired up so visitors could watch the correctly operating flaps. Amazing engineering as these tilt and slide exactly as they would on the real plane.
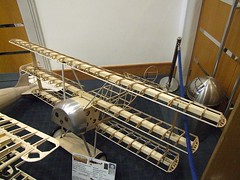 I wandered around enjoying close quarter examination of models that I had seen before and many that I hadn’t. They are a heck of a lot bigger close up, especially the half scale tiger moth. Rather than ramble on I’ll let the pictures do the talking. I’ve still no real desire to have a go but have even more admiration for those who put all of this effort in knowing that at some point they will have to point it up in the air, and even worse point it back at the ground again for landing.
My photos
Large Model Association website (stop sniggering at the back it's aeroplanes)
Heritage Motor Centre
Friday, October 29, 2010
Static flyers
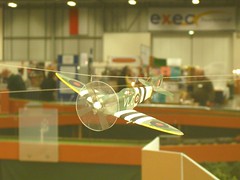 Spotted at Peterborough - this static Spitfire on an otherwise superb layout.
I don't know what it is about static aircraft but they really offend my sensibilities. To be fair this one has the decency to sport a plastic disk to represent a spinning propeller rather than the version supplied by Airfix but it still looks, in my opinion, Wrong.
A similar transgression was carried out by the fantastic Cher Tor 2mm scale model railway, home to a nicely modeled English Electric Lightning barreling down the valley. Except it didn't. It just hung there.
Do this in a real aeroplane and physics takes over. The result is a pile of bent parts on the ground. It's the thing I always worry about when faced with the prospect of getting on board a full sized flying machine.
What's weird is that I have a lot less of a problem with other static items on model railways that should really be moving. Cars posed on the road don't offend my eye too much, although I much prefer to see them parked at the side in positions that are appropriate for non-moving motor vehicles. Buses are traditionally placed on top of a bridge rather than a bus stop.
Worse, people are always immobile. Again, picking suitable poses helps a lot - no more "running men" on platforms please - but we accept that they don't move. Passengers never board trains either. I know we can't yet make them move. Maybe the eye just conveniently ignores the anomaly.
Why is it that we happily accept that the only moving thing on our layouts is the railway ?
But aeroplanes on string belong in bedrooms.
Thursday, October 28, 2010
Whitemetal crank
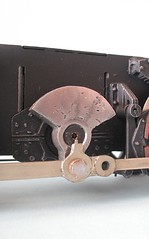 As a test model the Class 14 doesn't benefit from all the parts being finalised. Some are simply test shots that will do to prove the model but wouldn't be good enough for production.
Which is why the drive cranks are made from whitemetal. This might have been considered good enough in the old days but now we expect a bit more quality. Not that there is anything wrong with whitemetal per se but it isn't ideal for this sort of application. For a start when it comes out of the mould it shrinks. The shrinkage varies depending on the thickness of material. Real experts can allow for this but they cost a lot of money and so in the modelling world things can be a bit more hit and miss. In this case the crank throw isn't awfully accurate.
Now I could get away with this by reaming out the hole in the coupling rod a lot. The crank just needs to go around - drive can be supplied by one of the wheels instead. This works in other scales, not pretty but effective. In the larger scales though people might fancy driving the crank just like the real thing, which is one of the reasons milled steel is being investigated for this part.
Anyway, I still had to do something and decided that rather than try painting the crank in steel coloured paint which never looks convincing, I'd polish the whitmetal - it looks very different to the dull alloy you normally see with a little elbow grease. A few minutes with jewellers paper sticks and then some Brasso brought the metal to a shine. A coat of sating varnish and once lightly weathered it should look nice.
Wednesday, October 27, 2010
On approach to Birmingham New Street
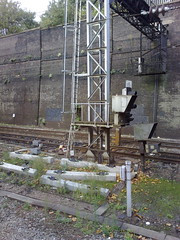 On my way to Brum, the train paused and I snapped this interesting scene through the window.
For an unprepossessing scene, there's quite a lot going on. Look at the walls for example. The main colour is track colour brown but there is green stuff hanging on. A surprising number of plants are sprouting from the mortar work too. The local hooligans have obviously been creeping down and defacing the brickwork and someone has painted over this with black paint to mask it.
Presumably there is a bit of PW work in the offing as those sleepers strewn around are nice and new. They didn't find their way down there by accident.
The ground is ballasted but weeds are sprouting everywhere. In older times weedkiller or the local PW gang would have taken care of these but we are in the post-privatisation era so that sort of thing no longer happens.
Finally, beside the signal post there is a telephone. How often do people model these ? It's only a stick with a box stuck to it painted grey. Just the thing for a spare five minutes at the workbench.
Tuesday, October 26, 2010
Modelzone, Birmingham
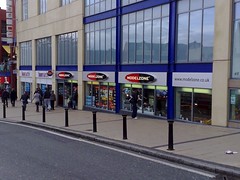 Hooray, the second city of Great Britain now has a proper model shop in its centre !
For many years the only place you stood any chance of picking up modelling supplies was the Ian Allan bookshop. Now while this is a fine establishment, and it's certainly on my list of place to visit whenever I go to Brum, it is a bookshop. Yes they have some RTR stock and a few plastic kits. There is a paint rack and some kits but this isn't their main business.
Now one of the chain shops has finally decided there might be the odd modeller in the middle of the country and opened a store. Previously an independent record store and then empty for a long while, it's not In the fashionable part of town, but at less than 5 minutes walk from the stations it's not exactly out of the way either. If you are less than a hundred feet from a large GAP then you're in the centre. Good pub on the opposite corner of the crossroads too. Games workshop is another minute away. I went to the fashionable part of town after this though and it was horrible. This is much better.
Anyway, you walk in at a higher level than the main shop floor. This gives you a good view of just what is available. Lots of ready to play with radio control stuff. And diecast "collectibles".
Then on your right is a long aisle of plastic kits. Above these over 20 different Bliings boat kits. At the far end Hornby and Bachmann supplies. On the walls some Wills and Parkside kits. In a corner two ranges of paint, tools, wood, metal, plastic and other stuff. A huge variety of glues too - I can get Zap-a-Gap !
I'll be honest, I came out of the shop empty handed. My excuse is that I was supposed to be looking for a new rucksack and had bought a shiny camera in the morning. It was touch and go with the Robbie the Robot kit though. Maybe next time.
Modelzone website
Monday, October 25, 2010
Zap !
Terry asks: Maybe you could throw some light on this.
I have been trying to convert my Bachmann class 04 diesel to DCC. I found instructions on the Bromsgrove Models website complete with pictures. The class 04 has a split-chassis, this being a large metal block which fills most of the loco. The appropriate leads from the decoder were soldered to the tags on the motor which were then insulated from the metal chassis with insulation tape.(The website advises heat-shrink tubing of which I have none). The other two leads from the decoder were attached to the metal chassis, one via a screw and the other via a plastic nut with which the chassis can be screwed together whilst maintaining insulation between the two halves of the chassis. Not the most secure joining of wires to the chassis!
Anyway, I stuck the decoder on the chassis where the cab will be. The decoder is insulated from the chassis with more electrical tape. I placed the chassis on the track, turned on my Bachmann E-Z controller and, amazingly, the loco chassis moved, although it wasn't as smooth as previously. Now here's the problem: I went to pick up the chassis by putting my fingers and thumb either side and 'ZAP!' a severe jolt was sent up my left arm! Any ideas as to why this happened?
Strangely, the decoder continued to work afterwards so that hasn't been fried. I wouldn't have expected 16volts AC to be powerful enough to give me a shock. What do you make of this?
Interesting. I can't comment on the DCC angle other than to say that as I understand it, the power through the track is 16V AC rather than the more conventional DC. A similar thing happens when you wire a Relco or other high frequency track cleaner in.
I know this because I once tried to clean the track on a fiends 009 layout and got the same mighty jolt. Something to do with oxidising my fingertips apparently although I can't claim the know the science behind it.
All I can suggest is learn from your shock and be careful not to bridge the opposing sides of a split chassis. I'm surprised that the chip survived the inadvertent short circuiting.
Can anyone else help ?
Sunday, October 24, 2010
Old fashioned exhibitions
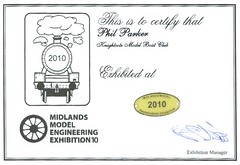 The Model Engineering shows are quaint. As an example, the photos shows a little A5 certificate I received to show that a model I had built had been exhibited last weekend. The yellow badge is a nicely etched brass plaque for me to attach to the model in some way to commemorate it's appearance.
Looking at some of the exhibits, it was clear from the number of badges on the stands that they had been shown off many times. We get a similar thing for model railway layouts, where the layout will get a badge, but not a certificate.
This isn't a big thing as far as I am concerned but the effort require to produce all the bits of paper, each with the exhibitors name on, must be quite considerable. After all this I bet there is someone out there who gets upset because their name has been mis-spelt !
All of this harks back to a gentler age of exhibiting. When gentlemen we pleased to show off the results of their years labouring in the workshop. The owners probably dressed up for their visit to the show and to actually have a model on display really was something to be proud of.
Talking of visiting, these are also the only shows I know of where significant numbers of the visitors have come by coach. Try and organise a trip in our club and all you are met with is incredulity that anyone of the members would want to meet up and travel in a bus to anything. Why do this when they can do it in their own cars ? Of course you don't get the fun of going in a group and discussing Whitworth threads on the way, but then you don't have to wait while the transport makes it's way to several pick-up points, or wait at a motorway services for a small group who insist on having a full meal when everyone else agreed on a toilet break. Personally I like not having to drive but then I've always been a bit old-fashioned !
Saturday, October 23, 2010
Empty modelling board
Sorry about this, two weeks of the "opportunity" to work late has left all my projects in stasis. Dust has settled on the modelling board and I've seriously depleated my stock of stock blog entires.
Come back tomorrow and I'll promise to find something interesting to write about !
Come back tomorrow and I'll promise to find something interesting to write about !
Friday, October 22, 2010
Broken track
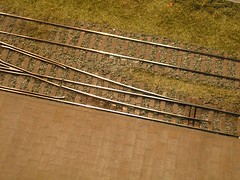 How this happened I don't know. One minute the station end of the crossover was fine, the next the entire switch blade was lying on its side. Every single joint had broken at the same time. I knew the hall was hot but surely not enough to melt solder !
Needless to say I wasn't prepared. For some reason my toolbox was devoid of a roller gauge and flux.And the barrier was groaning with modellers who work in 3mm scale and wanted to see some track repairs. Maybe they were fiddling with the track when I wasn't looking !
Help was at hand. One of the traders was 3SMR who just happened to have a 14.2mm roller gauge. That's not something I'd ever expect to find outside a specialist 3mm event, but this time were were lucky.
They also had some Gaugemaster non-corrosive flux. 12 quid later I was back at the layout heating up the soldering iron.
While warming up I scrapped away as much paint from the sleepers as possible. Then they and the rail side were polished up with a fibre pen. I had my "mucky" pen in the box which normally sees use on etched kits so is well impregnated with flux.
The rail was held back in position with the new gauge and I applied the liquid flux. The stupid solder wouldn't run. I tried again but no good.
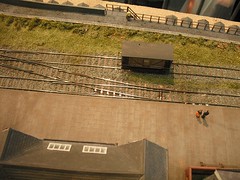 Everything was cleaned up again and I had another fruitless go. As far as I could tell, far from helping, the flux was inhibiting the solder flowing. Everywhere it wasn't the metal would stick. Fortunately I use cored solder so put this straight on the join with the result that it stuck although the joins were a bit bulky. Maybve I'm being hard on the flux but at the time it did seem pretty b****y useless and I certainly wasn't in the mood to deal with apparently defective soldering consumables.
No matter - after a quick wipe with the DOGA track rubber a wagon was shoved back and forth and then a loco. And then another. Amazingly it seems to be in the right place. OK so the alignment at the frog end is a big dog-leggy but things seem to run over it so I'm leaving it well alone. Nothing more than a quick touch of track colour paint touches this repair.
Just to be on the safe side I'm taking some proper flux to the next show.
Thursday, October 21, 2010
Home comforts and helpful advice.
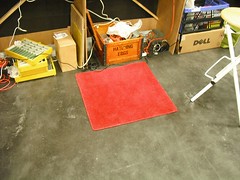 The floor in the Peterborough exhibition hall was hard.
 Very hard.
Hard enough that by the end of a day standing up playing trains our feet were sore. Dear readers, this is the pain we exhibitors go through to bring you, the paying public, high quality model railways. Don't worry about us, we will smile through the paint, troopers that we are...
Anyway, on Sunday there was a brainwave. For some reason in the back of the car was a red mat. A couple of feet square of carpet. And when we operate Flockburgh we don't wander around much.
Result - tootsies that are a lot happier thanks to a little bit of comfort. And that ladies and gentlemen is my advice. Protect yourself from the evil concrete floor with a bit of carpet and you'll still be skipping around at home time.
Wednesday, October 20, 2010
National Festival of Railway Modelling 2010
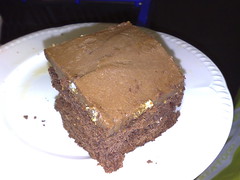 If there is one thing I like to find at a model railway show, it's this: Quality chocolate cake.
Never mind interesting layouts or varied trader stands, give me some good cake and I'll forgive a lot of things. Judging by the number of views cake recives on Flickr, you lot feel the same way.
The good news is that the Peterborough show saw some of the best choccie cake I have ever had the pleasure of devouring. And I am a conneseur of the stuff. Never let it be said that I don't check things out properly either, I tried 3 different slices and each was as good as the others, the top was creamy and the body slightly moist. At £1.50 for a decent lump they were a bargain too. I seriously considered leaving the layout at the hall and just filling the back of the car with cake...
Anyway, back to toy trains. We pitched up at the showground with Flockburgh and found our spot easily enough. Carrying the layout in wasn't too strenuous and everything was soon set up and working. After a quick snoop around we headed off to the Holiday Inn which was our accomodation for the weekend. Booked in we went next door to the Harvester pub for food and discovered that everyone for hundred of miles decend on the place to eat which left a heck of a lot of us from the show hanging around waiting for tables to clear. The mangeress was working hard trying get everyone through as quickly as possible.
Saturday started with a 9:30 opening, although we were far enough back in the hall that the first people leaning on the barrier didn't arrive until after 10. Even then most people were in full on shopping mode rather than looking at the trains. Those few that did just looked grumpy and wouldn't talk to us. Just like proper enthusiasts at every show you go to...
After lunch the crowds were thick enough that some real humans had appeared. Suddenly the show go chatty and the time flew by. The layout behaved itself apart from one switch blade coming off a tiebar. The J50 had developed an urge to leap off the track on one crossover about 1 in 5 times but we just stuck it in the showcase and used something else.
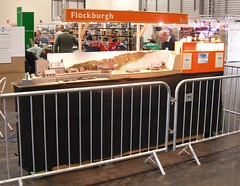 Sunday was even slower to start - the second day is always quieter. Again there was chat and lots of shoppers. We had a few more incidents which I'll recount during the week for your "entertainment".
All in all though it was a good show. All the layouts were good and the trade was pretty impressive too. BRM shows in the past have been a bit RTR box-shifter heavy but there was a lot of specialist traders offering thier wares which made a really well balanced event.
Tuesday, October 19, 2010
How to sell a programme
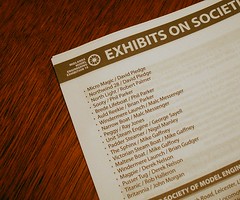 On the way in to the Model Engineer show I was accosted and flogged a programme for the event. Why did I buy it ?
 Simple - Every single exhibit is listed and that means my name is in there twice.
To be honest, I don't get the point of the guide. Why would you want to refer to it after the event ? For what purpose would you need to know the name of the builder of anything ? Surely if they wanted you to know who they were, they'd have put a little card with their details beside the model.
My suspicion is that it works on the local paper model. Open your local rag and there will be lots of photos of children. This is because their parents and grandparents will all go out and buy copies. Therefore the more people in the pictures, the higher the circulation. Genius.
Despite this we still buy the thing. In my case it's pure ego. As regular readers will be aware I'm about as much of an engineer as Ann Widdicombe is a dancer (Note: topical reference. I am so down wid da kidz !) but just for a moment I can pretend.
Oh, and it reminds me that I still haven't made any progress on the Brede Lifeboat which remains a hull in a box rather than a display on a stand. Honestly, I really do mean to finish it one day...
Monday, October 18, 2010
Model Engineering Exhibition 2010
 Only time for a quick visit to the model engineering show this year - I had to head off to a toy train show in the afternoon. Arriving at the car park entrance on Friday morning, it was a bit surprising to find a queue of cars and a very nearly full field. They were hastily cropping grass to make more space, and this at 10:30 in the morning !
All of this meant that the average age of the visitors was pretty high but then I don't ever remember seeing a hull of strapping 20-somethings. Still, there were a heck of a lot of them which is pretty impressive for anything taking place during the working week.
The show looked very similar to every other ME show - lots of metal things, made with great care and attention, very few of which I could ever hope to emulate. At least my steam boat "Sooty" was on display as part of the KMBC stand.. We'd decided to go for a steam boat theme this years stand to try and impress the visitors. Model boats are really proper model engineering - not enough metal - but we get to go anyway and they are a periphery interest for many people.
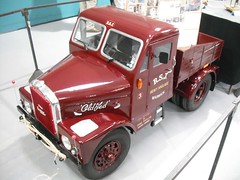 I'm always astounded that anyone actually starts some of the models. I mean who wakes up on the morning and says to themselves, "I'm going to start a half scale model of a lorry today" ? I can understand wanting a model, but even a quarter scale version is a pretty hefty object. You'll need a well equipped workshop with some lifting gear at the very least. Once you've finished, taking the results of your labours anywhere means heavyweight transport, a car trailer or big van. Should you be the owner of a Nissan Micra, you'll be loading it in the mack of your model !
Among the random thoughts that occurred to me was that every hole in a set of locomotive frames has to be understood, marked and drilled accurately. I find it hard work just to bomp the back of a bit of nickel silver to make a lump to represent a rivet - when your metal is 2mm+ thick steel, you must need some serious patience to put up with the slow progress that will result.
A few more photos on Flickr
Sunday, October 17, 2010
How high should a model railway be ?
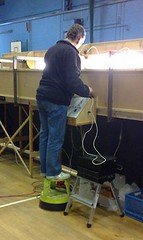 This is a question that regularly rears its head in the model railway press. Usually it's brought up by someone whining that children can't see the toy trains. They fail to understand that "the children" should be sweeping chimneys, working in t'mill or down t'pit and not cluttering up model railway exhibitions and getting in the way of the grown ups.
Anyway, what about us behind the barrier ? Not all railway modellers have the good sense to be strapping 6-footers. Some seem to have not been paying attention when it came to growing up. Or maybe they just stood to close to the steam hammer at t'steelworks.
Mind you, this guy must have very effective couplings and locomotives that never stall. It's not like he can wander along and give them a poke is it ?
Saturday, October 16, 2010
Lighting Loco and other lamps
 From the Constructional Suggestions page of the April 1935 Model Railway Constructor
Luminous paint, though rather expensive to purchase, is ideal for "illuminating" the otherwise lifeless loco and coach lamps. The tiniest spot placed on the bull-eye of the lamp is very effective in the dark. It is, of course, only effective for white lights.
-------------------------
Obviously the paint won't be as radioactive as it was in the 30's, and the "light" will be a bit green, but this sounds like a promising idea. Has anyone tried it ?
Friday, October 15, 2010
Flockburgh at Peterborough this weekend
Traffic permitting, Flockburgh will be appearing at the National Festival of Railway Modelling at Peterborough.
More details on the exhibition website
If you are around, please say hello !
More details on the exhibition website
If you are around, please say hello !
Not a clonk
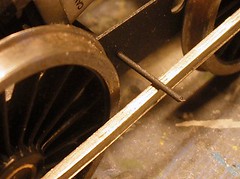 There's not much to say about this photo - you can probably work out why the chassis won't work.
- I'm working long hours and don't have time for much modelling so this fills some space and means I still haven't missed a daily post for over 2 years !
- Several chassis that have been built on my workbench have had tight spots that I traced to the rods just clipping the brake supporting wires. They aren't always this obvious !
Thursday, October 14, 2010
Sideplay reduction
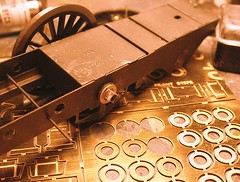 The C15 locomotive is supposed to go around some sharpish curves but with a short driven wheelbase I've decided that as little side-to-side movement of the big wheels is a good thing.
The kit designer obviously thought of us hard pressed modellers and so filled empty space on the etch with lots of washers. So many I think that I could have reduced the sideplay even if he'd included an N gauge chassis for those O gauge wheels !
Two thicknesses are supplied, full and half etch. On the driven wheels I've used a pair of full and a single half-etch washer. The others just get a pair of full depth ones so we get a fraction of a millimetre of play.
My only complaint is that the middle hole has ended up just a smidge too small. If you remember this then reaming them out a couple of turns while they are still on the sheet is easy. Forget and they are a real bugger to hold. Or you can do what I did and decide there are plenty of spares, I'll throw those two away and do some more !
Wednesday, October 13, 2010
Now that's an idea for a fascia
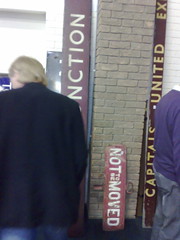 Mooching around the always interesting Great Central Railwayana auction I spotted this cracking sign. Were there not a person in front of it you'd be able to see that the text reads "Dock Junction". At 10 foot long and 12 inches deep this would be just the thing for a follow up to Melbridge Dock as it would match the length of layouts I like to build.
Mind you, there are a few little issues. The cost which I'm sure was many hundreds of pounds. And the Belingo can't accommodate a 10ft long board without punching a hole in the windscreen. And it would take a pretty beefy structure to support the thing over the layout.
Note: The board is described in the catalogue as A BR(M) enamel signal box nameboard, Dock Junction, (f/f). The box was outside ST Pancras just south of Camden Road Tunnels. 10" X 12', some discoloration.
Tuesday, October 12, 2010
Dark green paint
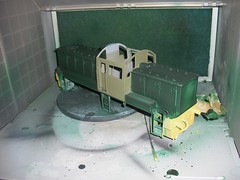 Yet again I have been surprised by the size of this G1 Class 14. To do all the dark bits has taken an entire pot of paint.
 A sensible person would have realised this and mixed it up in a glass jar attached to the airbrush. I didn't and had to keep stopping to refill the paint cup. By the end of the process my fingers were pretty green.
Note: the paint isn't really that thin in certain parts. It's just that the spraybooth is in the garage and it's a bit dark in there so I had to use the flash on the camera.
The masking looks to have done its job. I remember reading somewhere that you should remove it as quickly as possible once painting has finished otherwise the colour dries hard and tears when the tape is being removed. Also that paint stays liquid and getting the tape off allows it to relax and not form ridges along the lines of colour.
Monday, October 11, 2010
Masking up
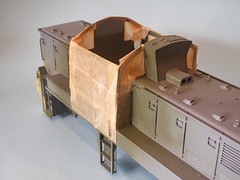 Having been a bit busy during the week, I was running out of stuff for the blog. Looking at the projects available I decided that spraying the Class 14 would be the best bet for a Sunday morning. With the cab in light green and buffer beam in yellow, I just had to do a bit of masking and then fire up the airbrush full of dark green to make a big step forward.
I don't like masking stuff. It never seems to work very well for me as regular readers will have spotted. The best tape I've found is a sort of paper/fibre brown stuff which no longer seems to be for sale. I bought my stocks from a now defunct model shop and added to the supply a couple of years later on discovering how good it was - but I can't remember where I did this. Any suggestions would be appreciated.
Anyway, the painted bits were carefully covered and great efforts have been made to get a good sharp edge. I hope it works.
Sunday, October 10, 2010
Trying to avoid saying the same old thing
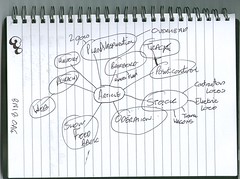 With two articles in the model railway press it seems opportune to say something about the process of writing.
Of the two, the easiest piece to put together was the Hornby Magazine one. Every month I build something, photograph the work as I do it and then write some words. The order of pictures is pretty much decided by the order of construction. I can't cover painting the walls of huts before erecting same or even pulling the bits out of the bag.
Most of my text is in the form of captions and those are simply descriptions/explanations of whatever is going on in the photo. I make a point of highlighting any potential pitfalls I'm aware of and how to bodge your way out of them. There is also a few hundred words introducing the piece but even there it's pretty logical. My biggest challenge is to try and avoid being too boring. Apparently this is quite difficult and finding people who can do it is harder than you'd think.
The ModelRail article was a tougher. Layout descriptions tend to all sound the same. For many years editors have learnt to dread the phrases "Baseboards were built using the usual methods" and "Wiring is a bit of a mystery to me". Sadly it's really easy to produce pretty much exactly the same article as everyone else has done - with only a couple of thousand words to cover many months of work you end up missing out all the detail which reduces things to "I had an idea made some baseboards put some track down wired it up did some buildings and some green stuff then ran trains on it". Interesting articles (and even blog posts) tend to be about details. These are also a heck of a lot more useful to the reader who actually wants to know how to do something.
Nowadays you'll notice that many descriptions, especially in the more finescale publications, tell you very little about how anything was made and instead focus on the builders inspiration. Apparently we need to understand the motivation behind a model railway more than the dirty hands end of the hobby. I suppose this makes a change from the dreadful fake histories that we used to have imposed on us many years ago.
In an effort to get around the problem I used a method of planning learnt at a course I was sent on by a job several employers ago. They were supposed to be teaching me how to write reports, in fact I learned loads about producing articles (Insert joke about readers wondering if I was paying attention at this point). The trick is to produce a spider diagram starting with a rough title, then spread out to the main topics and finally break these down into sub-sections. Once happy, it's a good idea to do this at work as you can leave it and come back to it occasionally when your mind wanders from employment to something interesting, then take all the stuff in bubbles and try to write a list in some sort of sensible order. Then all that is required is to fill in the bits between the lines and voila - a beautifully written article.
Incidentally, what IS the usual method of building baseboards ?
Saturday, October 09, 2010
Huts in Hornby Magazine
 A real departure for Parkers Guide in this months Hornby Magazine - I'm eshewing rolling stock for model buildings.
Hornby Magazine forum for this issue
Friday, October 08, 2010
Hellingly Hospital Railway in Model Rail
Back in May, Chris Nevard came over and took some photos of my model of the Hellingly Hospital Railway. The results can be seen in issue 149 of the magazine which should be in the shops when you read this (well, if you are reading it in October 2010 anyway - if not you'll need a back number). I've even made the front cover !
All this reminded me that I really should do something about the Hospital Railway Website. It's now been brought up to date with a few new pictures and a completely new (OK, copied from the Flockburgh site) design.
All this reminded me that I really should do something about the Hospital Railway Website. It's now been brought up to date with a few new pictures and a completely new (OK, copied from the Flockburgh site) design.
Thursday, October 07, 2010
Yellow paint and near disaster
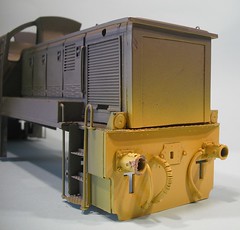 I thought I'd better do a proper job on this locomotive. Rather than use Humbrol yellow on the ends, I treated myself to some Precision Paints yellow. This appears to be slightly greener than the "wrong" version to my eye. I'm going to assume it's correct though or hundred of finescale nerds are going to have the vapours...
Anyway, the yellow was reasonably thick but still had the usual useless covering properties of the colour. I know this and yet still forgot to put on a white undercoat (on the loco, if you are looking for fashion advice, go somewhere else). Still, after around half a bottle I'd done the buffer beams and nose doors. I know this is a big loco but that still seems a lot to me. I reckon Halfords for paint next time !
Anyway, the model was carefully propped up securely (I thought) on boxes on the bench to dry properly. In the morning I checked on it and was more than a little surprised to see an empty bench. Worse, the model itself was lying on the floor.
Panicking a little I picked it up and examined the damage:
- A squashed buffer housing
- Two handrail supports no longer attached to the handrail
- Some scuffs on the nose
- A lifting ring missing (later found on the bench)
I desperately tried to work out of the model had twisted. All the other damage was easy to fix but a bent loco would be bad news. You can't easily restore this sort of thing as the metal stretches.
Fortunately, the square seemed to show that all was acceptably OK. The model had bounced off the bench and on to some carpet on the floor that I have to keep my delicate tootsies warm. Had it hit the concrete floor things would have been a lot worse.
Wednesday, October 06, 2010
Flexifield grass material
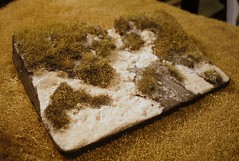 Spotted at Banbury show - this rather fantastic new scenic product.
What we have is a flexible substrate on to which is electrostatically deposited some fibres to represent grass. Three lengths are available - Standard Grass, wheatfield and course. This is then sprayed with colour (better than in the photo which I took in dodgy light at the stand), cut into 19 inch square chunks and sold to modellers and wargamers for 15 quid a pop. The later market were the original targets as they tend to produce marvelous armies and then fight games on squares of carpet.
The system has the advantage that the results are very strong. Unlike normal glued on nylon grass you can really abuse this stuff. I bought an off cut and have screwed it up without anything falling off. The little diorama is made up on a plaster base with "grass" stuck on. Sand is fine stuff from Games Workshop.
On the stand there were other demos. It seems that hammering the material produces some nice flattened areas for gateways but even a minidrill can produce some interesting effects. You can chop it with scissors for slivers or edges and PVA will be fine to glue it down.
Some interesting effects were shown using Plasticote spray paint to give "bobbles" on the bristles. This looks like undergrowth and is particularly effective on the longer versions which could pass for bracken and gorse.
I like the look of this stuff. Needless to say I don't have a grassy model on the go at present but when I do, I think I'll give it a go. The price might seem high to those used to buying 2 quid bags of flock but we compared the sheet on sale to one reasonably rural layout and I reckon a couple would do most of the greenery that the owner had required. Add to this the durability of the product, important for exhibition layouts or anywhere you will get idiots leaning on your baseboard, and it looks pretty good.
More on the website: http://www.hedgerowscenics.co.uk/ (Under construction at time of writing)
Tuesday, October 05, 2010
In service modifications
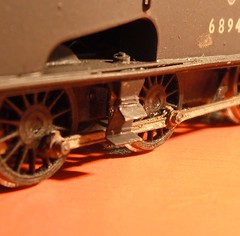 At Banbury show, the J50 locomotive was giving us grief. I've always had "fun & games" with compensated chassis based models which in my experience only run happily when pointing in a particular direction*, but this time it was different. Every time the loco reached the station the model lumped off the track.
After running it back and forth a bit, the problem became apparent, the side steps were just clipping the side. As the model reached the end of the platform, it was jacked up on one side thanks to the ramp, until it stopped or fell off. Or both.
So, despite all the effort I put in to build a model like this, I'm not adverse to doing horrid in-service modifications. Initially the steps were bent out of the way which seemed to help. A more permanent fix was to trip a fraction of a millimetre from the end of the treads with some scissors. OK, so it's still not engineering but it did the job.
Of course if I was clever I would have wondered how an etched brass model railway engine can put on weight. It's not like we feed them or anything after all, yet the model had previously been through the platform road without incident, and the platform hasn't moved either.
In fact when I looked properly, the loco body was on the chassis wonky. Looking down the layout this was obvious. Undoing a retaining bolt and tweaking gave me plenty of clearance. As long as the model was pointing in the correct direction anyway.
*This is probably 'cos I'm rubbish at flexi-chassis building.
Monday, October 04, 2010
Banrail 2010
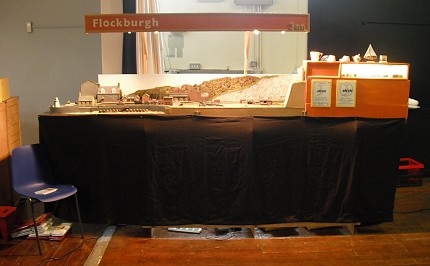
I hadn't planned to go to Banbury with a layout this year. However a freind had had to drop out for personal reasons, and I was planning to go as a punter, and Flockburgh needed to be set up for testing before our trip to Folkestone. Well, there was a nice flat space going begging and it was just as easy to set up there rather than disturbing the living room. This way we get the diesel paid for an free entry too !
A quick phone call to the organiser on Friday evening led to us being on the road at half eight on Sunday morning with a car full of train set.
Setting up we were pleased to be on the stage in the main hall. It's a nice dark spot so the model looks at its best. Getting up there is through a side door and past a broken piano so may be not everyone finds their way, but some certainly did.
Local shows can be a bit of a mixed bag and this was no different. The crowd wasn't huge but we spent most of the day chatting to people. In fact the gassbagging was better than many a larger event - maybe the enthusiasts were replaced by humans for the day !
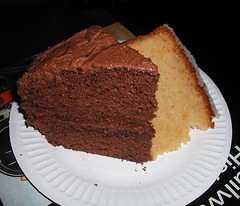 On the cake front (I know that's what you all care about) I can report that the chocolate cake came in suitably large slices but ran out by lunchtime. It wasn't perhaps as moist as I like (the lemon drizzle was suffered in the same way) but perfectly acceptable and much better than a recent House of Fraiser muffin I encountered.
Trade wise there was a lot of RTR and second hand. But there were gems too. I picked up the Wiro kit for example and have some very interesting scenic stuff to show as well in a few days.
At the end of the day we'd well and truly tested the layout. Apart from a dry joint and one modification to a locomotive, everything went very well. We had a pleasant day and are now ready for the new exhibition season.
Sunday, October 03, 2010
Monochrome modelling
 |
| Brief Encounter by Tony Reeves |
Not the colours black and white, but painted them as though you were looking at a black and white photograph. After all, the theory ran, most of us see the prototype in black and white because there weren't that many colour films around at the time. For some of us, steam railways are only something to be experienced in monochrome as we don't remember the real thing.
But would this work in 3D ? I've been pondering this and then tripped over this rather nice vignette from the film Brief Encounter. The modeller is Tony Reeves and you can see more of his work on his website.
Does it work ? I'm not sure. Maybe when we look at something like this, even if the only colours used are shades of grey, we still see the thing in colour. Any light spill will tend, unless it is specially balanced, to add colour to the scene. Put a desk lamp beside it for example, and everything is bathed in yellow. Not much but enough to warm up the scene. Stick the same thing under a fluorescent lamp and an imperceptible amount of green enters the picture.
Despite this, I think there is some mileage in the idea. Obviously it helps to have Tony's skill with the paintbrush, but I reckon a model harking back to the black and white days could be produced. You'd need to be pretty careful with the display but at least viewers wouldn't be able to argue that you'd used the wrong shade of GWR green !
Actually choosing the shades of grey would be a whole lot harder than you'd expect. The eye is used to seeing movies and photographs and will cry foul if you don't get the tonal work just right. It's likely to be harder than producing the same scene in colour. At the very least some serious study of photographs will be in order and not for the subjects either.
Tony Reeves website
Saturday, October 02, 2010
Defeated by the M25
If you are going to Folkestone show and are particularly observant you'll notice that we aren't there and neither is Flockburgh. Sorry about this. I wanted to be there. I'd taken the day off work, a move not exactly popular since I'm supposed to be bailing out a project that has gone pretty badly wrong. The layout was loaded in the car and we set off.
After a couple of hours the mileometer read 100. Most of these had been done on the M40. The M25 was being a car park. I was in the middle of 6 lanes and the temperature gauge on our Berlingo was going skyward. Rain was hammering down and the only good thing about the lack of progress was that it saved us from the blinding spray that had dogged the early part of the trip.
Looking at the time I concluded that if we carried on, the trip was going to take at least as long again and judging by the reports on the radio, considerably longer. More of a concern was that we were several lanes of stationary traffic from a hard shoulder. Probably no more than 30 feet but it might as well be 30 light years if you have a poorly car.
In the end the sensible decision had to be taken. Neither of us wanted to let the exhibition down but things seemed to be against us so we headed off at the next junction and babied the engine back home. 230 miles, about 6 gallons of diesel, nearly 8 hours of travelling later we got back to where we had started.
Why do we do this ?
I suppose there is a bit of ego involved. My last few weeks have involved lots of whinging people and some nightmare deadlines. A weekend of people saying nice things about something I'm proud of would have been just what I needed.
There's also the fun of being part of an event. Wandering around behind the barrier line is fun. You feel special. There are bits of the show like the exhibitors tea facilities open to you that normal mortals cannot hope to enter. A bit like the VIP area in certain nightclubs I suppose but with less champagne and a complete absence of scantily clad nubile women. :-(
And at the end of the day it's a model railway show. The sort of thing I have paid to go to. There will be other peoples layouts to look at and traders to charm the cash out of the wallet. Being out of my normal area, there are probably all sorts of goodies I'm missing out on.
Of course sitting on a motorway staring at the same car in front for hours on end has provoked some soul searching. Do we actually want or need to do shows any more ? Maybe I'm just not thinking straight because of the week I've had but at the moment I'm not sure. Mostly it's the driving - I don't enjoy it like other people. Not for me boasts about taking 8 hours to travel between a couple of motorway junctions. That is my idea of hell.
Maybe we need to reign in the distances travelled. The number of events has been cut down in recent years and perhaps we need to accept a smaller radius to accept. If you are the sort of person who will travel from one end of the country to another, good luck to you. I can see us being a bit more exclusive in future. If that means disappointing another exhibition manager, only the second time we've had to do this, then that can only be a good thing.
In the meantime, visit the Folkestone show website. Better still, visit the show.
 |
| I wish the motorway had looked like this when we were on it. |
Looking at the time I concluded that if we carried on, the trip was going to take at least as long again and judging by the reports on the radio, considerably longer. More of a concern was that we were several lanes of stationary traffic from a hard shoulder. Probably no more than 30 feet but it might as well be 30 light years if you have a poorly car.
In the end the sensible decision had to be taken. Neither of us wanted to let the exhibition down but things seemed to be against us so we headed off at the next junction and babied the engine back home. 230 miles, about 6 gallons of diesel, nearly 8 hours of travelling later we got back to where we had started.
Why do we do this ?
I suppose there is a bit of ego involved. My last few weeks have involved lots of whinging people and some nightmare deadlines. A weekend of people saying nice things about something I'm proud of would have been just what I needed.
There's also the fun of being part of an event. Wandering around behind the barrier line is fun. You feel special. There are bits of the show like the exhibitors tea facilities open to you that normal mortals cannot hope to enter. A bit like the VIP area in certain nightclubs I suppose but with less champagne and a complete absence of scantily clad nubile women. :-(
And at the end of the day it's a model railway show. The sort of thing I have paid to go to. There will be other peoples layouts to look at and traders to charm the cash out of the wallet. Being out of my normal area, there are probably all sorts of goodies I'm missing out on.
Of course sitting on a motorway staring at the same car in front for hours on end has provoked some soul searching. Do we actually want or need to do shows any more ? Maybe I'm just not thinking straight because of the week I've had but at the moment I'm not sure. Mostly it's the driving - I don't enjoy it like other people. Not for me boasts about taking 8 hours to travel between a couple of motorway junctions. That is my idea of hell.
Maybe we need to reign in the distances travelled. The number of events has been cut down in recent years and perhaps we need to accept a smaller radius to accept. If you are the sort of person who will travel from one end of the country to another, good luck to you. I can see us being a bit more exclusive in future. If that means disappointing another exhibition manager, only the second time we've had to do this, then that can only be a good thing.
In the meantime, visit the Folkestone show website. Better still, visit the show.
Friday, October 01, 2010
Borrow your layout ?
A gentleman from the paying public side of the barrier at a railway exhibition told me this recently.
He had received an enquiry about taking his layout to a show. The event was being held at a prep school in the Cotswolds and apparently takes place every year. On the 'phone to the organiser, he was being instructed when and how he was to arrive:
But we haven't even agreed terms yet.
Terms ?
Yes, how much I'll be charging as expenses.
Expenses ? We have to pay you to come ?
No, not pay me. But I have to hire a van to transport the model. Then there is petrol for the van. You don't actually pay me but I expect the expenses of bringing the model over to be covered like any other show. After all it will cost me money to bring the layout.
Oh. We weren't expecting that. We are a charity you know.
Fair enough. I don't expect to make any money doing this, it's my hobby. It is normal for the exhibition organsier to cover my out-of pocket expenses though.
Oh, err, I'll have to talk to the comittee and get back to you.
Anyway, a few days past and there was another call.
We've managed to sort out the payment problem
So you are happy to pay the expenses
Well, no. What we are going to do is come to your house on the Friday. You can show us how to use the railway and then we will transport it to the school in the minibus and bring it back to you after the show. That way we don't have to spend anything.
Needless to say, the reaction to this was not exactly positive !
"I wonder how many bits I would have got it back in ?" was the gentleman's question as he told us this story.
Subscribe to:
Comments (Atom)
