
This month I tick off an item on my model making "bucket list" as I dabble in S scale.This half way house between OO and O has appealed to me since I first became aware of it in a 1983 issue of Scale Trains. Being a scale for scratchbuilders also touches my interest in working away from the dominance of RTR models.
The timing of this project couldn't have been better. The society had just developed a kit based on a plastic moulded body when I started researching for my "Wagon kit in every scale" series. I'd assumed that there would be much effort pulling together items from several manufacturers, but no. Thanks to a special effort for the 75th Anniversary of the scale, it was all available in one box. An very nice it is too. The experience has tempted me to want to do more.
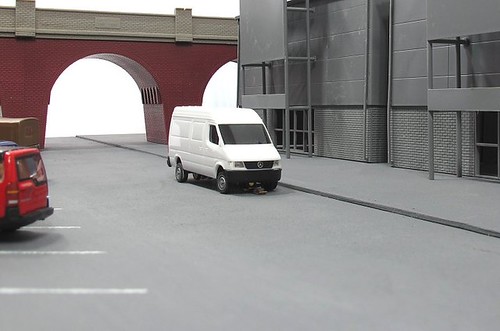
Moving things on layouts are always popular. Of course we normally mean trains, but Faller's road system has been with us for years now and yet I've never had a go with it. This changes with the first part of my build of a modern shopping centre.
The van shown in the picture circles the diorama surprisingly realistically at a sensible speed. With a little weathering, you'd not be able to tell it from a diecast, except when it starts to move.

When I was a child, a J94 could be found in a local park acting as a climbing frame. It's long gone now, but I've built a miniature version using a old Airfix kit.
Elsewhere, I'm helping you chose a craft knife and on the DVD there is a tribute to John Webb with a show of his fantastic EM gauge locomotives.There's also a little video I made in the Extra's section on a 009 loco shown in the main mag. I had to do a bit of chassis fettling for Ben and decided a video was easier than a long e-mail. I hadn't expected it to go public but the team thought it would be entertaining. Next time I'll be more showbiz!
5 comments:
A trip to WH Smiths beckons :)
Looking forward to getting hold of a copy of the magazine this month, as I designed the 009 kit you helped Ben assemble. Even I'll admit that it's tiny size does make it a little fiddly to build but hopefully you both found it worth the perseverance?
It's certainly fiddly. The problem we found is that the drive has very little "grunt" and so all the bearings need to be reamed out for friction free running. Geared chassis can usually be built a little tight and run in but not this one. Ben got a bit stuck here, but mostly because he doesn't own any reamers. I do, so I took it to bits and re-assembled. Now a runner.
Having said that, the body worked well and the finished model looks great and runs OK. I still think a touch of running in will help.
It's a bit of a masterpiece though. SUCH a tiny loco and no visible motor. Amazing.
Interesting, I'd assumed it would be the pickups that caused the most issue (I know they are the bit I found most awkward). The holes in the chassis were all reamed out to 1.55mm for 1.5mm shafts which is about what you'll get on a normal brass bearing, and I do check that a shaft runs smoothly through each pair of holes. Having said that as you say the motor is rather lacking in power so any stiffness at all is a real issue. If there had been space I'd have fitted ball bearings for the layshaft but I just couldn't figure out a way to do that and keep the motor invisible.
Any idea what size you made the holes or did you just use a tapered reamer to open them slightly. If opening them out a touch more helps then I might invest in another reamer (the straight chucking reamers to make nice straight bearings are exceedingly expensive compared with cheap tapered ones) for the next batch.
Not sure I'd refer to it as a "masterpiece" of design but I am rather proud of it. It's the first loco I've ever designed (only the the third loco I've ever finished, in any scale), and it was runner up in the 2015 009 society AGM modelling competition.
If you, or anyone else, wants to see more about how the design evolved and eventually became a kit then there are lots of details on my blog. The story starts with this post and then appears on and off until I'd built a second prototype and was awarded the runner up prize (see this post). Unfortunately I never gave all the posts a sensible label so it's not easy to find them all without simply working your way forward through the blog (something I should probably go back fix).
The pickups are entertaining - Ben had trimmed the wire already so I had to replace it with phospher bronze strip suitably thinned down (deadline looming, couldn't get thin enough wire). They do act as brakes and when there's not much power to spare...
Reaming was with actually with slightly tapered broaches. Just a whisker off each bearing did the job.
Post a Comment