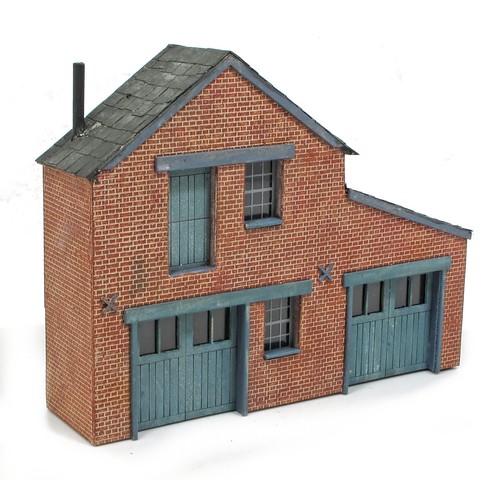
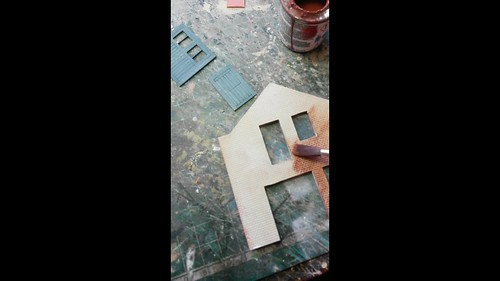
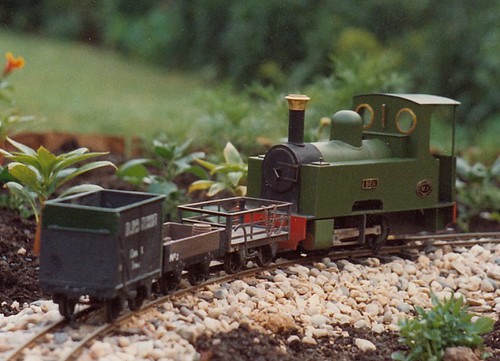
I've been putting off tiling the Harpers Yard roof. Being too stingy to spring for laser-cut roof tiles, I planned to cut them out of paper and apply each one individually. Let's face it, there are so few it should be a quick job.
Only when I started did I remember that it's a dull job cutting the tiles out (7 by 5mm, a bit big but easy to measure) of paper. Worse, even when drawing lines on the roof, I never stick them on as neatly as I would like, not helped by the tiles all being a very slightly different size from each other.
At least this is a backscene building. Anything further forward will get Wills or pre-cut tiles...
A daily updated blog typed by someone with painty hands, oil under his fingernails and the smell of solder in his nostrils who likes making all sort of models and miniatures. And fixing things.
Tuesday, July 31, 2018
Topping off Harpers Yard
Monday, July 30, 2018
"Weathered" doors
Dave asks, "How did you get the effect on the doors of your Petitie Properties brick building? The weathering effect is subtle but effective."
Thanks Dave, but there is nothing clever, I just painted the card board they are made from with a weak wash of Humbrol 144. Being a porus material, they soak it up but don't give a perfect finish. Nothing else was required.
You get the same sort of result when painting plaster buildings. It's important to wait for the paint to dry as it will look very different from the freshly painted appearance. This model from Ten Commandments faded in the same way, and I was really pleased with it.
Sunday, July 29, 2018
Isle of Man 1993

In preparation for our trip to Man, I've been going through some of the photos taken 25 years ago on my first visit. Some of them are a bit misty thanks to the truly terrible weather we experienced on that trip, but modern photo editing software can brighten things up a bit.
It's amazing quite how much has changed. You can't see this view now:

As the Aquadrome has long gone. There's been quite a lot of development at the Groudle Glen Railway too. Lhen Coan station now sports ticket offices, more sheds and a gift shop.

On the steam railway, the carriage sheds have gone, replaced by a Tesco. The signal box has moved too, if I took this photo now, it would be on my foot!

Saturday, July 28, 2018
Saturday Film Club: VW Action 1990
I've been thinking about my Beetle recently. It really is time I sorted out the fleet a bit. With a bit of luck my camper will soon find a new owner if he can sell his own bug for a deposit* - which leaves me with just a broken Volkswagen.
I bought the car in 1991 so would have headed to my first VW show later in the same year. That show was VW Action, then held at Stoneleigh park. As I went in, I marveled at all the people carrying large bits of car out. "I'll never do that" I thought. a few years later, my dad and I carried out some brand new doors for the restoration...
Fashions change a lot. There are less "cal-lookers" now. Less beetles in general as people prefer more reliable water-cooled cars. You don't see many Baja bugs either, but there will be one in my dream garage as I think they look brill. But as I can't (quite) justify building a Tamiya version either, that dream will have to wait.
*unless I win the lottery first and can build a garage, in which case I'm keeping it!
Friday, July 27, 2018
A locomotive kit from Butterley
Nipping over to the Midland Railway at Butterley for the garden railway open day, I had a great time. When this happens, I like to come away with a souvenir as a contribution towards the coffers and by the end all they had out of me was the price of a delicious ham salad bap.
Nothing in the gift shop appealed, apart from an APT riding certificate that people have been asked to make a "reasonable" offer for over the last 2 years. That and some Triang Big-big coaches that the contents of my rucksack told me I didn't need.
On the counter though, were some bags of Lego. "Home made" kits for a steam loco. Complete with printed instructions that I assume come from an official website that presumably also allows you to produce the kit and buy the bits. All for a fiver and a nifty gift idea. Not a bad price compared to official kits too.
Assembly of the loco kit takes a few minutes. I reckon the design is by a proper AFOL as the boiler and smokebox is a bit unusual in format. I though it very clever. A young Phil would have been over the moon with it.
Thursday, July 26, 2018
Someone DOES read what I write!
At Tracks to the Tranches last weekend, I found what might be the most exciting layout I'll see this year. It's certainly the most satisfying.
A simple 009 model, it might look familiar to regular readers. It's a copy of my model "Owen's Bridge".
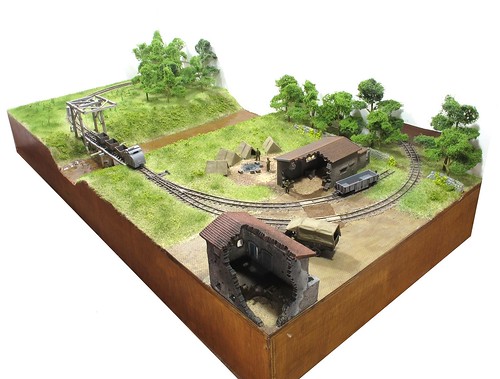
A simple 009 model, it might look familiar to regular readers. It's a copy of my model "Owen's Bridge".

Yes, someone has read my articles and followed them!
OK, this might sounds a bit sad, but I'm really, really chuffed by this. So much time goes into producing models for publication and yet there is very little feedback. I assume I'm doing OK, but it can be difficult to tell.
This is different. Not only has someone looked at my model and thought it was good enough to build themselves, they've done a creditable job too.
The hardest part is the bridge itself, based on a WW1 plan that couldn't appear in BRM as it had already been in NG&I. Nevertheless, the builder has copied it faithfully. The buildings are the very same ones I employed, although with a slightly more severe weathering job. Even the tents are the same - and I like the creamier colour used, possibly more accurate than my efforts.
You might notice that I don't identify the builder and that's because I don't know who it is. The current owner bought the model from eBay earlier this year. No more details have (rightly) been divulged.
If the builder is reading this though - well done. And thanks for making me feel really proud. Getting people modelling is something I care passionately about and it looks like I'm getting there. Yes, looking at the model is a little weird, but in a good way.
Wednesday, July 25, 2018
That's what I call Warehouse Wednesday
This is a post that I've been meaning to write for a while, but recent news has prompted me to get on with it.
It's said that you should be able to work out the period a model railway is set without seeing any trains on the layout.
What better way to do this for layouts set from 1983 onwards than including the relevant "That's What I Call Music" advert somewhere on the station?
With 3 releases a year, it would be possible to date a model pretty accurately. Music/train geeks (there are quite a lot of these) would be able to spot if you get it right too and nod silently in appreciation. Woe betide you if you get it wrong though...
Tuesday, July 24, 2018
Improving a Hornby water tower
I've always been a bit of a fan of upgrading old models. We are constantly presented with new, shiny and detailed things which can overshadow some perfectly serviceable older models.
When people complain that railway modelling is too expensive, what they usually mean is "It's too expensive for me to buy everything ready to plonk straight on my layout".
Hornby's back catalogue contains a wealth of products that looked good for their time but probably wouldn't past muster today. Some are still in production and others are easy to pick up as second hand bargains.
One such is the R8003 water tower. It's a nice shape and the tank is pretty good, but the printed brick isn't and those printed stone corners are a bit tacky.
But, with a few hours work and some laser-cut bits from scalemodelscenery.co.uk, I upgraded it to a state where the building could fit on most layouts. If you are handy with a knife and some cardboard, you could even do it for free, although those windows would be a challenge!
I decided to produce two models, one in brick and one in stone. Needless to say, efforts to find a pair of towers within the deadline failed so I had to cheat and detail a side and end in one finish and the opposing pair in the other. By removing the tank top and turning it around, the photos didn't give anything away.
Hornby Collectors Club magazine is available to members of the club.
Monday, July 23, 2018
Putting brick Plastikard on the walls
James asked "A question though. When I scratch build I sort of work backwards from the brickwork, to avoid odd edges and corners where the bricks seem only an inch wide. How do you go about making up the brick panels to add to a kit like this? Do you only do it after you've built the structure?"
I suspect the answer is "I cheat" or more likely, "I don't do it properly". Working on the basis that there is always a wall nearest the viewer, this one gets the bricks stuck on first with a slight overlap around the edge.
The others are then covered with the plastic butting up to the overlap and given a good wash of solvent (the plastic is stuck to the MDF with solvent-free UHU, never use a glue with solvent) to ensure a nice tight join.
Finally, I trim the overlap back to the edge. If I were proper finecale, I'd then cut the mortar horizontal lines before painting, but I reckon that most of the time I can get away without doing this. Maybe if the building is right at the front, but the work needs to be neat or it will look worse than the 1mm thick blank spot. Personally, I think a bit of dirt will help and perhaps a drainpipe to distract the eye.
Another option (I've not tried this) would be to leave loads of overlap, scribe along the edge and then band the plastic back at 90 degrees so it wraps around the model. A wash of solvent to soften it might be a good idea and you'd need to be careful not to scribe all the way though which will be tricky.
Sunday, July 22, 2018
Small locos at Tracks to the Trenches
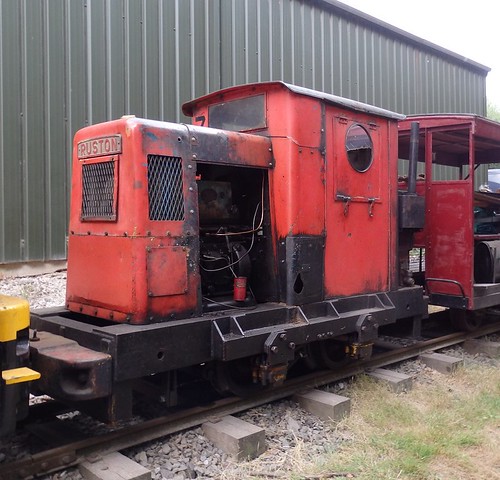
I have a tough job. A couple of weeks ago, I had to visit Tracks To The Trenches. We were doing a little filming for BRM.
But between takes, I managed to take a lot of photos of the fantastic collection of small, narrow gauge locomotives. Such a brilliant selection, and one I particularly liked. You'll have to guess which one though...
Saturday, July 21, 2018
Saturday Film Club: Isle of Man by railcar
Next week, I should be on the Isle of Man, so in tribute, here's a couple of minutes travelling in the ex-Donegal railcars out of Douglas station. Not a view likely to be repeated in the near future as restoration isn't on the cards. Apparently they simply aren't big enough, or fast enough for modern loadings. In fact there is a good chance they will be on their way back to Ireland...
Friday, July 20, 2018
Talyllyn perfection in Garden Rail
Sometimes my job allows me to meet some special people. The main feature in this month's Garden Rail is a loco built by Simon Atkinson. Before contacting him via social media, I didn't know him, but I knew his work. Specifically some of the spaceships that appeared in Blake's 7 back in the 1970s. Now he produces amazing graphic art and teaches model making.
You might think that us normal bodgers can't learn much from a professional. He has access to tools we don't and will probably use exotic materials.
Tools - yes, but then laser-cutting is becoming available and more to the point, it's not essential. You can cut sheets of plastic yourself, it just takes longer. And the rest of the work, well I can see how you could repeat much of this at home.
Elsewhere in the magazine we have some technology in the form of RC couplers and even running a layout completely automatically. There's quite a bit of rolling stock construction too as an antidote to that main course of scratchbuilding.
Oh, and a competition to win a very impressive controller.
Garden Rail 288.
Thursday, July 19, 2018
Bunglow, dock and a layout refurb in BRM
August is the scenic special issue of BRM and in the past this has seen me build a detailed diorama in 7mm scale (O gauge). This year is no exception, with the subject being a prefab bungalow.
Despite being built to a deadline, I always enjoy doing these. So far I've managed to keep them train-free with a vegetable garden and nissen hut being the previous stars. There's plenty of detail and this time, digital reader can even download some printable tea towels to add to their own washing line! (I just tided up the file I made for my efforts).
This isn't cake box size however, but I've built one of those too:
Using models from the Graham Farish range, we have a slice of a dockyard scene. This could easily be expanded to layout length by simply repeating the walls. In fact I have some left over if I fancy a bit more 2mm scale (N gauge) waterfront.
On the DVD, Howard and I take on the challenge of reviving a second hand layout. The model is basically very good, but the scenery needed going over. Two days work and the results are, in my opinion, excellent. It's a very different project from normal, but one I think people will find useful. You don't need to buy in a layout, you could just look at your own with fresh eyes and use some of our techniques.
Digi readers will also find me looking at the Heljan 07 and trying a Golden Valley Hobbies Janus loco.
August 2018 BRM.
Wednesday, July 18, 2018
Warehouse Wednesday: Tin hut
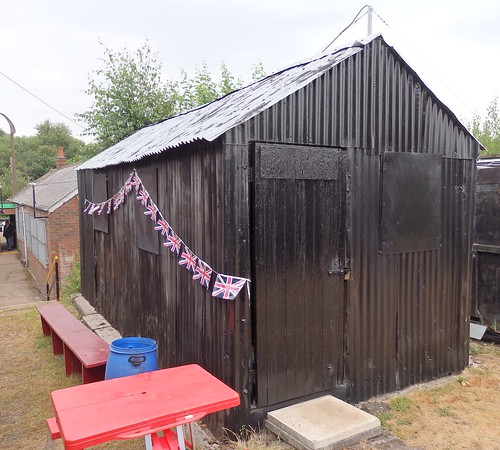
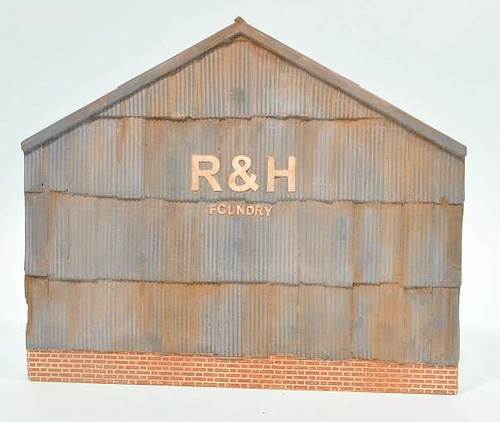
This week, I return to my love of corrugated iron with this cracking hut spotted at the Moseley Railway Trust.
A simple enough building, the doors and windows are boarded up and painted to match the walls, as so many scruffy huts seemed to be. If I have a comment, it's that the paint is good modern stuff, not the thick black pitch from days of yore. Not that this matters for modelling purposes.
I suppose it's a bit clean too, miniature versions would benefit from a coat of rust working its way up from the ground.
Tuesday, July 17, 2018
The perfect tool to dry-brush brickwork
I've decided that the Harper's Yard brickwork should be painted rather than pencil-crayoned. I'll probably use some of the Robert's mortar stuff too, but the key is - no brickpaper. I want all the finishes to match up and for me that means taking control.
Dry-brushing bricks is a bit of a fiddle, that's why I evolved the crayon method. It's very easy to get brick colour in the mortar lines. I've found a brush that makes the job easier though, a Humbrol Coloro Number 8.
These are the cheaper end of the Humbrol brush range and if I'm honest, not my favourites. They lose their pointed shape almost immediately and are very stiff. But, it turns out this makes them perfect for brick-brushing. See the exciting video below:
Shot on my 'phone, you can see how easy the job it. Paint is picked up on the brush, worked off again on the corner of the modelling board and then brushed over the bricks. A shallow angle to the surface is essential, but once you get the hang of it, pretty easy and with hardly any paint where I didn't want it.
I'll go over the surface with brick and a couple of browns to add variation, but the results look pretty good so far. And I'm keeping all those Coloro's safe now.
Monday, July 16, 2018
Back to the yard
Regular readers might remember that last month I started building a Petite Properties "Harper's Yard" kit. I got as far as sticking some Plastikard on the front, and then it all went quiet.
I had carried out a bit more work - the openings were all lined with plastic and I'd got as far as trying the windows. At this point I realsied that losing 1mm off each side made the pre-printed glazing look odd. On the PP stand, the model is covered with their brickpaper and the problem doesn't occur.
So, the lining was carefully removed despite all the effort I'd gone to to put it in neatly. Then the plastic started to peel from the front. Then it tore. Then I'm embarrassed to say, I had a bit of a meltdown and screwed the whole kit up and lobbed it in the bin.
But, I still like the model and with the bit more care, I think I can do a good job. So I ordered a replacement kit which has arrived and I'm back to making progress.
This time, the inside edges of the openings will just be painted. Some need to be a painted wood colour, others brick. While the lack of mortar lines might annoy me a little, once on a larger model, no-one is going to notice. At least I'm not going to tell them.
So, I'm going to learn from my mistakes. A slightly different tack to the build and no more modelling while stressed.
Sunday, July 15, 2018
Smallspace 2018
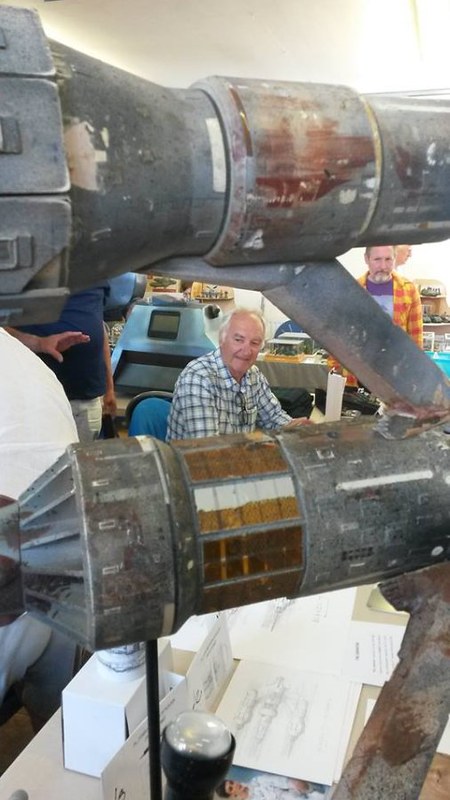
It's 40 years since the superb BBC sci-fi drama Blakes 7 debuted on our TV screens and a very young Phil sat and watched some dystopian telly, missing the sub-plot completely and just enjoying the special effects and spaceships. It was grittier than Dr Who but I didn't care.
Smallspace this year celebrated this with the original Liberator (in a VERY bad way) and an appearance by Michael Keating, who played Vila Restal in the series along with the designer and model makers from the show. A shuffle of displays allowed us to enjoy "Vila's Vault" with a collection of props and costumes, bot real and reproduction. You can tell the later, they are better made and more detailed!

Along side this there were examples of more sic-fi modelmaking, a bit of steampunk and the most amazingly detailed bakers shop where every item was hand made from clay and I wanted to tuck in!
Saturday, July 14, 2018
Saturday film club: Accucraft open day 2018
A couple of weeks ago, I headed over to Wales for Accucraft UK's open day.
Once the bargains had gone (I missed out on IOM coaches for a tenner - perfect for a carriage cottage) people spent the time runing trains on the test track - and I filmed some of them. There's a good variety of scales from G to 7/8th and some really interesting stock.
Friday, July 13, 2018
A working paddle boat for under 4 quid?
Loitering on a model boat forum, I spot a topic with a title along the lines of "This would be a good boat for the kids". Inside is a link to an eBay shop and a paddle boat costing £3.75. It looks like a bit of fun and so I hit the "Buy it now" link and then add a load of waterproof switches from the same shop for good measure.
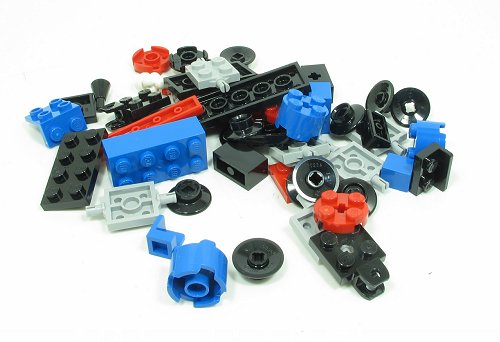
A week or so later a package arrives in a jiffy bag from China. The switches are brilliant, and impossible to find in the UK (I've looked a lot) but the kit is contained in a plastic bag. Opening this up and I have the bits above on my bench.
The instructions show that you basically use double sided tape to stick the foam shape to the plywood board, attach the double-ended motor with cable ties, wrap some wires around terminals and push the plastic paddles on the shafts.
I broke out the soldering iron for the wiring, twisting the wires didn't work for me and the paddles took a bit of brute force to fit on the motor, but the whole job was done in under 20 minutes.
On a pool, the little model potters around beautifully. Care is needed to make sure the paddles don't catch on the foam, but when working well, it's quite fast and utterly charming.
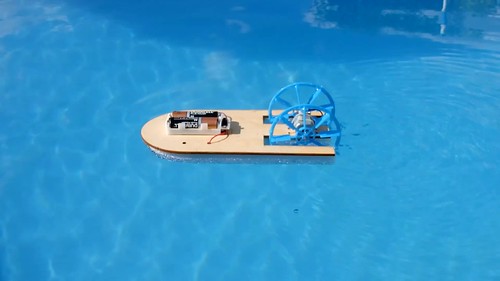
I'm already wondering what I can do to make more of this kit. For the price, it's a bit of fun and yes, would be good for kids.
If you speak Chinese, the company (Algga Science) website is here.
Thursday, July 12, 2018
Looking through the square windows
I've been working on a few model building projects recently and if there is one thing I will do my best to avoid, it's being able to see things inside the model you shouldn't be able to. Mainly this is being able to look through a building when there should be walls in the way, but can also refer to seeing the construction of the model.
Now, you can equip a model with a fully fitted interior. That's what the guys at Pendon would do, but I don't have the luxury of that much time and to be honest, for most models, it would be overkill. Fine if you like sticking things on the layout that no-one sees, but that's not for me most of the time.
My solution is to make up little boxes for the back of the windows. Inside is painted dark grey, not black, and then stuck in place to blank out the view. There needs, in my opinion, to be a little separation between the "glass" and the blackness or this looks odd too.
The job doesn't take long, but adds immensely to the look of a model.
Wednesday, July 11, 2018
Warehouse Wednesday: Falmouth stone warehouse
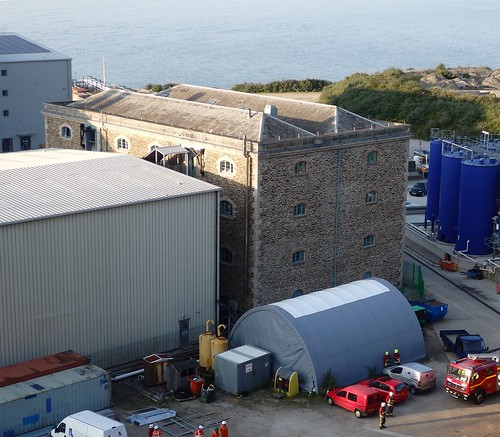
Spotted by my parents while on holiday, this rubble walled warehouse is a Grade II listed building - the full details of which can be found here.
As well as being very attractive, the shot is useful because the viewing gallery it's taken from is high enough to give a view of the roof. In fact, it's not a long way from the view we get of models like this on railway layouts.
Tuesday, July 10, 2018
MiG Oilbrusher
New, to me anyway, is this handy painting goodie from MiG. To anyone who has owned a car and carried out any work on it, it looks like a touch-up brush, and to all intents and purposes, this is what it is.
Inside the 7cm by 1.5cm tube, is 10ml of paint and in the cap is a long bristled brush. Unscrew the lid and you have a ready-loaded brush for tiny jobs.
I'm assuming the paint is an enamel because of the name - it certainly sticks well to plastic and metal.
I chose a dark brown (dark mud) that looked pretty close to Humbrol Track Colour. It's a very useful shade to have at shows for touching up scrapes or soldered joints. Most of the time a colour match isn't essential, some dirt will do the job.
Not the cheapest way to paint, mine cost £3.50, I can really see these being a useful extra tool for many modellers. It's certainly quicker than mixing a tinlet and then washing the brush afterwards. An essential addition for most exhibition toolboxes I'd suggest.
See the full range on the MiG website.
Monday, July 09, 2018
Robert's Brick Mortar Formula
One of my Canadian souvenirs, is this little bottle of "Roberts Brick Mortar Formula". It's a magic substance that claims to be able to fill the mortar lines in brickwork, something I've never had any success with. The stuff isn't cheap, but I thought I'd give it a go as I've not seen this product for sale in the UK.
My first test was some 4mm scale Slaters Brick Plastikard. I painted it brick colour using Humbrol 70 and left to dry overnight.
In the morning, I painted a little of the formula on the bricks and wiped it around a little. This is left to dry and then wiped again to reveal the faces. The effect is very impressive. A little polishing with a paper towel and the mortar is clearly defined.
I've no idea what is in this stuff but it feels like a very fine gritty powder suspended, if you shake it well enough, in a liquid. There's definitely some texture in there.
The colour is a bit bright so I experimented with a wash of thinned cream enamel (left) and Agrax inks on the right. They look OK, but a little work is still required.
The second text was on some laser cut MDF, again in 4mm scale. This stuff can be tough to paint as the bricks are so sharp my normal pencil crayon technique doesn't work. Again, I painted the bricks with enamel and once dry, used the formula. It worked a treat, possibly too well as you can see the brick joints aren't vertical.
1oz of the stuff covers 5 square feet, so a good chunk of anyone's layout. I'd certainly use this again in the future, even at the price.
Robert's brick mortar website
Sunday, July 08, 2018
KMBC Open Day 2018
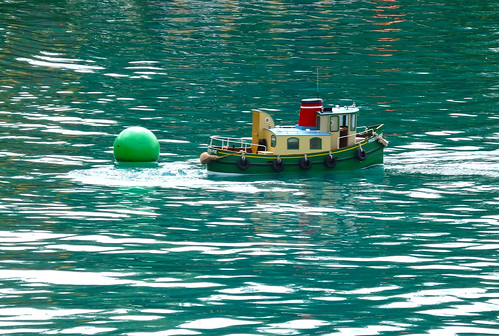
A bright sunny day in early summer spent beside our model boating lake? What could be better?
The KMBC open day enjoyed perfect weather and this brought out a wide variety of model boats, not just from the members, but from visitors too.
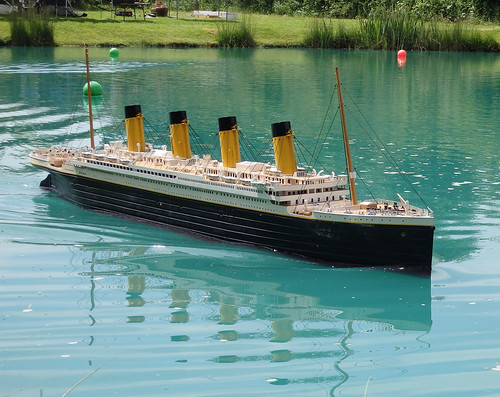
One of the highlights had to be this massive model of Titanic. With no icebergs to worry about, the processed around the pond in a stately fashion. To be honest, at nearly 6ft long, she is a little bit for our water, but just managed to make the turns smoothly.
I spent the day operating the Bring'n'Buy stall, so the chances to take photos were a bit limited, but at least I managed to get a sail with Pigeon Pie - well you have to take your best boat don't you?
Saturday, July 07, 2018
Saturday Film Club: Behind the scenes with Thomas
Some interesting footage here showing the filming of the pre-CGI series of Thomas the Tank Engine.
I'm no expert, but there appears to be footage from filming one of the films - a stupid dies with a grab on the top dangles from a viaduct at one point. Nevertheless, it's fascinating to see the scale of many of the sets required for the Gauge 1 and larger models to operate in.
Some nice 80s shirts going on too as well as vintage radio control gear.
Friday, July 06, 2018
LGB Track cleaning loco
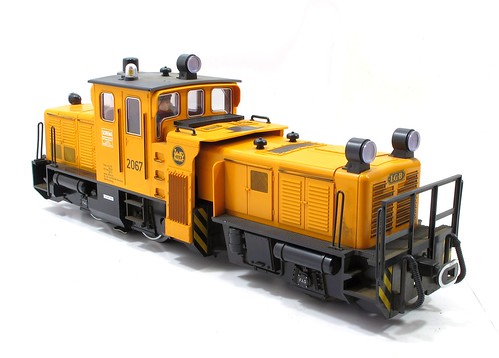
Summer is here and it's time to get the garden railway working properly. Maintenance over the winter means that one end of the circuit needs no work and most of the rest just a bit of a clean.
The better news is that cleaning duties can now be farmed out to a new addition to the fleet - an LGB track cleaning loco.
Picked up at a bargain price from an advert on Facebook, the machine is simple but effective. The back end 0-4-0 is a normal LGB loco. The "nose" houses a pair of motorised wheels that spin in the opposite direction of travel when the loco moved forward. The speed of the cleaning wheels, which have a mildly abrasive surface, is controlled by a knob on the cab roof.
It takes a beefy controller to power the loco. I'm using a Helmsman Model Rail unit designed for garden railways and offering 0-20V DC at 4.5amps. My suspicion is that the little 0.5a LGB controller isn't going to be man enough for the job. Sadly, the Helmsman unit is a prize for a forthcoming Garden Rail competition. I may have to buy my own.
The track is noticeably shinier after a few passes by the loco. How well it will deal with the dirt after months of inaction I'm not sure, but with parts of the railway difficult to access, this is a worthwhile purchase.
Did I mention the lights on top flash? They do - fantastic!
Thursday, July 05, 2018
Ben in 009
I'm not much of a loco buyer, prefering to build them myself. Normally, I'll have a crack at anything, but there was one kit I looked at many times and decided that it was beyond my abilities. Backwoods Miniatures Barclay Contractors loco in 009 (Link here, scroll down).
Building a high quality but fiddly chassis always put me off, even though I thought the loco looked delightful in the adverts. At the very least I would be required to quarter some tiny wheels and I'm no good at that in OO. Alongside this, I simply didn't have a real need for the model and there were (still are) plenty of kits in the "to do" pile.The kit isn't available any more and so I thought no more about it.
Fast forward a few years and I'm at the Oxford 009 show and on the society stand I spot a built up Barclay. After half a day of pondering, I ask to see if the model runs. It does, although a very slight tweak to the quartering might be required. Price £70 - a tenner less than the kit used to be sold for.
Looking at the chassis, it's not nearly as scary as I thought.The design looks not unlike some RTR 009 locos. The wheels would need to be set up, but turning the working bits over without a motor would be simple enough for fiddling.
All seems to work, but I fear the motor isn't long for this world. When running it heats up and a full speed blast for a couple of feet seems white smoke wafting off. Since nothing seems tight, I conclude that there is something bad going on in the windings. With Mashima motors being unavailable, I have to hope I have something suitable stashed away, or can one day replace it with another unit. The chassis design makes that look a distinct possibility, so I'm not worried.
Going back to the days when I looked longingly at the Backwoods adverts, they appealed so much I scratchbuilt my own version in 16mm scale, 32mm gauge. I was always rather poud of "Ben", so much so, I've ordered a set of Narrow Planet plates for the 009 version with the same name.
Wednesday, July 04, 2018
Warehouse Wednesday: Lean to workshop
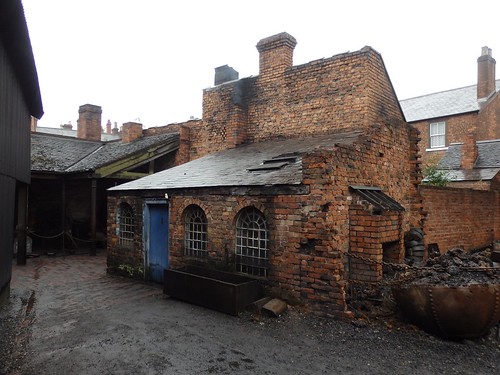
Visiting the Black Country Museum a few weeks ago, in the rain, I couldn't resist the properly mucky areas of industry. Yes the shops are pretty, but this is an industrial area and so that's the proper history.
This little lean-to workshop is (assuming the museum have got it right) the sort of useful modelling prototype I like. A single story, it's what you make when you've got some bits of a kit left over and don't want to throw them away.
Great for giving a model the "higgledy-piggledy" look that these sort of places developed as buildings were thrown up to do a job, not to look pretty.
Added detail - the ground was compacted dirty stone rather than tarmac. Not very flat, a skim of plaster mixed with black powder paint would do the job. Then add puddles.
Tuesday, July 03, 2018
The Branch Line by RPA Edwards
Publisher: Burke Publishing, London
ISBN: 0-222-99298-0
Hardback
64 Pages
£1.20 (24/-)
Published 1970
A book aimed at schools as part of Environmental Studies (who was doing this in 1970?), The Branch Line tells the entire history of a fictional line running to the town of Rockton in Rileshire.
The story opens in the 1840s when it is found that the old methods of transport, sailing barges on the River Rill, couldn't keep pace with the demand for the local stone. Along comes the railway and gradually barge trade dies out. On the other hand, farmers find they can transport their animals to market quicker. Passenger services were introduced and this allowed locals to travel, even as far as London!
After WW1, motor vehicles appear but they aren't as good as trains. WW2 though sees more improvements and the quarry company buys a fleet of lorries. Demand for stone changes too, crushed material being more use than large blocks.
The line started to lose money and was threatened with the Beeching axe. This would affect many people especially small market-gardners who sent good via train to the stall holders of Rilchester market rather than wholesalers. This extra profit was essential and would be lost if the railway closed.
Public meetings are held and petitions signed. A public inquiry takes place, but the outcome was still closure on the basis that the local bus company would run services for everyone and not just commuters. They don't of course, because of competition between two companies in one area.
The council investigates buying and running the line, but people aren't willing to pay higher rates to make this happen, so the railway closes.
With the line gone, the trackbed reverts to nature to the delight of foxes and schoolchildren doing nature studies. A local mushroom grower takes over the tunnel.
Lack of transport forces some of the characters from the story to move from houses in the country to flats on an estate. Rockton's town centre starts to die off as people with cars now decide to travel to larger nearby towns.
All this is illustrated with attractive paintings by Gareth Floyd.
The Branch Line is, to my mind, a brilliant book. It succinctly tells the story of a local railway from birth to death and uses a few character along the way to explain how the changes matter to people. Many of the events are recognisable, such as the comment that if all the people who had come to see the last train had travelled regularly on the railway, it wouldn't have closed.
As an overview of the social history of railways, there's very little better, at least as an introduction to the subject. It's also well written and genuinely enjoyable read.
Monday, July 02, 2018
Pictures from Pendon
Last week, I paid a visit to Pendon to see the opening of the Bristol Line. While there, I took advantage of the protective glass around the Vale scene to snap a few photos.
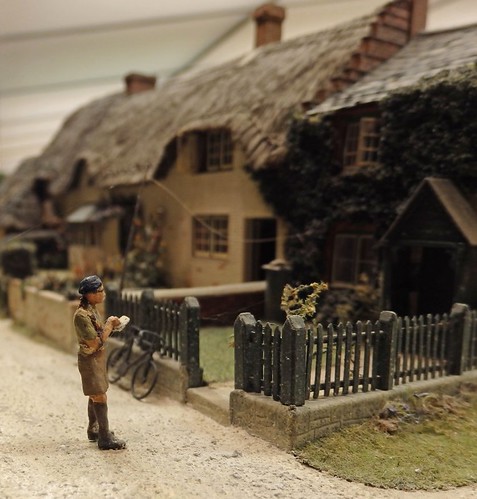
Roye England at work recording details of a cottage for the model.
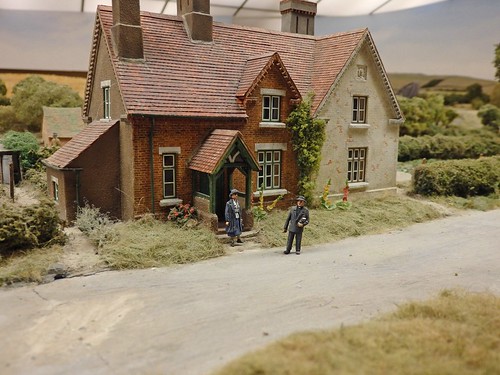
The vicar calls.
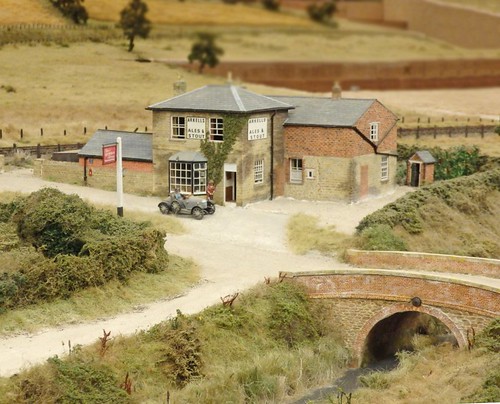
The Carpenters Arms.
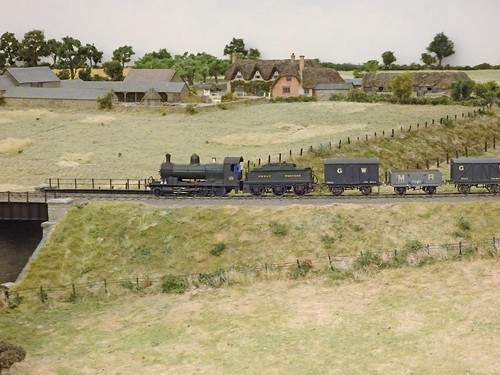
Some Great Western chuffer obscuring a nice photo of a farm.
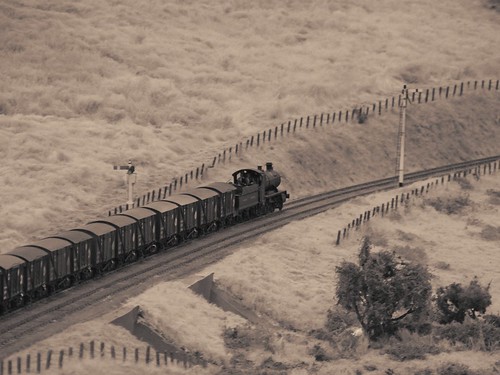
Banana vans in a scene where the white balance was so to cock that sepia toning the scene was the only solution.
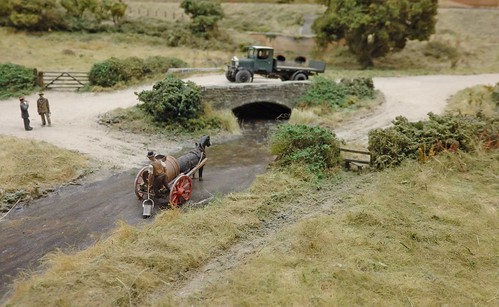
Collecting water from a stream.
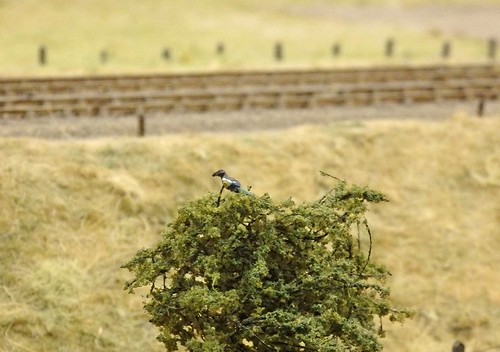
A bird (Magpie?) in a tree.

Roye England at work recording details of a cottage for the model.

The vicar calls.

The Carpenters Arms.

Some Great Western chuffer obscuring a nice photo of a farm.

Banana vans in a scene where the white balance was so to cock that sepia toning the scene was the only solution.

Collecting water from a stream.

A bird (Magpie?) in a tree.
All the photos are taken handheld with an Olympus SZ-17 compact camera. No stacking, a touch of white balance correction but nothing else.
Subscribe to:
Comments (Atom)

