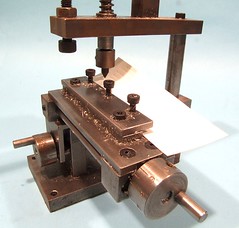
 Here's how you get nice straight lines of rivets - use all the bits of the press. That means the cross-slide which has only been out of the box a couple of times since I bought the thing. I mean I always planned to do some scratchbuilding but never quite got around to it. And I know this tool is a bit over engineered for punching out the half etched marks in kits, but then it is loverly to use for the job.
Anyway, the plastic was clamped in the slide, exposing the one failing of this machine - namely the clamping system only works with quite wide bits of material. If you want a thin strip you'll have to rivet it first and then cut it back. Either that or follow Pete Kazers example and make a clamp that fits in the clamp to hold your metal a lot closer to the press and anvil.
The slide advances 1mm for every turn of the graduated handle so that's the spacing I used. You couldn't get any closer really in plastic without the deformed areas overlapping. One you get the hang of it the jobs pretty quick too. I haven't counted how many rivets I made but there will be well over the hundred and every one in place to withing 0.05mm. I don't get any more accurate than that !
Of course you might be wondering why I'm bothering. Slaters do some riveted plasticard and I could just use that. Well, I do have some but (IMHO) it's not as good as my home brewed version. The embossing tool Slaters use is quite small so the result is lots of squares of bumps that don't line up. If I want I could make a strip as long as the bit of plastic.
My bumps look better than theirs anyway. So there.
No comments:
Post a Comment