Saturday, July 31, 2010

Short shed door

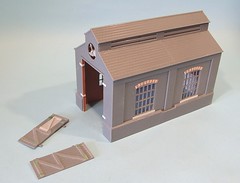
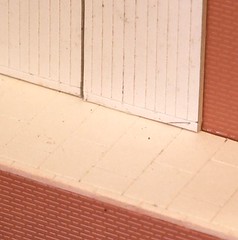
Short shed doorFile this one under, "What the hell were Airfix thinking ?"

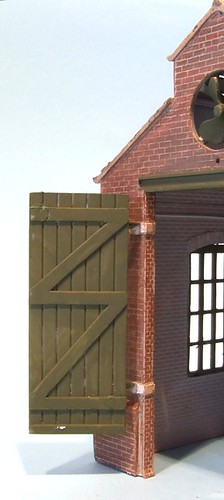
The shed doors are desperately short. Not a little short but the sort of half mast normally only seen on old men who feel the need to reveal their socks by having a great big gap between shoe top and trouser hem.

The other door has a person sized door in it and I wonder quite who would be able to leap three feet and make use of it. Presumably someone who can't simply roll under the closed shed doors.

Anyway, faced with the opportunity to make some new doors, not a particularly difficult job I suppose, I have decided to leave them off entirely. In BR days maintenance, especially on an out of the way shed, wasn't brilliant so I expect that once the hinges packed up the doors would have been dumped behind the shed to get them out of the way. That's before being burned in a brazier to keep shed staff warm in the winter !

Friday, July 30, 2010

Loco inspection pit

Inspection pitHow deep is a locomotive inspection pit ? I dunno, but a quick enquiry on the DOGA e-mail board and after a little chat, received this from Colin:

I toddled down to Hither Green depot and sweet talked the guy in charge. I measured the pit to be 3' 6" deep.bottom to rail head.

So there we have it, in 4mm scale 14mm.

My pit has to be inserted from the bottom of the board so I cut some brick plastic to the right size and then made shorter Daler board walls and floor to cover the bits not in the woodwork.

Steps at the end were scratchbuilt from plasticard. They are a bit rough but hidden in the shed no one will notice. Step making is fiddly but easier here. I cut the sides and stuck them to the pit sides then joined them with strips of thin (0.5mm I think) plasticard and lots of solvent to weld the whole lot together.

And I did remember to check the construction fitted in the hole. It did with only a little extra filing...

Thursday, July 29, 2010

Engine shed part 4 - Roof and detailing

Engine shed nearly thereHow is this roof supposed to fit ?

I appreciate that I've deviated from the kit instructions quite a lot by cladding the interior with brickwork and sometimes this has got in the way of the location aids provided, but I hadn't expected to have to reduce the height of the sloping parts of the back wall by a couple of mm to get the roof sitting flat. In hindsight I think the idea was that the tiles overlap the front and are flush with the edge at the back, but that would just look stupid to me so I hacked away at the wall to fix it. The results look pretty nice to my eye.

To get a nice fit I worked from the top down. The ridge is a nice strong moulding and once it's glued in place, fitting the vents is easy. On their own they aren't awfully strong but once attached to the top, this braces them up nicely. Finally the main tile panels go in and the roof is done.

Lower down, the windows have gained some chad toppings, why this wasn't part of the original moulding I don't know, and a cill appears at the bottom. Around the door the working hinges have been replaced and faux metal straps fitted over the holes. With my a little more thought, I might have decided to leave them alone as a little thinning might have been enough. On the real thing this is pretty chunky metalwork as it needs to be to support those heavy doors.

Finally, the huge moulding marks on the doors have been skimmed with filler and then give an good sanding.

Wednesday, July 28, 2010

Engine shed part 3 - Windows

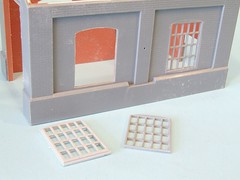
Window workIn an ideal model railway world, people would produce replacement parts for popular kits. That would mean I'd have been able to buy some nicely moulded replacement windows for the engine shed. Sadly, despite buying several different makes, none of them fit the holes in the side of the building.

Airfix supply some reasonable mouldings which are intended to fit from the inside. There is a flange around the edge to stop them falling out. If you look inside it's horrid but then when this kit was designed, that was the realm of super detail so no one bothered. I am fitting an interior so this at least had to be removed.

Test fitting showed I was going to have to thin the moulding down by nearly 2mm before it fitted in the hole flush with the inside and slightly inset from the outside. A 6 inch course file did most of the work with finishing off on a sanding block fitted with fine paper. This process makes a surprising amount of mess, but it's worth the effort I think.

Tuesday, July 27, 2010

Engine shed part 2

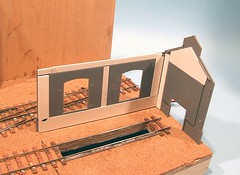
Engine shed part 2Some days you have to wonder about old model makers. I mean with the prototype sheds still standing and available to look at, how did the Airfix model makers get the bricks wrong ?

For those who don't understand brickwork, the way the things are laid is called the "bond" - you can read more about it on Wikipedia here. Most railway buildings use what is called "Flemish Bond" where you see a mix of stretchers and headers (the sides and ends of the brick). The Airfix shed uses stretcher bond, a form more commonly seen on modern cavity wall buildings and never as far as know seen on engine sheds.

Worse the bricks are too big. They are probably suitable for S scale but not 4mm. Still, I can't change them now even if I could be bothered. Just goes to show though that not everything was better in the old days.

Anyway, I pondered this problem and decided to ignore it. Inside the shed will be 4mm scale Slaters Flemish bond bricks. &mm ones were considered but are just too big to match the outside. OK so they won't match the outside but I can't be bothered to worry about this and doubt that many people will notice anyway. Except you lot and that's only because I told you.

Monday, July 26, 2010

Engine shed part 1

Engine shed part 1Very early on in this project I decided that I wanted to use an Airfix engine shed. Not converted to something weird but as an honest to goodness engine shed. Just to show it could be done.

My inspiration came from Martyn Welsh's layout "Hursley" which appeared years ago in issue 40 of Model Railway Journal. This might sound daft, to compare an Airfix building with one of the finest model railways ever made but there is logic to this. You see the preview photos showed the inside of the shed had been fitted out. It also provided nice clear shots to give me an idea of the changes to be wrought on the basic kit to bring it up to scratch.

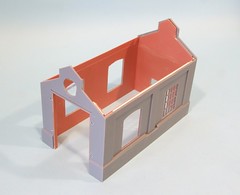
Anyway, one of the most important things I had to do is line the walls with bricks. Airfix, bless 'em didn't bother with interior detail. Not that they couldn't you understand, they just didn't in those days. So the first think I had to do is build up the inside of the walls with plasticard. 2mm did the deeper bits with some 1mm around the windows. I've not been to careful here as the work will be covered in the next stage. Just hope I don't regret that in the long term.

Sunday, July 25, 2010

Municipal Green

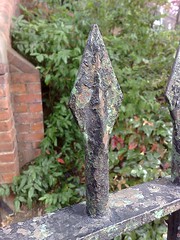
Municipal GreenI have a theory about colour. It is that should you not know what to paint some model metalwork, use green.

Not any green but that particular shade of green favoured by engineering companies and municipal organisations. Sort of Brunswick green but perhaps a little lighter. Bit like British Racing green too. Did GB just buy a big pot of it in the 1940's a decide to use it all up I wonder ?

In support of this theory I present exhibit A, a peeling iron railing I spotted locally. Under the layers of modern black paint, what do we see ? Municipal Green.

I'm not sure how you'd replicate this paint finish on a model. At a guess I'd suggest you would paint the spear rust colour. Sprinkle some salt on this, paint it green. Add more salt. Then paint it black. Once dry, wash the salt off. If anyone tries this, please let me know !

Saturday, July 24, 2010

International Large Model Aircraft Rally - RAF Cosford

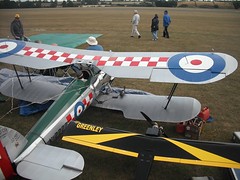
Half scale biplaneA bit of a departure for me this one. It's all my Dad's fault. Once upon a time he was a youth interested in aircraft. Time in the Observer Corps and lots of illicit visits to airports, the sort of thing you'd get arrested for now and nearly did then, followed and explains why his photos are of things with wings and propellers rather than wheels and buffers.

Anyway, we'd both seen photos of larger model aircraft and really fancied seeing the real thing. When I say large I should explain that in this case size really does matter. You need a 6ft span before you don't get laughed out of this club. Get to 20 feet and people really take you seriously.

Cosford is easily reached from Leamington thanks to a stunningly fitted out Wrexham and Shropshire train. When we arrived it was a bit drizzly but even so there were a couple of jets buzzing around visible in the distance. And when I say jets, I don't mean planes that look like jets with windmills stuck on the front. I mean model jets with real jet engines inside them for power. They could shift too and sounded fantastic too. Well, fantastic is your idea of quality sound is a small jet engine on full chat screaming around a few feet up in the air.
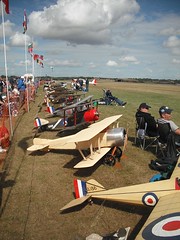
Dawn patrolEntry was 9 quid, which probably seems pricey to model railway enthusiasts but I doubt hiring an airfield is cheap and you have to do and awful lot of health & safety work to put on this sort of event so paying for the miles of orange fencing has to be covered somehow.

We walked across to the event and were surprised just how bit it was. At the time the jets had been replaced by a couple of bi-planes complete with Cindy doll wing walkers. These waved both their arms and  legs. It was quite funny to see them waving to the crowd as the planes taxied back to the flight line. They made smoke (the planes not the Cindy's) too just like a proper aerobatic team. From the ground ti was difficult to tell these were models.

At a guess there were at least a couple of thousand people visiting, possibly double that. Someone later told me that there were over 200 planes on display too. I can well believe this and it's a whole lot more than the dozen or so we expected. Trade was pretty comprehensive too, at least 40 tents were on hand to provide shelter during the showers and relieve people of their money.

The day improved quickly and the 4 ice creams vans on hand did good business. For me the highlight was the Victor and Vulcan bombers in the air. While appreciating the grace and shape of the Vulcan, the Victor always looked a bit odd. To see one fly though, even if it was a miniature (18ft span) version, was a sight to behold. It looked a dream in the air. Pity that all morning the commentator referred to it as a Valiant. Presumably during lunch someone dragged him to the Cold War Gallery where they have examples of the real thing and explained...

What I don't understand though is what makes anyone wake up in the morning and say, "I fancy building a half sized biplane. I've got an old microlight engine in the shed I could power it with." Nor how after three years building, you can power it up and point the front end skyward. There were two crashes during the day, a Foker triplane was completely lot thanks to a radio problem and  a WW1 British biplane crunched repairabley as it's owner tried to land it in cross winds. These guys aren't afraid to fly though. rarely was there only a single aircraft in the sky, many times you could see half a dozen or more. Most memorably were the air racers with 10 people flying around an oval course at the same time !
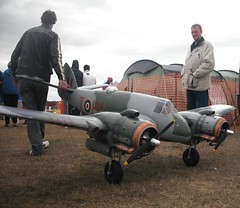
BeufighterThe range of prototypes was amazing too. A couple of airlines for example - Comet and 737 (I think), or a weird prototype bomber. Lots of WW1 planes but very few duplicates. Power came from both IC and electric engines. A Flying Fortress had a sound system fitted so the drone sounded like the real thing and covered the silent brushless electric motors ! Several planes did more than just fly with bombs and parachutists emerging from underneath.

This was like a proper old fashioned air show. But one with planes from all ages. If inspired, it was one you could anticipate taking part in next year too. There are quite a few almost ready to fly aircraft for sale. By the time you've kitted one out I doubt you see much change from 500 quid but them when you think of the price of a good model boat or railway layout, or worse a classic car, then the prices look very reasonable. For the scratchbuilder entire forests of wood were on sale and it's pretty obvious that most of the models in the sky owed more to this than and Chinese factory. Another thing spotted was that the age of the modellers building and flying the planes was quite a lot younger than that seen at model railway, boat or engineering exhibitions. Maybe this is the future !

To give you an idea how good this event was, we'd arrived at about half eleven and planned to get a look at the museum during the day. We got half an hour before it closed at 6pm. Next year we'll go earlier and forget about the real planes. They will be there another day.

I took a lot of photos. Some of them are here

Large Model Association website

RAF Cosford
Friday, July 23, 2010

Duff rubber tyres

Duff tyres
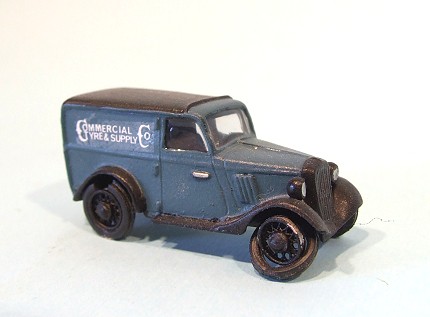
Back in April, I made up an old whitemetal kit for a Ford van. At the time I expresses suprise at the inclusion of rubber tyres. It's not a feature I've seen before in kits and seemed a bit pointless.

How right I was. In the few months since I made the model up, the tyres have given up the ghost. Being stretched over the wheel rims obviously was too much for them. Presumably temperature changes stressed the material too much and it snapped.

All is not lost though. I'd always planned this model as a semi-derelict item parked up on the railway somewhere and abandoned. The dereliction just needs to be emphasised a bit more now. Plenty of long grass growing up around the axles should make a battered tyres look a lot better. I'll try and tuck the breaks behind the wheels - real tyre don't snap like this but they do deflate and come off the rim if the vehicle is dragged around. Some extra dirt and rust and I think it will still look good.

Besides, I can't bear to throw it away now. Other modellers would never forgive me.

Thursday, July 22, 2010

Big slab of wall part 2

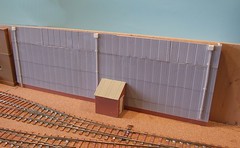
Warehouse side V2A trip through the Black Country convinced me what I had to do if I wanted big metal walls.

Corrugated iron and lots of it.

Within 10 minutes of my train ride I'd seen acres of the stuff. Mostly it's now black and rusty but once I'm sure there would have been some paint and possibly even a little colour involved.

So, the solution to my problem was simple, all I had to do is make the change. At first I tried to slide a blade between the old covering and the card base. This was a hopeless failure as the glue (Bostick Solvent Free All Purpose) stuck it to the surface too well. All I did was separate the layers of card. This isn't the end of the world. I'm still happy with my work so I'll keep it and perhaps finish the model off some day. After all, all the difficult stuff has been done, it's just detailing and paint required.

So I have made another card shell and this time covered it in Wills corrugated iron. Not the easiest stuff to work with to be honest. I needed more height than the sheet allowed for and splicing in an extra row was a pig of a job with lots of filing and fitting to avoid gaps. The designer had cleverly allowed for the join lines to be uneven as per the real thing but this makes joining sheets vertically challenging. Only after I'd finished did I find some Finecast vacuum formed sheets that would have been much easier to work with !

The little brick lean to was a spur of the moment decision once the model was in place. I felt the building needed a protrusion to break the slab up a bit and some different materials too. It's just plasticard on a card shell again and took only a few minutes to do. No measurements were required and I used a plastic door I had kept in my door pot from an old model. The roof is asbestos for variety, and 'cos I didn't have a big enough bit of the iron sheet left !

Wednesday, July 21, 2010

Big slab of wall part 1

Warehouse side V1Back in April, I wrote about a hanger side that inspired me for part of the layout in a box. I want a big slab of wall to fill most of the back to provide a nice anonymous background for photographs. Having had the idea, I needed to build the thing.

The main structure was easy enough, a Daler board rectangle with some ends to push it away from the backscene. Cover this with some Wills Box Profile Steel, just like the prototype and because I only had a single pack, allow space for a window.

The result is less than satisfying though. To my eyes it looks very much like a modern factory unit or warehouse. What it doesn't do is convince me that it's suitable for a model set in the 1950's.

Passing the question to the members of the Double O Gauge Association e-mail forum quickly persuaded me that I was right - these wall finishes appeared in the 1960's making them too late for my needs. I've always fancied having a go at a proper 60's prefab style building but this isn't the model to do this with. After all, I can't pose a loco in LMS colours in front of it can I ?

Tuesday, July 20, 2010

Valance making

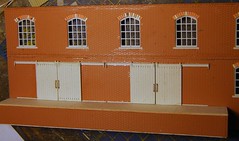
Valance makingNo one likes to work in the rain so I don't see why thoese unloading on the brick warehouse dock should get soaked. It seems that even in Victorian times people felt the same, although they might have been more interested in looking after the goods, that valances on the edge of warehouses were common.

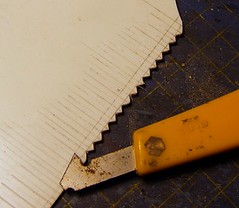
I decided to make a bespoke version., partly because it would look better but mostly due to a lack of suitable kit parts in my stash of bits. Using 1mm thick plasticard I decided that for easr of marking out I'd have 1 foot wide planks with simple points on the bottom. That leaft me marking every 2mm on the sheet. Every other line was scored with the Olfa plasticard cutter. Then each point was cut with a scaplel - a sharp blade made a huge difference here.Some of the points were nicked to simulate age. Surface age was arranged with a rub of emery paper although I fancy something a little coarser so I might try a wire brush too.

On the ends there is a suitable slope to bring the egde down to just below the top of the doors. Wills asbestos sheet finishes the job and keeps the weather away.

Monday, July 19, 2010

Warehouse doors

Warehouse DoorsThe card warehouse doors now have some suitable detailing. I've always planned to try and include all the ironwork required to make the doors look like they should slide even though most people won't notice it.

Most of the inspiration to be honest came from the photo of the O gauge layout "Wood Street" that has inspired this model. While copying a model isn't as good as copying the real thing, in this case it looks like the builder got things pretty accurate. I can fully understand how the rollers work and in fact the inclusion of the bottom runners is in line with doors I've seen. It's just not something that people normally bother with. However our railway club has sliding doors and there is a channel in the ground to stop them flapping back and forth.

All the metalwork is made from Slaters microstrip. I keep multi-size packs in stock and just pick something that looks about right. Clever people will plan ahead and have lots of different packs of different sizes. I'm not organised enough for that and too stingy to buy lots of packs.

Door handles are from staples re-bent to be around the right size. Holes had to be drilled in the card to accommodate them as despite my efforts I couldn't push them through the surface.

Sunday, July 18, 2010

The best investment I ever made

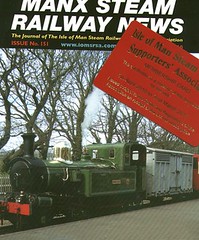
Manx Steam Railway NewsBack in 1993 I made my first visit to the Isle of Man. To be honest the main reason I flew over was to accompany my Dad who wanted to see some of the Manx Electric Railway centenary. He's always been interested in trams and you don't get that many 100 year old systems around here. I knew of the island of course but the steam engines all looked the same and I'm not really that into narrow gauge.

Needless to say, once I got there, I was fascinated. Every so often some Manx modelling turns up on this blog and I do now aspire to a layout or two based on the prototype.

Not long after returning from the island, I was made redundant with a reasonable payout. Most people would trot down to see the bank manager for advice on investing the cash for the future. I didn't as I knew the capitalist pig would laugh at my pot of money - junior civil servants don't earn much - and anyway, I'm a bit rubbish at this sort of thing. What I did do was buy a life membership of the Isle of Man Steam Railway Supporters Association. Currently this costs £180 or 12 years of normal adult membership. So if you reckon you are going to make 13 more birthdays then it's a bargain.

For this I get 4 top quality magazines a year and free rides on the Groudle Glen Railway. Or you do if you remember your membership card. And don't want to pay so you get a ticket to keep as a souvenir.

Anyway, that's my top investment advice. Ignore stocks and shares and look for life memberships in railway based groups then buy, Buy, BUY !

I'm in profit and that makes me a better money manager than most of the City of London. Told you they should have listened to me...

Saturday, July 17, 2010

Hornby Live 2010

FStand Number 10irst impressions - what a posh exhibition centre ! The venue was a very easy to get to conference centre on the edge of Hartlepool. Normally home to PowerPoint warriors, last weekend it was filled with model railways. Bet there's many a person stuck at the back of yet another dull presentation who wishes it still was.

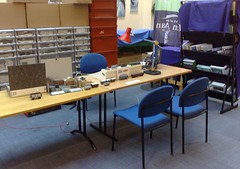
My stand, Number 10, was a couple of tables giving me around 8 feet to fill. My job was to show how you build plastic wagon kits so all I'd needed to pack was a modelling board and some tools. To add to the display the Melbridge Box Company came along as well as everything I'd built to appear in the magazine. Oh, and the railcar just for the sake of it.

As it turns out the desk lamp was superfluous thanks to the glass roof. The Box Company went down a storm though with the visitors. I explained my reasoning behind the model many, many times over the two days. But then that is why I was there and people seemed to enjoy it.

I'd like to be able to give you lots more information about the show contents but the truth is I didn't get to see anything. Breaking my cardinal rule, I'd done this event on my own and that meant from the start of the day until pretty much the very end, I was stuck behind the stand. Interest in most demos can be a bit patchy, people prefer the trade and then layouts in that order, but there was very little time when I didn't have someone in the seats in front of the modelling board and frequently a few more perusing the other items on display. My total output was less then one van. By Saturday I'd only managed to cut the sides and one solebar from the sprue. That means things were good, after all I make models at home but I was there to talk.

There was lots of chat too. I hope a few people have gone away inspired to have a go at making some wagon kits. If you are reading this blog as a result of picking up one of my flyers then welcome. Feel free to fire questions at me or just enjoy digging back through the archive on the right hand side.

One item that attracted a lot of attention was my model of 10203 the early Southern Diesel. I had to borrow a copy of the Hornby Yearbook from the Ian Allan stand next door, where they sold shop soiled copies for a very reasonable discount, so people could see the construction pictures. Since handing the model over to Mike for Bay Street, he has dirtied it with weathering powders and it really looks the business. I was under strict instructions not to let people handle it to avoid cleaning it up again !

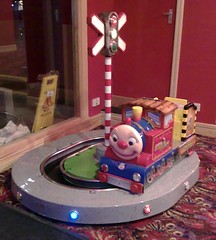
Amusement trainOther than that, my only complain was that the cheese sandwiches were of the poncey conference centre variety with more mayonnaise than cheese - Yuk !

My accommodation was in nearby Seaton Carew. Not the most salubrious location but I could be on the beach in 3 minutes, eating ice cream in 5 and should I feel the need, was home to a really impressive little railway that I think I might be building a model of one day...

Friday, July 16, 2010

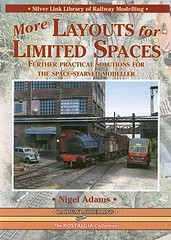
More Layouts for Limited Spaces

More Layouts for limited spacesMore print appearances for my models. This time in a proper book. Better still, a book I was partly responsible for.

A terrifying 14 years ago, Nigel Adams wrote a book for Silver Link called "Layouts for Limited Spaces". Melbridge Dock was one of the models featured in the layout gallery and even made it onto the front cover. I was always a bit chuffed by this.

Anyway, at a recent Warley show, I was talking to Nigel about the book and he mentioned that they were still reprinting it as people kept on buying copies. Fair enough I said, why don't you do a follow-up. After all it's not like there haven't been a few more models along these lines. Good idea he said and went off to talk to the publisher. The result arrived in the post over the weekend.

The format is different, the original is A4 whereas this is about 2/3rd's of the size. Also, the new one is fatter (144 pages) and colour throughout. The layout gallery is much expanded and aside from my contributions (which obviously I think are excellent and have the best photographs) you get to read content from several other well known modellers. I've always had a soft spot for the work of Charles and Richard Insley having admired their narrow gauge and American respectively models for many years. All the layouts include plans so you can pinch ideas to your hearts content.

Anyway, don't read any more, get on down to Amazon and buy yourself a copy !

Thursday, July 15, 2010

Up periscope

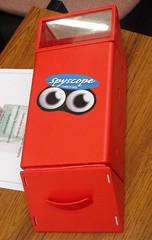
SpyscopeI want one of these !

Not for me you understand, but as a part of my exhibition kit. The lady who owns it uses a wheelchair and as such struggles to see the scenic part of many high model railways layouts at shows. She bought this from an Italian company called Navir.

I was kindly allowed to have a quick go and the results are awesome. You look at a model and all you see is the model. Your field of vision is limited a bit in the same way it's limited by the wings of a stage set. This 'scope is wide enough that you don't need to squint through it either, the view is natural, 3D and apparently slightly magnified.

At shows I'd lend this to children so they don't need to be lifted up or balanced on barriers. It's not that I'm worried for the backs of the parents doing the lifting, it's just that ever since I saw a child plummet onto the catenery on a nearby display I've always been wary. Don't suggest a lower display either - I want to be stood up for easy chatting to visitors and that means the baseboard has to be at a suitable height for my 6ft 3 frame thank you. The periscope would made everyone happy and I bet even some who don't need it would want to have a go.

OK, so I can find out more information on this on the company website. I just need to find out where I can buy one from...

Wednesday, July 14, 2010

GWR Minks in Hornby Magazine

August's Hornby Magazine features my article on building Minks (the Great Western van, not a furry animal) from Cooper Craft plastic kits. To add a bit of variety I made use of the manufacturers extra end packs to produce three identical but different items of rolling stock.

With a bit of imagination you can build the four ages of Mink: unventilated, single vent, shutter vent and finally double vent. Add to this the vans and ends being available in three different heights. That should result in a nice train of wagons that while all looking the same are in fact all slightly different. Not something the average person would notice but the cognoscenti would spot this and nod approvingly.

In the Staff Projects page I've been building, or rather painting, Corgi road vehicles. Specifically a Ford Escort from the 1970s. The idea of supplying diecast models in primer rather than fully finished seems like a really smart move to me. The biggest cost to the manufacturer is replacing the rivets that normally hold body and chassis together with a screw, although I'd be inclined to skip this and just tell the modeller to glue the bits together once he or she has finished painting. In the USA you can buy undecorated rolling stock so it's hardly a big step to do the same for road vehicles.

Elsewhere in the mag there is a free card kit for a narrowboat. I quite fancy having a crack at this although I think it's going to be one of the more challenging prototypes to build. Mind you, for various reasons I'm going to end up with three copies of this issue so maybe I can get at least one of them right !

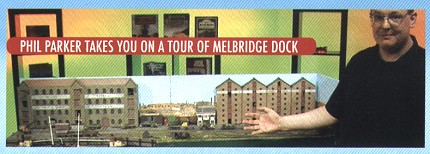
Finally, I got a surprise when perusing the adverts at the back to find myself staring back from the page. ModelRailway.TV have stuck me at the top of the page in their advert showing off Melbridge Dock. Ironically, this film isn't actually on the site at the time of writing although the Melbridge Box Company is there for your enjoyment.

ModelRailway TV Advert

Tuesday, July 13, 2010

R186


I don't know why, but at work last night, we were talking about old TV adverts. Someone came up with the famous J R Hartley one for Yellow Pages and in a flash I remembered the Hornby R186 Signal Box one that ran at a similar time.

Think how times have changed since 1983. You still have Yellow Pages, but nowadays the young lad would hop onto teh Interweb and buy the thing online rather than visit that rather pleasant looking model shop. Of course he would have to wait for delivery, something that doesn't seemed to occur to him here. In fact why didn't he do all this before his Dad's birthday ? Lazy ungrateful little tyke. Hope he doesn't get to play with the trains.

And talking of the trains, where did the layout come from ?

Surely it wasn't built just for the few seconds it appears in the advert. Did they find a real one and do some location filming ? If so, who has an attic that tidy ?

Monday, July 12, 2010

Carving cardboard

Slabs and doorTexture matters I think. Sometimes you want lovely smooth surfaces like locomotive paintwork or the hull of a fibreglass floating Gin Place. Other times you need a bit of rough (oh er missus).

The sliding doors on my warehouse should be made of wood. The paving slabs in the platform should be concrete. Both aren't really rough, more not smooth.

Therefore I've used unadorned Daler Board for them. I suppose the doors could have been wood but the card is easier to work. With a bit of care the surface can be scored with the back of a scalpel blade (don't push on the sharp bit when working the tool upside down !) and the result is a good clean line.

The only problem is you can't hit the undo button so a bit of careful marking out is called for or the slabs can get out of sync with each other. I had the same problem when I tried to do some Pendon style brickwork, the horizontals went fine but the verticals, well I missed one and ended up ruining their courses.

Painting will be with Humbrol enamel which doesn't seem to lift the fibres too much is applied reasonably thick (well, not thinned) as it dries fast enough to stop the card swelling.

Sunday, July 11, 2010

Modelling seasons

I've been seeing the mention of the modelling "season" mentioned on a Society message board which makes me wonder whether model making still has traditional seasons.

Where I live there used to be something called the "Coventry fortnight". During these weeks all the big industries would shut down and the good people of the West Midlands second biggest conurbation would pack up buckets and spades and head off on holiday. Although it's still mentioned, the demise of the UK manufacturing base means that it's more myth than reality nowadays. Modern firms let people take time off pretty much when they want within an agreed holiday allocation. Only school timetables enforce any structure to our time off. Even then there are lots of people who think nothing of nipping away for a crafty mini-break in a way that was once the provenance of the wealthy and James Bond.

So the world has changed. Does this mean that everything has ? Depends who you listen too.

The man on the message board would say no. Model making takes place in the dark cold nights of late autumn, winter and early spring. During the summer months we do other things.

Iain Rice, Chris Nevard and John Sutton would say no. Sitting out in the garden making things in the dappled shade of a handy tree is very pleasant. At the very least you can have the windows open the approved manner mentioned on the side of every can of paint or glue you've handled.

I suppose you can make a good argument that there are things you can do on the summer that aren't available in the other seasons. Mowing the grass for example. Or pulling up things you think are weeds. Or painting the house. Some even suggest some sort of sporting activity but if you take a look at the crowds at your average exhibition you can forget about that unless it's crown green bowls...

Exhibitions do have an off-season. Prime time is March/April followed by late September/October/November. You can hold a show in the summer but the numbers in the door will be pathetic. Sunny months are normally reserved for the specialist society shows which don't need to worry about attracting an audience in the same way.

I suspect that for most people it's just another bizarre reason people make up to avoid taking part in their hobby. The same people who have great plans for the new seasons activities have probably based themselves in uninsulated garages, lofts or sheds which are unusable in the hot and cold months. These are people who love the idea of a hobby, probably even enjoy visiting shows and spending money on it. They just don't want to actually have a go. You'll spot them writing in to the more finescale magazines or haunting web forums where they will indulge in hair splitting disputes based on theory rather than practise.

For me, I enjoy my hobby. I've even been known to go away and take a small box of tools and a little project for the evenings. Nothing smelly or difficult, just a bit of fun. The summer months are different and there are attractions to draw you away from the workbench but if it's that or watch the World Cup, then I've got a particular fiendish chassis I need to look at urgently !

Saturday, July 10, 2010

2mm scale Expo 2010

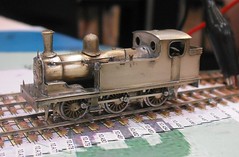
2mm scale locomotiveLast weekend there was a shopping exhibition - for next years exhibition we are short of a 2mm scale layout or two. It's not essential to cover all the scales in a show but for the larger events it's a worthwhile goal. A quick look at the 2mm Scale Association website revealed that it is their Golden Anniversary this year and a special event was taking place in North Oxford. Best of all the show was on for two days, specialist events are often only 1 day wonders to keep the costs down, so we could nip along on Sunday when the M40 would be a bit quieter.

Now I've no intention of ever doing anything in 2mm scale. I love the workmanship. The skills displayed amaze me, yet the idea of fiddling around with rail that looks like it came out of the back of a spider doesn't appeal at all.

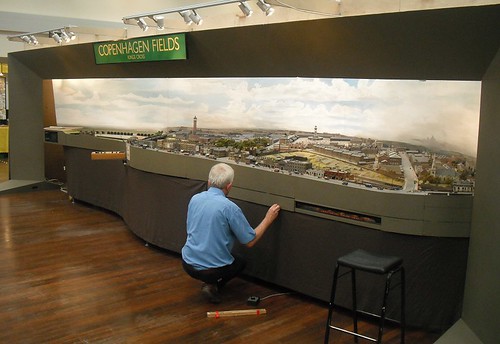
However once in the hall, I was fascinated. Two types of layout were on display - full scale affairs like Copenhagen Fields which have been on the circuit for a while and are fully finished (OK, I know it isn't but you get the idea) and ones designed and built as part of the Association "Challenge". Most of the later were still at little more than the bare boards stage. Not great were this an event aimed at the public but being able to see the construction methods was very interesting. Once finished all this stuff will be hidden by scenery and yet it's the bread and butter work that everyone who wants to take a model to an exhibition will need to carry out. There were a couple of particularly interesting ideas I'll spend more time looking at later this week.

The Society shop was particularly interesting to uninitiated. Since the trackwork is very fine yet requires quite a lot of accuracy, a plethora of jigs and templates are for sale. I can't think of any scale that has this level of support in that prospect. I didn't see a single roller gauge, so popular in 3mm scale upwards, but plenty of clamping things made by proper engineers.

Moving on to locomotives, these have been a source of fascination for a while. The model pictured is still under construction and has been for 11 years apparently. It runs beautifully and the builder assures me I could do the same sort of thing but I'm not convinced. The lack of gear train between the axles surprised me, the con-rods are still doing the job they are designed to. Flicking through the society book on mechanism building I understand that this isn't universal. Certainly the N gauge manufacturers don't do this preferring lots of gears. There still seems to be a lot of engineering going on in there which wouldn't be bodger friendly.

I asked about compensation and apparently this isn't common either. The axles bearings are ovalled slightly to allow movement and a phosphor bronze wire bears on the top of the axle to spring it slightly. Split axles are de regier though so some accurate muff-drilling is required.

As far as layouts go, well we could have booked everything for future years and not have been disappointed. Our exhibition manager is going to have his work cut out. Personally this was one of the most inspirational model railway events I've been to for years. I left with a head full of ideas, which makes it all worthwhile.

And I do have a tester kit of a van and length of track I bought years ago...

More photos on Flickr

Friday, July 09, 2010

Prepare to demo

As you read this I'll be busy preparing to take part in Hornby Magazine Live! (the exclamation mark is compulsory)

In fact I'll be thinking, "Why did I agree to do this before working out how far Hartlepool is from where I live ?" and then loading up the car with stuff and preparing to set off for the north.

My stand is the Live! version of my "Parker's Guide" column in the magazine. Put simply I'll be dragging out the pile of wagons I've built over the last year or so for articles and sitting behind them while you, the enthusiastic public, ask questions or tell me I'm an idiot and you much prefer the articles on making scenery.

For added entertainment The Melbridge Box Company will be coming too. This will allow me to run some locos if I get bored because no one wants to talk to me. There will be plastic kits behind the stand and if I've done a good demo then there won't be any progress on these as I'll have been talking too much.

More info on the event website

Thursday, July 08, 2010

DeHavalin DH2mm !


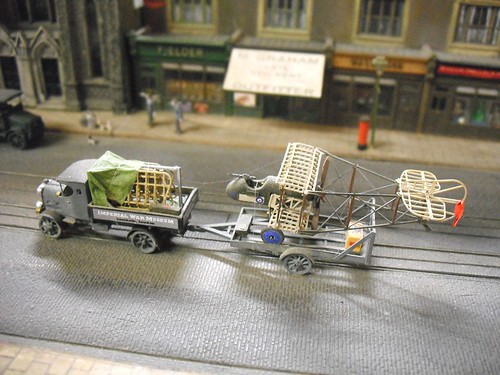
Down in the basement something stirred. It was the sound of DOGA members being allowed to have a look in the bowels of the Model Railway Club. What we found were bits of their finescale 2mm layout "Copenhagen Fields" and on the front as part of the street scene, this incredible model of a DeHavalin DH2 biplane being transported to the Imperial War Museum.

Unless you are viewing this site on one of those new fangled mobile telephones, then the picture you are looking at is larger than life size. In reality is is absolutely tiny. And exquisite.

Being a careful sort of chap who appreciates other model makers work, I didn't touch the aeroplane but judging by the neatness and quality of the work, the cross members and spars must be etched in metal and painted to look like wood. The assembly of these parts is incredibly neat too - if I wore a hat I'd take it off to whoever built this one.

More on the DH2 at Wikipedia

And in case you were wondering just how small a part of the layout this scene is, here's the full model:

Copenhagen Fields

Wednesday, July 07, 2010

That's where the water is coming from !

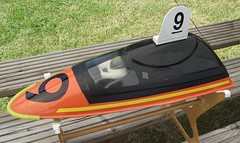
Slingshot Number 9On Sunday I mentioned that I'd been Slingshot racing at the KMBC open day. My results had been OK but not exceptional. This doesn't matter as it's a bit of fun.

However there has been a change to the rules which I believe has been detrimental to my performance.

As you can see from the photo, the boats now have to be fitted with a fin showing your race number. This was sprung on me at the last minute and I ended up using the generously supplied version - a square bit of plasticard stuck to some more plastic to make an L and then attached to the boat with a stick pad.

What about my aerodynamics ?

Obviously I did my best and carved it to shape a little with some scissors but it's still not right. I mean you don't see McLaren spend ages in a wind tunnel and then stick a roof rack on their cars at the last minute because Lewis wants to take a deck chair with him in case he breaks down and has to wait for a tow do you ?

Nor do you watch a nature documentary and look at sharks or aeroplanes or anything else where sleekness is a requirement and see a cardboard box nailed to the top. I wouldn't mind but this change is just so we can have a "caller" by the person keeping score to save the racers having to shout out their own numbers. Don't people realise that this is part of racing ? I say if they can't be bother to shout then let them forfeit the lap. All's fair in love, war and model boat racing.

Anyway, I need to make something a bit more stylish. I'm thinking about the sort of L-shaped fin that stock cars have on the top. I reckon I can use the horizontal bit as a wing to give me less down force and regain those hundredths of a second I'm currently losing.

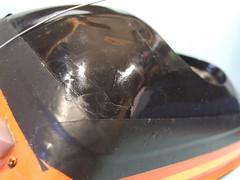
Slingshot BashAll I need is some carbon fibre, a few hours in a wind tunnel and I'll b e good to go. Unless I pop it into the bank. Or hit a fish. Or pick up some weed. Or hit another boat. No wonder, Formula Once employs so many people...

The other goodie was that I've been picking up more water than I would like in the hull at the end of a race. Looking proper look at the boat canopy. At some point I've picked up a bash which has now grown to look like crazy paving. Time for a bit more sticky tape repair I think !

Tuesday, July 06, 2010

Window topping

Window topThose round windows tops are a b*%%&r to do properly. I've tried various options over the years including scribing plasticard and bending individual strips of the stuff. Sometimes a commercial version will fit but then you have to buy loads of packs to get the size you want. The most successful technique seems to be choosing a prototype with rectangular windows so you don't have to bother.

Yesterday I mentioned my chad supply. Today I've used them to produce the characteristic splayed brickwork.

The method is simple - put a blob of Bostick all purpose on the workbench. Pick the chad up on the point of a knife. Dip chad in glue. Place on model. Do this 13 times and then shuffle the little card rectangles around until they look regular. Repeat for each window.

OK, it's not prefect - I should have cut every other chad in half to overlap the courses. They should be tighter packed too but I can live with all this for the sake of not going mad. In the context of a layout these sort of little niggles don't stand out as long as the overall impression is right. A philosophy even shared by the god-like (well if you remember his articles in old RM's) Alan Downes. And if he says it's right, who am I to argue ?

Monday, July 05, 2010

Chads

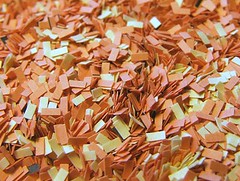
ChadsHere's one for da kidz - a pile of computer chads. Oh yes, how high tech are we today !

A little history lesson for those too young to know better. Programming computers wasn't always the fun keyboard based task it is today. If you think rattling out some HTML (yes, I know that's not proper programming but if you know that too then you don't need to be told about chads do you or didn't you pay attention during your "History of computers" module ?)  for your web page is tough, imaging having to write each line by punching holes in a card. Then putting these card into a pile that go into a reader. Then dropping then and having to work out what the correct order is or the program won't run.

The end result of all this work would have been some top software able to do calculations that your mobile phone would laugh at nowadays and a box of little card rectangles.

Railway modellers found a use for this waste product - the chads as they were known happened to be very close to the size of a 4mm brick. People would build their card buildings and then painstakingly stick individual chads on the surface making great efforts to keep the courses level and regular. Many, many happy hours would be whiled away in this manner and the results can be most impressive. Often better looking that those from plasticard.

Of course the biggest problem you find if you fancy having a go at this is acquiring the chads. My Nokia doesn't produce anything nearly as useful and I haven't seen a chad-maker since school and even then it was a relic rather than a useful bit of kit. My supply was purchased years ago from someone who offered them for the price of postage in the Railway Modeller letters page. I've no idea how many are in my tin and I'm not going to count them, but they are staying locked away. How knows I might fancy having a go at an individually bricked warehouse one day...

Wikipedia on chads.

Sunday, July 04, 2010

KMBC open day

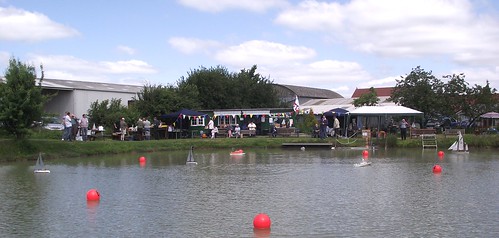
KMBC 20 June 2010

Time flies when you are having fun. A couple of weeks ago we have the Knightcote Model Boat Club open day and it's taken me that long to post a link to the pictures.

After the display in the local shopping centre, extra effort had been made to get the bunting out and as much covered space as possible in case any potential new members turned up. Although the weather forecast said we were in a for a dry day, you can never be too careful ! As it was, the gazebos were welcomed for the shade they provided.

The day's events involved some racing for both yachts and Slingshots. The former actually worked well thanks to an occasional light breeze and our modifications to the hedge. The boats actually raced rather than drifted around praying for wind. In the Slingshot races I did OK but couldn't touch the eventual winner who racked up 4 or 5 more laps than me over the five minute session. Needless to say I did emerge with a few "issues" with my boat which I'll write up later. Another first was the apperance of a couple of Club 500 class boats - we'll be racing these properly from next year. And yes I've ordered mine and will be building it for your entertainment.

More impressive was the take-up of the "free sailing" sessions. To date the gaps between events have always been a bit lacklustre and resulted in empty water. Not this time ! The biggest problem seemed to be getting boats off the water so races to take place. I don't know exactly how many miniature vessels were present but I'd guess at over 40.

There were some good 'uns too. I love Pete Munday's conversion of a Tomkat racing boat into a very convincing catamaran ferry. Although freelance it looks like those that I've travelled on to the Isle of Man. The Jet drive was playing up so it didn't get much time on the water but once this is fixed I'm sure we'll be seeing a lot more of it.

Now take a look at the photos on Flickr.

Saturday, July 03, 2010

DOGA AGM 2010

Last Saturday was DOGA AGM day. Every year some of us get together in Keen House, home of The Model Railway Club to chat and laugh and have a modelling competition. The numbers attending are never exciting as we have members all over the world and for some unaccountable reason, those living abroad don't think it worth flying half way around the planet for a chat.

Still, the meeting was interesting, and more importantly, shot. We do the official business as fast as possible with the intention of getting to AOB and giving everyone time to have their say about the Association. We've come up with a few new ideas that should see fruition over the next twelve months. We're also rather batter informed about the state of the hobby including at least one big potential change in the trade thanks to the contacts our Chairman has had.

After the meeting, a few of us repaired to the Euston Arch via a detour around St Pancras station to admire the fantastic restoration. There we put even more things to rights over a pint or two of some of that rarest of London commodities, proper beer. And since we were in the south, a couple of shandies !

My job on the day is to organise the modelling competition. This means printing entry and voting forms, lining the entries when they come in and counting the results. Oh, and then photographing them, all for the website and in-house magazine.

This year's winner of the Kitbuilt and Scratchbuilt locomotives category was a B4 tank made from Falcon Brass kit. These are known as "challenging" kits yet the results speak for themselves and it's a fantastic model. Interestingly, last year's winner was built from a Jidenco kit and these as similarly described as "challenging" but often prefixed by something a good deal coarser. It looks like DOGA members don't like easy kits !

At the other end of the tables were the scenic items and a deserved winner was Christopher Rabson's scratchbuilt stone bridge. Made from foamboard and Polyfilla, the results make me want to have a go at scribing some stonework now. I wonder if I can do a little bit on the layout in a box ?

You can see the results of the competition on the Double O Gauge Association website.

Friday, July 02, 2010

Sticking plasticard bricks to cardboard

BrickworkBack in the good old days, the cardboard carcases of all the buildings on Melbridge Dock were covered with Slaters Plasticard fixed in place with Dunlop Thixofix. This was an excellent contact adhesive - you simply spread it over the card and plastic, left until the glue had become transparent and then brought the two parts together. Models created over 20 years ago are still as good as new with no sign of the dissimilar materials separating.

You'd have thought that thanks to this success I'd have carried on doing the same thing for ever more, but no. Sadly Thixofix in it's lovely yellow tub has disappeared. Presumably and business model relies on selling customers more than a tub a decade...

Looking for substitutes, Evostick was considered but let's be honest, it smells horrible. Other contact adhesives are doubless available but you really need something without a vicious solvent it it or the glue will eat the plastic.

Anyway, when we built Flockburgh we tried Bostick Solvent-free all purpose glue. It comes in a tube rather than a tub and doesn't really smell. Even if you get it on your hands it wipes off. The glue is squirted all over the card and then spread around using a glue spreader (try the Early Learning centre for these) to give a nice consistent film. Then press the plastic into place, wipe off any excess that has squidged out and allow to dry underneath a heavy wight. Try some old railway modelling magazines, we all have piles of them around.

A few hours later the plasticard can be trimmed to size and windows and doors opened out.

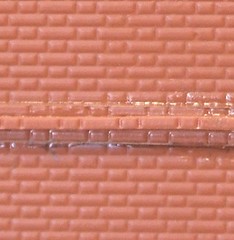
Finally, the best bit - decorate bricking. I find that cutting strips of bricks around 3 or 4 courses high and sticking these in place with cement followed by a wash of Mek-Pak works well. A further layer 1 or 2 courses deep makes things look even prettier. There are plenty of examples out there of more complicated brickery but this simple version seems adequate to adorn buildings and break them up a bit.

Thursday, July 01, 2010

Card mock-up

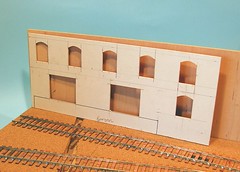
Warehouse testTime to try the warehouse in position on the layout. Without any buildings or stock, it’s easy to forget just how tiny this project is. That illusion is quickly shattered with the addition of a structure though !

Anyway, the building is in its most basic form at present. What I want to see at this point is “does it look right”. Accuracy is important but the most technically correct model won’t look as good as one that satisfies the eye with its basic proportions. I think I’ll get away with this so it’s time to think about some detail.

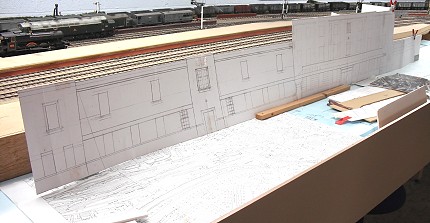
Card mock-ups have their place on any layout. If you have the time, building a simple version of a building and then leaving it on the layout for a few days is a great idea. You can sort all sorts of problems before getting stuck in with a fully detailed version and wasting lots of time because you spot a problem later on. The station below lost an entire bay to make it fit the site properly and look correct in position. How would you have felt if you’d had to alter a finished and detailed version ? And this is on a layout where the coaches are the same length as my micro project !

Mock Leamington