A daily updated blog typed by someone with painty hands, oil under his fingernails and the smell of solder in his nostrils who likes making all sort of models and miniatures. And fixing things.
Thursday, March 07, 2013
Tram skirts
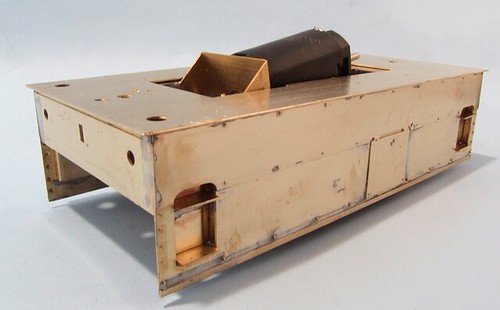
The skirts show yesterday are attached to the underside of one of the footplates. If I read the instructions correctly, I'm supposed to solder the pair of identical footplates together first, but I can't see the point of this.
When I built the 3mm scale version of this kit. I was able to have the loco body on one footplate and the skirts on another. This allows the model to be split for painting and working on the interior details. Possibly this has been changed on current kits as the instructions I'm reading seem to be written by Moses. Not that this matters as the kit is so well designed that it's not difficult to work out how to assemble it using a sketches supplied.
There's quite a mass of metal to deal with here. Using the photos I took of the model built by the manufacturers, I worked out that the skirts are overlap the buffer beam etched parts. Everything was tack-soldered in place with the electric iron. Once happy, the gas torch made for nice neat seam joins. Using gas pumps so much heat into the solder, the brass doesn't get time to heat up for overlays and steps stay where they were put.
After a quick clean up, the skirts were placed on the chassis at which point I though the gearbox was too wide for the hole. The I realised that it only goes in the correct was round as the hole is stepped to be wider at one end. A clever person would have spotted this straight away.
Labels:
model railway,
Y6 (7mm scale)
Subscribe to:
Post Comments (Atom)

No comments:
Post a Comment