A short history lesson. In the old days there was no such thing as a plastic kit. If you were a small boy of any age who wanted a model of an aeroplane, and in those days you certainly would want one and be able to express the desire without being laughed at, the only way to satisfy your desire would be to take a lump of wood and carve it to represent your prototype of choice. Even kits of the day tended to be little more than blocks of dead tree and a set of plans.
Then Frog and Airfix arrived and all this stopped. Why bother whittling when you could simple stick some pre-formed plastic parts together with glue not made from boiled horse but nice smelling chemicals ?
Despite this there is, it appears, a sub-culture of aircraft enthusiasts who can't look at a log without saying, "That would make a lovely super fortress", or in this case a rather splendid Short Sunderland.
Some of this comes from an interest in aircraft recognition models from the days when our early warning system, was augmented by the Observer Corps, young men who watched the skies and identified the incoming aircraft. To train then needed to see more than pictures and so 3D visual aids were made so they could see a craft from all the angles they might experienced in real life.
The display was full of "solids" as they are called. Difficult shapes rendered from wood using sharp knives, sandpaper and infinite care. Modern clear plastic canopies from plastic do appear but that seems to be the main concession to advancements in the hobby. The models are quite a small scale, the wingspan in the photo being around 15cm making the final model about 1:144 and not too space consuming at home. Of course when you make stuff yourself, you get to pick what you want and how big you want it.
I particularly liked the Sunderland because I saw one in a museum as a child and then owned an Airfix version build from me by my father (I was still at the oozing glue stage of plastic model making and not up to such a challenging subject so he generously did the construction for me). I still have the crew, retrieved from the damaged models final flight to the bin, which will one day appear in a new model when I have the time and space to do it justice.
A daily updated blog typed by someone with painty hands, oil under his fingernails and the smell of solder in his nostrils who likes making all sort of models and miniatures. And fixing things.
Wednesday, March 31, 2010
Tuesday, March 30, 2010
Who lives in a house like this ?
When not floating around in hot air balloons (see yesterdays post), one half of the couple I met on Saturday at the church show, builds dolls houses. Not just the common or garden sort either as the photo above shows. No, she spends part of the year giving and attending workshops at miniatura fairs in the USA. Because of this, her models are smaller scale than the normal 1:12 of the standard dolls house world. There's no less detail in them though.
The round house that took my eye was the result of one such workshop. The model was built over a period of several days and then had to be flown back complete with its protective glass dome. Getting that through customs and baggage control was more than a little nerve-wracking she told me !
The model itself is based on a kit and the most challenging part was the staircase handrail. The steps are laser cut and simply layered around a centre pole. The rail though comes as a single length of wood and has to be bent carefully to form the spiral, fitted to the supports and then adjusted so these are vertical.
Each room has a different theme and is furnished accordingly. The furniture is largely scratch built from wood.
The model sits on a turntable which is rotated for viewing or photography. The base is around 20cm across so wouldn't take up much space in a display yet is full of character. To my eyes, while it isn't the most realistic of model buildings, the novelty more than makes up for this.
Mind you, I love the idea of visiting other countries to run workshops. If there is anyone in the USA who wants to invite me over all expenses paid to give a talk or two on the UK model railway or boat scene, please get in touch. Or perhaps you run a cruise line and need some unusual entertainment for the passengers !
Monday, March 29, 2010
Miniature hot air balloon
I like to think that there aren't many model making hobbies I haven't seen, but sometimes (and I know this is hard to believe) I'm wrong. On Saturday I saw something that was completely new to me yet has apparently been taking place for many years.
Miniature hot air ballooning.
The husband and wife demonstrating this couldn't actually inflate the balloon, or envelope as we must correctly call it, but did give some impressive demos of the radio controlled burner system that makes the thing fly. Someone suggested that had we known, some sausages could have been cooked very quickly on the 3 foot high gas jets.
The whole unit was bought in from the makers in Germany and will cost an eye-watering £3000. For a third of that you get a one man, or one teddy bear, single seat and burner version which is just as flyable. Don't worry, the bears are unharmed and apparently enjoy the experience.
The unit works in the same way as a real balloon and the owners should know as they fly full sized versions and regaled us with tales of landings where they shouldn't have. In fact they have flown the model from the real one which must make for an interesting pairing sight. Normally though the miniature is demonstrated on the end of an extending dog lead.
Finally, just when you didn't think there could be any more fun, the basket incorporates a mechanism for dropping markers over the side. This is used in competition flying where the idea is to hit targets marked on the ground.
Photos of inflated model balloons here.
Sunday, March 28, 2010
Air, sea and rail
Model shows fall into several categories. At the top are the super high quality, single subject exhibitions - the sort of thing I take model railways too. These are focused, held in a proper exhibition hall and attended by a mainly enthusiast crowd who look miserable and don't like asking questions or appearing to enjoy themselves.
At the other end of the scale are the little local events where the display consists of a mish-mash of different items normally chosen because someone is willing to put on a display and fill space rather than any other reason. The audience is anyone willing to pay to come in and a fun time is had by all. Saturday was spent in something like this - the Air, sea and rail exhibition in St Nicolas Church.
Please don't think I am being disparaging - these events are the lifeblood of many a village fete or fundraiser. This one was held to feed the church restoration pot. Organised by a local modeller it saw displays of all sorts of hobbies that involved making things, just up my street !
The boat club put on a fine display. All the models on show came from a total of 6 people which shows that we either build a lot, or too much depending on your point of view. The vessels ranged from ready run yachts to scratchbuilt motor boats. Motive power covered sail, steam,electric and even a glow plug hydroplane. It's one of the best set-ups we've put together and looked fantastic. The tables were full and yet you could still see the individual items.
The timing was perfect - right at the start of the sailing season, we hoped to gain a few members. After all the local branches of WH Smith sell more model boat magazines than we have club members so there must be closet miniature sailors locally.
All this would have worked well except for one thing. No one came in.
Well, just over 30 people paid on the door and those we saw had a very nice time. Hardly surprising as there were lots of interesting things to see (more during the week on this) including boats, planes, trains, dolls houses to name bu a few. We all really felt for the organiser, adverts had gone out, posters were put up, word of mouth arranged via the congregation yet the numbers were disappointing. This was especially bad considering the previous years modest successes.
So, if you were in the Warwick area on Saturday and didn't go to the church to see the show, you missed out. We were there with lots of good things and a desire to talk about them. Instead we talked to each other and I won a prize on the raffle (some Tamya dinosaurs, best prize I've seen for a long while). Shame.
Saturday, March 27, 2010
Ruston 48DS
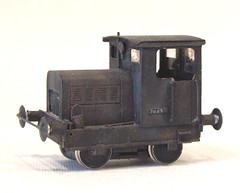
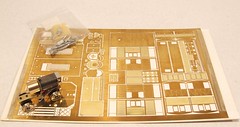
One of the smallest locomotives in my fleet is this little Ruston 48DS. Built from an etched brass kit produced by TAG models many years ago, the body just fits over a Tenshodo SPUD.
Although the model was sold as suitable for a SPUD, the instructions only seemed interested in using the Bachmann "Gandy Dancer" as a power unit. Therefore I had to improvise, fortunately not too difficult in this case. I think in this case I ended up with the better unit. Gandy dancers are nice and ingenious but pretty much have two speed settings - stop and go.
Using the SPUD allows the tiny bonnet to be filled with lead in an effort to give the thing some weight. The cab too has heavyweight innards. Despite this I wish I'd been able to get my hands on some uranium or other heavy metal !
When I built the model I obviously wasn't paying attention properly as the eagle eyed will notice that the sides are the wrong way round. The doorway should be towards the front !
One day I will fix this. I've never been one for revisiting old models and reworking them, preferring to start from scratch. The 48DS was never my finest hour though and I do have a very nice drawing on the front of a book that shows the real thing in glorious green with a bit more detail. While this was a simple kit, in my enthusiasm to build it (I was young dear reader) it didn't get the attention it deserved.
There are also some very nice photos on the web.
In fact I've enjoyed these as much for the industrial background scenery as for the locomotive ! I reckon that these ought to give anyone contemplating a micro layout some food for thought. A locomotive like this, a couple of wagons and a shoebox - how much more space do you need ?
Friday, March 26, 2010
Coals to Newcastle ?
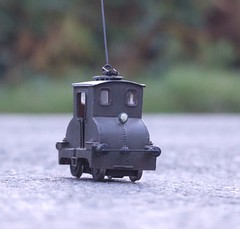
Or in this case, miniature Hellingly Hospital locomotive to the real railway.
Not that there is much real railway left I'm afraid. What you see is the model perched on the road crossing at Park Road. There are several photos of the prototype engine here so when I visited Uckfield Show last year, I took the opportunity to give the model a trip out.
Actually I did feel a bit daft taking this photo but living so far from the line, I knew I might not get the chance to do this again. It was a quiet evening so the model could sit in place for a few minutes without too much danger of being run over.
Anyway, building models of extinct lines running into asylums is pretty daft so I suppose this is just one more step towards turning myself into an inmate !
Thursday, March 25, 2010
Hellingly Station
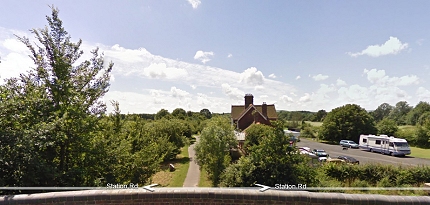
With Google Streetview now covering 95% of the UK, it has suddenly become fashionable to post pictures of interesting things you can see thanks to the wonders of technology. Or at least it was about 2 weeks ago.
Since, I've been too busy working to do much actual model making recently, and never one to be in fashion, here's my effort - Hellingly Station.
The building is very well preserved and exists as a rather nice private house. When I was last there, there weren't even any major alterations to what is quite an attractive building. Were the Cuckoo line to be re-instated, there is at least one station that could be recommissioned easily enough.
The Hospital line ran off to the left from almost exactly the middle of the photo. It curved away sharply before heading into the hospital grounds.
See the image in Streetview.
Sadly, the hospital itself isn't covered as the roads are mostly private and thus denied to the Google mobile. Shame really as when the pictures were taken the building was mostly intact but are now largely rubble.
My Hellingly Hospital Railway layout.
Wednesday, March 24, 2010
LWMRS Show handout
Despite being 10 months away, work continues apace to put the Leamington & Warwick Model Railway Exhibition together for 2011.
This year we have split the tasks up as the sheer size of the event means that one person hasn't got a hope of doing everything. While there has been a team running the event in the past, we've tended to put everything through the exhibition manager. Now the trader booking and liaison falls to my Dad and I - 'cos I can work the computer and being retired, he has the time to ring people up to chase missing forms.
Consequently, a fair bit of my time recently has involved putting packs together for over 40 traders and dealing with the returned forms. That's 40 different stands, each selling different products - we don't like too much duplication in the show as it makes things less interesting for the visitor.
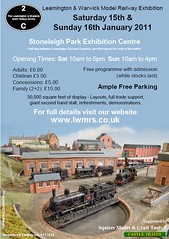
A more pleasant task was to create the handout that you'll find on lots of tables at exhibitions up and down the country. Chris Nevard generously allowed me to use one of the photos he took of Clarendon. Since this will be appearing at the show and is one of our club layouts it seemed a good idea bet. Besides, he takes a reasonable snapshot, not that you can tell from this picture as the screen grab from the PDF I sent to the printers isn't entirely happy. The real thing is much better. Technology huh ?
More details of the show will appear on the Leamington & Warwick MRS website.
Tuesday, March 23, 2010
First sail of the season
Sunday at the poolside was bright and clear. There was a little breeze, enough to make the yachts work well but not enough to drop the temperature. It's days like this that make me wonder why more people don't like sailing model boats.
I mean, I spent a happy couple of hours in the countryside enjoying the banter between a few mates who just enjoy making and sailing scale watercraft. If the rest of the boating season goes like this we'll be well happy.
Of course to the hardy types this sounds like playing with toys. After all we could be out on a real lake in full sized boats taking on the elements in a primeval battle.
To them I point out that at no point did we have to get wet. Our craft all fitted in the back of the car rather than a trailer. None of us felt the need to wear a rubber suit or bouyancy aid. Drying the hull was easily achieved with a single sheet of kitchen towel. And we were all back home for lunch.
Monday, March 22, 2010
Raising steam
Like an excited child at Christmas, one of my fellow boat club members has been asking to see my steam boat. He fancies something similar ans since this is pretty much the cheapest model you can buy it would make a good starter kit.
All of which means in time for Sunday's official first sail of the season, I had to make sure the model worked.
First surprise was that I'd forgotten to take the receiver batteries out. Even more of a shock - they had enough juice still in them after several months out of use, to move the steering servo. I've often found ni-cads not to hold a charge for long periods, even though they don't leak like normal batteries, but these were fine. OK, they have been recharged to be on the safe side but that was good news.
The same couldn't be said for the glue holding the servo down. This had completely failed and the thing flapped around in the bottom of the hull. Superglue to the rescue and we had steering again.
Finally, it was down to the sink to steam up on the draining board. There was enough fuel tablet in the burner for a test so I filled up with luke warm filtered water and lit up. While steam pressure was raised some 3 in 1 on all the moving parts made sure they worked freely and sealed the face between cylinder and block (I know I should use steam oil but I've run out).
After a few minutes pressure was up and the engine turned over nice and freely. There's not a lot of power as I discovered wiping the rotating flywheel with some kitchen towel - this pretty quickly stopped things again - but hopefully with two fresh fuel tablets I'll raise this a bit too.
The very last job is the best of all - clean the brasswork making the model nice and shiny to show off.
Sunday, March 21, 2010
Larger Scale Model Railway Show 2010
Before writing this entry I looked back at what I said last year. In a nutshell it was that while I enjoyed the show, the entry price was high and the trade on the light side.
This year the entrance was up another 50p to £8.50 and despite an impressive looking list of traders, those looking to spend money might have felt things were still looking a bit empty. In fact the layout of the hall divides nicely into two halves and in the back one, there were only a couple of sales stands.
Now don't get me wrong, going to model railway exhibition isn't all about buying stuff. You could argue that a rise in ticket price commensurate with a decrease in traders is a good thing if they are replaced by displays. The numbers of those did appear to have increased. Access to all of them was good and the aisles were wide enough to walk around in comfort, at least on Saturday afternoon.
Mind you, one idiot wearing his rucksack on one strap did manage to swipe my Dad a couple of times with it - not helped by wearing the wrong side strap so the bag stuck out as far as possible. Why is it so difficult for people to use these handy bags ? I simply (ready for this ?) take it off and carry it by the top handle when in a crowded area. If you must wear the thing at all times, just remember you are now twice as wide and no one will get hurt.
The other problem is that in the larger scales, a lot of the layouts are little more than test tracks. That's fine for watching trains rush by but you do see the sames ones every time. I love a Garrat locomotive but I have seen Tarrag shed many, many times now. Worse, Newchapel Junction seems to be in the same spot every year. Much as I love this layout, enough to want to see it at our show, a break would be a good thing as it looks like the organisers simply aren't looking for new models.
Still, if you like spending time watching live steam models do their thing, this is still a good show and I'll troop through the door next year.
Saturday, March 20, 2010
3mm scale Y6 tram
If you are looking at this on an average monitor then the photo is showing up larger than life size. Despite this I'm pretty please with this little model.
The brown body is a mix of earth colour base followed by a good wash of track colour to emphasise the plank lines and simulate the dirt that gathers there. A little dry bushing with dark grey highlights the lumps in the black areas. Finally the windows are glazed with Krystal Klear - not easy for the side windows as you have to smooth it over the surface rather than build up a skin in a hole in the normal way.
On the track the model is a bit flighty but controllable. Although it has been weighted, more is required to keep it on the track. The flanges on the supplied 14.2 wheels are very fine. The closeness of the skirts to the rail is unforgiving of trackwork that isn't level too.
Worse still, I have absolutely no use for this locomotive. I built a Scottish branch line and have something suitable for Yarmouth docks or the Wisbeech and Upwell line. Never mind, I've always had a soft spot for these and if you can't build what you like then it's not much of a hobby is it ?
Friday, March 19, 2010
Chassis complete
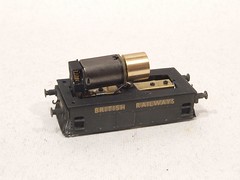
As you can see, the motor did fit into the chassis. OK, so the gearbox is visible but some black paint soom sorts that out. At least the gleaming flywheels is well inside the body because as a moving item it would have been obvious. Perhaps I should have offest the unit to move the gearbox back a bit. The wheels wouldn't have been in the right places but would this matter ?
Sadly what is visible is the transfer sheet between the letters. This is the downside of using waterslide transfers, especially old ones, on matt paint. Maybe if I'd sprayed the black bits in gloss and then matt varnished the results wouldn't be so obvious. Or if I'd stopped rushing and being stingy and order some newer decals instead.
To be fair, in real life this isn't so glaring but it's still anoying. Not anoying to make me go back and fix it mind you. I'm kidding myself that I've replicated the effect of the crew cleaning the words and nothing else on the locomotive. Well it sort of looks like that !
Thursday, March 18, 2010
Boxy body
People say diesels are boxes on wheels - well this definitely is and it's a steam engine !
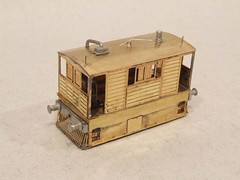
While it looks simple there are a few niggles to keep the keen modeller amused - the ends are double thickness so you can have planking inside as well as out. There is a second footplate which has to have it's hole enlarged to match the one atop the chassis. The windows are better (IMHO) glued in place as getting excess solder out of the plank lines is a bit of a nightmare. Looking at photos, these locos rarely ran with the windows shut either. Presumably with the boiler, smokebox and firebox inside the body it was warm enough for the crew even in winter !
On the roof there is a bell and mechanism. The wire are the thinest fusewire I could find soldered in place. The bell was the only casting not provided and took a bit of niffy whittling of a spare sprue. Getting that shape was much more difficult than I had expected. Well all know what a bell looks like but sit down with sharp implements to try and make one and you end up scraping away all the base material in search of the perfect form.
The sharp eyed will notice a distinct lack of cab handrails. I did try but the results looked rubbish so I decided the model looked better without them.
Wednesday, March 17, 2010
Moving chassis
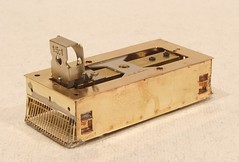
This locomotive is divided into two parts - top and bottom. The box like body sits on the chassis with side skirts and cowcatchers which in turn sits on the mechanical bits that make the whole thing go.
To fit the Bullant I had to make the hole in the footplate quite a lot larger, in fact I was worried that the gearbox would fill the cab area. In the original 7mm scale kit and even the occasionally available 4mm version, this isn't a problem. In fact parts are supplied to permit the builder to create a fake boiler and firebox to fill the innards. No such luxury in 3mm scale - I need that space for other things !
The bogie support has been firmly attached to the main spine to stop it turning. Then in a fit of engineering I drilled holes in the footplate so the bogie could be bolted in place rather than relying in superglue or solder. I actually want to be able to strip this model down for maintenance if required and anyway, it's not difficult even for me...
The only other point of note here is the cowcatcher. A fiddly bending job but not to difficult. Square ended pliers are the key to nice sharp corners. That and looking at photos of the real thing to realise that the proximity of the ground meant they weren't as perfect as you might think.
Tuesday, March 16, 2010
Bullant bogie
Fitting a motor unit into a kit that the manufacturer hasn't considered is always going to be a dive into the unknown. In 3mm scale this is something you just have to get used to - maybe someone has built the kit before you and written up their experience but probably not. More likely the model has been built but its inner workings will remain the builders secret.
Not here ! I knew the Bullant bogie would fit as I'd unpacked several of them on the stand and held the units up against the etched parts to see what would fit. Wheelbase was immaterial as these would be nicely hidden away behind the side skirts. I just wanted the whirly bits inside to be as hidden as possible.
Having chosen my unit, I tested it out on the workbench and then took it to pieces. Bye bye warranty.
There is method in my madness - the bogie is intended to pivot on the butterfly shaped bit of metal so you can use it in a DMU or similar. This sort of thing won't do though when in use as a tram - we don't want Toby spinning on his axis do we ?
The parts separate easily enough with the aid of a small screwdriver and unsoldering the pickup wires. The units themselves employ a clever modular construction which allows the manufacturer to produce different combinations of length and numbers of wheels. In fact if they would just sell the bits, I'm sure we could all manage to make our own. Doubtless with someone making up special versions with 12 wheels !
Monday, March 15, 2010
Y6 Tram
...or Toby as you may wish to refer to it.
This was the quickest 3mm scale loco kit I've ever built. The etched brass bits are a Finney & Smith kit which is in turn a 7mm scale Connoisseur kit shrunk down by the magic of photo reduction. Although the kit comes with a chassis, my plans involved trying out one of the Bullant bogies sold by 3SMR since I don't really enjoy chassis building. Anyway, I wanted to try out one of these new fangled units to see how good they were for myself and since you can buy them ready to go in my gauge of 14.2mm, this seemed like a good opportunity.
Even the cost isn't prohibitive - RTR you pay about 60 quid. Buy a set of wheels, motor and quality gearbox and you only save around a fiver yet still have to make the whole assemblage work.
Anyway, the kit purchase wasn't planned, it was pure impulse when I walked up to the second hand stall at the Kingsbury event and heard the etched metal calling to me...
Sunday, March 14, 2010
Kingsbury 3mm event
Ahhh, sunny Kingsbury in the spring. Time for a trip into Brum to go and buy some more 3mm goodies. Last year I managed to acquire an etched Tram engine kit and RTR power bogie, the resulting model was on the tracks in record time, under a month !
A school in the suburbs of Birmingham might not seem an obvious destination for a day out but Kingsbury is very special for the Midlands based 3mm modeller - it's where we can find all the suppliers of products in the scale under one roof. 3SMR, Finney & Smith, Geoff Gamble Books, Worsley Wagon Works, The Society Shop and Second Hand stall were all there. I noticed a new guy promoting an etched kit for a Southern Mogul too but didn't take much notice I'm afraid. 7mm modellers have a similar event in Telford in the autumn, but they need a much bigger hall for it ! For me this is a chance to stock up on bits for the next years model making. For the trade it's a way of presenting their wares to a targeted group of customers.
This year there was money burning a hole in my pocket. When one of my layouts appears in a magazine, once the tax man has his cut of the fee, the rest goes on buying the layout a new locomotive as a reward. It's a tradition I started years ago and seems only appropriate since the layout deserves a treat for looking pretty in photos.
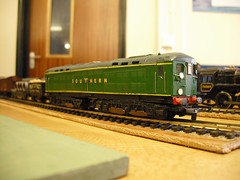
Anyway, what I really want for Flockburgh this year is a Class 37 or Class 17 (Clayton) diesel. Sadly kits for these are promised (threatened ?) but never seem to see the light of day. Next choice is a CoBo (Class 28 I think) which while not really appropriate, ticks boxes for me as I love ugly locomotives. Now there IS a kit for this.
In fact I strike lucky. On the second hand stall, the hole in some many peoples bank accounts and the place where people who buy 3mm stuff on eBay really ought to be looking, I find the kit for a tenner less than the normal manufacturer price. And next to it a resin body for a Class 33 that I think will make up into a nice Scottish Class 27. Obviously I umm and ahh over these for a while but since they are still there after an hour, fate has obviously decreed that they are to be mine.
Next stop, the 3SMR stand for some power - a couple of Bullant motor bogies. Since I had time to chat I discover that the 12mm variant of these and 14.2 version differ only in that the wheels on the later have a finer flange. Since my 3mm diesels run on OO wheels that have been regauged, I have decided to go for the deeper flange on these too. If I'm honest this is partly forced on me because the range in 14.2 doesn't cover the wheelbases I need. I'll just have to pull the wheels along the axles by a couple (OK, 2.2) mm.
So I leave with a lighter wallet and heavier bag. And also remember that that tram loco hasn't appeared on here yet. Perhaps I need to rectify that.
Saturday, March 13, 2010
Lots of etched stuff in Hornby Magazine
There's a lot of naked metal on show in the April issue of Hornby Magazine. My column this month covers the basics of etched kits - not by building one this time but just a list with photos of the various features you should look for. I've also covered some of the first questions people ask such as "How do I get the bits out of the fret ?"
The photos look particularly good. The main shot is of the Mercian Hudswell Clarke and I reckon is reproduced about 4 or 5 times life size ! All the others have come out well too. Whoever did the design has spent some time cutting things out from backgrounds.
If you are counting, 5 different kits are shown in parts. One of these, a MARC models ballast plough, features in the Staff Projects section in an unfinished state. This is an interesting kit for which I had a test etch. After comments a revised sheet of metal will be coming my way and should appear in the magazine in due course.
Friday, March 12, 2010
Watching paint
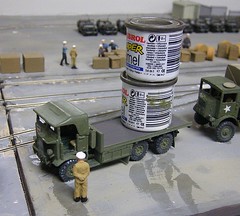
The little figure in the photo is probably wondering what the hell the driver of that lorry is carrying.
In reality, the lorry is on Chris Meads layout "Overlord" and is one of many military vehicles covering the model. Sadly, every so often they take a knock and since most are made from plastic, fall apart.
This means every time the layout is set up, there are usually a couple of vehicles that need repair. Being plastic and assembled with superglue (no, I don't know why he doesn't use plastic glue) they tend to break reasonably cleanly. Thus repair only involves more glue and pushing the bits together.
The lorry in the photo had left its rear axles stuck to the baseboard. The tinlets of paint just held the body down while the glue dried. We did fix all the wheels to the ground this time and hopefully they will stay there for a while !
Thursday, March 11, 2010
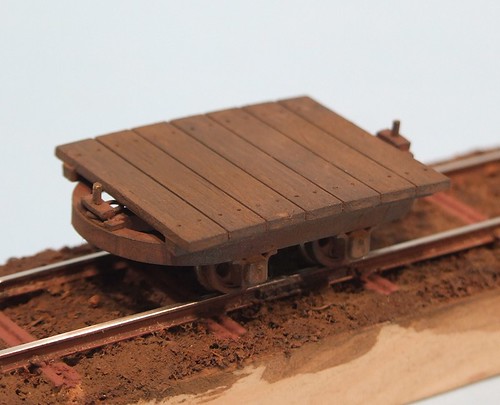
Last lap - The chassis and wheels of the platform wagon received a quick coat of rust colour. The "wooden" top some dark earth and dry brush with gunmetal. Once dry the whole wagon was washed over with "underframe grime". Finishing touches were some dark brown weathering powers dabbed randomly around.
I appreciate that this isn't the greatest paint job in the world. Some people would spend forever working in dozens of colours and produce a truly staggering effect. I don't have the skill, time of commitment for this and anyway, I think in the context of a layout you probably get 80% of the effect for 50% of the effort. For the moment, this is enough for me.
So, at the end of the project (yes, I finished one !), did I enjoy it ?
Certainly. This was a tenner very well spent. There were a few frustrations along the way but only because I'd never spiked track before. For a relatively small price I had quite a lot of fun out of this. Even if you never fancy doing anything similar again, it's still a fun diversion.
Will there be another O14 project ?
Possibly. I see a couple of options:
- The Groudle Glen Railway. For a start I think the line acquired a McEwan Pratt Baguley as seen in the opening credits of "Hi De Hi" last year and KB Scale do a kit for that. There's also a "Wren" lined up for the future. Neither are "proper" Groudle locos but they would be a start. The electric locos would be a relatively easy scratchbuild too. The steam stuff still presents a challenge though. Now if anyone has a Saltford Models 7mm scale whitemetal kit for "Polar Bear" stashed away and would be interested in a sensible offer for it...
- In the future I plan an On30 model. Part of this will involve a high level line between two mine buildings and this would be smashing in 14mm gauge. Best of all, the wagon kits are available off the shelf. Now this is a definite possibility ! Watch this space.
Wednesday, March 10, 2010
Taming SPUDs
Stu asks:I see that your Hellingly motive power uses SPUDs for power – I’ve heard that SPUDs aren’t very good runners – would you agree with this?
To be honest - yes. Sort of.
Tenshodo SPUDs (Self Propelled Underfloor Device) are a great way of powering a model railway locomotive without having to attempt the dark arts of chassis building.
Available in a wide range of wheelbases, if you want to power a railcar or DMU, they have a lot to recommend them. You'll also find some simple diesel kits suggest they are just the way to give your model some go.
And go it certainly will. The ease of use is countered by the unit's jack-rabbit running characteristics. The gears are tiny 28:1 sets driving each wheel. giving a top speed of warp 3 with acceleration greater than a BMW spotting a half car space in a line of traffic, yet I still find them suitable for producing locos. In fact both of the electric locos on the Hellingly Hospital Railway run on them and actually run pretty well.
As far as I can tell, there are a few tricks to getting a SPUD to behave itself. First, mount it properly. There is a bushed brass thing in the top which is where the device is supposed to hang when used as a bogie - this is where the weight should be taken, not on the ends of the axles, something I have seen a few times.
The biggest difference though, is how much weight you put on the SPUD. Lots and lots seems to be the key. The loco shown is a whitemetal kit. It weighs quite a bit (sorry, don't have a loco to hand to plonk on the scales at present) and this really makes a difference. I've built other locos and again found plenty of lead makes a big difference. You won't get a scale walking pace but a modest glide is perfectly possible.
Of course you still have to run the model in carefully - SPUDs do improve with use. Don't take the thing apart either or you can get dirt in the mechanism.
If you are building a DMU, take the chance to give your drive unit more pickups too. Tenshodo have handily provided some contacts on the top to allow this. Talking of pickups, if a SPUD plays up, check that the pickups are bearing on the back of the wheels properly, they can bend and flip over the top if badly mistreated.
So, a SPUD powered loco can be OK. It will never be as good as one built with a multi-stage gearbox but then it will be a heck of a lot easier to build. The choice is yours.
Tuesday, March 09, 2010
Platform wagon
Nice little kit this. Instructions are are provided but essentially you insert the bearings into the sideframes, stick these to the sides of the "hoop" and tut the wheels in. Then glue the wooden top in place and fit a couple of parts for the loop couplings.
The wheels are very nice but the design, a Hudson 4 hole apparently, reminds me of a rather ugly set of hubcaps available for Ford Escorts in the early 1990's. If the Dagenham designers were influenced by the good people working in Leeds design studios then it's a pity for them that the results look better under a narrow gauge wagon than on an XR3i. In model form the quality is excellent with nice consistent back to back measurements.
To be honest there are so few parts there isn't much to say. The bearings go in well and need no glue to retain them. The only niggle was that the axles seemed a touch too long to me and I had to use the same technique employed building Backwoods Miniatures wagons, putting the axles in place and grabbing them between both sides simultaneously. That way if there is any need to splay the sides slightly then it will be the same on both sides. Mind you, with the parts in place I can't see anything not vertical so perhaps it's just me. At the very least the chassis trundled up and down the track nicely enough.
The top simply glues into place with care being taken to make sure it is central. There aren't any obvious guides but it's not a problem to do this by eye. Throughout the job, I've used Revell Contacta cement followed by Mek Pak.
Finally some nice little mouldings are put on at the coupling end followed by a bit of wire and at one end, a flat metal loop.
The finished model needs weight as it is very light, but there's room under the platform for this. Painting will be fun, presumably these things were once new but I've not seen many photos of this state !
Monday, March 08, 2010
O14 wagon parts
The taster kit comes with a little bag containing the parts for a simple wagon. Or at least it should have done. When I opened the bag I discovered that a packing error had left me without the chassis hoop and sideframes. Disappointing.
Never mind, I thought, a quick e-mail should be enough to sort this out and so I fired one off before going to work.
By lunchtime I had had a reply apologising and promising the missing parts would be sent out. 48 hours later a jiffy bag had arrived with the extra sprue.
This is what I call amazing customer service.
Being pragmatic, I accept that a business based on supplying parts for people building model railways in an unusual scale/gauge combination is at best a "cottage industry". We aren't talking about a global giant like Toyota here, but a couple of people knocking out kits from a shed. They aren't going to become rich doing this - the KB Scale car park will be empty of Ferrari's and Bentley's I suspect. Mistakes happen in all the best businesses, it's how they are dealt with that makes the difference.
As it was, the response was far faster than I had expected. If sorting things out had taken a couple of weeks I wouldn't have worried. It's a model railway, not lifesaving surgery after all.
Now there are people reading this who think that the response I got is the least I should have expected. I think we've been conditioned by the ever faster pace of web services such as Amazon to expect delivery tomorrow. Not in 28 days but now ! And if we don't get it we'll be on the web forums slagging off the unfortunate trader who has "let me down". Remember the early days of eBay ? Payment by cheque, goods sent when this cleared. The whole deal took a couple of weeks. Now the auction is over, payment usually means Paypal and if the item isn't on the doorstep the next morning feedback is along the lines of, "RUBISH SELLER.TWO SLOW,I HATE THEM Z-----".
Well, not from me. KB Scale's service has swayed me toward O14 even more. I've only bought a wagon and a bit of track but they are tempting me towards more. On this basis I'd certainly heartily recomend them to anyone.
KB Scale website
Sunday, March 07, 2010
Churchrail 2010
Churchrail exhibition has a special place in my heart for it is here where something happened that has never occurred before or since. I won the raffle. Not only that, it was a decent prize - significant contribution towards a Hornby loco. That's why I have a Q1 in my collection. Presumably because of this, the show hasn't taken place for 5 years.
In 2010 though, Mark was prevailed (bullied and cajoled) to run it again as a fundraiser. The venue had moved from its previous church hall to a school. The programme promised 20 stands including 3 traders. Not a bad effort for 3 quid. And as any fule know, little, local shows run to raise money for schools will be selling home made cake which is a good enough reason to visit.
Wandering around the percentage of layouts that caught my eye was higher than normal. First up, one for the collectors, the largest display of Triang Big-Big railways I have ever seen. All the locos were on shows, several Hymeks, the 0-4-0 steam and diesels and a couple of rare (well I'd never seen them before) 0-6-0's from the range. All the wagons and accessories were on the tables too although I didn't see the barrel dropping thing work, I'm sure it would.
The kids loved it of course, 4 trains at a time running including one shuttling back and forth along the back. For the discerning enthusiast you could play "spot the different mouldings" - who knew for example that the Australians made a rip-off Hymek ? I means I know the nation are formed from our criminal outcasts but still. Mind you they did glaze theirs so it is technically a better model.
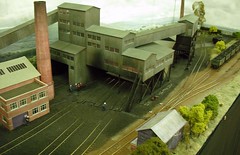
Summat Colliery looked good - a little bit of a coal mine in a surprisingly small space. Mines are usually great sprawling sites which would need quite a considerable space to model. Despite this, the result here is pretty impressive. The builder hasn't tried to cram everything in but instead concentrated on the loading screens and a decent length brick building. No winding gear here and it's all the better for it. The screens cleverly hide a sector plate too.
In N gauge I liked Highley Unlikely which is a little bit of Severn Valley Railway in the space you'd normally associate with a bookshelf. The builder, Tim, likes small layouts as he, like me, gets bored easily and wants to see results from his model making time. The buildings are mostly kit-bashed yet fit the scene very nicely. The end result is also very attractive and hopefully will convince a few people that they can build a model that can be allowed in the house rather than hidden in the shed.
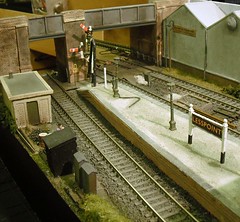
Finally, "Layout I would like to build" prize goes to Lesspoint. This is a micro layout with the gimmick that there are no points on the visible section. Instead there is a small terminus station with track disappearing under a bridge. Behind this is a sector plate that allows all the operation - trains can move from one road to another or be shuffled into the fiddle yard, where there is a single turnout.
The modelling is to a very nice standard and most importantly the model has atmosphere. You can really believe that this is a small, slightly run down station in an industrial town somewhere in the Midlands.
If there is one complaint, it's that like most micro layouts, operation isn't that exciting. I know because I fell into operating it thanks to the arrival of the gentlemen of the press at the same time as the owner was at lunch leaving exhibition organiser Mark playing trains. To be honest all you can do is shuffle very short trains around. The wiring is in to allow a loco to be isolated at the end of a coach and another to take the train away but I didn't try this.
This caveat aside, it's a very nice model. The size was determined by the builder living on a barge - not a space conducive to large scale models ! If you like building models then it would be fine and were it mine then I'd be happy chatting to people explaining how everything was constructed.
I've skimmed over several other nice models - Lochnagar manages to make a more convincing bit of Scotland than I've managed in the past. Claydon looked nice too, a real slice of the Cotswolds. Best of all, the choccie cake was delicious.
More photos on Flickr
Churchrail Show web site
Update: That's done it. My Dad has just heard he won a ticket for a trip on the Gloucestershire & Warwickshire Railway in the raffle !
Saturday, March 06, 2010
Legs
On Thursday we had a nice dose of coincidence - just as we were due to sit down and have the traditional exhibition postmortem - three members of the Abingdon club turned up to collect our barriers for this weekends exhibition.
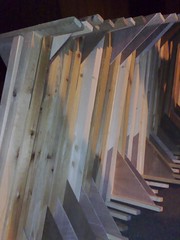
Many years ago, several members (including me) of the club met up in a members double garage with quite a lot of plywood and planed pine and started building some barriers. They come as separate legs and various lengths of cross pieces, and at the time were an absolute bargain. For the cost of one hire fee for the cattle barriers previously used, we built our own. They have now done over 10 years and apart from the odd repair have survived well. The stock has been added to over the years as our show has grown.
In addition we've rented them out a few times to bring in extra income, which is how a dozen of us ended up in a chain passing lumps of wood from the warm inside of the clubroom to the cold outside where the Abingdon trailer was parked. Teamwork is the key and we soon had enough to fill the trailer and hopefully enough for show.
And if your show needs barriers and you can collect, get in touch via the website: www.lwmrs.co.uk/
Oh, and the postmortem meeting went very well. Lots of comments and suggestions, some of the helpful !
Friday, March 05, 2010
Mud, glorious mud
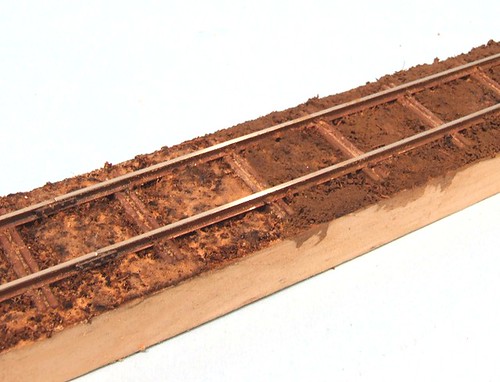
This is looking better. The tea leaf ballast has been given some patch coatings of fine sawdust (leftovers from sanding a wooden floor) pressed into place and then flooded with PVA.
Once dry it is painted with Humbrol earth colour (right hand side in the photo) and the results look pretty good to me - quite a bit like the track has been laid in soft soil which has turned to mud at some point. OK, this would be time consuming to do, as well as consuming a lot of tea and sawdust, but on this small section of railway track it seems to work. A bit of research could persuade me to use a lighter earth mix if the soil in the locality was a particular colour but this is only a test track so it doesn't matter.
Thursday, March 04, 2010
Tea leaves
Even though this is just a test track, I still feel it should be ballasted. Looking through various books it wasn't easy to find photos of industrial track as opposed to the bucolic country lines. I suppose that the temporary nature of these little railways combined with staff not interested in the demands of the camera toting enthusiasts mean less pictures for us modellers to gawp at.
Those that I did find didn't show much. Real lines were granite ballasted and the texture shows up. Industrial concerns seemed just to be smooth. At a guess, the main constituent of trackbed was mud and dirt. How to replicate this is another problem. Even the articles in Narrow Gauge and Industrial didn't seem much help as the subject was glossed over.
My attempts started with sawdust but this didn't seem to have any texture at all when prodded into place. Next up I considered real ash (we have a coal fire) but aside from the supply being a bit light in these warm spring days, it's horrible stuff to work with - one of the reasons steam vanished from BR tracks !
Digging around in my scenic supply I found some dried tea leaves. In this case the contents of teabags emptied out onto a tray and dried in the oven. Thinking "Nothing ventured, nothing gained", I sprinkled and prodded these into place and then applied dilute PVA with a dash of washing up liquid via a pipette.
The result looks worryingly too much like a bed of leaves. I think I need a bit of plaster or sawdust to take away some of the texture and then some paint as the tea is a bit brown.
Wednesday, March 03, 2010
Painted track
No problem with painting the O14 track. Those metal sleepers would have pretty quickly acquired a nice patina of rust as would the rail side. Since I've never seen bright rusty track this was followed with a weak wash of Precision "Underframe Dirt" and a spot of Humbrol Gunmetal around the fishplates to represent oil.
Less successful was an attempt to dab some weathering powders on to give the sleepers a bit of rust texture as well as colour. In my enthusiasm, I tried this before the paint had dried (I also took the photo too early, hence the shiny bits) and the result was more smudge than I wanted. That said, it IS a nice mucky smudge and since it's powder in wet paint, it won't fall off in a hurry !
The rail head was cleaned up with a screwdriver followed by a DOGA track rubber before the rust colour had hardened - it's a real pig to do later and results in giving in to temptation to use emery cloth with the resultant scratching.
Unlocking a Peugeot radio
Modern cars are funny. In an effort to reduce the incidence of car radio thefts, the devices need a code entered in them every time you remove the live power feed. In practical terms, if you disconnect the battery, or it runs flat, you have to re-enter the code to get some music.
That's not a huge problem if the car is new. On a second hand car it's no so good.
I disconnected the battery when I fixed the mileometer on my Peugeot 206, the radio stopped working. Luckily for me a previous owner had taken the time to write the four digit code in the manual. Unfortunately it was the wrong code.
I know this because when I entered the digits the radio didn't unlock. And when I did it again, twice, it locked up properly. I was not a happy bunny. Searching the web didn't help much either - no one seemed sure what to do. So I read the manual instead. Properly. Eventually. OK after 2 hours fruitless Googling...
First the right code was required. If you don't have it, the trick is to remove the radio, look at the numbers stamped on the case and then enter them into one of the many sites that will be presented if you enter "unlock peugeot radio code" into your favourite search engine.
To remove the radio, poke a long thin thing into the holes either side in the faceplate. A screwdriver worked for me but a knitting needle might be just as good. This releases the catches and the entire unit can be carefully slid out. Do not pull hard or quickly as it's still attached to the car with a lot of wires. You don't need to unplug anything as the codes are on the top of the case.
To return the radio, compress the long thing catches either side of the case, the ones you opened with your screwdriver, and slide the unit back. It should lock in position.
Once you have the correct unlocking code, power up the car (position A on the ignition) and enter it. Then listen to those bangin' tunez.
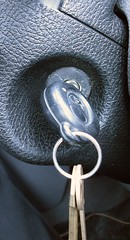
Unless that is, the display still shows "Radio locked" as soon as you turn the key. That means you've entered the wrong code too many times. The solution is to use the spare key to turn the ignition to A (one click) and leave it in this state for a whole hour. Since you still have the main key handy, lock the car up and go and have a cup of tea. If you only have one key, sit in the car and read a book for an hour.
At the end of this period the central display should be asking you for the code. Enter the right code and all will be well. Then write the code down somewhere you'll remember it if required again.
Oh, and if you've read anything online about sticking the radio in the freezer to achieve the same effect, forget it. That hasn't worked for many years. In fact you'll probably stuff the thing up as moisture will form inside and do the electrics no good at all.
Happy listening.
Legal note: This is an accurate description of what I did. If you chose to follow these instructions and things don't work, it's not my fault. Sorry.
Tuesday, March 02, 2010
Fishplates
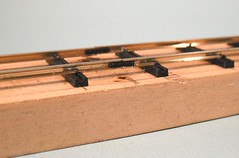
With two o14 track panels fixed to my bit of wood, I need to do a bit of electrical work. While this isn't a layout proper, just in case I decide to have a crack at a locomotive, there had better be some continuity from one end to the other.
A smart person would tin the bottom of the ends of the rails before spiking it to the sleepers and then attach droppers that go through the baseboard and join each rail to it's neighbour electrically. In OO I just solder the rails to each other but these joins can break if there temperature changes and the rails expand and contract. With PCB track, this isn't a big problem, but when the rail can move in chairs or spikes, it might be.
Needless to say I didn't do things properly, my electrics rely on solder smeared on the underside of the rail with a hot iron and some Carrs Red label flux. Once cool I had to use a square ended file to clean out the solder that had oozed up the sides.
Finally, the supplied cosmetic plastic fishplates were fitted with a touch of superglue. This all looks very nice although I should have a left a tiny gap between the rail ends for expansion as the prototype does. I'll just have to blame learner plate layers.
Monday, March 01, 2010
Sticking and spiking
Time for a plan B. Actually, time to go and read some instructions but this is my blog so you'll not be surprised to see I go for plan B. Since I can't spike the rail to the sleepers as accurately as I'd like there needs to be an alternative method.
Luckily there's no need for any original thinking, just do what I do with etched kits - tack the part be fitted in place and then fix it properly.
So, it came to pass that the rail was super glued to the sleepers. Best results are obtained using Zap-a-Gap which fixes the two nicely rather than a brushable Loctite which doesn't. Pity as the brush makes it easier to apply but when the rail falls off at the slightest touch convenience is outweighed by results. Mind you, a few drops applied from the Zap bottle seem OK and take long enough to grab that some deft work with the track gauge is possible.
Once dry, spiking becomes easy. The spike heads still have to be altered but at least the rail stays put. I've also discovered the spikes can go in at 90 degrees to the intended orientation and then rotate one past the rail head buy using a pair of very pointed pliers. If the top is still too long it just doesn't get turned all the way around.
The results are much better than before. One rail is arrow straight and the other isn't too bad either. I still don't fancy doing an entire layout this way - the Groudle project will, if it ever happens, be based on copper clad track but then it does have wooden sleepers so this will look fine.
Quite how you get the trackwork accurate enough for point work is still a bit of a mystery for me, although not as much as how you spike an entire layout without going crazy. I suspect that laying sleepers on tape alows for a tiny bit of lateral movement so perhaps glue is better after all.
Never mind, next I have to join the sections together.
Subscribe to:
Posts (Atom)