 Now for my least favorite part of building the 01 diesel - the drive cranks.
While the real loco might consider them a vital part of the drive train, on a model the whirly bits behind the cab steps are just along for the ride and not as helpful passengers. Decorative they might be, but they have the potential to hobble an otherwise nice chassis.
Building commences with laminating 4 layers of brass together to make each crank. Then the hole for the pin is opened out to size (1.3mm drill bit) and because I was feeling like doing a proper job, tapped to 10BA. Which promptly peeled the layers apart at one end. Not to worry, clean the swarf out and re-solder then all is fine.
Trouble started when I had to press the crank onto the shouldered axle. The first side is simple enough - trap the lot in a vice and squeeze. Crank 2 is a different matter as this has to be done with the chassis and all the bushes in place. With everything lined up I started to squeeze - at which point the crank fell off and vanished.
2 hours searching failed to find it. This included lifting a floorboard to see if it had managed to work through a gap a tenth of the size of the bit of metal.
According the kit instructions, you have to chose the set of crank etches you require from Romford or finescale. I had plumped for the former since those were the wheels I was using. In desperation I looked at the spare bits. As far as I could tell, the only difference was that the throw on the finescale versions was between 1/2 and 1mm smaller.
So, I made up another crank and soldered some wire into the hole for the pin. Then the new measurements were transferred from the existing crank using a par of compasses. This was drilled, tapped and squeezed on. The vice was spun around so anything falling off ended up on the modeling board and not the floor !
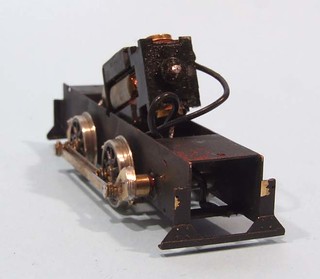
To keep the cranks the correct distance from the chassis I used some top hat bearings with the "brim" cut off. Had my measurements been a touch more accurate and I wouldn't have bothered with this as a couple of washers were then required to get things perfect.
After a bit of tweaking and much reaming out of the rods, the who lot rotates and doesn't seem to impede movement. A good thrash on the running in rolling roads seems to show all OK. Phew !
2 comments:
aaargh! how big was the piece you lost? I hate it when something like that, it can only be within a radius of 2 ft from where you are, but still it vanishes. Look forward to seeing the final model,
Lee
Don't worry about the missing crank--you'll find it tomorrow.
-Jeff
Post a Comment