A daily updated blog typed by someone with painty hands, oil under his fingernails and the smell of solder in his nostrils who likes making all sort of models and miniatures. And fixing things.
Wednesday, December 05, 2012
Parkside chassis - making the axleboxes move
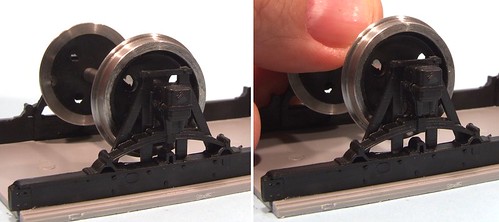
The biggest surprise I felt when I built my first Parkside Dundas O gauge wagon kit many years ago, was that the axleboxes are designed to move in the W-irons. To be honest, I've never been sure why they bothered with this - the larger scale wagons are a lot heavier than their 4mm brethren and thanks to a thick plastic floor, pretty difficult to make up wonky.
This isn't proper compensation - if it were, there would be a fixed axle and the other would rock around a centre pivot - however I'm sure it improves trackholding. You could convert it to normal compensation easily enough should you want to but here, I can't be bothered. That experiment can wait until I glue up the moving parts solid one day. Than I'll claim it to be science.
Anyway, each axlebox is made up of three parts; two plastic and a brass bearing.
Construction starts by making sure the rear part slides in the W-iron. If it doesn't file and scrape away plastic until friction-free movement is acived.
Then pop the bearing in. Add a dot of superglue to the top and cap this with the outer axlebox. The unit should still slide up and down, if it doesn't take it to bits immediately. Leave the parts to dry fully and have another go.
Three of mine work OK, the fourth is a little stiff but moves enough to work with the weight of the wagon on top.
Labels:
kitbuilding,
model railway,
O gauge
Subscribe to:
Post Comments (Atom)

No comments:
Post a Comment