You see the RTR track is designed for HO scale railways. .This means you end up with too many sleepers that are too short and too close together. Most people live with this because all the other benefits outweigh the visual disadvantage. Once ballasted and weathered, the track looks OK.
In an ideal world, I would have constructed some beautiful track from individual plastic components from C&L. Sadly looking through my stash of goodies I could only find a point kit picked up years ago on the cheap. Not nearly enough chairs in there.
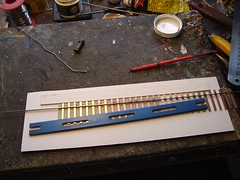
Plan B was to make tracks in the same way they are made on all the layouts we run - PCB sleepers and Code 75 nickel silver rail. The parts for this came from SMP products - these are now available from Marcway. Although you miss out on chairs, the track looks good and is easy for idiots like me to assemble.
To speed things up, I made a little jig from cardboard. This is nothing more than some strips about 5mm wide set a sleepers width apart. All it does is speed up the initial soldering of the rail to the sleeper. I simply slots these in the jig,
 solder the rail and once all the sleepers are attached, turn the track around and solder in the second rail. On a layout I'd do this with the track in position, here I wanted a dead straight section of line so I used a trackseta to achieve this.
Once scrubbed clean with Shiny Sinks, the result is very presentable and didn't take too long to do. Including making the jig, probably about an hour and half.
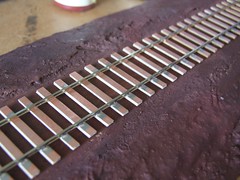
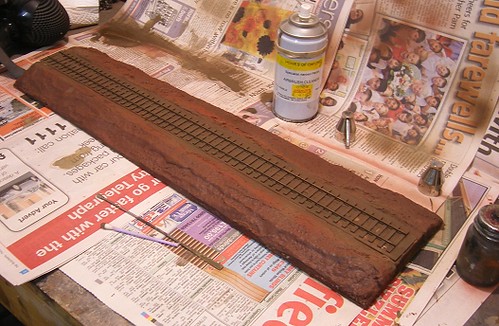
The track was them laid on some cardboard, to allow me some ballast "hump", on the board. A coat of red oxide primer and then some Precision Paints "Underframe dirt" and it's ready for ballast.
No comments:
Post a Comment