Yesterday I quickly reviewed some Scalescenes card kits for ISO shipping containers. These are interesting models but it's the delivery mechanism that is revolutionary and I wonder if it is the shape of things to come.
The principle of the kits is that the modeller buys the file along with the rights to produce as many copies for personal use as he or she wants. Production of the model is completely down to the purchaser. In this case that means you print off the kit parts yourself and lamitnate them on to cardboard to produce the components. In a couple of years if I want another kit, I just fire up the computer and printer to make it.
But can we go further ?
3D printing is much discussed on many modelling forums. At present the results aren't high enough quality for those of us in the smaller scales. Each layer of plastic laid down is arount 1/3rd of a millimetre high and to get acceptable results that has to be reduced by a factor of 10. On the other hand, people are experimenting like crazy with the technology:
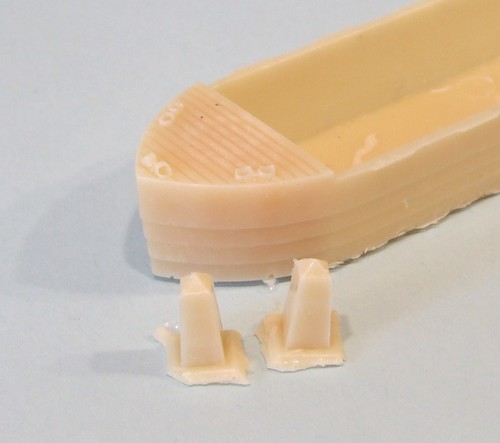
As you can see from the comparison above, the injection moulded model (Top) has nice smooth curves wheras the 3D printed version shows how the material is applied in layers. This will change though one day. The technology will improve, at which point will we all own our own printers and run off components ?
The machine at the top of the page is from Makerbot industries. It's a 3D printer you can buy off the shelf for around £1500 - less if you are prepared to do some of the assembly yourself. Obviously you then need to feed the machine a CAD file but it's a start.
Logically once you have the device then a Scalescenes style service where you buy the data for the part and run it off yourself is then a real possibility. The files themselves are readily available already and should you want the finished models then these can be bought on-line. Searching the Shapeways web site for the word "Train brings back 18 pages of results. I had a dig through and found a nice looking K6 phone box and a loco body that looks suspiciously like the one for the Hellingly Hospital Railway. Out of curiosity I've ordered these and will let you know how they turn out.
This is the future though. One day we won't store drawers full of components, we'll run them off as we need them. Except that we probably won't even do that, we'll buy in the data and make the model in CAD an then print it out. I'm not sure this sounds nearly as much fun but I suppose you can't stop progress.
A daily updated blog typed by someone with painty hands, oil under his fingernails and the smell of solder in his nostrils who likes making all sort of models and miniatures. And fixing things.
Sunday, July 31, 2011
Farewell to drawers full of bits ?
Saturday, July 30, 2011
Scalescenes cardboard shipping containers
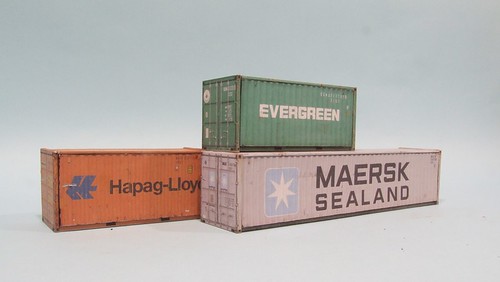
Here's what I call a good idea - cardboard kits for ISO shipping containers. Scalescenes have been producing kits for several years and while I've looked at them before, these really grabbed my imagination.
For those not familiar with the company, they sell you a PDF file for £3.99 which you print, stick to card and build. There are excellent instructions provided and best of all, because you own the file, you can print off as many copies as you like for your own use. Want to add an extra wing to a building ? No problem, just run off a bit more kit.
The containers kit provides 21 different designs, a mix of 20 and 40 foot boxes. They all display realistic weathering, just like the real thing when in service.
Construction isn't too difficult. Print them out on normal paper, photo paper is too thick, and stick the appropriate parts to 2mm card (Daler Board) or 1mm card, or nothing at all. The instructions recommend a Pritt-Stick type glue for this. I put the parts together with Roket card glue and this worked well.
A couple of hints - get some black 1mm card as it saves colouring the edges. Also, score the folds when you have to wrap the printout around a piece of thick card. Square edges are important and this helps a lot.
While these kits are designed for railway modellers, boat enthusiasts who are building container ships will find them even more useful as you can print the kit at any size you require. Just the thing if you need a few hundred !
Visit the Scalescenes Website
Friday, July 29, 2011
Abandoned railway van
Friday randoms this week are more random than normal. These photos were taken on a camera so old that it used film - Probably a Zenith 12 or Possibly a Practika.
Can you beleive it kids ? Yes, once upon a time we used to have to put canisters of film, 24 or 36 shots worth, in the back of a camera and once these had been used, take them to a camera shop to see what we got. Nothing instant either, unless you wanted to risk a dreaded 1 hour photo machine, it could take DAYS.
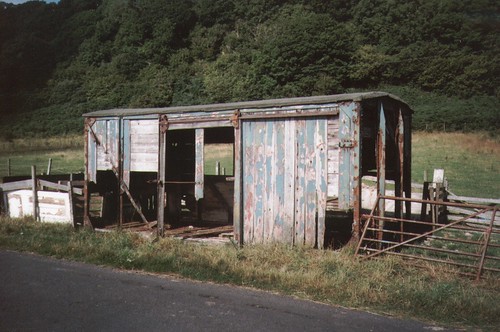
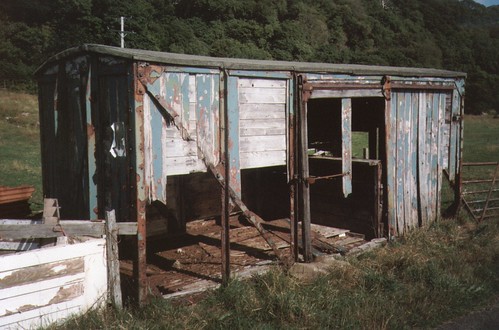
Anyway, these photos clearly show an old railway wagon in a serious state of decay. I'm struggling to identify the prototype, first thoughts are an LMS 12-ton van but the crossed strapping on the ends make me think perhaps not. Suggestions would be appreciated from the wagon buffs out there.
If it helps, this was spotted in Scotland, somewhere on the west coast, about 10-12 years ago. By now it's probably nothing more than rust dust. Let's face it, it was hardly in pristine condition when I saw it !
Thursday, July 28, 2011
Bracket mysteries
Last week I showed the horror that was my workbench, buried as it was in "stuff". Since then, I have finished the projects I was working on and tidied up. My bin is full but my work area is sort of tidy.
While mucking out I spent quite a bit of time trying to work out what should go and what should stay. I was pretty harsh on the basis that my collection of random odd-sized nuts, bolts and screws is big enough already and doesn't seem to be depleted ever. Likewise, random left over plastic bits from kits seem to go into a drawer because they might be useful, and rarely do they prove to be so they can go out as well.
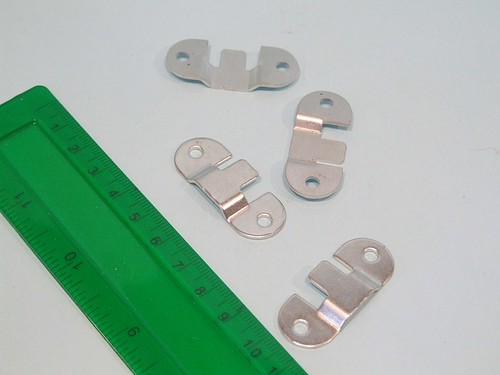
In one corner though, I found these brackets. They obviously came with something and were important enough for me to save from the bin. I just can't remember what the heck they are.
Now they must have come from something, probably DIY related and since you, the readers of this blog, are practical people, I wondered if anyone out there would like to suggest what they might be. And if I should keep them.
Wednesday, July 27, 2011
The Toy Box, March
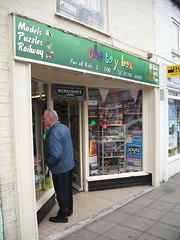
Another town, another model shop discovery. For literary reasons, I visited March in Cambridgeshire last week and wandering around the town, found "the toy box" just off the main street - 11 Station Road to be precise.
It's not a big shop but does stock a range of Bachmann and Hornby trains. There are a few model railway plastic kits and accesories too beside some Peco track. A general range of plastic kits and scratchbuilding materials are available although not a huge one. Finally, Revell paints, brushes etc are on sale from a very well stocked rack.
While not a big shop, it's nice to see it there. If I were local I suspect that it would be my second favorite shop in the town after Julies Bakery.
Note: The shop name and decor have changed since Google took the photo below:
View Larger Map
Tuesday, July 26, 2011
Damper van - Heavy Man !
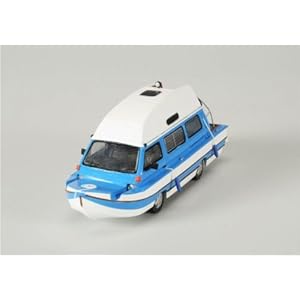
This blog does not normally cover die-cast releases, I can't get over the idea that's it's just blokes buying toy cars. However there is a new release that I covet - The "Top Gear" Damper Van.
Those with long memories will remember that I was so inspired by the combination of VW van and boat, that I had a go at building my own. If you don't remember then you can read about it in the archive. Be warned though, it wasn't one of my successful projects.
Anyway, Oxford Diecasts have licenced the entire set of amphibious Top Gear vehicles and these are now appearing in the shops. The cars/boats are based on those that the team tried to sail across the channel. This shows up in the Damper because of the colour (blue not green) and the higher pointed bow. The Mk1 I tried to model had a pointed end more akin to the canal barges normally produced by it's builders M&P Steelcraft.
Needless to say, this van will float about as well as my version did. All I need, is to find an excuse to put it on a model railway layout. Maybe a dockside scene as it's nearly 7mm. Or perhaps a boatbuilders with this part-finished in the shed. Hmmm.
Oh, and if you've just won the lottery, then the model is on my Amazon Wish List
Monday, July 25, 2011
St Stephen's Road buildings
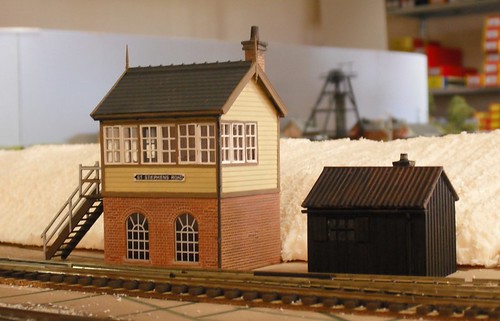
My modelling time has been consumed over the last couple of weeks with a pile of projects for Hornby Magazine's latest layout - St Stephens Road.
If you have been following them on Facebook then you will have seen the layout develop from baseboards to ballasted track, acquire some wiring and now some buildings. These arrived with me a few weeks ago in a big box which contained some smaller boxes from Ratio.
On Friday, I dropped off the finished models in the palatial offices of this august publication and plonked them on the layout. My contribution is the station, canopy, signal box, platelayers hut, goods shed and loading bank. A rather larger effort than I'd thought when asked. The kits go together OK, although there are a few wrinkles which you can read about in the articles, but if you want to do a good job, take time.
I reckon that each main building took around 8-10 hours to construct. Much of this is down to painting the stonework which takes ages, but these apparently simple structures turn out to be more complex and detailed than expected. That said, the result are worth the effort. I'm particularly keen on the signal box and could easily be persuaded to do another one, especially if I was allowed more time to put an interior inside it.
Considering these kits have bee around since the dawn of time, I was pleasantly surprised how nice the end results look. Well worth a look. Now all I have to do is sort out 200+ photos and write some words. That's next week taken care of !
Sunday, July 24, 2011
Sail servo bodgery
Do you consider yourself to be an engineer ? When you hear Kevin Webster in Coronation Street referred to as such, do you wince or shout at the telly ? If the answer is yes then look away now, and stop watching soap operas and get back to your shed and invent something.
Anyway, I am not an engineer but sometimes I have to pretend to be one. Today's problem is with my model yacht. It has two servos, one for steering and the other for tightening the sails. One is easy and done, the other is a new set of challenges.
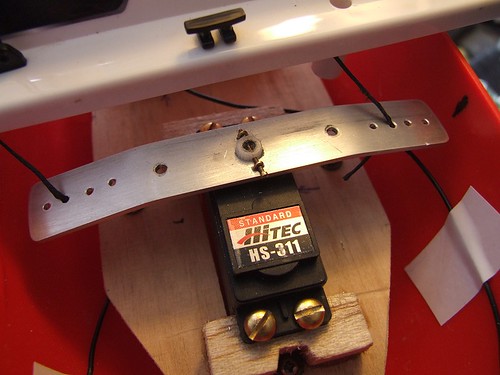
I acquired this model boat part converted from a RTR model. The last owner had ripped out all the old radio gear and installed a wooden tray to hold the servos. He'd also fitted an aluminium arm that when swung would pull on the cords attached to the booms the sails are fitted to. When the arm turned one way the booms would be hauled to the centre line of the boat, tightening the sails, turn the other and they can swing freely. Quite what this achieves is currently beyond me as I don't understand the principle of wind powered sailing, but that's what's supposed to happen.
Putting in the arm was the last thing done. Then the boat was put back together and returned to its box. And then passed on to me.
The problem seemed to be that the torque on the arm/servo union is going to be quite high. Normally, the arms are plastic and have splined holes to match the splined shaft of the servo. Here I have a metal arm with hole best described as "butchered" in it. Certainly not splined and hardly round. It was a reasonable tight fit but a bit of testing showed this wasn't enough to hold.
The servo shaft is nylon so glue wasn't an option. I'd probably fill the mechanism with gunge anyway. You can't solder to aluminium (well I can't) so I didn't fancy trying to make a collar with a grub screw and fit this. Finally, thanks to time and tea, I came up with the solution shown.
The arm is put in place, with the servo centred. A hole is drilled through the shaft and a tiny bolt screwed in. Then the arm is drilled to accept bent bits of brass. It's 0.7mm metal and the hole is the same so it's a very tight fit and required a little assistance from a toffee hammer. Finally a touch of superglue on these brass staples will hopefully hold it all together.
I'll let you know in a few days if this all works, and how my sailing lessons have gone. Or not if it all goes very badly.
(Note: The big news is I typed yacht several times in this post and spelt it correctly each time - a first !)
Saturday, July 23, 2011
Sprue
Sprue. The leftover branches of a plastic kit.
There are at least two approaches to building a kit:
Option 1 – Read the instructions and then carefully follow them step by step to produce a finished model.
Option 2 – After a cursory glance at the instructions, take the biggest part from the sprue or etch and try to work out what attaches to it. With a bit of luck this will be the second biggest part. Keep going like this until all the parts have been used. In theory, this means the model is finished.
Yes, I go for option 2. Even when I do read the instructions I still tend to reach a point where I spend my time looking at parts and trying to work out what they are instead of waiting for their staring moment to turn up in the paperwork. It's not such a bad method – the kitmakers don't always get it right, I'm working on a model where the roof trusses go in before the internal platforms, which them have to be threaded through all the stuff above them.
Mind you, I'm now the proud owner of a sprue from the Ratio Goods Shed which has two left over parts on it which I can't identify. This could keep me awake...
Friday, July 22, 2011
ex-LNWR dock tank
Introduced in 1896 these small shunting tanks had the very short wheelbase of 7ft 3in and a trailing Bissell truck to cope with the very sharp curves for use in docks. Unusually the saddle tank was square in section, an inelegant and unusual design.
I'd only ever seen a square tanked loco in the Rev Awdry's books (who according to the Internet was called Neil) and even he didn't look like this beast. When I spotted the M&L kit on a second hand stall and the box said "Dock Tank", I knew it had to be mine. The kit made up easily enough, in fact it pretty much fell together. The body is whitemetal stuck together with superglue and the chassis a nice set of brass etchings.
On the layout, the biggest problem is the long wheelbase. On normal track it's fine but give it a trip around the Dock's tighter curves and that back truck jumps off the rails. My suspicion is that the sloppy and slightly sprung axle just doesn't cut the mustard as a replacement for the proper engineering job. On the other hand the model looks nice and anyway, my engineering isn't up to the job. Not to worry though, the model looks great in the display case and I've got plenty of other model locomotives to run anyway.
Wikipedia on the prototype engine.
Thursday, July 21, 2011
Are you a messy worker ?
Lest you think dear reader that I operate in some luxury workshop with acres of space and hot and cold running nymphets handing me tools as I work, let me disappoint you.
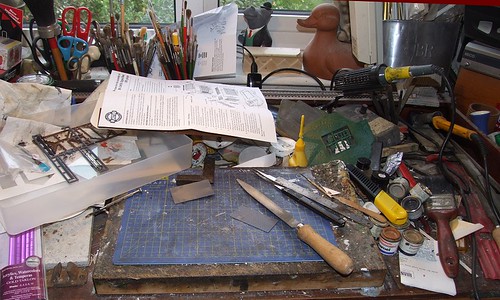
At the moment, my modelling bench, a 4 ft long section of desktop, is the messiest it has ever been. That's a pretty big statement but sadly, it's true. In fact it's such a mess that I had to take a picture of it.
In the middle is the building area, an A4 cutting mat with only a few tools on top. This sits on an inch thick wooden board which raises the model making area from the surrounding detritus. Without this I wouldn't get anything done and might even be forced to tidy up a bit.
On the left we have a plastic tray containing bits of plastic kit. I have a number of trays like this, some plastic, some cardboard, which I use to keep projects together. Hopefully putting the bits in here stops me loosing anything. Sadly I tend to throw empty sprue's back in so while the kit parts might be in there, they are a bit buried.
The box is sitting on top of a big pile of paper towels, for cleaning brushes, and a ceramic soldering slab. In the back corner you can just see my pot of turps.
On the right there are tools. Big files gather at the end, little ones under the other stuff. You can tell which I use the most ! There's also a cheapo set of screwdrivers in an open plastic box. I do have good screwdrivers but for must work, such as opening tins of paint, poking down the necks of glue bottles and scrapping at things, these will do.
Beside the board are tinlets of paint for the current project. This involves painting stonework so I like to keep the colours I've used to hand as I tend to forget. “Write them down” I hear you cry – I have but you can't be too careful.
At the weekend, I will have a tidying up session and get my work area looking spick and span (sort of) but for the minute I'm a bit busy. What's weird is that despite the mess, I'm having no problems getting things done. I can generally find the tool I want, when I want it. OK so the screwdrivers have to be rounded up occasionally but progress is good so does it matter ?
So, are you a tidy fiend or prefer to work in a mess ?
Wednesday, July 20, 2011
The chippies on fire !
There's a myth that only the best modelling is only found on the workbenches of those who write for magazines. We sit in our ivory towers and produce the 3D equivalents of Old Masters which you, the poor and unskilled are allowed to worship.
This is of course, complete rubbish. While sitting behind my table at Hartlepool, lots of people came up to me and chatted about their modelling. Plenty of it is really impressive. As an example, take a look at this video by Chris Heath. He's used Scalescenes card kits to produce a beautiful row of shops.
To cap it all, one of them is on fire. He did explain how this was done and it's very simple. No smoke, just flickering LEDs and the effect is brilliant. Easily one of the best attempts I've seen.
Now go and look at Chris's blog.
Tuesday, July 19, 2011
Foxdale progress
Over on the Foxdale desk, my Dad is making great progress on the fancy crossover section of the track. All the points around the crossover are in place and some even have switch blades.
The wagon I completed at Hartlepool runs as well as my original test item and we now have a nice little train on the layout. If I can get around to sorting out the couplings, maybe we can even connect it up.
On a technical note, Parker senior was really struggling with the soldering until I spotted he was using a cheapo lead free solder. Switching it for some normal lead/tin stuff helped enormously. If he was using something bigger than an 18W iron, or the solder had been made up with solver in the mix, all would have been well. As it was, it wasn't. So kids, get some old fashioned solder, just remember not to suck the end of it.
Monday, July 18, 2011
Resin casting - Part 2, making the castings
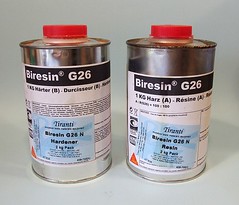
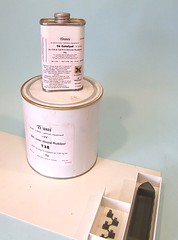
With the mould ready, producing castings is easy. The recipe is simple, pour some hardener into a pot and then add the same amount of the contents of the other can. Be careful to get this something like right, or at least less harder than resin. The chemical reaction is exothermic - try and make it work too fast and the mix will heat up rapidly and bad things will happen. I'm not sure if you can make it catch fire but it's not an experiment I want to do.
My cans came from Tirantis and according to the date on the side, are 5 years past their sell by. Undeterred, I had a go anyway. The hardener label instructs the user to give the liquid a shake before use, which I did on the second attempt. Both liquids were poured (not measured) into a plastic yogurt pot and stirred with a Tamiya stirrer.
The mix was then carefully poured into the mould. I sloshed it around to try and work out any air bubbles and left to cure. Attempt one took about 2 hours and the results were still a bit soft. On the next go, after shaking the hardener, things were much better with a good, hard, casting produced after 20 minutes.
Removing the casting from the mould takes a bit of flexing and probably would be a touch easier if some release agent had been involved but I don't have any to hand and it's not essential. The tiny details still have air bubbles in them which could be fixed with filler but probably won't be since these are wagon loads and will only be seen from a distance.
The important point is that this is all kitchen table work. No special tools are required, just 30 quid(ish) of mould material and casting resin. If you don't need the fine detail and want to make the resin go further than adding talcum powder will do the job but to be honest, it's probably not worth it. As a technique for mass-production of 3D objects, it's brilliant.
Sunday, July 17, 2011
The future of model railway control ?
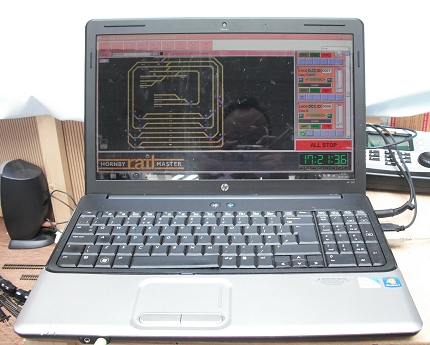
Last weekend, I had the opportunity to have a go with the latest Hornby Railmaster software attached to the magazine's N gauge layout. I was only in charge of it for a few minutes, but it was long enough for me to work out it's not for me. Big time.
I must start by saying that the system works. On screen you have a mimic diagram showing the track plan. Clicking on the points changes them. Down the side of the screen are a list of locos. Each can be selected and driven on screen using the mouse. You have the option to drive the loco in the conventional way, or to pick "cruise" which sets the train off at a pre-determined speed. So we had a 9F on a long coal train set to 15mph. No need to use the speed slider, just press the button and let the computer sort it out.
If you want to get sophisticated then train movements can be pre-programmed. A DMU shuttle service operated and each time the train came into the fiddle yard the points changed so the service alternated between two different units. While clever the programming relied on timing the trains and they didn't seem to run reliably enough for this, sometimes they wanted to go out the back of the siding, other times not running far enough. Maybe OO stock would be better in this respect. Certainly operating in a glass-roofed room didn't help as doubtless the temperature changes would affect the motors.
So if it all works, why don't you like it ? I hear you cry.
I don't know really. Maybe the act of clicking on points didn't seem that natural - a larger touch screen would have been better but that just seems like an expensive version of the button-based mimic panels I build on the back of layouts. I poke a button with my finger instead of prodding the screen.
The problem seemed to be the list of trains. Working them using the mouse was positively unnatural. It will sound weird but I find I need the connection of twiddling a knob and seeing a loco move. There's too much separation. The list was long too which meant much scrolling up and down to find the one I wanted - no fun when you've messed up and need to find it in a hurry.
Now you are probably shouting something about me being old-fashioned. That's a pretty impressive achievement in this hobby but one I'll hold my hand up to. Da kidz will probably love the idea of running trains via the compuery box. With a bit of practise, picking trains from a list will get easier and I suspect they could have been grouped more suitably for stupid people. If I could identify the locos (why are N gauge choo choo's so tiny ?) faster it would help too.
So, this might be the future of train set control, but I'm stocking up on 12DC stuff.
Saturday, July 16, 2011
Festival of rocketry
The Festival of Rocketry is an international rocketry event organised and run by the United Kingdom Rocketry Association to encourage and promote the hobbies of model, high power and amateur rocketry. The event runs for three days and is open to those who want to launch model and high power rockets.
Which is why I spent a bit of Friday afternoon in a remote field somewhere near to Kineton chatting to a man in a tent. You see, when they say 3 days, what they mean is 1 day of setting up followed by 2 days of whoosh.
So I didn't get to see anything fly but I did have an interesting time. Luckily I have a bit of history in rocket building, years ago I built and Estes kit for a Space Shuttle. It flew around 30 feet in the air, which wasn't high enough for the opening parachute to be any use. After 2 flights, my shuttle went the way of the real thing.
What became quickly clear on seeing the beasts on show before most of the flyer's turned up was that my efforts were very much the baby slopes end of the hobby. These beasts would make the buyers from Ann Summers eyes water !
In the photo the tallest grey rocket is around 5 feet high. It has two stages and is made of cardboard. Yes, the stuff you pack posters in. Well, a sort of high-tech super cardboard that is mega strong. The fins are plastic as is the nose cone.
The engine for the red beast lying down costs £120. It's a solid fuel motor and will accelerate the rocket to 600mph and up to a ceiling of 7000 feet - the maximum allowed at this event. In the unlikely event you are a railway modeller reading this then that's a good toy train going up in smoke EVERY TIME YOU PRESS THE BUTTON. As the man who built it said, "You don't fire it very often." He's not kidding !
Yet, this isn't the top end of the hobby. At least one American rocketeer claims to have put a rocket into space and even in the UK, there will be an event next week with a max ceiling over twice the one available here. Amazingly, these rockets are retrieved and fired again, something NASA could do to take a look at. Many incorporate radio location devices and radar thingies (sorry, I got a bit lost at this point in the explanation) to prove the height attained.
While I might not have seen a launch, I did have a very interesting half hour thanks to a group of enthusiasts who weren't just happy to talk about their hobby, the positively revelled in it. Quite frankly if you want to get kids interested in science, give these blokes some cash and get them into schools.
Anyway, you have two days to go so go and have a look at the website.
Friday, July 15, 2011
Hunslet shunting
A random picture ? Yes indeed, welcome to the first "Random Friday" where I put up pictures of stuff that I've been sticking in front of the new Nikon. Well, I've got to get used to it sometime and I still can't find all the buttons or work out what the modes are !
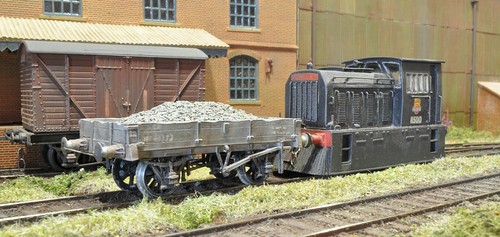
Anyway, what we have here is a Silver Fox resin kit for a Hunslet Dock Shunter propelling a scratchbuilt LSWR ballast wagon. As a beginners loco kit, this is lovely, one resin lump which you stick on a SPUD. The only modification was to drop the whole thing down a little to get those side skirts a bit closer to the rails.
The wagon is made from plasticard and probably a little over-distressed. Those top edges look like someone has been chewing at them and the buffer beam has taken a wallop, although the buffers are still level. Hmmmm.
Behind we have a shockvan courtesy of Bachmann I think. It's a nice model and after changing the couplings to Spratt & Winkles, I've used it many times on different model railways. I don't think I even changed the wheels as they were good enough for the trackwork. That's the thing with modern RTR, a quick weather and it's good to go.
If you want a bigger image, just click on the picture.
Thursday, July 14, 2011
Point lever mistake
When I built Melbridge Parva, I thought that as an industrial yard, the points would be operated with levers rather than from a signal box or even ground frame. This wasn't a problem I thought, just make up a little plastic base with the lever stuck to it. Fit this to the side of the points and all will be fine.
And it was, right up until I tried running a locomotive.
The loco stalled on the tiebar. Another attempt with the controller wound up higher saw the model leap off the rails. Closer inspection showed that the connecting rods were clipping the point levers as it passed. Bending the lever to the side cured the problem - sort of.
At the show I thought I'd get away with this, right up until I ran a loco with side skirts. These not only clipped the bent lever but actually managed to break it away from the base and deport the top end a few inches up the line.
The solution as any fule know, is to do the job properly. The sleepers either side of the tiebar should be extended and the lever fitted to this. In real life that's what happened, presumably railway companies worked out that the rod/lever collision wasn't healthy for either.
Wednesday, July 13, 2011
Resin casting - Part 1, making the mould
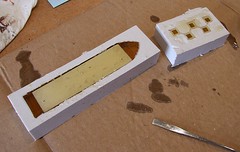
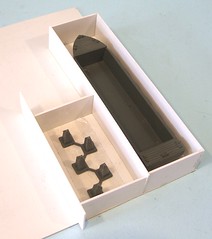
Sometimes you need a lot of identical items when building a model. In the example I'm about to show, the need came about because we had acquired an aged Airfix pontoon kit from an auction and knew that the pontoons themselves would be ideal as wagon loads on the layout. There were only a couple of snags, we needed at least a dozen of the things, and ideally, they wanted to be slightly shorter than those in the box.
Luckily, I've done a bit of casting on polyester resin in the past so didn't see a problem. All we needed was one correct pontoon and I could make replicas from this. That's a whole lot easier than performing a cut'n'shut on lots of models. You also don't end up with loads of leftover bits from a pile of kits (See legal note at the bottom of this post though).
The pontoon was prepared and stuck to a sheet of plasticard. Walls a few mm higher than the top of it were made with more plastic. Some people use Lego for these but all of mine is up in the attic and the plasticard is to hand. While I was at it, I did some tank obstacles in the same way, although the glue wouldn't stick these down so double sided tape was used.
Next, the mould material was mixed up. The stuff I use is from Tirantis (a very helpful company to deal with) and is designed to set at room temperature. This is important as it allows the masters to be made in plastic. Some other moulding methods require metal masters assembled with silver solder as they are poured at high temperatures. The downside, if you can call it that, of my method is that you can only cast in resin, not whitemetal or brass. Mind you, some pretty convincing brass look resins are available if it's just the look you are after so it's not such a big limitation.
Anyway, the mould material is mixed up as per the instructions (95% mould to 5% hardener) and slowly poured over the masters. The consistency is a bit like very tick custard. I try to pour around the master to give any air the best chance to escape. Once the mould is full, air bubbles will surface and can be popped with a pin. One other advantage of this stuff is that no mould release is needed to get the parts back out again. (Health & Safety Note: This is a bit smelly. Read the side of the can and make your own mind up about this)
The material takes a couple of days to set fully, or at least that's how long I leave it. You certainly need 24 hours and I like to give it more time before removing the walls in case only the top has set.
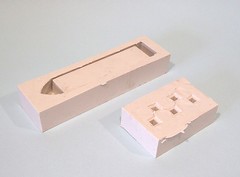
The walls are peeled away and assuming all is OK, the masters released from the plastic sheet. I then leave them for half a day to let the air get at the bottom of the mould. Again, I'm probably being over cautious but better safe than sorry.
Finally, the mould is flexed and the master released. The resulting mould should produce 25 perfect copies of the master if I'm careful it. To be honest I should have made the sides a bit thicker but will probably be OK. I'll find out when I try pouring the resin in a few days time...
Legal note. I'm no lawyer but as I understand it, casting parts this way is acceptable as long as you are only using them yourself. You can't sell them and certainly should not pass them off as the originals. On a more practical note, this doesn't necessarily work out any cheaper buying the kits. The mould and resin all cost money and have a limited life-span. Of course, if you make the masters yourself then you can cast away and put the results on eBay if you want to.
Tuesday, July 12, 2011
Hornby Magazine LIVE 2011
Oh, the pressures of being a best selling author ! Or at least that's what I thought half way up the country on a motorway full of spray. Not to worry though, as I pulled up at the venue the sun came out and apart from a few showers, one when I was transporting cardboard buildings from the car, the weather improved greatly. Hmph.
Anyway, the plan was simple - bring a boot load of projects from my Parker's Guide column in Hornby Magazine along, deposit them on a table, sit behind this and chat to the public. Simple.
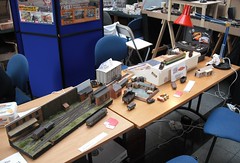
And that's pretty much how it worked out. I set up Melbridge Parva and then decorated the area with other goodies from my projects box. A small worktable gave me an area to build models in and a few chairs for potential visitors who wanted to chat went out front.
Both days started a little slowly because I was at the back of the Ian Allan stand. You had to walk around a little bit of the show to find me, but find me people did. Once they arrived, I didn't stop talking until the late afternoon both days. On Sunday morning I drew a line across a bit of plastic and didn't get around to cutting it for another two hours !
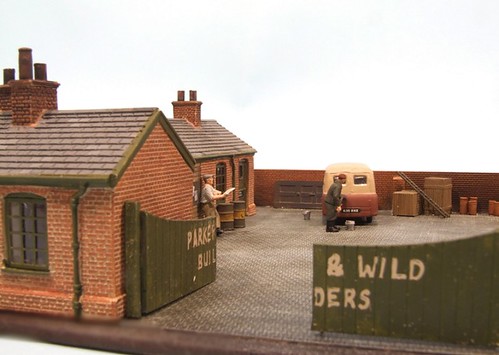
It was very interesting to see what was interesting people. The highlight was the little builders yard I built from Skaledale ready to use buildings. Around 2/3rds of those I spoke to wanted to have a look at it. One man had even been so inspired he'd produced a rather excellent variant with some mine buildings bought in a sale. Three of these, one with a roller shutter door fitted in the end, made a very nice part of a goods yard. I'd have been happy to do something similar myself !
A repeated comment was "It's not as big as I thought it would be from the photos" but everyone loved the chance to see the real model. On a pure ego level, it was fantastic to hear this - writing for magazines can be an odd experience, there often isn't any feedback to anything you produce. Therefore the chance to have a chat and find out that some things are well received is great.
This is especially interesting because on-line, all the chat had been about the Class 33 detailing. This loco was on the stand and several people wanted to have a look - I'm not precious about these projects and encourage visitors to handle them if they are genuinely interested - but less than the buildings. Maybe a loco is a very specific subject but modifying resins brickwork is more the sort of thing that everyone fancies a crack at ?
Whatever, I spent two very pleasant days chatting to loads of very nice people. If you are visiting this blog for the first time after picking up a flyer - welcome - please dig around the archive on the right hand side for loads of content. Please get in touch too. I'm always happy to try and answer your questions, at the end of the day, I simply want to help people enjoy their hobby.
Monday, July 11, 2011
Micromodels Lifeboat
Warning: This is NOT one of my successful projects. If you want to believe model making is easy and everything works perfectly, go somewhere else today.
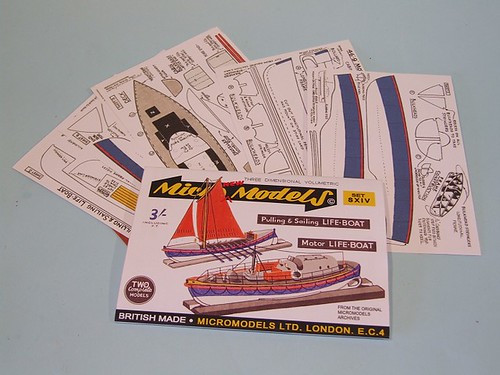
I'm not going to regale you with the history of Micromodels, you can read that here. Suffice to say, that they are small scale card kits popular in the 1950's and 60's. You didn't need a lot of space, the toolkit was limited and yet the range of subject huge. I've always been fascinated by them and spotting that you could buy reproductions taken from the original printing plates on eBay, resolved to have a go.
I decided to go for set SXIV containing two lifeboats, fancying having a go at the motorboat. At 6 quid it didn't seem like an expensive experiment.
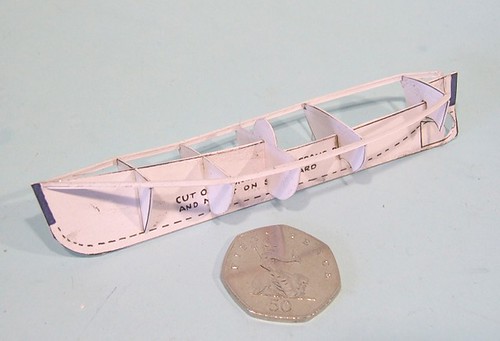
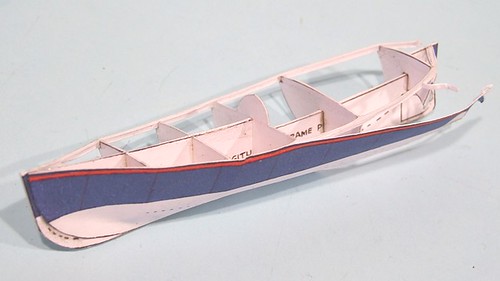
The kit arrived is a slim packet as a series of A6 sized cards. Construction starts by sticking the keel and formers to thicker card, I used Bristol Board, and then cutting the parts out carefully. Glues used were Roket card glue and balsa cement.
The basic boat formed easily enough. The card stringers were a bit bendy and one didn't seem quite long enough but at least it looked like more conventional, larger scale model boats under construction.
The problems came exactly where I was expecting them. The theory is that each curved side is clad on a single hit. Card isn't brittle, but neither does it bend that well. I fixed the top edge and it didn't fit.Then I started again and fixed the bottom edge. That was better but still didn't seem a particularly good fit. Several times, the part was carefully pared away and re-fitted but I simply couldn't get the bend I required. I'm not convinced that the parts fitted that well but with pre-printed card, it either works or it doesn't. You can't fix things with a bit of filler !
At this point I knew I was beaten. I'd tried and failed. Maybe I should have picked an easier kit to start with. Maybe I simply don't have the card modelling skills for this sort of work. If I tried again, I would certainly replace the stringers with thin hardwood which would certainly stiffen up the hull for the subsequent cladding.I might even be tempted to stick the keel parts onto wood or thin plastic for added strength.
I don't know, but leave these suggestions for anyone else who has a go. In the meantime, that beam engine kit looks interesting...
Sunday, July 10, 2011
Fashion Advice
OK, it's late. I've spent the day at Hornby Magazine live exhibition answering questions and trying my best to sound intelligent followed by a 3 1/2 hour drive. I'm tired and have to go out in the morning.
Worse, Blogger decided today's post should be considered draft instead of making it appear as expected this morning. So, I have decided it will be held over until tomorrow.
Instead, I offer some fashion advice based on my observations yesterday. I know, I know, you don't come here for that sort of thing, but stick with me.
It doesn't matter how trendy your trousers are, or how much effort you put into your beatnik style facial hair. You can never, ever, be fashionable; if you are carrying a length of Peco concrete sleepered track.
That's all, thank you. I'm off to bed.
Saturday, July 09, 2011
Hornby Magazine half century issue
Is it really 50 issues since Hornby Magazine first burst on to the news stands ?
I remember all those years ago, dropping into the newsagent in the middle of Warwick to pick up my daily paper and spotting it's brightly coloured cover in the rack of mags. Always keen to read the first issue of things I picked up a copy and later in the day had a browse. As I recall, I was surprised that anyone thought there was room in the market for another glossy monthly. How things change !
At the time I certainly hadn't envisaged I'd be writing a regular column, my publishing efforts had largely stalled. In fact most of my written output revolved around this blog which was just past it's first anniversary. There were a few pieces in Model Boats but that was it. Mind you, I was test building and had a proper job to occupy my time too !
Anyway, my contributions to this months issue have a definite Great Western theme. Parker's Guide covers the Cambrian Shunters truck - an interesting little model that isn't the easiest thing to put together but has bags of character when you do.
£20 projects see's the classic GWR Pannier tank given a bit of personality. Since the law requires every GW layout to have at least two of these locos, you can't really escape doing a bit of detailing work on one of them unless you like identical locos appearing together. To be honest, this doesn't need a lot of effort, but I'm particularly pleased with the sandbox operating levers made from flattened brass wire. I know, little things etc...
Finally we get the Clinic where Dr Phil renumbers a loco, turns a PO wagon into something suitable for BR days, paints some people and shows you how to do brickwork with pencil crayons. And thinks it's about time that picture in the header was changed !
Elsewhere there;s loads of good stuff but the big surprise is the double page and very complimentary review of the ModelRail/Dapol Sentinel shunter. You might have been tempted to think that the magazine wouldn't review a rival publications product, but then back in 2007 you might have been just as surprised to see a magazine called "Hornby" looking at Bachmann products.
Friday, July 08, 2011
Have workbench, will travel
Today, I will mostly be sitting in the car and driving north to Hartlepool for Hornby Magazine Live. In the back will be Melbridge Parva, now all wired up and ready to operate.
There will also be many of the models that have appeared in my "Parker's Guide" column along with some of the £20 projects. If you want to see what these things look like in the flesh, this is your chance !
Of course I'll be there with a modelling board building things but mostly pontificating and answering your questions. Please stop by for a chat. If I get anything built, it will have been a poor show !
More on the Hornby Magazine Website
Thursday, July 07, 2011
Perfect World Scenics Village Well
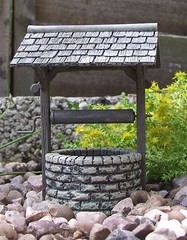
I've not added anything to the garden railway for a while so with an afternoon to spare, I dug out this kit by Perfect World Scenics for a Village Well hoping it would provide a quick and easy project. I was right.
The kit is cast in polyester resin which is a nice material to work with for modellers and should stand up to the weather OK. The base is a single casting with all the woodwork being constructed from various separate parts. The roof is very nice in that it has a solid resin "tent" at it's core to which the side supports are fixed. It's then topped with very nicely moulded roof panels. If I have a quibble, it's that these represent wooden shingles rather than a more traditional British slate or tile finish.
All the parts fitted OK once cleaned up. The slots in the uprights for the diagonal parts had to be files out a fit for a decent fit but nothing that should cause people much difficulty.All fixing is with superglue. For extra security the "wooden" joints are drilled and pinned with plastic rod. This leaves some nice looking "pegs" just like the real thing would have if it pre-dated the age of nails and screws.
Painting was carried out with acrylic paints. A grey/brown base dry-brushed with beige's, browns and yellows.
Construction time including painting is probably only around 3 hours.
Wednesday, July 06, 2011
How long ?
The model railway exhibition world is just sooooo glamorous. Guess what I spent Sunday doing ?
Varnishing barriers.
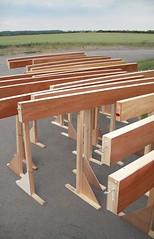
The Hornby Magazine Live show this weekend (tickets still available, put it on your calendar now) are borrowing the barriers from the Leamington & Warwick MRS. I'm not actually a member of the club any more, but my Dad is President and neither of us wanted to see anyone let down. The trouble was that the hurried woodwork we carried out in January might have produced sufficient barriers for the show, but they really need another coat of varnish. Plans had apparently been in place to sort this out as well as checking that all the legs fitted in all the sockets. Needless to say, none of this had been done.
So, along with a couple of other greatly appreciated helpers, tea and friut cake, we set too to sort out the crowd controllers. After a bit of investigation we worked out that the legs could be divided into two piles - those that would go in all barriers and those that would only go in the originals we built many years ago. The difference was tiny and due to inconsistencies in the planning of the wood when it was supplied, but it could have caused problems.
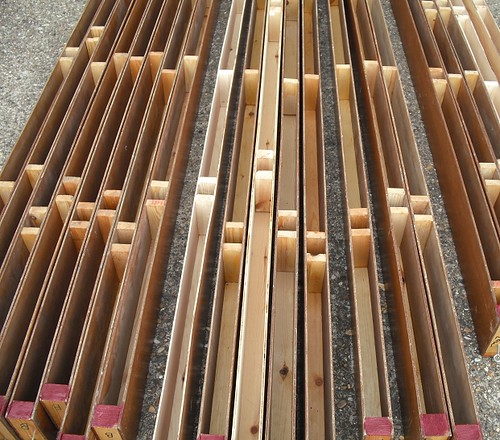
So, one set of barriers have red ends and the legs that will only fit them have red feet. Well, maroon really because we found a can of this in the clubrooms.
The newer barriers have now been painted with another coat of floor varnish and feel a lot smoother to the touch.
And how much barrier do you need for a show ? Well, Hornby Live needs 500ft. That's 200ft less than the Leamington show In January. That's quite a stretch if put end to end. Or to put it another way, around 80 barriers and 160 legs !
Tuesday, July 05, 2011
Adding extra pickups to model locomotives
Matt asks: I'm looking to improve the pickup capacity of some of my older models (as well as adding extra features to certain models like tender lights) but there is one small snag to this. I need more pickups, especially on Tender locos.
Could you recommend any vendor selling pick-up like material used in commercial models, and if not, a simple solution adaptable to, in particular, bogies.
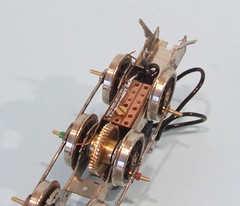
Once upon a time, the Double O Gauge Association used to sell a kit of parts to assist modellers wishing to add extra pickups. Then the evil manufacturers started producing toy trains with pickups on all the wheels so no one needed the kit any more. Thus, it was removed from the range since no one was buying it. The results were adaptable, and not unlike the pickups you see in the photo on my Caledonia chassis.
However, all is not lost. You see, in this kit were a number of easy(ish) to find items. First, there was some veroboard. That's the copper colour sheet with lots of holes in it. This is sold for electronics enthusiasts to make up circuits on. Maplin sell it, although they call it stripboard. One sheet will do a lot of locos, or you could cut in half, stick the leftover on eBay for 10 times what you paid for it while claiming it is a miracle material.
The pickups themselves are 28swg phosphor-bronze wire. I use these for all my locos and the choice seems to be an effective balance between flexibility and stiffness. Eileens Emporium are your supplier of choice here. I think I'm on my second or third roll which gives you an idea how log it will last.
You'll need some wire to connect the veroboard to the motor. Something very thin is needed. We're not talking mains voltages. Get the thinnest you can as it will be lovely and flexible. Back to Maplin for this. although lots of model shops will be able to help.
Finally, some nuts, bolts and screws to hold the veroboard to the locomotive. 8BA will be as big as you want to go, although 10BA will be fine. Eileens do a good range.
In use, attach the veroboard to the bottom of the loco. Cut a length of phosphor-bronze wire and tin the middle 10mm. Tin a bit of the veroboard (you might do this before fitting it, especially if you are gluing it in place) and then solder the wire to this. Add the connection wires. Finally bend the pickups with small pliers and bad language (not my favourite job. Be prepared to replace the wire until you are happy) and cut to length.
Driving wheel pickup are easy, other not so. The challenge is to have sufficient pressure on the wheel to keep the wire in contact but not to act as a brake. On this basis, I'd look at tender wheels because a bit of weight in the water cart helps enormously.
Could you recommend any vendor selling pick-up like material used in commercial models, and if not, a simple solution adaptable to, in particular, bogies.
Once upon a time, the Double O Gauge Association used to sell a kit of parts to assist modellers wishing to add extra pickups. Then the evil manufacturers started producing toy trains with pickups on all the wheels so no one needed the kit any more. Thus, it was removed from the range since no one was buying it. The results were adaptable, and not unlike the pickups you see in the photo on my Caledonia chassis.
However, all is not lost. You see, in this kit were a number of easy(ish) to find items. First, there was some veroboard. That's the copper colour sheet with lots of holes in it. This is sold for electronics enthusiasts to make up circuits on. Maplin sell it, although they call it stripboard. One sheet will do a lot of locos, or you could cut in half, stick the leftover on eBay for 10 times what you paid for it while claiming it is a miracle material.
The pickups themselves are 28swg phosphor-bronze wire. I use these for all my locos and the choice seems to be an effective balance between flexibility and stiffness. Eileens Emporium are your supplier of choice here. I think I'm on my second or third roll which gives you an idea how log it will last.
You'll need some wire to connect the veroboard to the motor. Something very thin is needed. We're not talking mains voltages. Get the thinnest you can as it will be lovely and flexible. Back to Maplin for this. although lots of model shops will be able to help.
Finally, some nuts, bolts and screws to hold the veroboard to the locomotive. 8BA will be as big as you want to go, although 10BA will be fine. Eileens do a good range.
In use, attach the veroboard to the bottom of the loco. Cut a length of phosphor-bronze wire and tin the middle 10mm. Tin a bit of the veroboard (you might do this before fitting it, especially if you are gluing it in place) and then solder the wire to this. Add the connection wires. Finally bend the pickups with small pliers and bad language (not my favourite job. Be prepared to replace the wire until you are happy) and cut to length.
Driving wheel pickup are easy, other not so. The challenge is to have sufficient pressure on the wheel to keep the wire in contact but not to act as a brake. On this basis, I'd look at tender wheels because a bit of weight in the water cart helps enormously.
Monday, July 04, 2011
Double O Gauge AGT 2011
Last Saturday was my annual trip down to London for the annual get together of the Double O Gauge Association (DOGA). Every year we meet up to have a nice brief meeting followed by a longer chat in the pub about toy trains and stuff.
My role during the day is to run the modelling competition. We have 5 classes and attracted over 30 entries in total. Members bring their models along and an hour or so later they vote on the ones they think are the best. Then I announce the results, take photos and everyone is happy.
The photos will eventually appear on the website but I thought I share a couple with you now.
The first is a HR Drummond 0-4-4T built from a Jidenco brass kit by Alan Harding. He won the kitbuilt and scratchbuilt locomotives class with this. Hardly surprising when you consider many people think of Jidenco kits as little more than scratchbuilding aids, or a box of bits of brass that might bear some relationship to the model you would like to build. As you can see, in the right hands, a very impressive model can result.
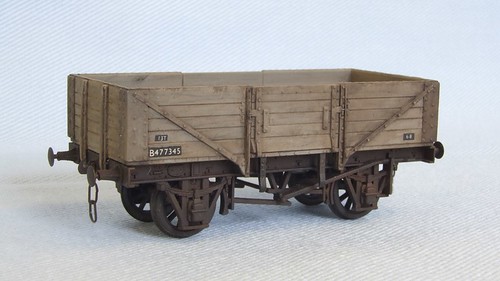
The other that caught my eye was this BR 13T open wagon by Tony Newton. An Airfix RTR model with a bit of detail and weathering isn't an exciting project but the model is atmospheric and looks lovely.
Seeing the models on display is quite an encouragement to get on and produce something special for next years event. I wonder if I can find any kits...
Sunday, July 03, 2011
Return of the orange top
Sinking Club 500 racing boats seem to be a bit of a theme at the moment, but for a change I have some good news.
First - after a couple of days drying out in the garage helped by occasional blasts from the hair dryer, everything in the boat is working again. Even the receiver, a part that normally dies when brought into contact with water, is fine. The motor looks a touch rusty but it's only surface stuff on the casing.
Next, walking by a skip at the bottom of the road I spotted an thick polystyrene off-cut. No one was around so I salvaged it from under the rubble and now big chunks are fixed inside the hull. If the boat is going submarine again, I want to keep as much water out as possible !
This work has altered the trip though. The model is a bit more nose-heavy and needs careful handling in turns or it pirouettes rather than carves through the water. Maybe a little adjustment to the steering will stop this happening in races.
Finally, we have had some fishermen removing carp from the water. Among other things they dredged up was the boat top I lost back in March. It's time on the bottom has left it muddy but otherwise undamaged. A quick clean up in the sink and it will be as good as new. I just hope I don't need to use it again in a hurry !
Saturday, July 02, 2011
Foxdale track progress
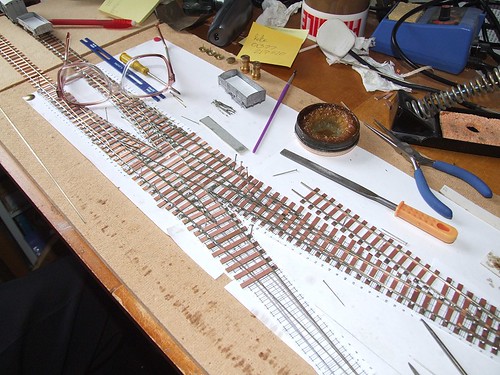
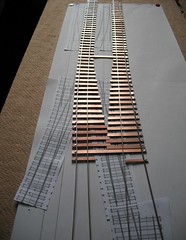
While I've been building chassis, my Dad has been hard at work making something to run them on. At one end of the station there is a complex crossover which seemed to obvious place to start.
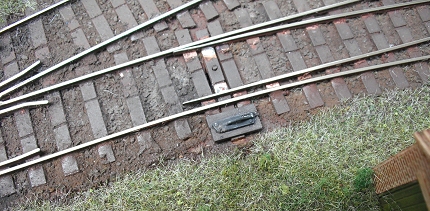
As is his wont, the 5 points will be made in one lump. The idea is to have the longest lengths of continuous rail possible. The section on the photo includes 2 points and the sidings at the end of them. The rail carries on from the bottom of the picture and should fit in the next points as well. Electrical continuity will be assured and running improved, or at least that's what we've found to date.
Construction takes place on a slab of softboard with plans stuck to it. The track is lifted every so often for a trip to the sink and scrub to remove the flux. That;s why it's not sitting on the plan in the picture.
Friday, July 01, 2011
Powered Caledonia chassis
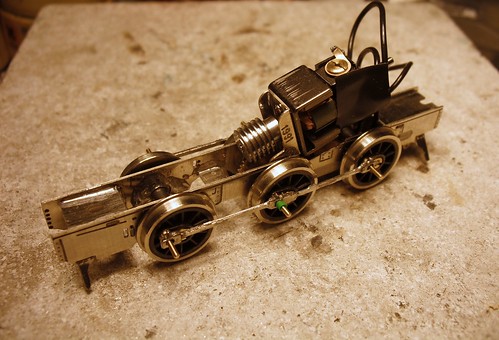
The chassis works, the gearbox works. Time to bring them together.
First, any bearing inside the chassis frames has to be filed away so the 'box will slip in to place. Then there was a bit of fiddling around to get all the holes (2 frames, 2 gearbox bearings and the final drive gear) lined up so the axle would go through.
A quick test and the wheels rotated nice and smoothly. I always carry this out using an H&M controller as the lack of sophistication shows up tight spots with a feedback controller might overcome.
Then the rods go back on. You can see the horrors in the crank pin areas - those holes should be round not oblong - but it still worked. Pedants will also spot the rods are back to front. They work better this way despite the original jig being set up with them the correct way around (I checked, I really did. Several times). It doesn't matter, the thing runs acceptably well.
Finally I've fitted pickups to the rear 4 wheels. This is a live chassis model, that's why one of the motor terminal is covered with insulating tape, so only one set is required and these are 28swg phosphor bronze wire attached to veroboard bolted to a frame spacer. I'd like to say that I only did 4 as this will highlight electrical "issues" better than if all 6 wheels were grabbing electricity, but the truth was I couldn't be bothered to do the front pair. I'll sort this out later. For the moment the chassis is good enough for track testing.
And testing it did. Back and forth over the longer point crossover without any problems. No lumps or bumps or stalling. I wish the Isle of Man had bought more of these things rather than the more complex to build 2-4-0's !
Subscribe to:
Posts (Atom)