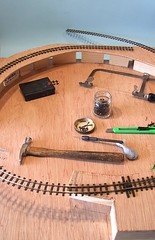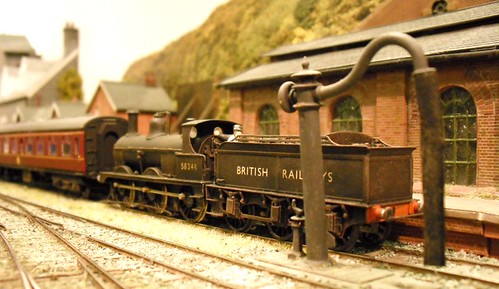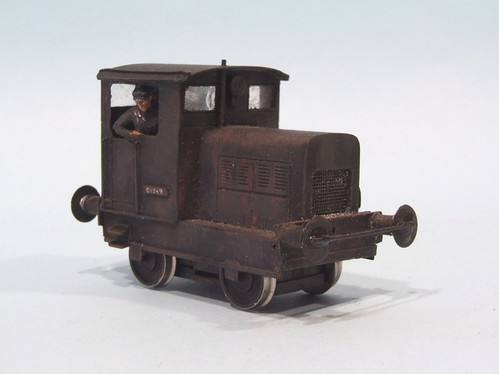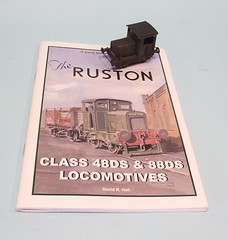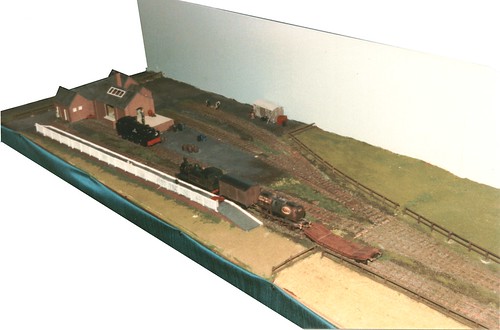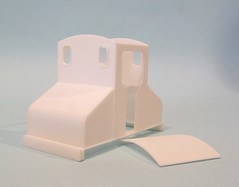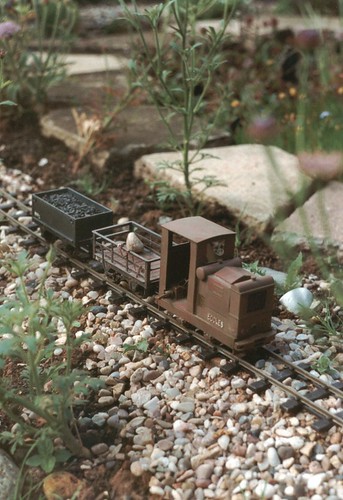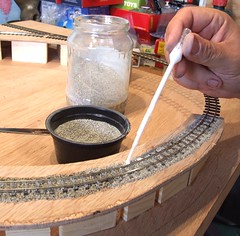
Happy with the running, it was time to do one of those jobs I hate in railway modelling - ballasting. It's boring, takes forever and if you don't get it right, can ruin the look of the layout.
The ballast I used is a mix of granite and Slaters limestone left over from the Hellingly Hospital railway. The result is lighter than pure granite and I think is more appropriate for an estate railway. It's probably a bit coarse but the slightly cartoony effect appeals to me.
I like to trickle the stones down the centre of the track and bush it away from the rail sides and sleeper tops with a finger. Brushes tend, in my hands, to lift the stones up whereas number 1 digit pushes them down. Do a lot of it and you can certainly harden the skin on your fingers. Before this you exfoliate a bit, but then I'm worth it.
With the insides done I move on to the sides ad do the same thing on the edges. It's important to keep the ballast line neat and reasonably straight. On the mainline this would be managed by the plate layers and they would be in competition with other gangs for neatness. On an estate these matters are a lot more relaxed but even so, the lord of the manor will want things kept tidy.
Glue is the normal 50/50 mix of water and PVA with a couple of drops of washing up liquid. Dripped on with a pipette, the thing I discovered was that doing this AND taking a photo is harder than it looks !
A daily updated blog typed by someone with painty hands, oil under his fingernails and the smell of solder in his nostrils who likes making all sort of models and miniatures. And fixing things.
Wednesday, August 31, 2011
Tuesday, August 30, 2011
Test trains over the gap
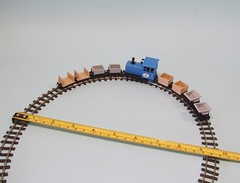
This probably looks a little foolhardy. Running trains over track supported by nothing more than thin air ought to be a recipe for disaster. Luckily the Minitrains stock isn't very heavy and Peco track is strong so despite the mid-air curve, nothing bent as the little train ran around.
With the curves being fairly generous(!) I didn't expect any problems and that was the case. Just to be on the safe side I let the train run round and around for several minutes both forwards and reverse. This was proper testing, not just running trains for the fun of it. Heavens, no. And running the stock at top speed was essential to spot any future problems obviously.
From this angle you can see I didn't get my baseboard line into the bridge quite right and the trackbed around the sides is a bit more generous than it needs to be. Both of these can be fixed now I know exactly where the rails are going to be.
Labels:
"Handyman Hall",
009,
model railway "Handyman Hall"
Monday, August 29, 2011
Nailing down the track
Yet another novelty for me - nailing model railway track down. With the hand built stuff we attach one rail to the sleepers, glue these down and then add the second rail. You can't do that with Peco, it has to go down in one go. Glue isn't an option either unless you use superglue as it doesn't grab fast enough.
With a roundy-roundy, the ends of the tracks have to meet up. In this case the main element that was going to affect alignment was the point. Peco have introduced a new range of "mainline" narrow gauge points in response to those modeller who have argued that the hobby has moved on from rabbit-warren layouts to much more prototypical formations. The new points are therefore longer then the old ones and in this case, a larger radius than the rest of the circuit.
With the point being the linchpin, the lengths of flexi were connected to each end of it using fishplates (it's years since I've used these too) ans the who lot shoved around until I was happy everything would line up OK and be reasonably smooth. Peco pins were pushed in through holes drilled in the sleepers. By not hammering these home I was able to pull them out every time I realised the track was in the wrong place - which was quite a lot.
One of the last jobs was to cut the rails back. A peircing saw loaded with a fine blade worked a treat for this and gave me cuts that didn't need cleaning up to fit the fishplates.
Sunday, August 28, 2011
Spamalot
If you have a blog, eventually you will be getting some Spam. It's not difficult to spot despite the efforts of the spammers. Unfortunately for them, I have past experience at taking on the lads from Lagos and say "bring it on".
First up, Vinod tries to comment:
Nice blog dear I like the way as you present your view among the all visitors. I would like to join you again on this blog it’s a very nice visit on this blog. It’s very attractive and effective for visitors. soldering wire suppliers soldering flux manufacturers
Dear ?! Did I give you permission to be so familiar with me ? It's nice of you to say that this blog is a very nice visit but think that you could do with some advice on sentence construction. Allow me to offer my consultancy services. Oh, and the link doesn't work now - I broke it - if you want to advertise on my blog then I want some cold, hard cash.
I also seem to attract attention from people too lazy to read the blog:
Dear Sir / Madam
My name is [name] and i want to place an order of Workbenches. please i want you to get back to me with the types and sizes you have available with the prices quote as well. please i will also need your website so that i can go through and see the other product you have. thank you and don't forget to let me know the types of credit cards you do accept for the payment.
or
Good Day,
Am [name] i want to know whether you carry(PLASTIC TANK) in stock for sale.If you do so kindly email me with the sizes and the price ranges on that so that i will know the quantity to offer and also i want to know if you accept credit card as form of payment.Are you the Sales Manager or the Owner?Awaiting for your prompt reply.
Regard
These arrive with monotonous regularity. Sadly, not often enough to make me think I ought to try selling workbenches, plastic tanks or any of the other stuff they have found by keyword searching, just enough to be annoying. I mean, does it say anywhere on this site that I sell them ? No. The only mention is in the title of the blog or in the case of the tank, a post about the Hachette Tiger Tank partword. If you bother to read you will be pretty clear that it isn't a web site selling workbenches or tanks. Can I make it much clearer ? What do you want, flashing text ?
What has happened of course is that someone has bulk e-mailed this out in the hope of harvesting some live addresses. Send a reply and I'll be on yet another list sending me stuff to fill the Spam filter. You might wonder if it is worth the effort. Sadly it is. You know those e-mails offering Viagra ? Send a million of them and you'll flog $100 worth apparently.
Saturday, August 27, 2011
Advertising
How great is this boat ? I know nothing much about it other than one of the members donated it to our model boat club on Thursday. The model is wooden, unpowered (shame !) and about 18 inches long. I doubt it is based on a plan, although if you know different, please let me know.On an exhibition stand it's going to be a real eye-catcher.
The last point is important. Although the club isn't desperate for new members, you always want to attract a few just to make up for those who leave during the year. More importantly, extra people means more friends which is what the hobby is all about. However in a crowded hall, a model that stands out from the crowd is really handy. The contact details written on the side mean all those photographs will have the important info on them...
Which brings me to the subject of advertising. The sharp-eyed will notice a new advert on the right hand side menu for www.ModelRailwayLayoutsPlans.com . I've been running Google adverts for some time and while these bring in a tiny income every time someone clicks on them, I am interested in developing the potential further. While I'm job-hunting, I'd be daft to do much different !
So, if you want to avail yourself of some very reasonably priced advertising, please get in touch. I'll consider anything, although if you really want me to link to your donkeyPorn website then the bill going to be big and payable in advance.
Rest assured that the blog itself isn't going to change much. I'd rather serve up some targeted advertising than the slightly random Google stuff. You;ll still get up to date ramblings and poor quality model making by someone with gluey fingers. Unless I'm soldering when they will be burnt. Still, it gets the glue off !
Friday, August 26, 2011
The Handyman Hall Estate railway
Time for some thoughts on my prototype for the 009 railway. For a long while I've been a bit of a fan of the Heywood estate railways and have always fancied having a go at one. For those not familiar with the concept, basically the landed gentry years ago would build a small gauge railway ostensibly to transport farm produce and other items around the grounds of their country pile. Some, such as Sir Arthur Percival Heywood, were pretty serious about developing these into real working lines. Others, I suspect, just wanted to build a model railway and there's nothing wrong with that.
The photo shows Percival's classic and best known locomotive, Katie. She was an impressive beast being able to negotiate incredibly tight curves thanks to some nifty swivelling axle arrangements that I will not be explaining further here. Go and find an engineer or better still, buy the excellent book on the subject. However the man himself worked with 15 inch gauge railways. I will be modelling a 2ft gauge line.
This isn't so far out of the question. Doddington Hall used to have a 2ft gauge railway. It was sold lock, stock and barrel in 1982 to those restoring the Groudle Glen Railway and now forms the basis for this excellent little line. There is also at least one existing line that uses narrow gauge trains to move lavender from field to packing shed and thier stock looks a lot like the stuff I have from Minitrains.
So, my plan is to build part of the railway at Handyman Hall. Literate types might recognise this as the location for the Tom Sharpe novel "Blott on the Landscape". Neither the book or TV series mentioned a railway but then they didn't mention there wasn't one either.
Thursday, August 25, 2011
Wood-henge
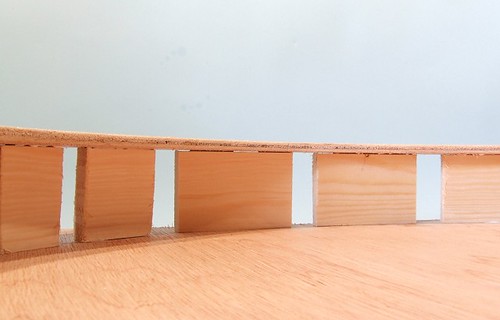
The track base on my 009 layout now has more than a few softwood supports under it resulting in an effect that to my eyes looks a bit like Stonehenge but made from dead tree.
No ? Oh well, please yourself.
I'll be honest and admit that detailed planning hasn't played a huge part in this model. I sort of know what I want and am happy that the track will fit but apart from this it's all being done by eye. The supports are the metric equivalent of 2 inch wide wood, because that sort of looks right. It might be that inch and a half or even slightly less would have been better but who knows.
What I do know is that track needs a good, solid surface if the model trains are to run properly. Much of the scenery will be made from insulation foam and I know it's pretty solid but in my heart I can't say I'd be as happy to fix the track to it as I am to use bits of wood. Has anyone out there tried odd-ball materials ?
Wednesday, August 24, 2011
009 Baseboard
Or rather a baseboard for a 009 layout. Inspiration for this owes a lot to Chwarel Bach by Neil Rushby. His layout, which appeared in the May 2011 issue of Railway Modeller, is a simple circle of track running through lush green scenery. I loved the look but felt I ought to complicate things a little, hence the point I looked at yesterday.
One idea I was keen to pinch was the raised track-bed. All the previous Hornby Magazine layouts have been flat top baseboard affairs. Since this was a much smaller model it seemed a ideal opportunity to do something a bit different/ Besides, all the techniques work just as well for standard gauge.
Anyway, a trip to Torries in Warwick saw me leave 18 quid lighter but with a couple of 2ft square bits of 6mm ply, some lengths of softwood and a large offcut of hardboard.
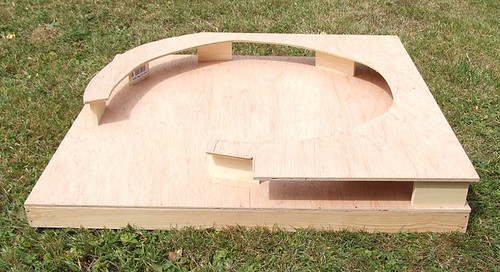
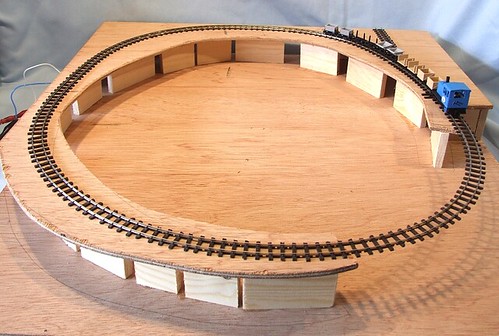
Some text track bending followed by a session with the jigsaw reduced one of the squares quite a bit. It was supported on risers and the whole lot held together with pins and glue. You get the basic idea from the photo. That big gap will have track over it eventually.
Tuesday, August 23, 2011
Peco SL-E496 point
I've not bought a Peco point for many, many years. So long ago that I honestly can't remember the last time. Since making my own track, or at least farming the task out to my Dad, it's just not something I do. However the 009 layout needs to be as Ready T Run as it can, so the track must come from Peco.
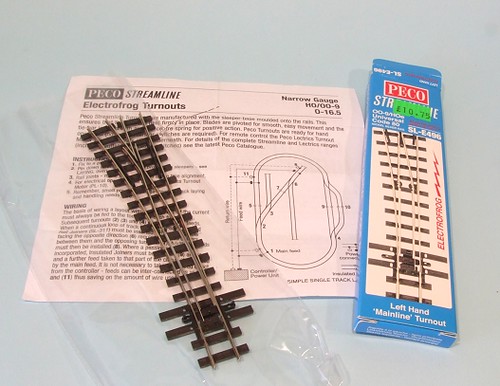
Inside the box I found my point, from the modern 009 range that has replaced the previous "Crazy Track" wrapped in a plastic bag. A sheet of instructions with DC layout wiring info was included. The box was compact, but strong enough to afford the contents some protection.
The point itself is very nicely made. Hand built track is usually rather less engineered than it's RTR counterpart. My point blades are made from a single length of rail. Peco have a pivot in theirs. These snap back and forth nicely too. Under the frog there is a wire that should be routed through a hole in the baseboard. I know this is an electrofrog point but don't understand what this is for. The electricity seems to find its way around perfectly happy. Am I missing something ?
Detail is good. I like the extended sleepers beside the tie-bar to support a lever. The fixings look tidy and sleepers are grained like real wood.
All-in-all, very nice. For a tenner I suppose the price isn't too bad either. It's not like these things are going to sell in the millions after all.
Monday, August 22, 2011
A little 009 project
When I first saw the Minitrains HO scale narrow gauge pack, I knew it had great project potential. A loco and 10 wagons for £100 - bargain. Add a bit of track and some sort of controller and you have everything required for a small layout, for less than the price of many OO locos.
A little arm twisting saw me liberate the sample pack supplied to Hornby mag for review with the intention of building a layout for the magazine. This is a rather larger project than the ones I normally tackle, a new scale/gauge combo for the magazine too.
First up I needed to work out just how big a project I was looking at. My hope was that I could be thinking along the lines of a pizza box style layout - a circular track that takes up very little space. A purchase of a couple of lengths of 009 track from Classic Train & Bus, who amazingly had this and a point in stock, saw me testing.
Gradually a length of flexi was bent until it was a u-shape of under 10 inches diameter. Despite the curvature the little loco ran happily and the wagons seemed inclined to stay coupled up so this looked positive. In my head a 2 foot square board sounded goo and this proved I could happily get the train around it.
Sunday, August 21, 2011
3D printed 4mm scale K6 telephone box
How's that for a title full of Google juice ?
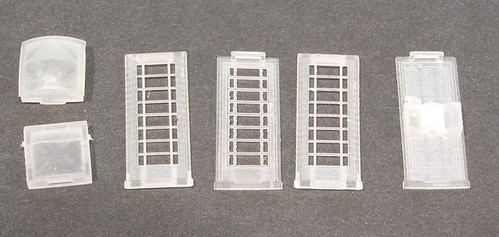
Yes, the final (for the moment) trip into the world of 3D printing has arrived. The man from UPS dropped off a box big enough for a reasonable sized cat or two modest tubs of ice cream. Inside was loads of polystyrene and a small packet containing the parts show above. Methinks that Shapeways boss ought to go down to the packing department and have a quiet word with them.
Anyway, the parts are printed in a soft and flexible material which apparently allows for greater detail than the stuff used before. It certainly works - those glazing bars are incredibly thin. Even injection moulding would be pushed to replicate this. The telephone on the back wall is very nice too, better than the whitemetal ones I've used in the past.
Assembly required simply clipping the sides into the base and then the top on to these. Some glue in the corners is a good idea. One problem is that the material makes the parts very difficult to see and it took me a couple of goes to work out that the door must be opposite the back wall or the corners don't work. It's very flexible too making things a little more tricky.
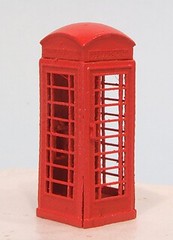
Once stuck together, I sprayed the model with Modelmates primer and then several coats of Humbrol satin red. Slightly too many as it turns out as one of the "Telephone" signs is a little flooded. With the paint on I could also see my duff assembly, too late to do anything about it. Let's just hope no-one notices the door is ajar... The surface of the sides isn't flat either but covered with micro furrows in bands. From normal viewing distances the effect is OK by if you look very closely you'd wish you'd used etched brass.
Finally there is a problem that may or may not be connected with the material - the paint won't dry. 18 hours after spraying, it's still tacky.
K6 box on Shapeways website
Saturday, August 20, 2011
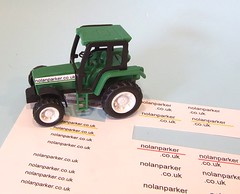
Promotional Tractor
I've written a novel. It's really funny, and now needs to find a publisher. Luckily my co-author is a bit of a marketing whizz and so we have some cunning plans.
One day we were having a coffee and cake (cake features heavily in our discussions) and the idea of attaching a promotional tractor to mailshots to publishers and agents floated across the table. Nothing more came of it but a few weeks later I was looking for a tiny farmers company car and picked up 3 plastic versions for 99p. As it was, they were a bit big for my immediate needs but looking at them I wondered if I could use my model making skills to re brand the toys.
Looking at them, on the side of the engine bay was a sticker that just said "Farm". Not very imaginative but for 33p each, what can I expect. The low cost had lead to cheap glue for the sticker and it peeled of cleanly to be replaced with a bit of paper showing out website address. This was printed on photo quality paper, you need to the higher resolution this allows so the tiny letters are readable, and stuck in place with a smear of UHU.
The end result looks very nice. They are too big to post with query letters sadly but I'm sure we'll find a use for them at some point.
And if you want to know more about the novel, click this link.
Friday, August 19, 2011
Ruston shunts at the box company
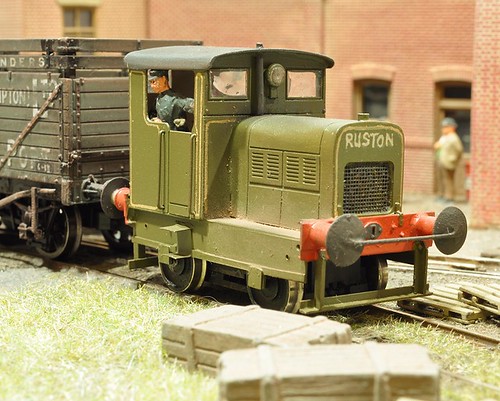
Well, I thought I might as well finish the week by trying to recreate the painting from the front of the Ruston book. To do this I set up the Melbridge Box Company and posed the little 48DS locomotive with a handy wagon.
The cruel enlargement shows up the deficiencies of my "Ruston" script. I used the same pen as for the lining but the paint was runnier and required a lot more tidying up with a green loaded brush. A better, or at least more patient, painter would have re-done it using a fresh tinlet. If it's tried that I suspect the build up of base colour would have considerable after all the attempts...
Behind the loco, the wagon is a wooden bodies open fitted with coke rails (these allow a greater volume of coke to be loaded as it's lighter than the coal the wagon was designed for) which towers over the tiny engine. A private owner wagon, the paint has worn away and BR aren't going to bother to give it another coat, they just slapped some black patches where the new numbers need to go and let it eek it's last few years out on the network.
Thursday, August 18, 2011
Paint and loving the lining pen
Before all this work, the little 48DS locomotive was a rather uninspiring black with rusty bits. My intention was to go all industrial and paint it green. Much prettier.
Humbrol 150, Forest Green, looked a good match for Jonathan Clay's lovely watercolour. Contrasting with the red buffer beams it looks fabulous. Industrial stuff was always painted green anyway so the colour is a bit of a no-brainer.
The problem was that Ruston lined out it's locos so I was going to have to give this a go. The job seemed more suited to the Bob Moore Lining pen than a bow pen. The former comes with spaces that attach to the nib allowing the line to follow edges. This took a bit of tweaking but once going I quickly seemed to be getting the hang of it.
Once most of the lines were in place I joined them up following a ruler, or even freehand. Corners were blobbed in.
The finishing touches were to tidy everything up with a small brush and green paint. Corners were rounded this way and wobbly lines straightened. This is the bit that we all assume professional painters don't do, all lines being perfect first time. Truth is they do fiddle and push paint around. Probably not as much as bodgers like me but it happens all the same.
Having dreaded doing this job I found myself getting quite into it. OK, the results are not perfect but they are good enough for me and that's what matters. As I always say, it's my toy train and I'll so that's all I care about.
(And yes it is wonky on the chassis. I need to sort this out next)
Wednesday, August 17, 2011
More detail, now with plastic
One of the most notable omissions from the Tag Models kit was the ironwork dangling from the buffer beam. Presumably this is to protect the underframe from detritus on the track but for the model it's more important visually as it provides both height and detail to an otherwise blank area. I made the girders up from brass angle although bending some sheet wouldn't have been too bad as long as the fold had been scored properly to aid the bending.
Up to this point all the soldering had been carried out with the trusty Antex iron but for the buffers I decided the RSU would be better bet. The overlays on the buffer beams mentioned yesterday had covered the mounting holes and rather than re-drill these I simply removed the pips from the buffer shanks, tinned the ends and fixed them with the RSU. A little adjustment was required, something I'd have avoided if I'd measured rather than working by eye, and there we had it. The ends of the loco looked like the ones in the painting I was following.
With the metalwork finished it could move on to plastic fiddly bits. The back of the bufferbeams were turned into a C-girder formation with the addition of a few scraps of microstrip. New sandboxes from square rod and more offcuts of thin sheet appeared. These can just be seen in some of the pictures but I couldn't find a clear photo. They are square and about this height. Maybe slightly fatter but I can't be sure and these look OK.
Finally a rear light can from some of those leftover moldings stored in a little drawer to come in useful "some day". At last this day has arrived. Heaven knows what this was once upon a time but now it's a light so the driver can see what he's reversing in to.
Tuesday, August 16, 2011
Rebuilding the 48DS
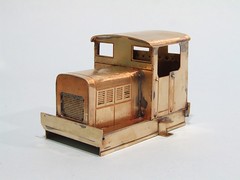
Once all the parts of the little 48DS locomotive were cleaned up, the task of putting them back together could start.
First up, the cab was rebuilt, taking care to put the sides on the correct way around this time. My previous mistake was easy to make, conventional cabs have the entrance at the rear so the driver can lean on the "window" at the front. on a tiny diesel this would make getting in and out difficult. The driver is sat at the back and can swing his legs to the side to slide out with the correct configuration.
The work highlighted the problems faced assembling a second hand etched brass kit. During my last attempt I'd obviously had some issues with the fit, probably caused by my inexperience/incompetence and had filed the ends a bit. Thus now I found it impossible to get a perfectly square box as the sides were fractionally different in length. This doesn't show on the finished model but frustrated me for a little while.
One thing I have been able to improve on is the roof. Those cab sides aren't very tall and so the roof has to be bent very tightly to fill the gap. Previously I'd made good the space with scrap etch. This time I nailed it by some vicious metal wrangling.
With this done, detailing started. The buffer beam appears to have an overlay in the picture and so I made one from thin brass sheet. The same material was used for replacement cab steps since I'd lost the kit originals at some point. At the same time a 1mm strip was added to the bottom of the sideframes. Plastic sheet would have worked as well but I fancied practising my metalwork and so soldered the sheet - with a proper iron too, no easy RSU work for me !
Monday, August 15, 2011
Making money
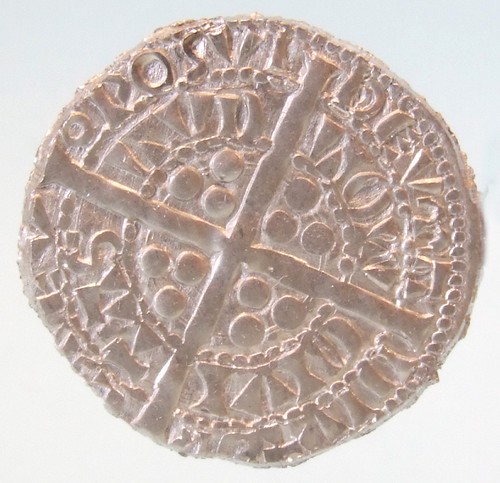
Last Sunday, at the Living History Fair, I made some money. Well, a King Edward the 1st Penny anyway. It's not a lot but it's a start.
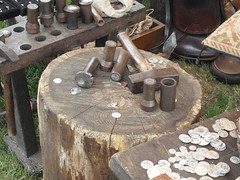
Making the coin was easy, pitch up at the Grunal Moneta stand, hand over a pound coin and the man gives you a pewter disk. This is placed on a die, a tube placed over this and then a second die put in her. Belt the combination with a hammer. Once.
Then take the dies apart and remove the coin. Simple.
The coin I made would have been half a days pay for an English archer, so worth quite a bit more than the quid I paid for the pleasure of stamping it. Mind you, I need a time machine as the local shops don't seem very keen on medieval coinage.
The dies are interesting as they are hand carved. That means someone whittling steel to produce the incredibly tiny patterns for each half. If you feel the need, the nice man will produce your own coinage for you so it's possible to sit and stamp out your own at home. This probably isn't a bad idea what with all the "real" currencies heading toward worthlessness at the moment.
Visit the fascinating Grunal Moneta website.
Sunday, August 14, 2011
The campaign for less detail
All this investigation of 3D printing has me a little worried. As the technology improves, the results will be perfect. Worse, it's possible to print in colour. Combine this with 3D scanning and model making as we know it will be superfluous. Just take your scanner down to the prototype and a few days later you have an absolutely perfect miniature replica.
That doesn't sound much fun to me. Where are the burnt fingers ? The sticky patches on the modelling board evidencing the use of glue ? The aroma of Humbrol paint ?
But then it occurred to me. There will still be a place for it. History has taught us that.
It's the difference between painting and photography.
If I want an accurate record of something I take a photo. Assuming I can use a camera and not get my finger over the lens, the result will be a perfect, accurate, representation of whatever it was I pointed the front of the box at. Anyone can do it with varying degrees of success.
On the other hand people still paint. Others still buy their paintings. We haven't closed the National Gallery just because some of the images aren't as realistic as we might like. In fact some of them are downright hopeless.
So in the future we will have people putting together hyper-accurate models using the latest technology. For a while we will stand in awe as the perfect scene plays out in front of us at an exhibition. Then we will wander off and see the impressionistic version put together by some bloke with cardboard, bits of sawdust and painty fingers. They won't be as accurate it's true, but they will have personality and feeling.
In fact you could argue that the quest for every more realistic and detailed models is the highway to nowhere. At some point you will be overtaken by the technology. On the other hand, blokes in sheds will still enjoy making models, just with less detail. So join us in the bodger camp - you know it makes sense !
Saturday, August 13, 2011
Class 153 and cardboard house in Hornby Magazine
It's a bit modern image for me this time in the September 2011 issue of Hornby Magazine. For the £20 project I've done a little detailing on a Class 153 railcar. The Hornby model is excellent and to be honest my work is mostly confined to putting in some passengers and re-hanging the snow ploughs. A bit of final dirt and the job is done.
That's not to say this isn't a magazine worthy project. For lots of people even going this far is scary, so it's important to give them an easy lead in to some basic modelling. Once upon a time we all cut our teeth and fingers detailing RTR stuff but the modern products don't need as much work.
Elsewhere I get on with some card modelling with a Howard Scenics kit for some terraced houses. It's the simplest one in the range yet the results look very impressive. I know you can buy resin building now but I really like these. In the flesh (card ?) the model looks great. If you don't fancy hacking away at a plastic loco, perhaps this will be more tempting ?
Friday, August 12, 2011
Crane tank
Lots of cranes today. In the background you can see a Coles mobile crane made from parts from the Airfix recovery set. This is a very old conversion, the sort thing model makers have been building for railway layouts since the 1960's and none the worse for it.
The thing you are all looking at though, is the Neilson crane tank locomotive. Two of these were bought by the SECR and one survived into BR days. My model is a South Eastern Finecast whitemetal kit. It's an interesting model to build - there aren't many parts so assembly is quick and pretty easy. The problems come thanks to a tiny gear set resulting in sprightly performance if you aren't careful. Combine that with a massive overhand behind the wheelbase, on the real thing this would have helped counterbalance the weight of the crane, and the result is an engine that will perform wheelies !
Always a popular loco in the stock display, we don't actually run it that much but then I've never worried too much about building only practical chuff-chuffs.
Thursday, August 11, 2011
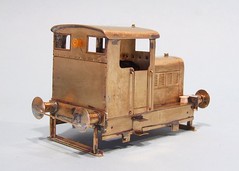
Brass kit vs gas torch
After it's trip to the paint stripper, the little model locomotive was looking pretty sorry for itself. This wasn't the end of it's trials however, those cab sides were still on back to front so they needed to come off too.
I suppose I could have used an electric soldering iron to melt the joints but a gas torch seemed a gentler option. I know that might seem odd, but I find that you can pile heat into the solder faster so it melts before the temperature of the surrounding brass has gone up by much. Also, the inside of the loco was still a bit painty which would have affected the heat transfer from the iron.
Plan A was just to remove the roof and sides. Then I noticed that the back was a bit lose. Since it had a row of poorly punched rivets I decided that it ought to come off too so I could use the rivet punch. Which lead to the front coming off as well for the same reason - we want the model to be a consistent standard all over don't we ?
After all this hot action it was just left for me to scrape, file and finally burnish the remaining solder from the parts. Next week I can start putting things back together.
Wednesday, August 10, 2011
Plastic vs Paint stripper
First up for the fettling of this little model locomotive is to get all the old paint off it. Since my imagination had only stretched to a spray of black followed by a hint of weathering, this wasn't any loss.
After removing the SPUD and driver figure, the model was dunked in a pot of Nitromors. Almost immediately, the surface started to bubble and leave the brass. 5 minutes later I was cleaning it off under a running tap and looking at shiny metal.
It's at this point when I realised just how much plastic detailing I'd carried out. The bottoms of all the sides were left with the remains of microstrip. Behind the buffer beam a girder melted, on the cab sides the numberplate was not happy and even the rain strips were on their way out.
Maybe I'll replace some of this with metal detail but possibly not. After all, I don't intend to dunk it in the paint stripper again in a hurry !

Tuesday, August 09, 2011
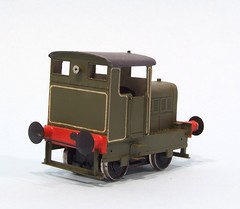
Ruston 48DS revamp
I'm not one for updating old models. Once I've finished a project, it tends to stay finished unless a bit of routine maintainance is called for. Models are built to the best standard I can manage and then left alone. There are a few tucked away that probably could do with a bit of attention rather than being hidden but then I've so many nice new things to do it never seems to happen.
However, there is one model that I'm less than proud of and feel the need to fettle. It's my smallest locomotive, a Ruston 48DS.
This tiny model loco is a TAG Models etched brass kit sitting on top of a Tenshodo SPUD. It's runs, much tot he surprise of people looking at the layout, and thanks to every nook & cranny being filled with lead, pretty well too.
But, there are problems. Firstly, the cab sides are on back to front. I don't know how I managed this but I did. The biggest spur was the purchase of David Halls excellent book on the locos years ago. The beautiful watercolour on the front made me realise how poor a model I'd built.
So, it is now time to turn the caterpillar into a beautiful butterfly. Or at least make this 48DS a rather prettier example.
Monday, August 08, 2011
Cawood Station
The Cawood, Wistow & Selby Light Railway was my Father and I's first proper exhibition layout. I described Wistow Station some time ago and now have found a photo of the Cawood end.
Being the larger station we allowed it to spread over 2 baseboard, eventually. The MK 1 version was constrained to a single 4ft board but this proved too tight so modifications were made. Both versions weren't too far out in terms of design. The station layout was unusual in that the building was at the end and at right angles to, the platform.
Buildings for both stations were of the same design. Ours were Daler board covered with Superquick brick paper. This method can still provide very effective results if carefully carried out. I still have the block of buildings as it was too painful to throw out everything, so I chopped out the board surface to retain them and binned the rest. Some of the details have since been recycled to current layout which not only saves money but just seems nicer. These bit and pieces gave good service and deserve their place in the sun.
Anoraks might well wonder why I have a J94 and GWR 0-4-2 tank in charge of trains. My response is that that's what I had and they worked. The Lowmac bought from Beatties with a (removed) NCL trailer on it for 50p, Airfix tank wagon and once of my early Parkside vans probably still on it's plastic wheels (metal wheels came to the kits after I bought this one) complete the stock in the picture. I don't suppose many of my early wagons ran that well but we were proud of the layout and would have happily taken it to more shows. This didn't happen so we went on to build Melbridge Dock and the rest is history.
Sunday, August 07, 2011
3D printing - first results
Last week I opined about the future of modelling and wondered if 3D printing was going to make all those boxes of bits we model makers stash away obsolete. Not knowing the real answer I decided to take the plunge and order a couple of examples from Shapeways to see what they were like. The first has arrived.
The first thing is that the service was amazingly swift. I placed my order on Sunday and the box turned up on Wednesday. Not bad considering the contents didn't exist in anything other than a computer file when I requested them.
Anyway, my parcel contained an On30 steeple cab locomotive body that looks a heck of a lot like the one running on my model of the Hellingly Hospital Railway. The material its made in is described as "White, flexible and strong". It's certainly white, seems as flexible as similar thickness plastic and presumably has a similar strength although I've not tested this.
The surprise is the surface. I knew that 3D printers couldn't do curves very effectively, they render as a series of steps albeit tiny ones, but the verticals on this model have the texture of very fine sandpaper. I'm assuming that this is because the model is "grown" from a pile of powder. I'm not sure how to deal with this at the moment. My inclination is to shoot a coat of high-build primer over the whole thing to see if this smooths the surface without losing the lovely rivet detail on the ends.It's this that stops me sanding the model flat, well that and the feeling that I shouldn't need to. After all, if I have to sculpt the model locomotive out of a lump of plastic, this isn't the future. Well not yet anyway.
Never mind, I'm reasonably impressed. I'll see if I can turn this into a finished model. In the meantime, I've also got a K6 telephone box on order in a different material. We'll see how that turns out.
Saturday, August 06, 2011
Sprinters they are a-changing
The BBC report that my local railway line is due for some new trains. The new rolling stock will be replacing the 25 year old Sprinters currently running.
This makes me feel very old.
I remember being on the train to Nottingham, on the way to visit the show in the days when it was in the middle of town. Our transport reversed at Derby and so paused in the platform. Ahead of us was a new, shiny, Sprinter. Since we had a few minutes to wait I ran along the platform to take a look at this new wonder. It was clean and fresh, unlike the rattly DMU we travelled on.
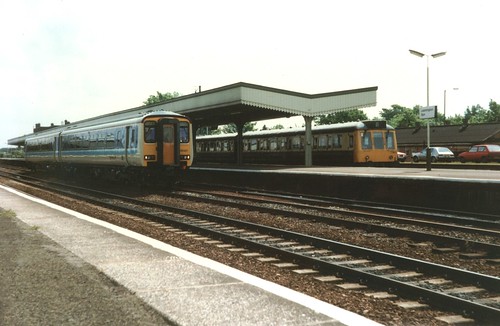
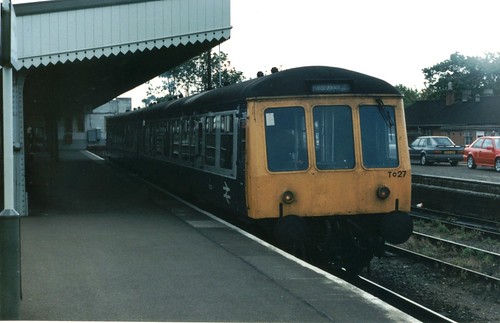
The scene above shows the change from old to new. What would now be called a "heritage" DMU on the bay platform working the Stratford-on-Avon train. The main line is occupied with a 156 unit that will be going to Birmingham. Now the "modern" train is to be replaced with something new.
But do you feel a little nostalgia for the older set ? I do. OK, so they were rattly and smelly and badly maintained and draughty, but if you weren't travelling on them for work, who cared ? As long it wasn't winter or wet anyway. At least in those days the tickets were cheaper.
One day, da Kidz will get all nostalgic about these new trains. All this new colourfulness can't be as atmospheric as an old blue and grey DMU can they ?
Friday, August 05, 2011
Ruston on a short train
Whatever happened to Saltford models ? It's a question I keep asking in the desperate hope that someone will say "I've got the moulds in my shed, would you like them ?" or "I've got a stash of their kits, would you like them ?"
Years ago, my first attempts at a garden railway were in 16mm scale using Peco SM32 track. The loco is a Saltford model kit and the wagons from Cooper Craft. The later are still available and if you fancy a large scale plastic kit then I can recommend them heartily. Like most of the range, the fit is excellent and detail superb. My understanding is that they are pretty accurate too.
The loco was rather more basic. Several sheets of plasticard and some instructions telling you how to cut the parts out. Then a few whitemetal castings finish the job and if you've been careful, a nice looking model emerges from the workbench. Power is to a single axle from a 6v motor. In the engine compartment are 4 AA batteries and that switch sticking out of the cab door is all the control available. With a top speed of not very much this is fine, especially for those of us who just like to watch the trains go by. It was a really enjoyable kit to build and well within the capabilities of a youthful Phil. Whether modern modellers would be quite so keen on such a basic model requiring a bit of effort I'm not so sure.
Eccles by the way was our cat when I was very, very, young and all my garden stock was named after pets.
Thursday, August 04, 2011
Boat club in Model Boats and cats on model shop counters
It's a bitza post today as I have a couple of tiddlers to blog. First up, the latest issue of Model Boats magazine features a write up I've produced on the Knightcote Model Boat Club. There's a brief history of the club from the days before the lake was dug, right up to the present day - a photo shows the new clubhouse being craned into position.
Photos show the lake and old premises and a couple of shots of our stand at the International Model Boat show. Hopefully it makes the club look interesting and dynamic which might spirit up a few more members. We aren't short of them at the moment but with the current average age, you need a supply of "young blood" to be on the safe side !
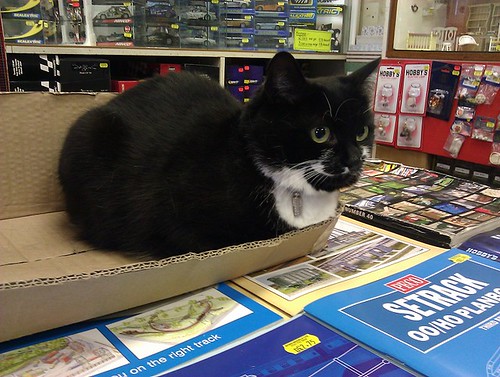
While looking for boat bits, we dropped in to Bob's Models in Solihull and I couldn't resist taking this photo which is just full of cute. The cat was sitting on the counter and while it didn't think much of the staffs attentions, despite them giving it a little pile of munchies to gobble, but the customers fuss is very welcome. There were two cats in the shop and so they can have a counter each. Very sensible.
Wednesday, August 03, 2011
Eric the canal pusher tug and his barge
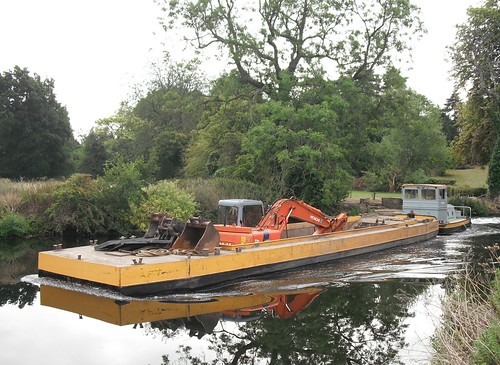
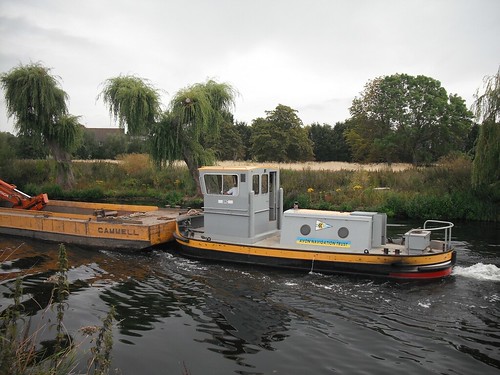
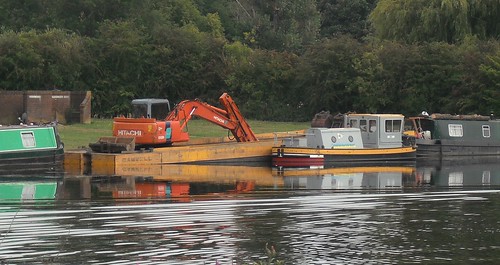
Spotted down on the river Avon was this very modelable pusher tug and barge. You don't see that many working boats these days and this combination stands out amongst the pleasure cruisers and tourist boats more common around here, especially in the summer.
I can't tell you much about the two vessels other than approximate lengths. The barge is 60ft long and the tug around half this. I'd put the tug width at the same as other narrow boats - 7ft but the barge is much wider, possibly 12ft.
If anyone fancies a challenge, I have a nice shot of the tug control panel and barge interior to help, just get in touch.
Using some plasticard or even normal cardboard, I don't think these would be too difficult a project. In 4mm scale you could use a diecast digger to finish the model off. It would certainly break up a line of more traditional cruisers on a model railway.
Avon Navigation Trust
Tuesday, August 02, 2011
Modern model cars
For a future project I'll be needing some modern model cars. The sort of thing you find at any station nowadays. Basically a mix of executive saloons and Chelsea Tractors.
But where to find them ? Once upon a time model shops were full of the darned things, usually made by that great 80's pop group Carmarama. Now they seem to have disappeared off the market to be replaced with the excellent, but far too vintage, Oxford Diecast range.
Worse I find myself looking at Ford XR3i's and Mk1 Golfs and having to remind myself that these are not modern any more and haven't been for quite some time. I am old.
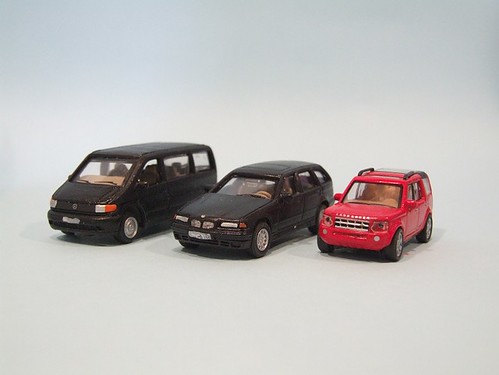
Anyway, I did manage to find some motors - a couple of German Carmaramas and a 1:87 Landrover Discovery. Sadly the former were Police vehicles and the later a bit on the small side. All we stupid shiny. I mean even around there the 4X4's are that clean !
Anyway, the Merc and BMW were stripped down and dunked in the paint stripper. The holes left from the removal of the signs filled in and then re-sprayed with car primer. A shot of black seemed good next - all Beemers are driven by evil people so what better colour ? Finally all three received a coat of satin varnish. I want clean cars in my car park. The Humbrol Satincote didn't go on as smooth as I would like but that might be down to a combination of age and inadequate mixing. Not to worry, these are only scenery. If I was really worried, I might also have to fix the fact the steering wheels are all on the wrong side...
Incidentally, just as this post goes up, Chris Nevard does car mods as well with this excellent rundown.
Monday, August 01, 2011
1 hour loading bay
Last week I had a bit of a panic moment. A parcel sent to Hornby Magazine on Monday didn't arrive until Thursday. 1st class mail and it still takes 3 days to get from the great metropolis of Leamington Spa to the rural outskirts of Peterborough. Needless to say, by the end of Wednesday I was convinced that the Post Office had stolen or lost the package.
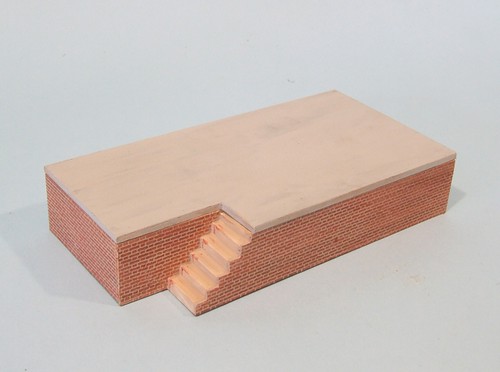
Inside was a little loading bay with crane for St Stephen's Road. The layout is being built to a tight deadline and losing a building, even an unimportant one, was bad news. Which is why on Thursday morning I eshewed the model boat club to make another model.
The loading bay is pretty simple. Construction starts with the steps formed from Plastruc angles stuck to the inside of the brick plasticard. Once these are OK, I make up the sides and top of the box from Dalerboard and stick the steps and wall to these. Then the rest of the components are stuck together. Finally the plasticard is fixed to the outside of this.
On the top a separate layer of card is painted a sort of concrete colour while the bricks get surfaced. This keeps the colour separation nice and tidy.
Total building time was about an hour with another 30 minutes for paint. Long enough for the message to come through that the parcel had turned up and my new model wasn't needed after all.
Subscribe to:
Posts (Atom)