Railway models, in my opinion (and it's MY blog so that's what counts around here) must be weathered if they are to look realistic. The prototype was clean for about 20 minutes and even then didn't look as toylike as a freshly painted miniature.
I didn't wan to break out the air bush for this model as I had a set of brand new Humbrol Weathering powders to hand and wanted to give them a go.
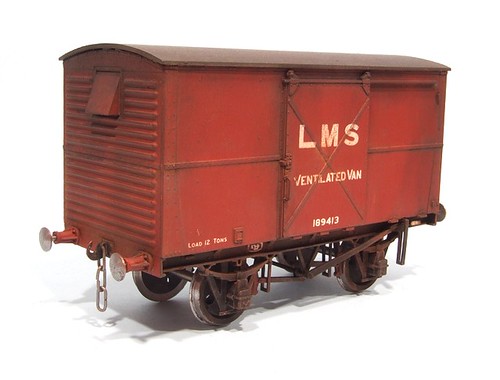
The process began with a light dry-brushing of the underframe with dark grey and rust coloured enamel. This highlights the high-points of the detailing and edges of the mouldings.
Next, some Railmatch underframe dirt was thinned and tricked around the door edges and metalwork.
Finally I worked over the whole model with the weathering powders. Two shades of rust bushed on to the bodyside metalwork and a little on the black underframe (it shows up more on the later so I use less) then some dark earth in the same areas as the underframe dirt as well as a gentle dusting over the entire body.
Finally, smoke colour over the roof and higher parts. This is a really nice colour - not black but a good match for sooty muck.
The powders stuck very well, better than some I've used in the past. Despite this I've sealed then in with a distant blast of Testors matt varnish. That didn't remove them so I guess it will be OK.
Now my wagon has character. You can see and appreciate the detail. It's taken more effort than a 4mm van would but then the larger scale demands more time on each model. When you are paying over 20 quid for a kit though, you want to spend plenty of time working on it to get some value for money.
5 comments:
It's a beautifully built model but the large style pre-1936 lettering would only ever be on a grey van as they changed to small lettering very shortly before switching to bauxite.
Argghh!
Oh well, for the moment it will be filed under "It's my trainset, I'll run what I like on it." Maybe in the future, I'll get around to to fixing this. For the moment I'll claim a pantshop error.
Thanks for letting me know though. It will stop me goofing on the next one I build.
Excellent modeling-did you use any photographic reference for the dirty bits?
Not specific ones but I've been going through a couple of colour phot railway books recently and looking at where the muck hangs around.
To be fair, you can't go too far wrong if you remember that metal rusts, soot falls and grime comes up from the ground. The key seems to be less is more. Better to underdo the effect than go over the top.
Looks beautiful! Really subtle and nice.
Post a Comment