 After a couple of extra scrapes of filler, I decided the Bedford was ready for paint. Trying to match the colours of my AEC lorries, the top half of the cab is Humbrol 103, the bottom half, the wrong green. Far too bright.
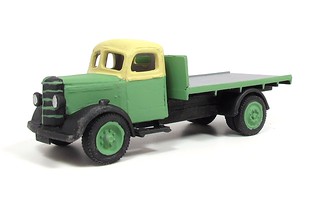
 More interesting is working out which bits should be black. Looking at photos, the mudguards aren't body colour, something I had always assumed they would be. Photos of the prototype tell me I'm wrong so black it is, as is the radiator, something I'd normally paint silver.
Choosing the too bright a green makes the model look a bit toy-like but having carefully painted the bars on the radiator, I decided against fixing this, hoping the weathering would take the edge off it.
Applying dirt kicked off with a wash of thinned track colour (173) carefully worked downwards to replicated rainfall. With a less than perfect model, the trick is to stop it collecting in the places you don't want it too - it's easy to see dirt in those bits that could have taken just a smidge more filler for example.
Next, some brown powders were brushed over the model. For once, the paint grabbed the powder and hung on to it, resulting in a muckier lorry than I'd expected. Wiping the stuff with a damp finger made little difference so it's a pretty mucky vehicle in the end. The photo is possibly a little cruel to the finish as it will be fine on a layout.
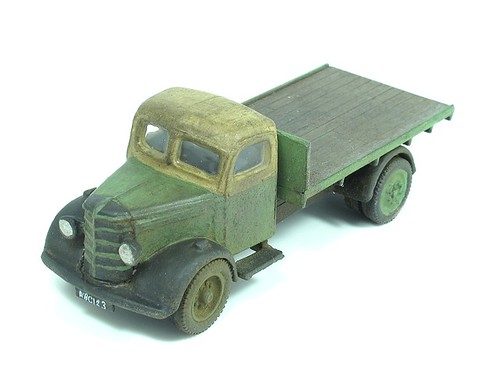
A drop of Krystal Klear in the windows and the model is done. You might suggest that a wing mirror would be nice - the prototype has an easy to make disk on a stalk - but my road vehicles travel in a foam lined box that would probably remove such an item so I left it off.
In the end, this turned out to be quite a nice model. It looks the part and once I'd sculpted the parts out of the moulding flash, assembly wasn't difficult. If I built a second one, I think I'd be happy to make something that could sit alongside a diecast version without looking like the poor relation. A successful project I think.
5 comments:
I'm not sue about that radiator colour scheme. Photos of restored vehicles aren't always 100% reliable but most OBs I've seen have either had a black or body coloured radiator with steel/chrome bands, or have been entirely body coloured. I've not seen one with a black radiator and body coloured bands
I picked up the colour of the raditor from this image: http://truck-photos.net.s3.amazonaws.com/1576.jpg
You are right about not relying on preserved vehicles for colours, there are plenty showing body colour radiators too.
The body colour strips are a mistake though. Can't think why I got the idea for paint rather than silver between looking at the image and picking up the brush.
I think with a combination of getting the wheels wong and a paint error that would be difficult to fix without a repaint, I'll cound this project as a no-score-draw rather than a success. Fixing those would be simplest by starting another kit instead of fixing this one!
Phil,
I think that sort of "look at image... pick up(wrong) brush" moment has happened to us all on multiple occasions. The mistake is always so obvious in retrospect. I think these Bedfords have one of those shapes that are quite difficult to capture. I'm not even sure the usually excellent Road Transport Images have got it right
I can't argue about the shape of the Bedford. There is something not quite right about all the models I've seen - it's as elusive as the sahpe of a Western diesel front end.
This kit isn't bad, better than the Spingside to my eye, but there is still a market for a really top-notch version.
My neighbours got an OB and thats black rad with body colour bands. Its maroon with a cream cab and black mudguards. It is a restored vehicle, but the guy used to have a haulage business using the things so I'm pretty certain his livery/ colour scheme is correct and authentic to the original :)
Post a Comment