First job with the Inspection railcar kit was obvioulsy to plonk the Bachmann chassis on the track and and see if it works.
It didn't.
I wasn't surprised. There was a spare motor and set of wheels and rods in the box. That didn't bode well. Still, a little diagnosis seemed a good idea.
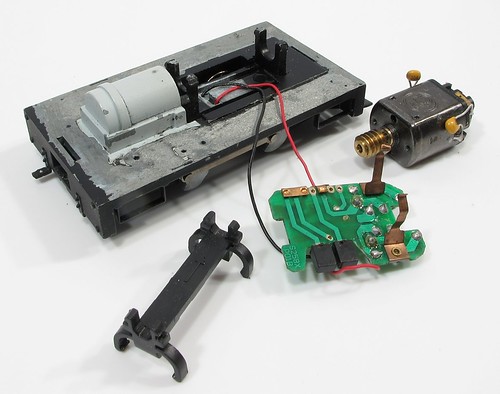
The surprise, for me anyway, was that the motor is clipped in place for ease of assembly. To remove it, the PCB is unclipped from the top and then the central plastic clip is taken out then the motor can be wiggled free.
Putting a bit of power into the contact, it spun over. Held back in, it drove the geartrain and wheels happily enough too. Putting the whole lot back together though, nothing.
After a few minutes applying power in different places, I diagnosed a couple of problems.
First, the wires from the pickups push into the circuit board. The red wire was lose so I stripped and tinned both of them for a better fit. I'd have soldered them to the board if required, but left that for later.
Second, the connections to the motor from the board are those phosphor bronze arms you see reaching upward in the picture. On wasn't quite making contact with the sides unless it was gently prodded. Re-bending it slightly with pliers sorted this out.
After less than 20 minutes work, my chassis was running back and forth sweetly on the test track. The kit is looking like a bargain now.
1 comment:
This definitely sounds like the basis of a "how I fixed it" magazine article.
Post a Comment