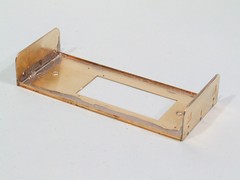
Flipping the footplate etch on its back the first job is to fit the valances. These are supplied as a pair of brass strips, oddly not next to each other on the fret but not difficult to spot once you realise one is numbered 2 and you want its identical twin.
I had a go with these but with no positive locator's and thin metal to grab hold of, gave up in frustration. I could fit them but getting the results nice and straight was impossible.
So, off to plan B. Bin the strips and replace them with some brass angle. No problem keeping this in line !
The buffer beams are laminated from two parts by running solder around the edge and then fitted to the end of the footplate. I'm not sure this shouldn't overlap the top of them but it doesn't, or at least if it does you don't have enough space for the chassis to drop in. Not to worry, a decent fillet of solder with hold it in place and I did snip the top corners off the sideframes to allow for this.
No comments:
Post a Comment