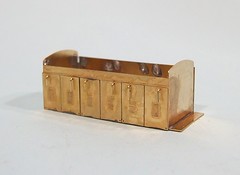
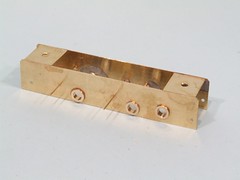
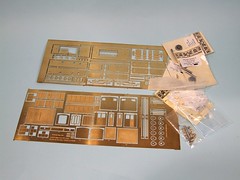
In this weather, building an extra radiator seems like a really good idea !
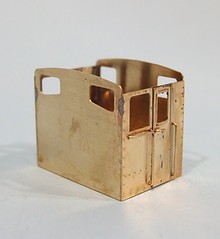
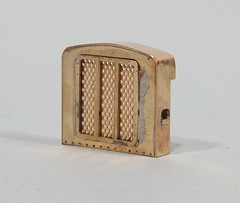
On the 165DS this is assembled as a separate module and then attached to the bonnet. Construction starts simply enough with the sides and top being wrapped around the front. A pair of half etch sections in the corners to make the bends easier.
The grill bars are laminated from two parts with a bit of solder around the edge. Then the mesh is fitted from inside, I had to trim the top a little to get it to fit. Then the bars are fitted from the outside - and the aren't as wonky as the photo appears to show, or at least they aren't when I check them with number one eyeball or the engineers square.
The steps are fiddly but work very well. Two bends in a tiny bit of brass (thank goodness for square ended pliers) produce the tread which hooks over the outside edge and fixes with a blob of solder inside. Then a sliver of half etch is bend and fitted around the inside. I'll be honest I thought this was going to find itself ignored as you wouldn't miss it, but bending the metal around a small screwdriver allowed it to clip to the tread/back part.
Finally the outside corners were given a little rounding with a file. Not too much, there isn't that much meat in the metal !
A daily updated blog typed by someone with painty hands, oil under his fingernails and the smell of solder in his nostrils who likes making all sort of models and miniatures. And fixing things.
Friday, December 31, 2010
Thursday, December 30, 2010
165DS Bonnet part 1
Now for the fiddly bit. The bonnet sides are half etched and the first job is to fit the half-dozen doors. A smear of solder at the bottom will do as fitting the handles will fix the tops. Or at least that's what the instructions tell me anyway !
Handles were bent and fitted using the Formica spacer. A good blob of solder inside and plenty of flux will hopefully handle (pun intended) all the fixing duties. I cut them roughly to length and will do the final finishing once the bonnet is finished. This is a trick learned from the Gauge 1 version !
The bonnet ends are fitted to the cab end of the floor, like the cab this is a separate item that can be bolted down, sides are attached and then the front former goes in 'cos now I knew where it had to be. Amazingly everything looks pretty square at this stage. I'm still summoning up courage to bend the top...
Wednesday, December 29, 2010
Fitting a draught excluder
As I write, winter is here in full force and our cat isn't happy with his bed being beside the garage door as the big gap underneath lets a whole lot of cold through. Even in his nice soft basket, he'd like a be a bit warmer.
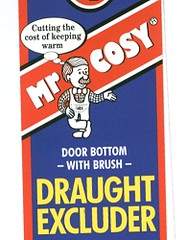
So, it's down the DIY store to pick up something to close that gap. I chose a brush style device from the very trustworthy looking Mr Cosy. At under a fiver it's probably going to pay for itself in saved heating bills in a couple of years. That's good for the wallet and environment and extra smugness for the homeowner.
Fitting is withing the capability of anyone who can handle a screwdriver and junior hacksaw.
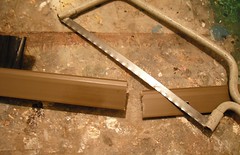
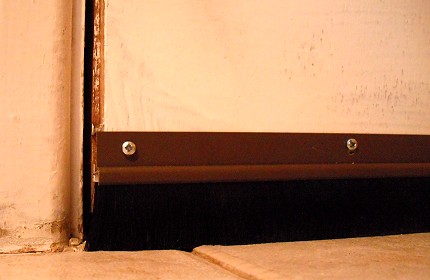
First, the excluder has to be shortened. As supplied it's 36 inches long so I had to hack off a few inches to fit the door. The brush bit has to be slid back and the plastic holder chopped with the hacksaw. Being PVC it's an easy job - just hold it up to the door, mark with a pencil and chop away.
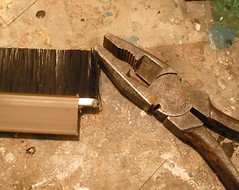
The metal strip that holds the brush has to be shortened next. The instructions say to use pliers but don't explain this. What you do is chop the metal with the wire cutting part of the pliers. This probably won't cut through it - at least if your tools are around 40 years old - but it will weaken the metal and you can bend it back and forth to snap it. Then grip the newly cut end very hard to squash the U-shape, or "crimp" it. This grips the brush and stops it sliding out. Incidentally, the left over brush makes a handy tool for clearning debris from a workbench so nothing need be wasted !
Slide the metal brush holder back in the PVC part with some glue (UHU will work) to stop it sliding around in the plastic.
Then screw the unit to the door with the screws provided. I'm assuming a wooden door in which case a hand screwdriver worked well for me. Good thing too, as the battery in the electric one was dead. Something to do with being a cold garage I suppose. If it's a metal door you'll need to drill some pilot holes.
The holes in the PVC are slightly slotted to allow for adjustment. You want the brush to just touch the floor not wear it's way through ! Open and close the door a few times to make sure.
Four screws are provided and after shortening I had 3 holes so used these. Then the final one was screwed through the plastic at the opening end of the door, just to be on the safe side.
All in, about 20 minutes work. Result: no draught and more importantly, a happy cat.
Tuesday, December 28, 2010
165DS Cab
You can tell when a kit has been designed by someone who actually builds them. There are little touches that others wouldn't bother with. In this case, designing the model so it is modular for easier painting should the builder fancy a complex livery.
The cab has a separate floor around which the sides are assembled. First the doors have to be fitted in the half etch recesses in the side. You could use superglue but I soldered as you can't solder the handrails in place if you've used glue - the fumes given off contain cyanide ! Next the rivets are punched in the side. I've used 4mm versions as in this case slightly too big trumps far too small.
The front and back (make sure you get them the right way round) are fitted and then the sides go in. The later overlap the former.
Finally, handrails. A sliver of Formica was used to ensure they are all the same distance from the side. Clamping the 0.45mm wire between this and an old lolly stick allowed me to wield the soldering iron inside and get a good gob of solder to grip them securely.
Monday, December 27, 2010
165DS footplate
Flipping the footplate etch on its back the first job is to fit the valances. These are supplied as a pair of brass strips, oddly not next to each other on the fret but not difficult to spot once you realise one is numbered 2 and you want its identical twin.
I had a go with these but with no positive locator's and thin metal to grab hold of, gave up in frustration. I could fit them but getting the results nice and straight was impossible.
So, off to plan B. Bin the strips and replace them with some brass angle. No problem keeping this in line !
The buffer beams are laminated from two parts by running solder around the edge and then fitted to the end of the footplate. I'm not sure this shouldn't overlap the top of them but it doesn't, or at least if it does you don't have enough space for the chassis to drop in. Not to worry, a decent fillet of solder with hold it in place and I did snip the top corners off the sideframes to allow for this.
Sunday, December 26, 2010
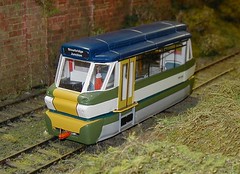
VW railbus - Snow stops play
So there I was on Christmas morning, wanting to play with my new toy train and the flippin' snow gets in the way !
The new toy is a Brekina G gauge VW railbus for the garden railway. The garden railway currently under several cm of snow. When I spotted this being reviewed in both Garden Rail and VW Camper & Commercial (both times by a Mr David Brown), my combined interest in trains and VeeDubs made it an essential purchase for the line. Best of all, a few hints and Santa came up trumps.
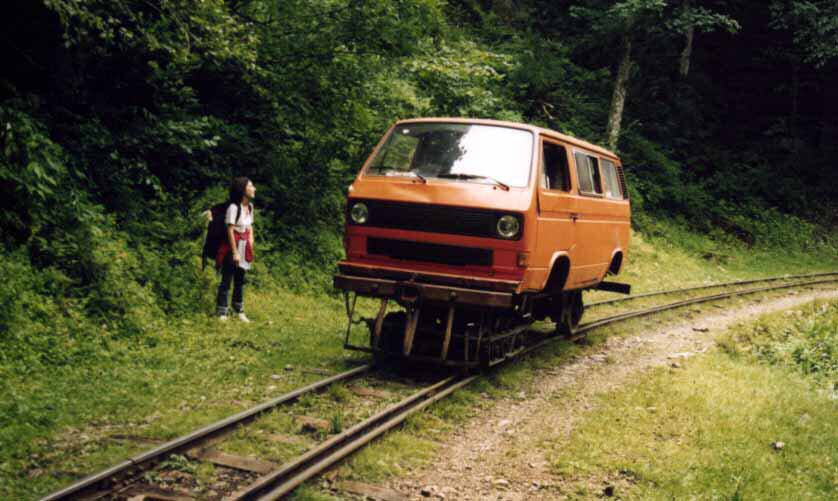
Now you are probably thinking that this is just a crazy made up model. Well, you would be wrong. Brekina have taken a few liberties with the prototype - the real things (there were several) were standard gauge whereas the model is narrow gauge and therefore probably not technically possible without replacing the engine with something less wide - but this doesn't matter. After all it's a splitty bus running on rails, it doesn't get any better !
Interestingly, the model includes a long side footstep that extends under the opening doors whereas the prototype does not. They have left the headlights painted over too which is wrong, but I think I can fix this easily enough.
Now all this is fine but apart from screwing the steps in position, this isn't real model making is it ? No, what I need is to do something like this:
So, if anyone knows where I can get a 7mm scale Type 25 from, the let me know as I think my On30 project suddenly needs more rolling stock...
In the meantime, let's hope the thaw begins soon so I can get out and play !
Saturday, December 25, 2010
Merry Christmas !
Merry Christmas to everyone reading my ramblings.
Now switch off the computer and go and play with the stuff Santa has brought you.
Or even the stuff he brought you last year which you haven't go around to building yet !
Friday, December 24, 2010
165DS Chassis
The chassis is pretty much as simple a beast as it could be - there are two sides which you put bearings in and then sandwich around some spacers.
The only problem is, choosing the spacers. Now this is a kit shot down from 4mm scale. The original had OO and EM/P4 frame spacers. You might say "the gauge is the same, use the OO ones" but you'd be wrong. They have got narrower as part of the reduction process.
I did a little measuring and worked out that if I used the wider spacers and then took quite a lot of the meat out of the "brim" bit of the top hat bearings, them I ought to be OK. Or at least if my back-to-back gauge is correct. The trouble with Gibson wheels is that they don't like being taken on and off the axle so I won't know for sure until I put them on properly.
Anyway, I fitted the bearings easily enough, only the tiniest amount of hole enlargement was required and the tapered reamer quickly dealt with this, and then the whole lot was placed on the Hobby Holidays chassis jig to make sure it went together nice and square. Only the driving axles were jigged, the jackshaft will have to take care of itself.
I have a couple of criticisms at this point. Both are more preferences than actual complaints and neither impedes progress. First, the brass seems a bit thin. I haven't measured it but I prefer something a bit thicker for chassis's. In fact I prefer nickel silver which is a lot less flexible but can see why we have yellow metal here. Second, the spacers are located with half etch lines in the chassis and I much prefer slots and tabs as they are more positive. OK, so the hiding the join is harder but I feel it's a small price to pay.
I'm sure most people will disagree and that's fine. neither would put me off buying another one of the kits (I rather fancy the Clayton...) though.
Final point, the top corners of the chassis have been snipped off as under the footplate there will be a fillet of solder holding the buffer beam in place. You won't see the bodge and the extra metal will make the buffers stay put.
Thursday, December 23, 2010
Ruston 165DS
Time for a new project on the workbench. I've been asked to build a Ruston 165DS - in HO.
The choice of prototype was largely determined by the availability of a suitable kit for a British industrial locomotive in 3.5mm:1ft scale. Judith Edge have reduced a number of their products to the (slightly) smaller scale and so win the sale.
Out of the flatish box (no chance of putting the finished model in here) come a couple of etches for the parts and some resin bits for the bulkier items. A bag of bearings, screws and other bits plus some pages of instructions finish package.
To this I've added wheels: Gibson as they were the nearest suitable ones, and yes I've bought 3 axles in case I bugger one up, plus a motor and gearbox.
This is the second Edge kit I've built, the first being a BR 06 Diesel - this went together OK so I'm hopeful that this isn't going to be too difficult. But then I've said that before - watch this space !
Judith Edge Kits
Wednesday, December 22, 2010
Ho Ho Ho Train repair
'Tis the season to dig out cheaply made decorations.
After a year badly packed in a box there will soon be requests to "stick this back together". Sometimes it's really handy having a model maker around the place !
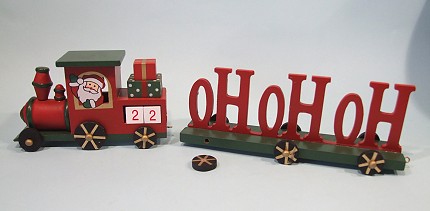
The model shown is a train (no surprise there) made of wood. Sadly, one of the wheels has fallen off. Many people would just ignore this or just throw the thing in the bin. The environmentalist in me, bolstered by the cheapskate, says this is wrong. Why chuck away a perfectly good decoration when a simple repair would render it as good as new ?
Obviously the first thought was just to glue the wheel to the carriage. I fancied doing a proper job though, and since the wheels rotate, decided that they still should.
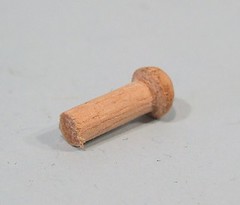
The wheels are held in place with wooden rivets and the problem is that one of them is missing. I found a bit of dowel sort of the same diameter as the rivet head. A length of this was put in the chuck of my electric screwdriver and set spinning. Holding a Xacto -saw blade on it marked the bottom of the head.
Next I held the workpeice (look, proper terminology, get Model Engineer Mag on the phone !) in the chuck and carefully carved away the stalk. Finally a spin with a coarse file and then sandpaper finished the job. All that remained was to glue it in the hole, pop some gold paint on and the decoration was as good as new.
Total time, probably half an hour because I wasn't in a hurry. Satisfaction - pretty good.
Tuesday, December 21, 2010
Left-overs
It's not just Christmas dinner that results in left-overs. I was tidying up yesterday and turned these two half built models up.
The van was started when I demonstraited (in the sense of building stuff for an audience rather than "railway modellers for peace") at Hornby Live back in July. I feel I ought to finish it but so far the tidying hasn't revealed the leftover parts from the kit so there might be some issues there. Of course I do have a stash of brake gear and buffers so maybe there is a chance. A bigger problem is what to do with it - it's not like I need any more LMS box vans for the layout.
The hut dates from Warley and at least I do know where the parts are for this, in the bag with the rest of the kit in a big pile of unread books. Again, I only built this model for demo purposes and have even less of a need for a Superquick hut than a van. However it seems a shame not to compelete it.
This makes me think though. Like most model makers, I'm really good at starting projects and not nearly as good at finishing them. Maybe I need a New Years Resolution to do something about it ?
Monday, December 20, 2010
Model Railway Constructor Number 1
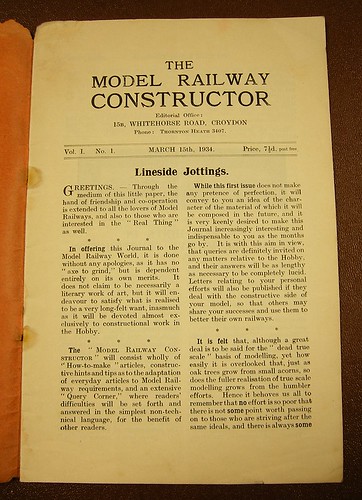
This is the editorial page of Model Railway Constructor magazine, Volume1, Number 1.
I particularly like the from the last paragraph:
It is felt that, although a great deal is to be said for the "dead true scale" basis of modelling, yet how easily is it overlooked that, just as oak trees grow from small acorns, so modelling grows from the humbler efforts.
Wise words often ignored nowadays.
Sunday, December 19, 2010
Superglue and sky
Looking for some information in old magazines a couple of weeks ago I tripped over an old article of mine in the late lamented Modelling Railways Illustrated. After getting over the shock of how long ago it was (late 90's since you ask) I reaslised that the model featured had stood up pretty well.
The locomotive kit is a Nonneminstre Models whitemetal Planet Diesel. Mine runs on a re-wheeled Tenshodo SPUD (another article a couple of months earlier) but most interestingly, is assembled with Superglue.
To many modellers, or at least many of the vocal ones at shows it seems, are suspicious of Superglue. It's too new fangled for them. Not strong enough. Will fall to pieces after a few minutes. You'd be better off with solder. Or nails. Or if you must use glue (looks to heavens at my stupidity) then something involving boiled bovines or fish is what you need.
These same people of course will extol the virtues of 1960's H&M controllers and deny that any form of technology has moved on in the last 50 year - a bit like their wardrobe or opinions on personal grooming.
The truth is that if you use a good glue, my oft stated preference being for Zap-a-Gap, then it will last. The loco in the photo is 15 years old and as good as it was when I built it . Use some rubbish from the pound shop and yes you can expect trouble. After all they aren't going to invest in lots of R&D when you are paying 10p a tube including the cost of tube, packaging, delivery and profit, are they ?
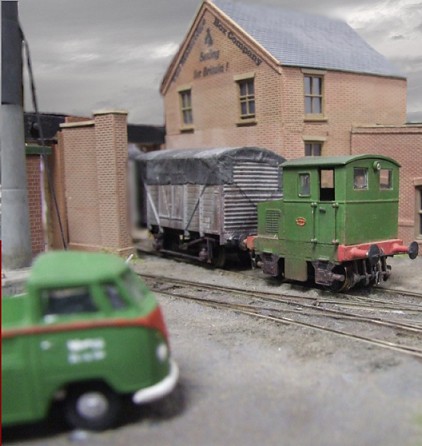
While digging out this photo I got a bit carried away with the Photoshopping (actually Paintshop Pro V7, but we'll stick with the genericised term) hence the sky "borrowed" from Flickr and the extended building (you can see how much here) as the micro layout didn't allow for a full depth building but this looks really odd from this angle in the photograph. I won't normally do this as it's (IMHO) cheating to improve modelling with electronic trickery but this is my Blog so I my rules apply.
Saturday, December 18, 2010
Hours of fun for father and son
This time next week it will be Christmas Day. Yes, the festive season is upon us again and I bet you haven't done any shopping have you ? You certainly haven't sent me a card...
Anyway, this year we have to hope that the festive period will see lots of train sets being unwrapped by eager children of all ages. Circuits of track will be hastily laid on the carpet (Note: don't do this, the fluff gets inside the locomotive and stops them working) and Flying Scotsman will be thundering round pulling its pair of coaches.
The lucky ones will get a goods set. That's far more fun as you normally get a point to allow a siding to be added. That seems to me far more fun because you can shunt a bit, explains why my layouts always have points. Maybe extra track packs will be added, a nice baseboard and then some scenery. From these tiny acorns a brand new P4 modeller will be born.
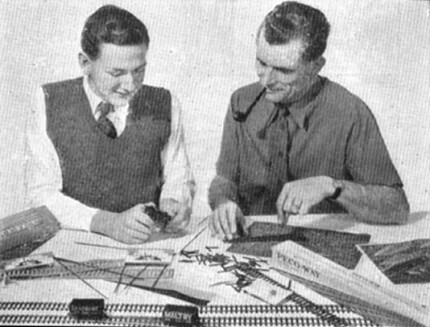
The photo above is pinched from a 1955 magazine and pretty much sums up the changes in the hobby. Father (smoking a pipe) is working with his son, who appears still to be in school uniform (apparently in the old days you never took this off during term time) on a joint model. They are building track from Peco individulay components, which are still available. The text encourages people to move beyond proprietary track and on to building your own.
Old photos like this are entertaining, that's why I've posted it, but it illustrates an important point - a hobby like this can be a great way of bringing the generations together. You just can't do this with modern technology. Were this scene from 2010, Dad would be frustrated because junior has beaten him yet again at something on the games console. They would both be wearing tracksuits as well but we let the sartorial comment pass. Eventually the son would decide he was happier playing with his mates and they would have nothing in common apart from some DNA.
So, railway modelling can save the world. It brings families together in a way few other activities can. Do your bit for the fabric of society, buy the kids a train set for Crimbo !
Labels:
model railway,
Nostalgic Modelling,
Random thoughts
Friday, December 17, 2010
Badges
There's a lot more to organising a toy train exhibition than simply booking a few layouts and traders.
One of the jobs that always seems to get left until just before the day is making badges for those taking part. For more years than I care to remember, the L&WMRS has had a badge making machine capable of producing very nice 55mm diameter button badges.
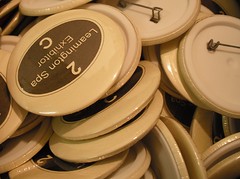
After a bit of photocopying, and a few hours badge stamping we now have several hundred badges. Three colours of course - cream for Exhibitors, pink for Traders and a nice easy to see yellow for Stewards. You would be surprised how complex one of these is actually. There are 4 pieces:
and making each consists of two operations. This is far to exciting for today - I'll save actual badge making for a future post.
I wondered exactly why we make these badges. After all there is a separate area for exhibitors to partake of tea and coffee and we give them tickets for lunch. The best reason I can think of is that if you find someone inside the barrier line, you can tell if they have a reason to be there. Also, if someone nips outside (not that likely in January but you never know) it saves the guy on the door asking to see their ticket.
Now you are probably thinking, "I wish our show/layout/group had lovely badges like those." Well the good news is that they can. Visit the club website and drop us a line and I'm sure we can give you a quote.
- Clear plastic front
- Printed emblem (the 2C logo in the picture)
- Inner flanged disk
- Back containing the pin (which technically counts as a 5th part but as it is supplied fitted to the back we'll ignore this)
and making each consists of two operations. This is far to exciting for today - I'll save actual badge making for a future post.
Thursday, December 16, 2010
Changing the battery in a Peugeot 206
The cold weather has finally killed the battery in my Peugeot 206. If left a couple of days the engine cranked asthmatically and would fail to start. Charging it up again would give me another day or so's grace but this couldn't go on. Time to swap the heavy lump for a good one.
To be fair I have no idea how old this battery was and I'm not using the car very much at the moment, so it's not a huge problem but when I do need to drive I prefer not to have to plan a few hours ahead to ensure my portable electric supply is full.
First up, access the battery. Pull the lever found in the wall of the passenger foot well to pop the bonnet and then at the front of the car release the catch by pulling up the plate just above the nose badge. Finding this always takes me a bit of scrabbling around but don't try and force things - if you do manage to open it then you'll have broken something.
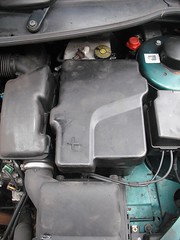
The battery live under a plastic cover on the right hand side of the engine. This pulls off revealing to top of the battery and the strap that retains it. If the cover is missing, try and get a replacement. Bridging the terminals on a car battery can cause a fire - I once spotted a woman looking at the back of her Golf which had flames coming out. She was carrying golf clubs and a motorised trolley. To put this in the back of the car she'd taken the battery out and put it in the boot first. The clubs had rolled on top of it and voila, flambe VeeDub. Luckily I stopped with a little fire extinguisher and dealt with the flames but it taught me that car batteries should be covered !
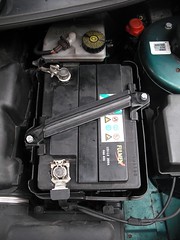
The strap has to be removed by undoing the two 10mm blots on either side. Put these and the metal strap to one side, the upturned plastic cover is good for this. If they are stiff, spray penetrating oil or WD40 over them and let it soak in. Don't force these as they are set in breakable plastic.
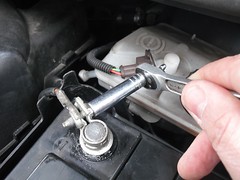
Next use an 8mm spanner to disconnet the negative terminal. Tuck the lead out of the way down the side of the box. You don't want it finding its way back to the terminal earlier than expected but this can happen as the leads are stiff. The negative (-) should apparently be taken off first to avoid the chance of short circuits.
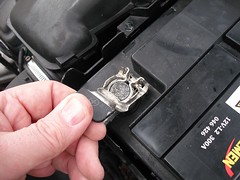
The positive terminal is a lift off connector, just pull the plastic tab up and it should snap clear.
Next lift the battery out and drop a new one in.
Easy you would think except that when I tried it I found the the new battery was shorter than the old one. It seems that the books all suggest the shorter battery for a 1.6 206. Use this though and it will slide back and forth in the box every time you accelerate or break. I couldn't get the leads to streatch either.
The man at Halfords suggested I could cut the box down in some way, which worried me as I can't for the life of me see how you are supposed to make it 4cm sorter ! Looking at the two batteries side by side shows the problem clearly enough.
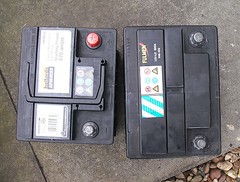
Anyway, I went shopping looking for a 24cm long battery offering at least 300A. After visiting a couple of places I found one that offered 450A (this is the max current available) the right size. This dropped back in the box and the strap was replaced to stop it moving up and down. This is a requirement for an MOT so don't leave it off. Again, do not do up the retaining bolts too tightly, I found finger tight plus a tiny bit to be enough.
Put the positive terminal (+) back on followed by the negative. There might be a slight spark when the metal touches but I ignored this as I assume it to be the electronics getting power. Snap the cover back on and test the starting. If all is OK the car should turn over nicely (mine did) and all will be well.
Now you need to unlock the radio.
Legal note: This is an accurate description of what I did. I am not a professional mechanic and these notes are offered for entertainment only. If you chose to follow them and things don't work, it's not my fault. Sorry. If you are at all unsure then get a professional to do the job.
To be fair I have no idea how old this battery was and I'm not using the car very much at the moment, so it's not a huge problem but when I do need to drive I prefer not to have to plan a few hours ahead to ensure my portable electric supply is full.
First up, access the battery. Pull the lever found in the wall of the passenger foot well to pop the bonnet and then at the front of the car release the catch by pulling up the plate just above the nose badge. Finding this always takes me a bit of scrabbling around but don't try and force things - if you do manage to open it then you'll have broken something.
The battery live under a plastic cover on the right hand side of the engine. This pulls off revealing to top of the battery and the strap that retains it. If the cover is missing, try and get a replacement. Bridging the terminals on a car battery can cause a fire - I once spotted a woman looking at the back of her Golf which had flames coming out. She was carrying golf clubs and a motorised trolley. To put this in the back of the car she'd taken the battery out and put it in the boot first. The clubs had rolled on top of it and voila, flambe VeeDub. Luckily I stopped with a little fire extinguisher and dealt with the flames but it taught me that car batteries should be covered !
The strap has to be removed by undoing the two 10mm blots on either side. Put these and the metal strap to one side, the upturned plastic cover is good for this. If they are stiff, spray penetrating oil or WD40 over them and let it soak in. Don't force these as they are set in breakable plastic.
Next use an 8mm spanner to disconnet the negative terminal. Tuck the lead out of the way down the side of the box. You don't want it finding its way back to the terminal earlier than expected but this can happen as the leads are stiff. The negative (-) should apparently be taken off first to avoid the chance of short circuits.
The positive terminal is a lift off connector, just pull the plastic tab up and it should snap clear.
Next lift the battery out and drop a new one in.
Easy you would think except that when I tried it I found the the new battery was shorter than the old one. It seems that the books all suggest the shorter battery for a 1.6 206. Use this though and it will slide back and forth in the box every time you accelerate or break. I couldn't get the leads to streatch either.
The man at Halfords suggested I could cut the box down in some way, which worried me as I can't for the life of me see how you are supposed to make it 4cm sorter ! Looking at the two batteries side by side shows the problem clearly enough.
Anyway, I went shopping looking for a 24cm long battery offering at least 300A. After visiting a couple of places I found one that offered 450A (this is the max current available) the right size. This dropped back in the box and the strap was replaced to stop it moving up and down. This is a requirement for an MOT so don't leave it off. Again, do not do up the retaining bolts too tightly, I found finger tight plus a tiny bit to be enough.
Put the positive terminal (+) back on followed by the negative. There might be a slight spark when the metal touches but I ignored this as I assume it to be the electronics getting power. Snap the cover back on and test the starting. If all is OK the car should turn over nicely (mine did) and all will be well.
Now you need to unlock the radio.
Legal note: This is an accurate description of what I did. I am not a professional mechanic and these notes are offered for entertainment only. If you chose to follow them and things don't work, it's not my fault. Sorry. If you are at all unsure then get a professional to do the job.
Wednesday, December 15, 2010
Parry People Mover - Part 2
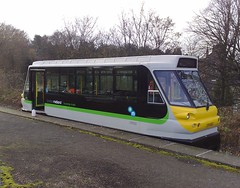
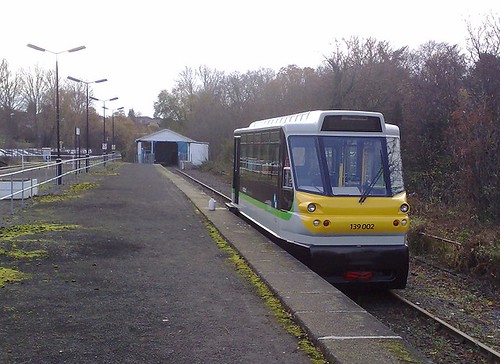
At the end of November I blogged about the Parry People Mover now running on the Stourbridge Junction to Storubridge Town branch. At the time I suggested it would be a real micro, micro layout, but that a RTR version of the railcar would be needed.
What I failed to mention was that my fellow Leamington and Warwick MRS club member, Peter Lloyd, has a bit of a history with this prototype. A few years ago Railway Modeller ran a competition challenging people to build a model of the Parry Railcar. Plans and photos were supplied - and Peter won it with the excellent O gauge model shown in the picture.
He takes up the story:
You may recall the competition in Railway Modeller some years ago to build one, which I did, in 0 gauge, and subsequently wrote a couple of articles on, this started a long relationship with John Parry and his team who were anxious to produce a model for their shareholders, over the past couple of years we have been bouncing ideas around. The aim was to produce something relatively cheaply, this does not sit easily with 0 gauge, however we are getting close, the main problems are sorted and we are getting components prototyped. The base and ends look like being resin, with laser cut sides and a resin roof, although static there is room for a power bogie under the floor.
In the interim Parry’s have employed a graphic artist, to produce manuals etc. He is an N gauge modeller and member of Kidderminster club, together we have also been working on an N gauge version which should debut at our exhibition, this is a clear moulded body with etched fittings which fits an N gauge chassis. He has also just ordered an 00 mechanism, so who knows?
Now, according to my calculations, an N gauge model of the entire Stourbridge branch would be 8.7 metres long, or about 26 feet. That's a pretty big model BUT you do get the entire line from junction station to town.
Wikipedia entry on the Stourbridge line.
Parry People Movers website
Tuesday, December 14, 2010
Your first train set
Ian asks:
I have bought my son his first electric train set and am not sure now how to progress with putting it together on a base board. Well, mainly, I want to put it on a 4x 6 board that will fold in two to be stored away. I'm not sure how to join the track electrics on a folding board and what hinge joints would be best to use so it can be folded into it self protecting the track. Would be grateful for any hints or plans if you have previously come across these issues.
Now I've never built this sort of train set. I have some ideas but can think of nothing better in this instance than to point people at Michael's Model Railways blog, where he has built just this sort of thing for his son:
Part 1 - Building the baseboard
and
Part 2 - Wiring and playing !
He's done this so well that I don't think I need to add to it. And yes I am a little bit jealous !
I'd also suggest looking for books by Cyril Freezer such as First Steps in Railway Modelling which give plenty of good basic information as well as being a good read.
Finally, for very little money you can buy the Peco "Shows you how" booklets which cover all sorts of useful subjects.
Monday, December 13, 2010
Warley stock box
Building rolling stock for magazine articles has one side effect - I've got an awful lot of models that need a home.
Some end up in my normal stock boxes and will be seen running on one of the layouts, but many don't fit in to my scheme of things and exist only so I can write about them. Obviously I still want to hang on to them so more stock storage is required, which is bad news as box building is dull.
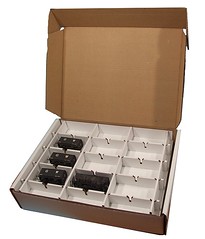
So, when I spotted this at the NEC I handed over my fiver quickly hoping it would help me out.
"The Warley Stock Box" is a cardboard box divided in the manner of something full of chocolates, into two layers. Total capacity is 30 wagons. The dividers can be removed so longer vehicles can be accommodated although this reduces the numbers. Since it's made of card, some nifty knife work would allow the modeller to have whatever arrangement he or she requires.
In use the LWB hopper fits fine, the standard vans less so. They need a bit of foam to stop them moving around in the space. For static storage this isn't a problem but on the road I prefer something that restrain the stock a bit better. I'd also prefer the wagons to sit on their wheels rather than rub the paint off the side. So while they fix my initial problem, I'll need to carry on building proper boxes for exhibition use.
Having said this the biggest problem is that you can't buy them anywhere but the show so I'll have to wait another year before adding to my supply.
Update: This can now be bought from the Ian Allan shop.
Sunday, December 12, 2010
Out of sync information
A couple of months ago I searched the books and magazines I have in possession for information on the Killin Pugs as I was building a model of one. At the time, I dredged up a couple of pictures in a book which gave me something to work on, but I'd have liked a bit more.
Now I'm after pictures of mobile cranes. These are everywhere when I don't want to see them but when I do ? Well I've found one shot of a similar but different one to the prototype I'm building.
But guess what ?
The information pixies have been around and while removing the photos I want, the popped back in and entire article in the Killin Pugs with pictures of both sides of the locos in different liveries, an explanation of how the design came about and even a plan for the engine shed they worked out of !
Modeller Backtrack Volume 4, issue 3. August/September 1994 if you are interested.
Saturday, December 11, 2010
Brick wagon in Hornby Magazine
The January issue of Hornby Magazine arrives through the letterbox and it's good one if you want to know how I built a Parkshire bogie brick wagon. The main photo looks good, I've posed the finished model on Melbridge Parva and the foreground ground cover looks very good. Properly fluffy and with some nice flowers to brighten up the scene.
Elsewhere I've reviewed the portable spraybooth I now use while painting, and talking of this, Staff Projects covers the dropping of the Class 14 while doing same.
Should you want to read stuff that wasn't written by me (why ?) then I can recommend the Warley news section which reports on a heck of a lot of RTR models that were announced or seen in prototype form at the show. Worryingly I have kits to build for at least two of the items so I had better get a move on before the out of the box models arrive !
Best of all though, is that on Page 107, I have inspired someone to build a Killin Pug ! This is (for me) fantastic news as the reason I write all this stuff is to try and persuade others to have a go and get their hands dirty doing some model making. It looks like for once, this has worked. Rob Watson, who made the model, has done a very nice job on it too.
Friday, December 10, 2010
Arrrrrrgggggghhhhh !
You know the moment - working on a fragile model when it slips from your hands. Maybe for a heart stopping moment it lands in your lap but just as the relief starts to wash over you, it continues it's plummet to the floor.
For a few moments you can't look. The minds eye conjures up the picture that awaits you on the floor. A pile of mangled parts with many of the smaller ones flung to the far and dark corners of the room never to be found again.
Guess how I know this.
Thursday, December 09, 2010
Things you never knew you wanted part 12 - Weld bead
Browsing the latest copy of Narrow Gauge and Shortline Gazette, my eye is taken by a rather impressive model of a Plymouth Diesel locomotive in 1:20.3 scale.
Reading the article there is obviously a lot of scratchbuilding and that's a good thing as you get to learn lots of new techniques. Milling the frames from "natural" ABS looks pretty impressive even though I'm not sure how natural ABS is. Can you get it in a garden centre or health food shop ?
It wasn't this that really interested me though. At the detailing end of the text, there is mention of replica weld bead made of resin but fixed to waterslide transfer paper so you apply it like a decal. "That sounds a bit crazy" I thought but as there was a website address, I decided to have a look anyway.
It's true Weld Bead is available. All a bit large scale for my work - lets face it in anything smaller than G1 you'd be hard put to see the lines and if you did they would look over scale - but for the growing finescale movement in larger scale modelling they are a boon.
What did interest me though are the HO scale rivets applied in the same way. These could be just the job for replacing those removed by sanding on RTR models undergoing detailing. Sadly at 13 quid a sheet plus postage I'll not be in a rush to try, but if anyone knows a UK supplier...
More on the Archer Transfers Website
Wednesday, December 08, 2010
Details, details
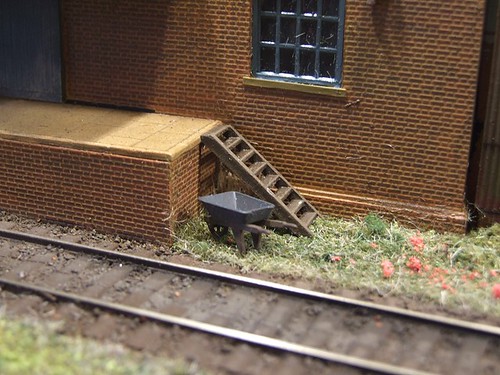
Tidying up the other day I found some detail parts I didn't get around to fitting to Melbridge Parva.
For the end of the warehouse platform there is a set of steps. This solved the problem of miniature people having to jump down to the ground and then being unable to get back up. In real life these would probably be made of brick but I'll assume that the builders didn't bother and improvised with some wood. Not that I forgot. At least Plastistruct made fixing the problem easy.
Under these is a wheelbarrow. I haven't glued this down as I don't think it fits in - there's no track where people have walked and you'd need to bump it over the rails. A wheelbarrow is a fine thing but I can't see why one would be here. I made up the detail from a CooperCraft workmans set of tools kit and this does provide quick and easy detail but on a micro layout you have to be selective and in this case I'm selecting not to use it.
Tuesday, December 07, 2010
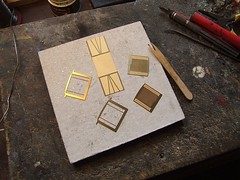
Soldering board
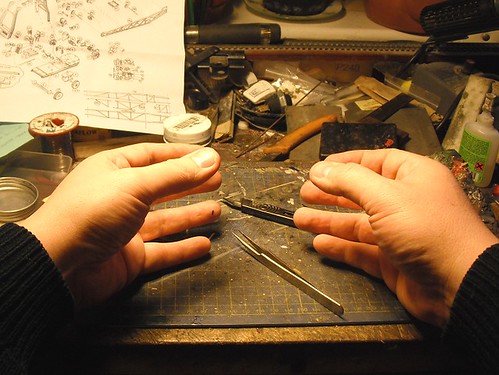
In the middle of my workbench is a wooden cutting board. For many, many years this has been where all my soldering has been carried out. The result of this is that the board is now 80% dead tree and 20% flux and grease. The surface is pitted and rutted with ever smaller areas that can be considered flat. I should replace it but it's been with me for so long I can't bear to. Besides, I seem to get on OK with it.
In the same shop that generated yesterdays post I found the solution. A soldering board.
To be more accurate, a ceramic board in an off white colour. 15cm square and half a cm thick, the top surface appears to be perfectly flat. I could probably draw some useful lines on it to aid accuracy but I haven't.
Working on it is great. The surface is hard but not slippery. The flux doesn't soak into the surface but if it does, then I'll throw it away and spend another 3 quid plus VAT on a replacement. If I'm feeling flush I'll get a bigger version. Something a foot square is only a tenner. Bargain.
Soldering boards on Cousins website
Monday, December 06, 2010
Tweezers and a diamond shovel
Christmas time. Off for some shopping in the Jewellery Quarter in Birmingham where I wander in to a tool shop. Just out of curiosity you understand.
Of course the tools are the very same that we model makers use, in fact there was a pretty big crossover between the items in the shop and the contents of the Squires catalogue. The biggest difference was the price. Presumably when your raw material costs a lot, you spend money of equipment ! I really fancy a Jewellers workbench but at 900 quid it's a bit beyond my means at present. Beautifully made though.
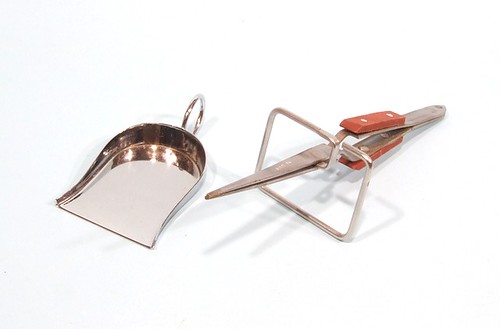
Anyway, I did leave with a couple of goodies. First a pair of sprung tweezers with a built in stand. I recon these will be very handy when soldering small parts.
Next, a diamond shovel. Presumably this is for moving small stones around. For me it will be a liquid lead or crumbled coal shovel. Just the thing for scooping up granules and dumping them in the coal space of a model loco. Lets face it, coal and diamonds are sort of the same thing aren't they ?
Cousins UK website
Sunday, December 05, 2010
Tiny little tramway
I love this. A micro-micro layout from Japan built by Akihiro Morohoshi.
The 6 inch wide model is N gauge but the quality of the modelling makes it look much larger.
You can see more pictures here
While blatantly a gimmick, it's very well done gimmick. Too many people have an interesting idea and then ruin it with the execution. I know of at least one person who could produce a layout a week, all interesting in concept but all terribly badly made. The creator of this model has done some excellent model making - most people would be very happy to produce weathering as good as this - but still managed to have fun.
Of course I'm now thinking of how I could do something similar. Could a 3mm scale version be built ? What would I put in the middle ? Train or Tram ? Can I make the key go round ?
I bet the 009 fans out there are also wondering along the same lines. Let's face it, you know that placed on a table at a show, this would be a serious crowd pleaser. Perhaps on the top of a catering size tin of beans - a Heinz Mine maybe ?
And apparently "Densya no Kanzume" means "Can of streetcar". The guy even made his own convincing tin label !
Saturday, December 04, 2010
Peter Snow's model railway
Listening to the Today programme on Radio 4 this morning I was surprised, any shocked to hear a new report on the 100th anniversary of the Model Railway Club in London. The running order for the show says:
0742
Britain's first model railway club was set up four years ago. John Humphrys celebrates the anniversary by playing on Peter Snow's train set.
You can listen to the report here.
Needless to say the BBC had to find a "celebrity" angle on the story and since Jordan wasn't available, Peter Snow did the job. It was even filmed so we can see what he gets up to:
Film of Peter Snow's model
Now if I were to be picky, I might suggest that some ballast wouldn't go amiss and those station buildings could be upgraded to SuperQuick, however Mr Snow is obviously an operational modeller rather than a model making one. No problem with this - he's built a layout that looks like it would be great fun to operate !
After Peter's trains, the interview carries on with Tim Watson from the Model Railway Club who brings a bit of gravitas. He pointed out that there at least 100,000 people (an underestimation in my opinion) interested in the hobby in UK and that Warley a couple of weeks ago saw 18,000 of them come through the doors in a couple of days. It was nice he was able to point out there are different aspect to the hobby too.
Best of all at no point did either the words "anorak" or trainspotter" find their way into the text. It's not a big thing but a prime time mention on arguably the countries most important radio programme is pretty impressive. If only the politicians who listen (and they all do) would realise that we hold the key (from an O gauge Hornby model) to the future happiness and prosperity of the nation...
Friday, December 03, 2010
Finished 14
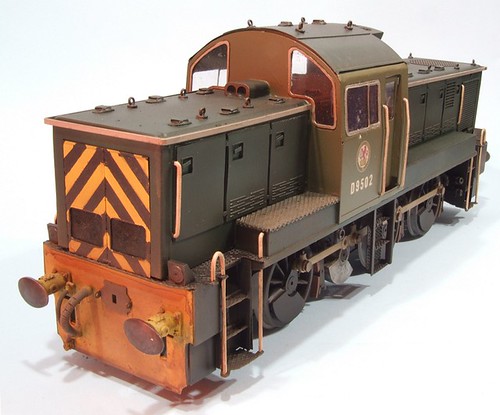
Some models need to be weathered before they look "right" and the Class 14 is just such a beast. It looks OK clean but a waft of dark earth, weathered black and track colour really bring it alive.
The spraying wasn't very precise, I started with earth on the lower regions. Then the black along the top to represent the outporing of the exhasut. Finally a general going over the with "Underframe dirt" to unify the model.
To finish up the windows were glazed with shirt collar plastic and weathering powders daubed around the buffer beams. It's almost a shame to hand this one over as it looks lovely. If you are a Gauge 1 modeller, get in touch with Mercian Models to enquire about the kit, which should be available next year.
Thursday, December 02, 2010
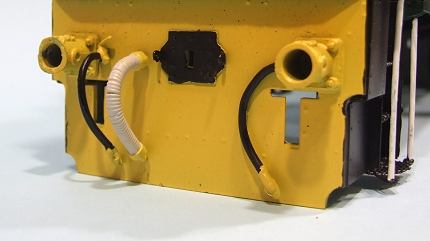
Vac pipes
Today's lesson is to pay attention to prototype photographs before working on a model.
I normally paint vacuum pipes on the ends of model locomotive with a pale grey or cream colour. After a wash of track colour the results look pretty convincing to my eye. This I did on the class 14.
Then I looked at some photos to ascertain the colours of the cables also on the buffer beam. At this point I discover that the Vac pipes are black. Doh.
Wednesday, December 01, 2010
D9502
Top service from Fox Transfers. I had a little panic on Monday night realising that the loco had to be delivered on Friday and the only time I had to finish it was Wednesday evening. Worse, I was out of suitable numerals in my transfers box. I had numbers but no letter D's
Could I paint these ? After a few minutes thought I decided the answer was no. It would look rubbish, even from a distance in thick fog.
So, off to the web site and place an order. Fox processed it on Tuesday and they were in my hand on Wednesday. Relief.
All I had to do was pick a number. Some would look at photos of the real thing and decide on a loco to model. All I did was work out how to avoid using all of any particular digits on the sheet. Hence, 9502 - no repeats !
Tuesday, November 30, 2010
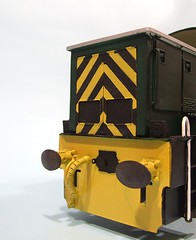
Wasp stripes
Of all the jobs I don't look forward to when painting a model locomotive, it's got to be warning stripes on the ends known as "wasp stripes". They are eye-catching (obviously) and yet fiddly to get right.
I've tried various methods over the years. For the G1 Class 14 my method was simple - hand them over to my Father and get him to mask the lines. This wasn't laziness on my part, it's just that to get them right takes time and that was something I didn't have thanks to work commitments.
My plan had been to cover the entire door, draw the lines and then cut away the unwanted masking. He cut the tape into strips and carefully stuck them to the yellow painted parts.
All I had to do was paint the unmasked area with some Humbrol matt black and carefully peel the tape away. The results look pretty good I think.
Monday, November 29, 2010
Parry People mover
Is this the future of branch line railways ?
Nipping up to Stourbridge last week I spotted that after a long gestation, the Parry People Mover is operational. It runs the shortest branch line in Europe, nipping back and forth from the junction to town stations. I've always been a fan of the concept - essentially a flywheel stores energy to power the vehicle, this is spun up every so often either by a small petrol engine or electricity. It's efficient and should be greener than a normal diesel railcar.
What I want to know is, where can I buy the model of this thing ? I mean there are two of them so surely Bachnby should be rushing out a RTR version straight away ? It's a disgrace I say.
Actually this could be just the think for the space strapped modeller. The Town end of the line is a single track. Obviously rolling stock is limited in range, the aforemented people mover and a single coach railcar for when the Parry machine is out of action. Operation would be a bit dull too but you could automate this. In fact the more I think about it, maybe it would make a nice little micro layout...
Sunday, November 28, 2010
Toy trains - cheaper than football
A couple of weeks ago, a colleague said something very blogable.
"I've just got two tickets for the Villa. They were a bargain, only £30 each."
30 quid ! Each !
Amazingly, it turns out that these were restricted view tickets. So that is three crisp ten pound notes to sit and watch 22 millionaires wandering around a field trying not to bump into the goalposts and boot a ball into a net. And it's all over in 90 minutes apart from the bit in the middle where the poor dears have to have a bit of a rest.
Compared to this, model railway shows are a bargain. Even last weeks NEC bonanza cost just over a third of that price and you can stay all day. OK, so the views of some of the layouts might be restricted but you can always go away and come back once the crowds have cleared a bit.
Despite this, modellers think they are being charged the earth. One spent quite some time explaining this to us at the weekend. Of course he mentioned the 8 quid parking fee imposed by the NEC, something to do with having to maintain car parks for tens of thousands of vehicles I suppose. Mind you the Villa ticket doesn't include anywhere to leave the motor either. It's a moan that I hear more and more though. I know that toy trains cost money, but so does any other hobby. Even walking requires footwear. I suppose naturism is free but if most of the people I see at shows take it up then the Government will have to tax them back into their clothes.
Perhaps the problem is that model railway exhibitions don't cost enough. Maybe if the superstar exhibitors were paid more than petrol money, say £90,000 per week, then we would be taken seriously ? It's worth a try you know !
Saturday, November 27, 2010
Hornby Magazine Yearbook No.3
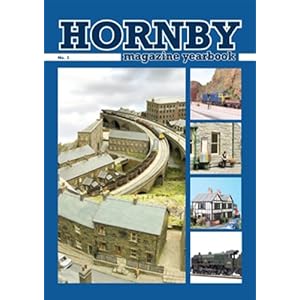
Last Saturday I picked up (and paid for you will note) a copy of this years Hornby Magzine Yearbook. As usual it is an excellent mix of quality articles, two of which are by me.
The first is a couple of pages on wagon tarpaulins. These aren't difficult to do so they will hopefully lead to a few people starting modifying their models. Open wagons spent a lot of time covered up in the real world, but on models they travel around carting empty space up and down the country. No wonder the railway companies went bust.
Article two is much bigger. Melbridge Parva hits the pages in glorious technicolour. It looks fantastic and because I was able to photograph the construction process, gets full coverage. In fact I suspect that the page area devoted to it is greater than the area occupied by the model itself. The photos have definitely been printed bigger than life size !
Elsewhere there are layouts and "How to" features. The quality of the images is particularly strong with some that made me stop and stare as I looked through. Good Christmas reading for modellers again.
Buy the book from Amazon.
Hornby Magazine Website
Friday, November 26, 2010
LNER Carriage
This is the last Warley post I promise.
Sometimes I buy stuff because I feel sorry for it. This happened once with a 1361 class steam engine and that cost me loads of cash but resulted in a very nice little shunter for my layout.
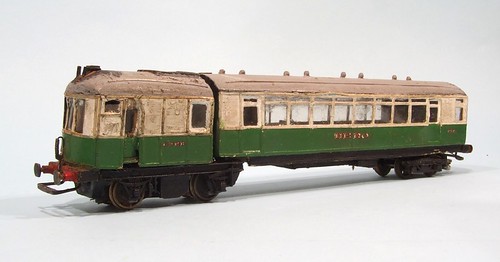
This time it was a scratchbuilt model of an LNER railcar. Not, you will conclude, a very good one. It is however, one that someone has tried very hard to construct. Whoever the builder was, they put a lot of effort in to the model and for that reason alone, I think it deserves to survive.
The vendor was telling people that it was worth the tenner he was charging for the power bogie. I disagree, the world has plenty of Triang power bogies, but not all of them are in models of railcars. I bought this for the body and hopefully I will one day have the time to restore it properly. If this was an antique, its style would be described as "Arts and Crafts" and everyone would appreciate it.
The photo makes thing look worse than they are. The carriage end isn't bad at all - I've certainly seen worse. The locomotive part has gone wrong around the doors. I suspect some bodged repairs looking at the glue blobs at the top. Hopefully I can clean these up. The roof could do with a repaint too as the brass rain strips have shed paint.
Obviously this won't ever be a finecale model. One day I still hope to build a kit for this prototype but this model can join my LMS railcar in a "special" collection.
Subscribe to:
Posts (Atom)